Lessons
Day 1
1Calibrating Your System for Accurate Results
40:07 2Shoot Prep: Workflow & Lighting Setup
17:07 3Shoot: High Key Beauty Portrait
19:13 4Shoot: Hollywood Glamour
17:54 5Student Shoot: Colleen
13:48 6Student Shoot: Andrea
12:27 7Image Review and Q&A
15:46Skin Tone and Black & White Points
27:01 9Image Selection
25:20 10Global Color Correction
21:02 11Retouching Basics
46:12 12Advanced Skin Smoothing Technique
46:36Day 2
13Luminosity vs. Color
14:44 14Shoot: Low Key Dramatic
28:43 15Student Shoot: Ian
11:54 16Student Shoot: Michael
11:20 17Student Shoot: Colleen
03:41 18Shoot: Beauty Light
12:57 19Luminosity Blending in Photoshop
16:07 20Applying Luminosity
12:19 21Color Correction in Lightroom
23:57 22Detailed Retouching
23:55 23Color Space Discussion
19:16 24Darkening and Lightening Skin
21:10 25Spot Treatment
12:20 26Sharpening
29:57 27Compositing
54:51Day 3
28Introduction to Shooting Movement
11:41 29Shoot: Dancer Leaping
10:52 30Students Shooting
44:15 31Shoot: Dancing
14:59 32Student Shoot: Ian and Colleen
08:57 33Shoot: Dancer Portrait
15:49 34Dancer Session Q&A
11:30 35Figure Retouching
10:52 36Liquify Filter
10:16 37Masking and Edges
13:22 38Importing a Background
16:47 39Color Change and Motion Blur
24:45 40Enhancing Color
17:59 41Removing Tattoos and Adding Effects
21:30 42Lee's Photoshop History
21:56 43Final Portrait Edit
19:03Lesson Info
Student Shoot: Ian
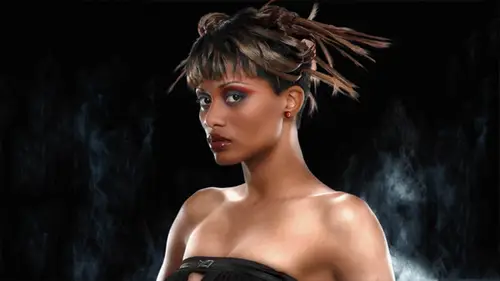
Yeah let's let's bring out our first student shooter here who you want you're in already is like he's got his camera sorry so first first key here he talks to the model we establish some report before we start shooting always a good thing all right good, good, good, good looking awesome should go okay, so you're now shooting uh you're shooting us be tethered so the you know you can't don't don't shoot too rapidly I'm getting a busy light here again it's no good yeah yeah okay, now you were set at I s o one hundred uh one sixty one sixty all the fun of waiting for technology do you have ah eliminated I've got one in my bag. Sorry. No well then at least take off that builder absolutely still says busy is not normal. Yes, so those those, uh those filters that they sell you at the camera store to protect your front element I'm gonna you know, go back and talk about this again uh those little filters? Yes, they do protect the front element, but, um just take him off. Especially if you're if...
you're shooting in studio uh there's lots of lights around here he doesn't have a lamp shade either to more surface to air surfaces catch the reflections and will dim the cont reduce the contrast she's our way just want to make sure that we have a clean and captures possible so just take those clear filters off your lens and uh ramos good to go here hopefully I don't know where should I be? I get out of the action here, ok? One more question while we handle the technical bitches so a question from from eyes in job oh visa from cebu city in the philippines how do you study someone you were working with for the first time without it being awkward so that was back to the question about which side of the face was better uh well, do you tell them what you're doing the no I mean, you know, usually if you have, uh a portrait sitting saying your client is the subject you will have met them at least you know, once before the shoot and when at the day of the shoot you kind of sit down and just chat have a little interview and you could be looking and trying to decide if their issues you're not like, you know, put them up under the lights and go ok, sit there and let me study you you know, um so it's just use your judgment, you know? And yeah, I just usually it's like coffee in the morning get make sure everybody has their coffee and we're we're just chatting like we do here when you are pre show banter, we're just you know, really, the purpose is in that case is to check the audio and all that kind of stuff. Well, your pre shoot banter with your subject is all for you to kind of learn as much as you can about your subject, and we had a few moments there before, uh, this whole event got started to kind of, you know, so I had my I knew from the beginning, any other questions, way have a question from rk fitness photo who asked, how do you determine how to set your life to fit the model based on facial structure and gender? And to add to that, you know, would this be a very different set up if this was a female versus a male? Are you going for a completely different and well, typically with female beauty, we're going for a more of a beauty look, I would I tend to go for the classic beauty lighting, which is light right over the land's. Um but that's not necessarily always the case, so I might use exactly the same set up the big difference here. I'm using a really big, soft source for a dark skin subject that's the main difference with paler skin, I'm going to use a smaller source because I want a little more shadow action. In this case the larger sources going to tend to film or of the of the plains of the face and you're not going to get like deep shadows under the jaw and that sort of thing so that's the main consideration here is it's really the size of the source for me and I know some people would shoot was a big source like this for anybody this is you know, it's a certain kind of a look but for me this is more important for the darker skin subjects they're like we're ready are we ready he's like chomping at the bit of here well ok so okay well I'm gonna get in a little bit closer because I want to I want to see what I've been hoping teachers you got I think that the women would agree about the eyes it's like that's gonna work so we're going toe we're gonna try to dial that one so I'm the one thing I'm thinking maybe if you could lean forward just a little bit and I want you to extend your job out a little bit I want you to drop your forehead in a little bit okay? This is a little tip here I'm gonna I'm gonna loop this okay over your shoulder try and kind of keep it so you don't step on it okay let's see if that comes up the shooting one to you are we seen on the in studio monitor there we go excellent take just a little time half step back wait go back a little bit more I think you think there, john I want you to drop the head a little bit more for sixteen he's close enough to turn your head this way I want you to your shoulders just a little bit this way lean forward just a little bit here, bring your eyes back to me tilt your head back your eyes back to me we're gonna do one more variation on that in just one second mean for just a little bit more drop your chin just a little bit more so he and strategy here is he's directing the position of the talent um specifically right? And I was doing the same thing yesterday and then I decided that she was better opposing and I wass uh you know, just something to bear in my mix it up a little bit so you're not always giving him absolutely direction? Absolutely. It feels I got what I think these work maybe you can step back a little bit more and do you have any ideas may be turning over shoulder shot ok that way and then looking back yeah back towards me that's awesome oh, excellent that's wonderful and maybe you could lean forward just a little bit more on then eyes back towards me you're making this too easy on that's great. I want to see what my catch line is doing here what do you think about these, lee? I think I think they're good my losing within a detail in the left I uh I can't see him that maybe I I'm I've learned now not to trust this in studio monitor so uh sure that sounds great. Yeah, a little turn a little bit more this way that's great. And raise your chin just a little bit for me please. Thank you. All right, let's uh let's give somebody else a chance here who else wants to shoot? Thank you very much. Be bold question maybe go over different between, um set up that you and him had so you have your engine is eighty five and as I also, um shudder and stop were different than what your ears and crackers you could say a huge difference in the poem it is I think the difference that we're seeing in the look of the images that are being displayed on the in studio monitor has more to do with fact that he's shooting tethered to the computer and it's going right to the computer and then being displayed through lightning so these are sort of rendered versions I'm essentially uh tethering directly into the monitor through h d mon so the previous for me are kind of uncalculated going it's, like the raw video output, is going to the monitor directly, so they do look a little bit different because that there's a distinct reddish, it seems like there's a distinct, more reddish tongue. Yeah, I think that's partially the monitor this'ii mama areas is definitely redder, but he's also it's a more contrast, you look, I think, because it's going into light room rendering is different between the two things, and we'll see where not once I get going into post, you know, the image of probably look a lot closer in their sort of tonal structure. Ah, and that's the drawback of doing this direct to video approach um, faster previous so when I shoot, they come up quicker, but maybe not quite as accurate display to, you know, to the photographer, so I'm used to that I used to shoot film, and I'd never know what I got till I got back from the lab, so I know that I'm going to be in good shape once I get into photoshopped, but, um, I'm hoping that I'm hoping to illustrate some techniques to use to lighten up dark skin so it's okay to have something that's a little on the dark side because way we're going to do some tricks and photoshopped later on.
Class Materials
Bonus Materials with Purchase
Ratings and Reviews
Luis
Skin tones correction and portraits editing are new to me. This course provides a set of tools for me to improve my portraiture work. Lee doesn't just show you how things are done, but also the reasons for the corrections. The delivery is a bit dry because the topic is quite technical. You can have a break between lessons, if it becomes too overbearing for you. I highly recommend to take this course, if you are planning to do portraits, head shots, or even senior pictures.