Lessons
Lesson Info
Class Introduction
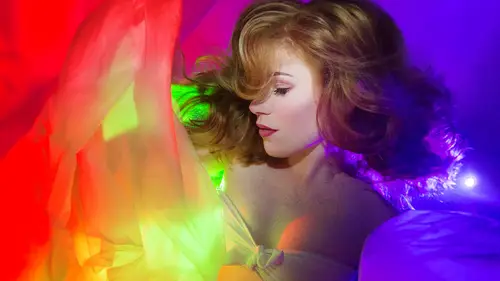
Hey guys, welcome. We are going to talk about skin retouching today, my name is Kristina Sherk, my company is called Shark Pixel, hence why I have a crazy shark fin on my head. A little bit, I'm just gonna give just a brief explanation of how I got here, and then we will get into the retouching. Today, we're gonna be working on this image here of my cousin, and I'll show you the before and after that we're gonna be doin'. All right, so definitely gonna be focusing on skin for the most part of today, but yeah. So a little bit about myself, my name is Kristina Sherk, I kinda joke with people, saying that I almost majored by accident in Photoshop, and even though I was a digital art major, I kind of felt like, you know, that most of my time was spent learning Photoshop full-time, and what I really, really love to do is I love translating Photoshop into regular English so that people can understand it, so we will get started now, so now that I've introduced myself and you've seen the shark...
fin, I'm gonna go ahead and take it off, and then we will get down to the nitty-gritty of what we are going to be doing today. So who shoots portraits? Do we shoot portraits a lot? Yeah, okay, good. That's why you're probably in a skin class, a retouching skin class, as you guys know, skin is kind of one of the hardest things to retouch and retouch well, and so that's the reason for the class today, and I'm gonna be talking at kind of a fast pace because this is literally two hours worth of data that I'm gonna try and condense for you guys into one hour, so what I'm going to be doing is I'm gonna be supplying a notes PDF for you guys to download on the page so that you guys don't have to take necessarily copious notes today. It's all gonna be laid out for you, and there's going to be a lot of stuff in the notes that I'm not able to talk about in the class, so definitely download those notes, because they're gonna definitely help you and keep you on track, and give you an outline of, you know, how to retouch skin. So, let's just talk about why we retouch skin. So for me, lemme find the right, we retouch skin to kind of minimize the distracting elements on a person's face, especially on a portrait so that the true features can really come through and you can really connect just immediately with the person in the photograph, and so in this example, you can see the difference between harsh overhead lighting, you can see softer overhead lighting, and you can see the blemishes, so if you look here, there's like little pieces of styrofoam that are here all over the face, and you can see that with harsh lighting, they're a lot more prevalent, and a lot more visible, and as soon as you soften the lighting, you can see that they're less visible. They're still there, but it's softened, the lighting on it, so definitely having softer light is going to be a good idea for retouching skin, especially problem skin, and please just never do this, you know, (laughs) unless you are doing this for a very serious intention, under-lighting or villain lighting is never really flattering on skin, or on any face, to be honest, so unless there's a specific reason why you would do that, I would try and maybe just stay away from it, but anyway, so that's a little bit about why we retouch skin, and showing some examples of lighting and modifying lighting as well. So, anytime I'm teaching Photoshop, what I'm trying to teach you guys is how to work smarter and not harder in Photoshop, and so a lot of the times, it will include workarounds, or thinking about something differently, or that kinda thing, and so that's definitely one of my mantras, is work smarter, not harder, and the other thing, my other Photoshop mantra is gonna be 90% of what you do in Photoshop, what you change in Photoshop, can be changed... what you're trying to fix. 90% of what you're trying to fix in Photoshop can be changed by either changing the brightness or darkness of a pixel, or the color of a pixel, and so if you just wash away all of your preconceived notions of what Photoshop is, and you literally just zoom in to the pixel level, you can change so much just by brightening, or darkening, or changing the color of a certain pixel, so whenever you are getting kind of, "Oh my God, why isn't this working? "I'm so frustrated, this tool isn't responding "like it's supposed to." Calm down and say, they're just pixels, and I'm gonna get through this, and there's a way to fix it, 'kay? Sometimes we over-complicate things in Photoshop.
Class Materials
Bonus Materials with Purchase
Ratings and Reviews
Shana J
Quick and to the point! I did learn a few things from the course. Thank you. My only issue is that the model's face was already for the most part blemish free and nearly perfect. It would be good to see these techniques done on " not so perfect" skin. Kristina even said that the model's skin was nearly perfect. So why not use an image where we can truly see the skin retouching process at work?
user-9c856e
This class gets down to the nitty-gritty of smoothing skin and creating a 3D illusion. I really liked the way Kristina showed how to combine tools to save time and the frequency separator method she uses. The class notes (to download) are detailed so I didn't need to take notes - love that! Note to Kristina: Love the shark fin!
Audrey Agin
A good class and information is easy to understand. But in the general world, some us do not have models & clients with perfect skin. Wish this was demonstrated on a person with a few more problem areas, so we can really see the improvement on the person.