Lesson Info
8. Back Side Controls: Wheel & Custom Buttons
Lessons
Class Introduction
16:37 2Photo Basics
04:38 3Camera Controls: Control Wheel & Shutter Release
04:08 4Camera Controls: Mode Dial
26:05 5Camera Controls: Top Deck
18:35 6Camera Controls: Back Side Controls
15:00 7Back Side Controls: Function Button
25:35 8Back Side Controls: Wheel & Custom Buttons
10:58Left & Right Side Controls
07:02 10Bottom Controls
04:59 11Front Controls & Lenses
13:16 12Menu Page 1: Quality/Image Size 1
09:48 13Menu Page 2: Quality/Image Size 2
03:56 14Menu Pages 3-5: Shoot Mode/Drive 1/AF1
09:02 15Menu Page 6: AF2
05:42 16Menu Pages 7 & 8: AF3 & AF4
05:56 17Menu Pages 9-11: Exposure & Flash
06:33 18Menu Page 12: Color/WB/Img Processing
08:49 19Menu Page 13: Focus Assist
06:03 20Menu Page 14: Shooting Assist
06:29 21Camera Settings: Movie
07:43 22Camera Settings: Shutter & Steady Shot
08:37 23Camera Settings: Zoom & Display Auto Review
07:13 24Camera Settings: Custom Operation
11:55 25Network Menu
11:19 26Playback Menu
07:18 27Setup Menu
26:52 28My Menu Overview
08:13 29Camera Operation
10:14Lesson Info
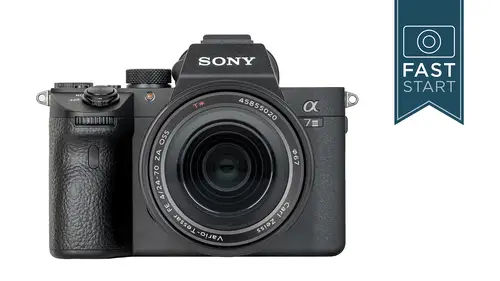
Back Side Controls: Wheel & Custom Buttons
Continuing along the back of the camera. The control wheel, multi-purpose wheel, but when you press in on the top it's a button that controls the display. So when you press the display, it's gonna change what you see in the monitor, or what you're looking at in the Viewfinder. We talked a little bit about this before when we talked about the Viewfinder, but on the monitor it'll change on the back. One of the things that it also has is this screen it's called For Viewfinder. What that means is if you only wanna use the Viewfinder on this camera, the back of the camera is dedicated to showing you features that are turned on. So it's gonna show you shutter speed, aperture, the horizon level, all this information. It's got a function menu over on the right hand side. Now, the funky thing about this is that this function menu is not customizable like the previous function menu that we talked about. So there's a preset number of controls in there and you can't change 'em. But they're just a ...
part of this for the Viewfinder. So if you know you don't like using the back of the camera, I typically don't use the back of the camera, but sometimes I do. So I don't normally use this myself, but I could see how it's a very handy tool 'cause it's got a lot of information there. If you wanna control which one of these options that you cycle through, for instance, I love the graphic display, but I don't use it. (laughing) I like the idea of it, but I just don't use it. So I go up into Camera Settings into the Display Button Monitor, and then I uncheck that box so I never have to see that. So as I cycle through, it's just not a part of what I'm seeing on the camera. Over on the right hand side is an ISO button. It's also a custom key that you can reprogram for other things. We already talked about the ISO when we were in the function settings. I'm not gonna do it again. But this is a great easy way, and, I am really torn on these cameras about whether they should label something ISO, or whatever the feature is, because this is a reprogrammable button. Let's just say that you wanted to reprogram that as white balance, every time you look at that, you're gonna have to go, ISO, oh, that's white balance for me, so I typically leave it as ISO. Just, intuitively, it makes it a little easier to work with. The down button is one of those customizable buttons. It doesn't have anything, so that's one that you can customize to whatever you want and it won't confuse you in anyway. Over on the left, customizable button. Reprogram as you wish, but to start with, it is a drive button. We talked about this more fully back in the function menu so I'm not gonna do it again here. But Single and Continuous are the modes that most people are switching between. Down at the bottom is the playback button. When you go into playback, the camera kind of switches modes as far as what all the buttons do on the camera. So obviously that's gonna play back your most recent image and then we have a number of other controls. We have a variety of dials and joysticks that we can use to go forward and back through our images. Then you'll notice the little zoom in, zoom out. So if you wanna check sharpness on a photo, you can do that. In fact, let's go ahead and do that right now. Let's set it up on our subject. Let's see, what do I wanna zoom in? I wanna zoom in on the timer clock down here. I'm just gonna put that right in the middle, focuses. Takes the picture. Oh, I got it set in the bracketing mode. I'm gonna let it finish the bracketing mode, and turn that off. We were playing around before. Let's get it back here. Now we'll take one simple photo. We'll play back. And, like most of the cameras, you can zoom in. This is currently set to zoom way in, real quickly. So you can go in and out, very quickly. You can go in very quickly. You go out a little bit more slowly. Once you're zoomed in, if you wanna check sharpness, yeah that looks pretty sharp. I'm gonna use the joystick up here and there's a little navigator window. We're really tight in here. So we can jump a little bit back out. If we go far enough back out, full image, and then we can go into thumbnails. So this way you can kinda scroll through and see all the other images that we've been taking in the class so far. You can go out, and you can see actually a calender of when you shot different dates. You can go choose photos on different dates. You can actually go choose different types. A still photograph, or movies. Different types of formats there. So if you were taking pictures in different months, you can find it a little bit easier. This is real handy for somebody whose on an extended trip and they're trying to navigate and Hey! I got some great photos last week! Let me show 'em to ya. You can go back through 2,000 photos or just go back to the day you shot them. So then you can zoom back in, find your photos, and continue to zoom in. Have some fun, play around with that a little bit more. Delete obviously gets rids of your images from the card that's selected. I will give you a bit of a warning, is that, if you are recording to both cards, it's possible that, depending on how you have the camera set up, it will only delete images from one card. Be aware that it's not getting rid of them on both of them, which could be a problem. But if anyone's trying to get around, say, a security guard, and they say bring that camera over here, you have to delete that image. You can ahead and delete that image and it's like, okay, I still got it on card 2 on there. So, if you're a security guard, don't put that on the forums. Then we have our send to smartphone button which we talked about before. And our lock key, which is a very light level of protection on our images. Playback displays. So, when you're in playback mode, you can choose to see more or less information about your images. Usually, I just wanna see the image. Is it composed right? Does it look right? But sometimes I'm curious. What shutter speed, what aperture? Then I would use the display info. And if you wanna look at the histogram, that will give you even more information about all the other settings on the camera. That's something that I would constantly cycle through as I'm trying to look at different information about the photos I'm using. So just realize, you just keep pressing the button and it cycles through the different options. So, this camera has a number of buttons that are customizable when it's in the playback mode. So if you don't like the operation of the way some of these buttons work, you can reprogram these buttons to do different things. You'd go into the custom menu, and you can reprogram it. Now I do have a special message for Cosmo. Cosmo is somebody whose been on a couple of my tours and when you get on two tours, you get your questions answered live, in the class. He had a problem on his camera because he's got this camera. He shoots a photo. He's got it in two second playback, so he sees it for two seconds. He wants to go take the next photo so he presses the AF-ON button to take the next photo, but while it's playing back the image, what does that do? It zooms in on the image. So rather than taking a photo, it zooms in on the image, and Cosmo, no, you cannot reprogram the AF-ON button. But, if you do have your camera set up in that manner, here's what I would recommend. Press down lightly on the shutter release. That kicks the camera back into the shooting mode, and then you can press the AF-ON button for focusing to take the next shot. So that just is a great way of kicking you back out of the playback mode. If you come on more than two tours, you get your question answered live in class, recorded forever, for everyone to see. Alright. Video playback, a little bit different than everything else. So when you've recorded a movie, you'll hit the center button to play things back and then to get your control panel, you press down. This gets the control panel which is all your standard types of controls for controlling your video on there. One that's kind of unique, that I wanna do a little demo here, is Photo Capture. That is where you're pulling a still frame from the video and saving it as a new file. So what I'm gonna do is I am gonna first put my camera in the video mode. So my camera is now in the video mode. Let's turn this on. We can see our 16 by 9 frame. What I am going to do, is I am gonna pan up across our little stand here. So what I'm gonna is do, I'm gonna start recoding down here. We can see I'm recording. I'm just gonna pan up. Try to do it as smoothly as I can without a video head. Then I'm gonna stop this. Okay. Now I'm gonna go into playback. We have a video here. So if I hit the center button, we'll start playing the video and if I press down, we'll see our control panel over here. So what I wanna do, I'm gonna pause this for the moment, is I'm gonna go over to the right to the photo capture mode, here. I'm gonna press this. Now I get to choose what frame do I want. so I'm gonna kinda go through this a little bit. I wanna get those apples right in the middle so I'm gonna get this, right, there. You can see the bottom of this little indicator is our photo capture icon. So now I'm gonna press down. It just saved that as an individual image. I'm gonna press menu to exit up here. Let's see if this went right. So, let's playback. So this is our video, once again, that we saw. I'm just gonna let that play through. If I go to the next file, this is my still image, right here. Now, this is not a high resolution image, in fact, I can see down here, it is a 16 by 9 aspect, 2.1 million pixels. Alright, so that's the resolution. Normally we'd be getting 24 megapixels on this because we're pulling a still frame it's lower resolution. Now we can pull that in-camera, which can be handy in some situations, where it might be fast moving action or you just shot video and you wanna get a still photograph out of it, for use right then and there. Little light down on the bottom is the Access Lamp. This is usually the I'm working with the memory card that the cameras trying to tell you. Most important is if that light is on, do not take the memory card in and out of the camera. That's writing information to the camera so don't bother it, it's working.
Class Materials
Bonus Materials with Purchase
Ratings and Reviews
a Creativelive Student
John GreengO! What a wonderful teacher! As always to the point. You do all the testing for us and we get an amazing tour of the camera. Really thrilled with your class once again. Thanks a lot!
user-7002e3
Thanks John. Another great class! I appreciate the thorough explanations. I many never use all of the features on this camera but at least I know what they do. Love all of your classes and would definitely recommend them.
Mary
Wonderful class. John is a great instructor. Learned a lot. Only wish he'd include a bit more on using a7iii to shoot video, such as using Clear Image Zoom, and including video in the ending Camera Operation settings section. Loved the course though.
Student Work
Related Classes
Camera Guides