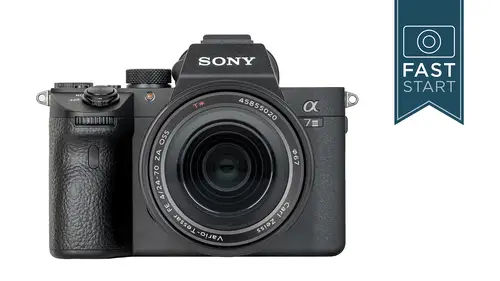
Lesson Info
4. Camera Controls: Mode Dial
Lessons
Class Introduction
16:37 2Photo Basics
04:38 3Camera Controls: Control Wheel & Shutter Release
04:08 4Camera Controls: Mode Dial
26:05 5Camera Controls: Top Deck
18:35 6Camera Controls: Back Side Controls
15:00 7Back Side Controls: Function Button
25:35 8Back Side Controls: Wheel & Custom Buttons
10:58Left & Right Side Controls
07:02 10Bottom Controls
04:59 11Front Controls & Lenses
13:16 12Menu Page 1: Quality/Image Size 1
09:48 13Menu Page 2: Quality/Image Size 2
03:56 14Menu Pages 3-5: Shoot Mode/Drive 1/AF1
09:02 15Menu Page 6: AF2
05:42 16Menu Pages 7 & 8: AF3 & AF4
05:56 17Menu Pages 9-11: Exposure & Flash
06:33 18Menu Page 12: Color/WB/Img Processing
08:49 19Menu Page 13: Focus Assist
06:03 20Menu Page 14: Shooting Assist
06:29 21Camera Settings: Movie
07:43 22Camera Settings: Shutter & Steady Shot
08:37 23Camera Settings: Zoom & Display Auto Review
07:13 24Camera Settings: Custom Operation
11:55 25Network Menu
11:19 26Playback Menu
07:18 27Setup Menu
26:52 28My Menu Overview
08:13 29Camera Operation
10:14Lesson Info
Camera Controls: Mode Dial
Next up is the mode dial on the camera. This controls the shutter speeds and apertures of the camera. So let's go through all the different settings that we have on the mode dial. We're gonna start simple, which is the auto mode. And this is the mode that, well, let me be honest, I hope you do not use this mode. I hope you do not have to use this mode, 'cause you're gonna receive so much information in this class, you're gonna wanna do much more. The reason that you're not going to want to use this mode is that when you are in this simplified auto mode, there's a number of what we would call child safety locks put on the camera, that will not allow you to get in and make those changes on the white balance or the motor drive, or some other setting on the camera. This is a perfect mode, when you're handing the camera to your friend, or your cousin, who is a wonderful person, but a terrible photographer, that you don't want them to mess up your camera, and you just want them to take simpl...
e, basic photos. And, so it's the perfect camera hand off mode to be in. Now, when you do put it in this mode, the camera will have a scene recognition system, that it will automatically recognize a scene, and it will tweak the settings of the camera ever so slightly, ever, ever so slightly, in a direction that is a little bit better for that situation. I've found that it doesn't go far enough, and that's one of the reasons why I don't like these modes, is that when it goes to sports photography, it says, oh, you need a fast shutter speed, and it says "how 'bout a 250th of a second? That's faster than average," which it is, but it's usually not fast enough for really fast action. And, so when you know more about what you're doing, you're gonna want to get well beyond this scene recognition mode. But it's perfect, once again, for very simple, just quick, basic shots. Next up is the scene mode, and this is a slightly more advanced version of the auto mode, and this is where you get to select the scene. In the auto mode it was scene recognition, where the camera's trying to recognize it. Here you're giving it a little bit more information so now it's gonna be able to set slightly better settings on the shutter speeds, apertures, metering, focusing, and all the other systems on the camera. And, so you know, if you're running the all state triathlon then you put the camera in the sports action mode, and you hand it to your friend, and it's gonna be doing a little bit better than it would in the scene mode. Not quite as good as professional sports photographer, in manual, who knows exactly what they're doing, but it's a good step up mode, you might say. Now, in order to change the scene modes, you can go into the menu system and change them in the menu system, or you can just do 'em from the front dial of the camera. And let me just do a quick little demo here with this. So I'm gonna put it in the scene mode. Helps to turn the camera on, of course. And so by turning the dial on the camera, you can see up here in the top left corner, the flower for closeup, mountain for landscapes, and the different modes that we have, and you'll occasionally see other features changing, like right below this you see in the sports mode, it goes into the high speed motor drive. The focusing system AFS changes to AFC there, and this is a reasonable cheater mode. Yes, you can cheat using your camera. If you're like, "what is sports photography? I don't know anything about sports photography." Oh, well it goes to a motor drive of high, it changes from AFS to C which stands for continuous, and you may see some other changes in here as well, but it is somewhat limited on the changes that it does make. And so there's only so far you're going to get with letting the camera figure your creativity in the scene mode, and so it's just the next level up, going from very simple to full manual. We're gonna skip one mode and jump down to the movie mode, and so one of the things that's great about Sony is that they have a long history with video cameras and movie cameras, and so this camera is a very capable video and movie camera. So if you do wanna shoot movies, it'd be best to put it into the movie mode, you're gonna see a frame come up on the back of the camera in the viewfinder that shows you the new aspect ratio that you're going to be shooting in, and there is a movie record button on the back of the camera for starting and stopping. It's a simple one press to start, and then press it again to stop. There's a lot of things going on in the movie mode, we'll talk a bit about 'em now, and more later as we get into the menu system. One of the most important things is it does shoot 4K in a large frame, which is very nice. It does shoot HD, has a couple different file formats depending on what you're going to be using. The AVCHD is kind of an older format, designed for Blu-ray recording, which is not something a lot of people do, but it's part of Sony industry, so they keep it in there. Most people are gonna probably wanna keep it on 4K for highest resolution, or HD if HD is enough resolution for what you're doing. In the menu system, we'll be covering these more thoroughly, but you can see the shortcuts in here now. One of the other important settings is the frame rate, frames per second that you are shooting. Most video is shot at 30 frames per second. Some video, depending on which country you shot it, is at 25 frames a second, and Hollywood likes to shoot their stuff at 24 frames per second. So there's different standards depending on what you're doing. And then the data rate, how many megabytes that you are recording per second. The greater that is the more information that you have to work with in editing. And so I think video can be kind of separated into two simple groups. You've got people who are serious about video, that are gonna edit videos, and are gonna create some sort of story, a commercial, a documentary, a movie. And then you've got, kind of, mom and pop recording video clips. And for those mom and pops recording video clips that you're just looking for just a quick simple video, you don't need that highest resolution, it's not that important with the data rates on it. But if you are doing editing then it can become more handy in there. Like many of our cameras today, we have a limit of 29 minutes when shooting HD or 4K. It's just a technical limit, it's put in for tax reasons we're not gonna get into. There's a 4 gigabyte file limit, and when you go over that it creates a new file, so it's potential that a long video at a high resolution might be on two or more files that you would put together in editing. The focusing system is either in manual focus or in continuous focus, and as we talk to focus throughout the rest of the class, you'll see some of the other options, and that is while you are recording. So, on the frame size there is the option of recording with a 1.5 crop on this camera to give you more telephoto capability. Now, usually when it comes to cropping, I usually say don't ever do this, but in video it's a little different, because we have much more resolution than we actually need for video, even 4K video, this camera actually provides higher quality video if you put it into this 1.5 crop mode. The question is, does that mess up the composition that you're trying to get? 'Cause if you're trying to shoot wide angle you just can't shoot this, but if you are shooting sports, yeah, you could just leave it in here the whole time. Gives you a 50% more telephoto, and gives you better image quality on top of it. And so one of those cases where you get more in both cases. I've mentioned the resolution, 4K is kind of the current standard right now, so it does shoot that. We also shoot full HD which is gonna be still what most people have on their TV's these days, and it also shoots what's called HD which is 1280 by 720, in what's called a proxy movie. And this is a little addition, 'cause when you shoot a 4K movie, that is a lot of data, and if you were to try to transfer that, either via memory card, or wifi system to another computer or phone, that could take a long time and use up a lot of bandwidth, and so one of the options you can do is record simultaneous full size movie as well as this little small thumbnail movie. Now the thumbnail movie is still HD, so it's still very good quality. I'll talk more about that as we go throughout the camera. Now, there are different frame rates available depending on which resolution you have shot. You can see that when you shoot 4K you can't shoot it 120 frames a second, that's a lot of data, and the processors can not handle it at this time right now. Mentioned before about some of the different formats. Here is kind of the quick rundown of those different formats. We've got 4K, HD are gonna be the most popular options. Not too many people are gonna be using the AVCHD. Frame rates, once again, 30 is your standard rate in the United States. 25 is standard in Europe and Asia and other places around the world. You can do double that rate, either because you like the look of that rate, or because you know in the long term you're gonna wanna cut that in half and slow it down. Same thing is true with the 120 frame rate. And if you want your movies to look a little bit like the Hollywood movies, they film it at 24 frames a second. So, it's a whole cinema thing, we're not gonna get totally into, but it's nice that it has all these options on there. Now there is also the option for doing slow and quick frame rates, and this is either to accelerate or slow down time in a video. And that's the next mode that we're gonna wanna talk about on the dial. So let's turn it over to the S&Q mode here. And so there'll be settings in the menu system where you can go in and choose exactly what you want this to do here. And if you were gonna be shooting for a 30 second, 30 frame per second final video, you can record at up to 120 frames per second, or down to 1 frame per second, either to speed up time, or to slow time down. And you can also choose different video playback speeds for different purposes that you might want. And so I've had to create a new slide here, to show you what normal speed looks like. And let's slow this down by half, and we'll slow it down by a quarter, and a fifth as well. And so I'm recording at different frame rates, and if you know you want to shoot something in slow motion, this is a great way of doing it. If you wanna speed time up, well here's what normal time looks like, I need to show this. And then recording at 15 frames, playing it back at 30 speeds it up double. You can speed it up 3.75 times faster, 7.5 times faster, and so the camera does have a time lapse capability built into it. It's not the traditional time lapse In the A7 Mark II, Sony took out their little PlayStation apps where you could add in time lapse to it, so the camera does not have time lapse per se, but it does have time lapse that it gives you a final video. The difference is that you do not get all the individual frames that photographers tend to like, so they can make those adjustments. But if you are shooting video, and you just want to shoot a video and get a finished video right out of the camera, it does have that in this particular feature right here. Alright, let's get into more of the still photography section, here. The program mode is a little like the auto mode, in that it's setting shutter speeds and apertures for you, but you get to set everything else. So, drive mode, white balance, all those other sorts of things, you have 100% control. It's just giving you a good general shutter speed and aperture. Now, the program that's built into the camera, what it's trying to do is it's trying to give you a hand holdable shutter speed, so it's trying to give you a 60th of a second. And so once it has that, then it'll give you a little bit more depth of field, and a little faster shutter speed, and back and forth, but it does have no idea what you're actually trying to shoot. Whether it's portrait, or whether it's fast action. And so what you can do with the camera is you can do something called program shift by turning the front or the back dial to get a more appropriate setting for what you want. So, let's do a little demo here. Let me go ahead and turn the camera over to the program mode, and let's take a look and see what we're getting for our shutter speeds and apertures down here. Let me change the display to take off some of this information. So as you can see, the camera is trying to get us a shutter speed of a 60th of a second. Now I wanna go in and make just a quick change before I demo this, and that is I'm going to change the ISO. We have lights in here, but it's not super bright, so I'm gonna set this at 400 and see where that puts us at. And, boom, that puts us right at a 60th of a second here. And so if I want, I can turn the front or the back dial, and you can see now I'm going to slow shutter speeds and more depth of field, so if I was shooting a landscape shot, you know, I might set it here to F16, and I can change it on the front of the camera as well. And I can change, let's say we're gonna do a portrait here, max on this lens is F 4.0. That gets us at an 80th of a second right here. And so pretty simple when we make that change, and let me go ahead and turn on some of that display I wanted to show you. up here in the top left where it says P, actually I'm gonna turn the camera off and on, 'cause I just wanted to completely reset that, you'll see it just says P, and there we are back at a 60th of a second. As soon as I start turning the dial, (beeps) There's my P. (beeps) Now I've gotta get that display back up, there we go. It gives us a P star, which indicates we've changed it from the standard setting. (beeps) And there's our P star display. And so it'll reset after a period of time, or if you turn the camera off, and so if you wanna have the camera set up for quick picture taking, the program mode works pretty well, you just have to kind of put those things as you change 'em, but make sure that those numbers are where you want them for the shutter speeds and apertures. Next up on the list is the A mode, A stands for aperture priority. This is one of the favorite modes of many semi-serious and very serious photographers. To be honest with you, serious and professional photographers, they only use two modes on most cameras, full manual, and aperture priority. And aperture priority works really well, 'cause there's a large range of shutter speeds that the camera will automatically use, depending on what you're input is in the aperture priority category. So you can use the front dial or the back dial, either one, to make these changes. And with apertures you might want to stop it down to F if you want a lot of depth of field. So you wanna have the foreground in focus, the background in focus, this is very common in landscape photography. If you set it down at 1.4, you're gonna get really shallow depth of field, so you can get a subject that's really isolated from the background. Very good for portrait photography, or any time you were to want to focus in on a particular subject and have that background go out of focus. So that's aperture priority, and as I say, that's a popular one because there's a limited number of apertures that you can choose from, but there's a lot of shutter speeds that the cameras can compensate and match that with. Next up is a matching mode called the shutter priority mode, and this is very similar, but just the opposite, if you will. This is where you get to change the shutter speed and the camera will adjust the aperture according to what you need for this one. Now the problem with mode is that there are a lot of shutter speeds, and it's kind of easy to go out of range, as I'll show you here in a moment. And you gotta watch for these numbers that blink at you, because what that's saying is this is the maximum aperture, and it's still not wide enough to actually shoot this photograph. But shutter priority does work pretty good if you do add in auto ISO, and so it's a very popular technique with certain sports type photographers who do need a wide range of different shutter speeds they can quickly change between, and they wanna have the ISO system come in and save them if they don't have enough aperture to work with, you might say. So, with shutter speeds, as I mentioned before, you would choose a very fast shutter speed, like a thousandth of a second, to stop fast motion, like an eagle going into a river. You would use slow shutter speeds to show blur, show action, so wind blowing some scarves around at one second can be a fun shot, as well as rivers flowing and other landscape type shots with water movement, for instance. So, let me show you real quickly, aperture priority and shutter priority on the back of the camera, so let me switch it over into aperture priority, so we should see our A up here in the top corner, and front or back dial, either one. I'll change the back dial. You can see it turns to orange when I'm changing it. So if I wanna shoot at F22 I need .4 of a second. If I wanna shoot wide open at F4, I get 1/60th of a second. No problem either way. Let me change the dial to the S mode now. You can see we're on the S mode here, and now we can immediately see that the 4 is blinking at us because we are not letting in enough light for a proper exposure here, and so I can turn my shutter speed dial down here, so that I don't get a blinking number, and I can shoot a picture, let's go down to the lowest number we can get to, which is gonna be right about 60th of a second. And if I wanna go to a faster shutter speed, or, excuse me, a slower one, well then it's letting in too much light. And if you're just not paying attention at all you could set a shutter speed like 2 thousandth of a second, take a picture, and you're gonna get, let me play this wonderful picture back to you, see there's our wonderful really dark picture, 'cause we weren't paying attention to the controls on the camera. So if something is blinking at you that is kind of always the warning that something important is going on. When the cop's lights flash at you it's important, alright? And so when the shutter speeds and apertures blink at you, that means you need to make some sort of adjustment on the camera. Alright, moving on, next up is full manual. A lot of people's favorite setting on the camera, because that gives you full control over what the camera is doing. In this case we're going to split the controls, front and back, on the dials. The front one controls the aperture, the back one controls the shutter speed, and then you're gonna need to look at the metered manual system in here for judging whether you are overexposed or underexposed. Now, serious photographers, professionals, like manual exposure for a couple of reasons. Two most popular reason is consistent results. When you have figured out what the correct exposure is you can shoot multiple photos under the same lighting and get good results for all of your photos. You don't have to rethink the metering on every single shot. Another reason for it, is tricky lighting. Whether things are overly dark or overly bright, that will fool camera meters, and if you manually check it, use the view finder, use the histogram, use the light meter in the camera, you can take a little bit of time to figure out the first correct exposure, and get it correct for all those tricky lighting scenarios. Now, when you are in the manual exposure, the slowest shutter speed goes from 30 full seconds down to a bulb mode, and the way bulb works is with the shutter release, when you press the shutter release, it opens the shutter and exposes light to the sensor, as long as your finger is on the shutter. Now, finger on the shutter is not a good technique, 'cause you're gonna move the camera around. That's why you wanna use one of those cable releases. And so ideally this would be done on a tripod. When you release your finger off the shutter release, it ends the exposure in that case. And so, not available with the electronic shutter, and we'll talk more about that as we get into the class. So, let's put the camera in the manual mode, and show you some of the things that we can do in here. So right now we have the camera at two thousandth of a second and F4, and our metered manual, MM, is flashing S2, which is our warning we are under exposed, not by two stops, but by more than two stops. So I'm gonna change the front dial, but that's not gonna do anything, 'cause that's my aperture, and this is only making it worse in this direction. So I'm going to leave this at 4, I'm gonna change the back dial, and I'm gonna start changing the shutter speed down. You can actually see it getting lighter, and pretty soon that minus 2 is gonna change to minus 1.7, there we go, 1.3, getting closer and closer to proper exposure. Now this is what is called metered manual, this is your normal exposure, and if you don't agree with the camera, well, you're in control, so you can do whatever you want. And let's say I would prefer this to be a little bit darker than average, by a third of a stop. Well, fine, set it to an 80th of a second, and take a photo, and it stays there at an 80th of a second as you go through this. And so you can just adjust here. If you said, I would really like to shoot at a 15th of a second, for whatever reason you want, you could then go change your aperture back down to your zero setting, 1/15th at an F8 right there. And so that's the way manual works. As I mentioned, the shutter speeds, if we go down far enough, they'll go into full seconds. And we get to 30 seconds, and then we get to the bulb mode. And it cannot give you an image preview in this case on the LCD or the EVF, because it doesn't know how long you're gonna leave your finger down on the shutter release. And so that's gonna be a little bit of trial and error practice in order to do that. Alright, let's get this back to the normal range. So that is your manual exposure. We do have a very cool feature that a lot of people don't know about on this camera, that I remember on a Pentax camera years ago, and I learned about it, and I'm like why doesn't everybody do this? And that is manual shift. If you're somebody that enjoys using the camera in the manual mode, and you've figured out what the proper exposure is, you can hold down on the auto exposure lock button, and turn either the front or the back dial. Use the front dial it's a whole lot easier. It's gonna maintain the exposure, and I think this is really cool. So let's go ahead and look on the back of the camera, and I'm gonna set up a proper exposure, which I think we have set up right here, and, okay, this is a good exposure, but I don't like my shutter speed and aperture, so I press AEL, and we should see a little star down here turn on, and now it's locked, and if I turn the front dial, it turns this much in the same way program shift did, that we talked about earlier. And so if you said, hey, I really like this portrait at F4, let's try it at 5.6, you don't have to turn the front dial three clicks and the back dial three clicks the opposite direction anymore. You just press and hold that one button and go back and forth. And for somebody like myself, okay, I'm telling you what I like because I teach classes and I wanna show things, here's what it looks like at F 5 6, and here's at F 8, and here's F 16, it makes it super easy to make those changes in the field very, very quickly. But I think anyone who wants to have control of the camera, it's just a way of doing it fast and easy. Last on the dial is number one and number 2. And these are favorite sections, where you can set the camera up to work exactly the way you would like it to work in any particular scenario, and there's a lot of ways and reasons why you might use this. You might be a wedding photographer, where, A, you do a lot of portrait photography, so you'll be standing there, you want shallow depth of field, a reasonable shutter speed, and you want to take a portrait. But then when people are moving around, they're walking up and down the aisle, they're dancing, you need something to accommodate for faster action, you can have that set to number 2. So what you do is you set the camera up the way you want it to, and then you memorize your settings, you program those into the camera under one and two. And so you're gonna dive into the menu section, and you memorize these settings, you set them into the memory, and then if you want to recall them, you can go in there and do this as well. Now we do also have something called M 1, 2, 3, and 4. And these are electronic memory positions. So technically, the camera has six memorized slots for your type of photography. Two of them are on the dial, four of them, and I don't like this aspect, I think this could be done better, are stored on a memory card. You can choose whether it's on memory card one or memory card two. I don't like this because I'm reformatting my memory cards and I'm deleting them on a regular basis. This might work well for somebody who only uses one memory card for photos, but they use another memory card for their memorized settings in here. And so if you had six complicated scenarios that you didn't like switching back and forth, you could have these stored on 'em. It is a little bit funky, and I'm not a big fan of it, but it is two good solid settings, which I think most of us will be able to make use of in here. And so we'll talk more about these memory positions as we get into the rest of the camera, but just know that they're there. Basically, you set the camera up the way you want it to, go to these menu settings, and set 'em in there into one, two, or one of the card storage, M one through four. Alright, so that should be a good rundown of all the options on the mode dial. As I say, most photographers kind of stick with manual and aperture priority, although I think that one and two option is gonna be a favorite for a lot of photographers. And when uncle Joe who doesn't know how to work your camera wants to borrow it, put it in the auto mode, and say don't drop it.
Class Materials
Bonus Materials with Purchase
Ratings and Reviews
a Creativelive Student
John GreengO! What a wonderful teacher! As always to the point. You do all the testing for us and we get an amazing tour of the camera. Really thrilled with your class once again. Thanks a lot!
user-7002e3
Thanks John. Another great class! I appreciate the thorough explanations. I many never use all of the features on this camera but at least I know what they do. Love all of your classes and would definitely recommend them.
Mary
Wonderful class. John is a great instructor. Learned a lot. Only wish he'd include a bit more on using a7iii to shoot video, such as using Clear Image Zoom, and including video in the ending Camera Operation settings section. Loved the course though.
Student Work
Related Classes
Camera Guides