Lesson Info
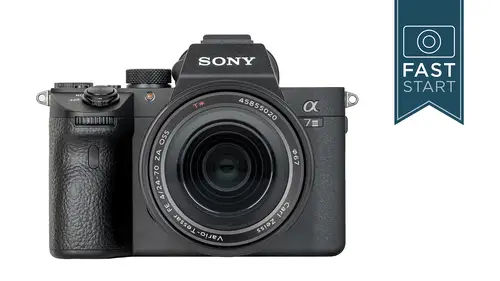
12. Menu Page 1: Quality/Image Size 1
Lessons
Class Introduction
16:37 2Photo Basics
04:38 3Camera Controls: Control Wheel & Shutter Release
04:08 4Camera Controls: Mode Dial
26:05 5Camera Controls: Top Deck
18:35 6Camera Controls: Back Side Controls
15:00 7Back Side Controls: Function Button
25:35 8Back Side Controls: Wheel & Custom Buttons
10:58Left & Right Side Controls
07:02 10Bottom Controls
04:59 11Front Controls & Lenses
13:16 12Menu Page 1: Quality/Image Size 1
09:48 13Menu Page 2: Quality/Image Size 2
03:56 14Menu Pages 3-5: Shoot Mode/Drive 1/AF1
09:02 15Menu Page 6: AF2
05:42 16Menu Pages 7 & 8: AF3 & AF4
05:56 17Menu Pages 9-11: Exposure & Flash
06:33 18Menu Page 12: Color/WB/Img Processing
08:49 19Menu Page 13: Focus Assist
06:03 20Menu Page 14: Shooting Assist
06:29 21Camera Settings: Movie
07:43 22Camera Settings: Shutter & Steady Shot
08:37 23Camera Settings: Zoom & Display Auto Review
07:13 24Camera Settings: Custom Operation
11:55 25Network Menu
11:19 26Playback Menu
07:18 27Setup Menu
26:52 28My Menu Overview
08:13 29Camera Operation
10:14Lesson Info
Menu Page 1: Quality/Image Size 1
We're gonna jump into the next section right now which is menus. We have a very large section on menus, so we're gonna get that started right now. So, basic controls. We have dials and buttons that we've talked about before. We're gonna hit the menu to get this all started. In the menu we are going to be breaking down different controls with tabs and so we're going to organize these into different tabs. And it's pretty logically put in here with the exception of camera settings one and two. It could all just be one, it doesn't make a lot of sense to me. There's a lot of video stuff in too. And some custom controls, but we'll get into that in due time. One key feature to look at. When you go through the menu system, when you see these two symbols, these are little icons that are gonna indicate whether something is with still or with video functions. All right, so we're diving into the menu system. We're gonna start in a very logical manner. The top left under camera settings one and the...
se are gonna deal with image quality and image size. And so the first option is whether you're shooting RAW, JPEG or both. So RAW is the original information off the sensor. You're gonna get 24 megapixels and you're gonna get either a 25 or 50 megabyte file size. I'm gonna talk about that in just a moment. JPEG is the simple option. It's the format that we all use to send people images and even print images off and they're very handy. If you have a RAW image, you can create a JPEG later in your computer. If you have a JPEG, you cannot make a RAW out of it. So, RAW is what a lot of the serious shooters are using. You can shoot RAW plus JPEG so that you get two files. In general, I don't like this because if you have a RAW, you can create a JPEG. The reason for this is when you need JPEGs right away and you don't have time to make them on your own later on. And so, those are our basic options when it comes to file format. And so if you're a very simplistic user, just getting started, JPEG is fine until you get your software game figured out. But RAW is what I recommend for the more serious user. And so, as we go through these recommendations, you'll see my general recommendation and one for the more advanced user in here and this will carry forward onto the PDF that comes with the class, on the recommended settings. So I'll have all these recommendations on page one, page two is left blank so that you can fill in your own favorite settings on that. Continuing on. RAW file type, okay. If you have a Photographer party that you're going to and you want to get a discussion started, just yell compressed, uncompressed and see what happens with the party. People have different opinions on this and I'll lend you mine along with some visual support of my idea on this. So, the uncompressed is the original information from the RAW and you get this beautiful, wonderful image that you can work with. The compressed RAW is where Sony takes a look at the information and they kind of ask the question, where can we save some space and they get rid of some information that you probably don't need and you end up with a smaller file size. Which is gonna just make transferring, file size, storage, everything easier in the long run. But, hold on a minute, what did they just throw away? And is there anything important? And so this is the question that I have been wondering for years and I'm constantly checking on different cameras. So, of course, I went in and did a test and I shot identical settings. Changed it between compressed, uncompressed. I magnified it. I looked in the highlights, I looked in the shadows. I can see some differences, but I can't see any quality difference myself. And with this and with other brands of cameras, I've tried this in many ways. I've tried overexposing, underexposing and then recovering it in software. I've tried looking at color information to see, does it still have as many colors? Are they the right colors? And I still haven't gotten anything from any manufacturer that looks significant. All right, so, my recommendation is to leave it in the compressed. That's where I leave it on my camera. Now, there is a little caveat. There's a few people out on the internet that are just screaming their heads off right now. Occasionally, software doesn't work as well with compressed as it does uncompressed, 'cause it's kind of a special version of the RAW. I've seen some people shoot compressed, they download it to their iPad which has old software running on it and their images are not visible. They can see they downloaded something, but they can't see it because their software was not up-to-date. And it's usually just a software not being up-to-date type thing. I have also heard but not have verified that in processing the images in Lightroom, like building the previews and stuff, it took a little bit longer with compressed than uncompressed, which is counterintuitive 'cause it's a smaller file size, but apparently, because it was compressed, the computer is working to uncompress it and look at it and it took a little bit more processing. So, there are some software issues that you may want to test when using compressed, But everything that I have seen when it comes to image quality, there seems to be no problem with it. And it does save a huge amount of space. All right, next up for the JPEG shooters, you can choose extra fine, fine and standard. This is just the compression on each of this. On each of these different settings. And so it will change the file size a little bit. Normally you wanna shoot in the highest quality you can. This is where there will be problems with compressing your image more. JPEG image size. So the previous one that we talked about quality. That was the compression. This is the actual resolution of the image. And so you can change it from 24, 10 to six. You know, at this point now, most people are just shooting everything 24. We have memory that can handle it. But you know, back in the day when we were shooting with 10 megapixels, it was perfectly fine for a lot of things. So you may find that you don't wanna use as much data. Perhaps, you know, pictures of kitty. You don't need 24 megapixels and a million of them. Perhaps 10 megapixels is more than enough for your Instagram cat photos that you're taking. Aspect ratio. The aspect ratio of the sensor in the camera is three by two, but when shooting video, most of that is done at 16 by nine and if you wanted to shoot still pictures at 16 by nine, you can see that in the viewfinder with the framing. Not something a lot of people do, but if you are shooting for that aspect ratio, it's nice that you can see it in the viewfinder. All right, this is a really important thing and I don't know why Sony did it here. So there's an important change that we're gonna make here that is gonna make you go hmm. So, this is where the camera can crop in, we're gonna go into a sub menu. Let's go into that sub menu here. So, APS-C, super 35, that's what S35 stands for, is a way of cropping in on your image and using the smaller area in the frame. And you can have the camera automatically do this or manually do it. Manually is if you just wanna crop in and do this. Some people will say, you know what, I don't mind a 10 megapixel image. Let me just do a 50% zoom in with the press of a button. You can program this into one of the shortcut buttons. Now in auto, what happens, is if you had, let's say a Sony A65 100, you took one of the lenses that was designed for it, you put it on this camera, it's shooting a crop frame image, it would automatically crop in and just show you that cropped image on there. So, auto is not a bad option here in some ways. With the exception, and Sony I don't know why you did this, if you are using the camera in 4K video, which is a very common thing, the camera automatically crops it to 1.5. And it's just like, what? Why did it do this? Well, it did it for one reason. The camera actually records better quality video in the cropped 4K mode, than the full frame mode. And that's because of the number of pixels that it's reducing down to make that 4K video. And so, it's easier to do that compression and you get better image quality when you're in that mode. However, you're not getting the angle of view that you may want from your lens. And so this is a feature that if you're really nit-picky about video, you may wanna test to see how it looks to you. Myself, I'm kind of picky, but I'm not that picky on my video yet and so, I have turned this and set this to manual. Normally it comes set to automatic. So when I set it to manual and I put on a 24 millimeter lens, I wanna see 24 millimeter width when I'm recording my video. So, yes you can shoot full frame with this but you do have to come in here and change it to manual, which is important. And actually, this one here allows you, the first one allows you to change it manually, this is where you actually turn it on and off. And so, be aware, you gotta come in here and make these adjustments to make sure you're shooting full width if you want that from your lenses.
Class Materials
Bonus Materials with Purchase
Ratings and Reviews
a Creativelive Student
John GreengO! What a wonderful teacher! As always to the point. You do all the testing for us and we get an amazing tour of the camera. Really thrilled with your class once again. Thanks a lot!
user-7002e3
Thanks John. Another great class! I appreciate the thorough explanations. I many never use all of the features on this camera but at least I know what they do. Love all of your classes and would definitely recommend them.
Mary
Wonderful class. John is a great instructor. Learned a lot. Only wish he'd include a bit more on using a7iii to shoot video, such as using Clear Image Zoom, and including video in the ending Camera Operation settings section. Loved the course though.
Student Work
Related Classes
Camera Guides