Lesson Info
13. Menu Page 2: Quality/Image Size 2
Lessons
Class Introduction
16:37 2Photo Basics
04:38 3Camera Controls: Control Wheel & Shutter Release
04:08 4Camera Controls: Mode Dial
26:05 5Camera Controls: Top Deck
18:35 6Camera Controls: Back Side Controls
15:00 7Back Side Controls: Function Button
25:35 8Back Side Controls: Wheel & Custom Buttons
10:58Left & Right Side Controls
07:02 10Bottom Controls
04:59 11Front Controls & Lenses
13:16 12Menu Page 1: Quality/Image Size 1
09:48 13Menu Page 2: Quality/Image Size 2
03:56 14Menu Pages 3-5: Shoot Mode/Drive 1/AF1
09:02 15Menu Page 6: AF2
05:42 16Menu Pages 7 & 8: AF3 & AF4
05:56 17Menu Pages 9-11: Exposure & Flash
06:33 18Menu Page 12: Color/WB/Img Processing
08:49 19Menu Page 13: Focus Assist
06:03 20Menu Page 14: Shooting Assist
06:29 21Camera Settings: Movie
07:43 22Camera Settings: Shutter & Steady Shot
08:37 23Camera Settings: Zoom & Display Auto Review
07:13 24Camera Settings: Custom Operation
11:55 25Network Menu
11:19 26Playback Menu
07:18 27Setup Menu
26:52 28My Menu Overview
08:13 29Camera Operation
10:14Lesson Info
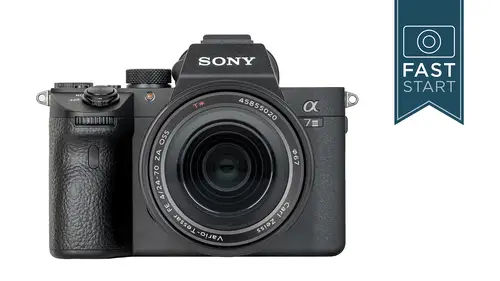
Menu Page 2: Quality/Image Size 2
Page two, long exposure noise reduction. What happens here is when you shoot a long exposure, like 30 seconds, the camera does 30 seconds of processing to reduce the noise in the images. And this is really irritating when you're doing 30 second exposures at night, 'cause you gotta wait another 30 seconds to do your next exposure. And I, of course, wanna see how much difference does this make, and so I did a 30 second exposure with the feature on and off, these are the results. Just in case you can't see the screen real clearly. I don't see any noticeable difference here, at all. And so I think this whole long exposure noise reduction is a waste of time, so turn this thing off. And maybe there's a scenario that it has a big impact, but I haven't seen it in any of my tests so far. And when you do leave it turned off, you can always add noise reduction later on in software as well. Alright, next up is the high ISO noise reduction. Now, when you shoot with high ISOs, you are going to get n...
oise, and so this is for JPEG shooters. If you wanna set a high ISO, this test is done at 51,200. I set it pretty high so that you can clearly see what's going on. That is what you call a noisy image. The camera can reduce that noise, but when it does reduce the noise, it does kind of mar the details. And so there is a trade-off as to how far you wanna go with this. And so, if you wanna use it, I would either use it on low or turn it off and use external software for reducing noise in the JPEGs later on. Color space is dealing with the range of colors that you are recording. By shooting in raw, you are getting AdobeRGB. So if you shoot raw, you don't even need to worry about a change. If you shoot JPEG, if you're gonna manually adjust your images, exposure-wise, post-production, you would change it to AdobeRGB. I'm not sure who would leave it at sRGB, but if you were just shooting straight from the camera in auto mode straight to Instagram, then you're probably fine in that. Lens compensation is gonna deal with correcting with lens imperfections. Yes, I said it, lens imperfections, not all lenses are perfect. So shading composition can be set to auto or off. A lot of lenses, especially the fast lenses, will have a little bit of vignetting or darkening on the corners, and you can correct for that, and basically it's just brightening up those corners a little bit. For a skyline, that might be nice, but for portrait photography, I am often even adding in more vignetting, I like it on portraits a little bit more. And so this is something that a lot of serious photographers would leave off, depends on what you want your images to look like here. Once again, all of these are for JPEG only. Raw users are gonna get the original information off the sensor. Chromatic aberration is a color ghosting that happens when you have bright backgrounds and solid foregrounds. There is a little bit of color ghosting that changes the color as it wraps, or as the light comes around these solid objects. And I haven't met anybody that likes chromatic aberration. So this is something that you can safely turn off, or automatically, excuse me, leave this in auto so that it automatically corrects for this. It'll correct for it on the JPEGs, not the raws. Still something you have to deal with later on with raws. Distortion compensation, this is mostly for wide angle lenses. Let me go back and forth between these two images. So any lens that has a little bit of distortion on it can automatically be corrected, and so people generally don't like distortion unless you specifically have a fisheye lens, and so you can leave this on auto, and it will fix it on your JPEG images.
Class Materials
Bonus Materials with Purchase
Ratings and Reviews
a Creativelive Student
John GreengO! What a wonderful teacher! As always to the point. You do all the testing for us and we get an amazing tour of the camera. Really thrilled with your class once again. Thanks a lot!
user-7002e3
Thanks John. Another great class! I appreciate the thorough explanations. I many never use all of the features on this camera but at least I know what they do. Love all of your classes and would definitely recommend them.
Mary
Wonderful class. John is a great instructor. Learned a lot. Only wish he'd include a bit more on using a7iii to shoot video, such as using Clear Image Zoom, and including video in the ending Camera Operation settings section. Loved the course though.
Student Work
Related Classes
Camera Guides