Lessons
Lesson Info
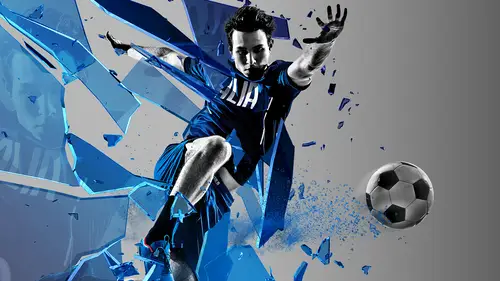
Light Frame Effect
When you want to combine a light element with a subject here so we've just got this woman that's just on a white background just jogging. I want to go ahead and do a quick and dirty extraction here and by quick and dirty I mean this is not going to be precise, I don't want it to be. So I'm just gonna use a magic wand and now this kind of brings up an interesting point. When you have a subject that's on a white background or just any solid background, when you want to select a subject, I've seen a lot of people they'll take and try and use quick selection. They're dialing into the subject. If the background is solid, you might find it easier to select the background and just simply invert the selection. I've often found that way. So I just took the magic wand here, set it to a lower tolerance, and just clicked once on the background, solid white, it's going to select the whole thing, and I'm just going to go into select inverse. Now the subject is selected. So now I'm going to go into s...
elect and mask and just make sure, let's just kind of clean up around the hair here a little bit. That's all I'm going to do there so like I said, quick and dirty. So I'm gonna command J, select that, put it on a new layer. Now you can see the density around her hair, there's some transparency in her hair here a little bit. You could go back and readjust this selection but just as a quick and dirty thing, here's a quick trick to fix that. Duplicate the layer a couple of times and it just builds that density back in and then you just merge the layers back down and now the subject is extracted. So now I'm gonna take and sample. I'm gonna grab my eyedropper tool. I want to sample kind of the dark blue of her outfit here so we'll go into the shoes and just kind of get this dark turquoise color. In fact, I'm going to make it a little bit darker. And that I'm gonna make as my background. So I'm gonna create a new layer underneath the active layer. If you just hold down command or control and click the new layer icon, it will automatically put that layer underneath because doing this takes too long. So what I'm gonna do with that layer is fill it with that dark turquoise color so just option delete fills it in and now we can see a little bit of error. See, she's missing a good chunk of her head there but that's not relevant. It is, but it isn't. I'm going to make a rectangular shape here and I'm just gonna use my shape tool. I'm just gonna draw a box kind of right over the subject here. Now this is a vector shape so I'm going to go into the options bar and just set the fill to none. And I'm going to go in here to the stroke and set that to white. And let's make the stroke really large. I'm gonna go about 50 on that, there we go. And the point here, what I'm going after is I want this box, this stroke box, to be as if it's a light frame that she's jumping through and it's actually casting light on her as she's jumping through it. So with that, I'm actually gonna make it a little bit thicker. Let's go and make it about 75 pixels, there we go, and I'm gonna go in here and add a layer style to it. So I'm gonna double-click the layer and let's go in here and add an outer glow. We'll just do a white glow in overlay mode, increase the size up. So you can see it's getting me a good amount of glow coming off that shape there. Now, I want to mask that shape so I can reveal the subject. So parts of her I want to stay behind the strobe, parts of her I want to bring forward. So I'm going to go into the layers and command-click on the layer containing the extracted subject which is going to load the shape of that subject as an active selection. And then we're gonna go right up in here to the rectangular layer, make sure it's selected, I'm gonna option-click or alt-click if you're on Windows right on the layer mask icon here. And that's gonna create a mask based on that selection. Now what I want to do is go and get my brush tool and it still has the bouquet. By the way, just jumping back here real quick. That bouquet brush I selected, once you've got that all set up the way you like it, just go in here and do new brush preset. That way it will save all those settings that have been applied to it so you don't have to go in there and do all that dialing in again. But I do want to get just a regular brush here so I'm gonna go in and get a regular, round brush. Turn off all these settings here. Don't need all of that, okay. Now, I'm gonna paint with white on the layer mask. So now I gotta determine which areas I want to put behind so I'm actually gonna paint over the arm here, it's gonna reveal that box, so maybe over the shoe in the bottom here. Gonna leave the hand kind of coming in front of it there. I think I like the way that looks. And the rest of it, I'm gonna go ahead and leave it alone there. Obviously, I would normally fix this right here where it's coming out of her head but for the sake of demonstration, it's fine. In fact, I'm just gonna do a quick and dirty fix here. This is not a tip I recommend. Oh that just made it worse, nevermind. Oh you know why? It's because I got the mask on it. Right there. Not helping. Alright. Now, to get the light looking like it's shining on the subject, there's already a good amount of highlights on her but I want to enhance those more so, especially in the hair right here and such. I want to do this directly on the layer itself. Normally I'd probably put this on its own layer. I really want to manipulate the pixels of the actual subject and this is the point where you're going to make a change that's permanent. So if you're doing this for real, I would recommend making a duplicate of the subject layer. In the event something goes wrong, you can just delete the layer and start over without having to go back and extract it. But I'm gonna go in here and set my foreground color to white and I'm gonna go up here in the options bar and set the brush blend mode to overlay. And actually, I don't want to do white. Let's do more of a lighter blue based on the character here and now I'm just gonna go in on that layer. Make it lighter, there we go. So as I start painting, you'll notice it's adding it to the background so I'm gonna undo that. Gonna go in here in the layers panel and you want to lock the transparency of the layer right up here where it says lock, just click on that first icon. Now we'll isolate the effect to just the area of the subject so if I go in here and just start dabbing, it's probably a bit extreme. We'll undo that. Probably for this sort of thing, I would probably want to use some pressure sensitivity. If you're not using a pressure sensitivity tablet, dial back the opacity of the brush a little bit. But I am going to go ahead and activate transfer and pen pressure there, okay. And now I'm just gonna dab on there so there we go. It just looks like it's picking up a light right on the edge of the subject there. Right here on the arm. And even stands to reason that the light would really be kind of casting along her leg here, wherever elements are facing the light elements. So maybe yeah, paint a little dab here. But it's just selling the fact that there's that light element shining on the subject. It's probably a bit extreme but you can see now, with a little bit more tweaking, you can definitely make that subject look more like it's in that scene there. And just to finish it off, let's put a new layer above the background layer and just set your foreground color to white and if I add a radial gradient, white to transparent right in the background and put it in overlay, we get a little bit of a glow coming in from the background there. Kind of an instant, cool sports ad in no time.
Class Materials
Bonus Materials with Purchase
Ratings and Reviews
Pat Saizan
Great short course. Love to see advanced photoshop classes like this. Cory is great and an excellent instructor.
Beth Krzes
i found this class to be very informative. the image and description were a bit misleading but I did enjoy the subjects covered. well worth the time. I think he went through the steps quickly, you do need a better than average understanding of layers and tools as he isn't always clear as to the "path" of how to do certain steps. I took notes, attempted the project and listened to the lesson again to reiterate the sections that my notes weren't too clear. also was more focused on watching the process vs just writing it down. would recommend this class to anyone who wants to step up their skils in PS.