Lessons
Day 1
1Introduction
11:19 2Two Exposures Explained: Ambient & Flash
18:24 3Flash! A Drama in 4 Parts
18:42 4The Triangle: Aperture, ISO, Shutter
18:08 5Overpowering the Ambient Light
37:36 6High Speed Sync
15:03 7High Speed Sync Q&A
25:15Shutter Priority Mode
23:12 9Manual Mode
50:21 10General Q&A
19:21 11Color It
15:53 12Diffuse It, Twist It, Pull It
17:29 13Click It, Zoom It, Remote Control It
24:13 14Shoot: Softbox and Umbrella
41:44 15Shoot: Three Light Setup
21:56 16Shoot: Freezing Motion
17:39Day 2
17Introduction
06:28 18Bouncing the Light
36:18 19Off-Camera Flash Options
29:03 20Light Modifiers
08:15 21Limitations of Your Flash
20:48 22Shoot: On the creativeLIVE Roof
27:55 23Flash Modes: TTL & Manual Mode
16:50 24Light Metering
13:48 25Light Metering Q&A
42:50 26Guide Numbers
18:52 27Built-in Meter
20:28 28General Flash Q&A
24:10Day 3
29Light Shaping
36:58 30Group Lighting
46:18 31Lighting Dark Environments
17:37 32Indoor Holiday Photos
23:10 33Outdoor Events at Night
13:46 34Lighting Dark Events Q&A
13:14 35Portrait Lighting
32:22 36Portrait Lighting Q&A
21:57 37Butterfly/Clamshell Lighting
16:06 38Q&A and Lighting for Men
24:12 39Final Q&A
06:15 40Ninjas!
27:02Lesson Info
Light Shaping
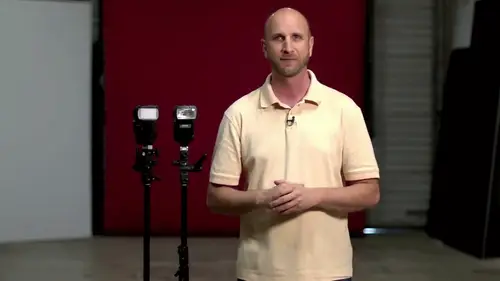
We have done a ton of stuff of last three I was looking at all those videos and I was like, wow, we have gone through a lot of stuff made you sort of have that same reaction that's like, well, yeah, we did that so day one, we did a solid foundation, we talked about the exposure triangle and what that means to our ambient light. We learned about the exposure training for a flash we had discovered that are two different things we've learned about the appropriate amount of light we learned about the pre flash on our camera, and we call that the ninja that goes out and secretly figures things out we learned about through the lens mita ring and the strengths and weaknesses of that yesterday we talked a bit about modifying light, getting our flash off the camera, we went up on the rooftop, we try to overpower ambient light, which really means under exposing ambient light and popping in some flash to get some interesting things, a lot of discussion, we did a a shoot at night, which is awesome...
today, we're going to take all of that stuff that we've learned we're going to put it into practice, basically, we're gonna have a lot of fun today today's, fun, well it's going to be shoot, shoot, shoot, shoot, shoot on dso we're going to go through common scenarios scenarios like, what if you wanted to shoot, maybe a family gathering during the holidays? How do you get that catch a little bit of the ambient light? Make sure if you're maybe shooting, trick or treat, you know kind of stuff you get that wedding receptions or outside events, shooting groups, shooting sports, we've got a several of those things, and so we are going to be shooting almost all day. I was looking on all of those comments that are sent in using the hashtag wallace live on twitter. I was zipping through the facebook stuff last night and just sort of trying to catch up on what people are talking about. One of the things that I saw that I really want to dive in a little bit more on today is shaping light. I really want to talk a little bit more about shaping light before we get into those scenarios. We touched on this a little bit yesterday, but I really think we can go a little step farther on this and so we're going to talk about that. First, we're going to talk about light shape, we're going to start by talking about some of the stuff that kobe we talked about yesterday with what happens when you zoom that flash, you know, apples to oranges. That thing will have a demo that we created we're going to do that I'm going to talk about the position of light and how that affects contrast, we're going talk about distance from subject inverse square law we're going to release show you the inverse square law on well, the math was going to show it to you what happens in reality and then we'll talk about the size of light so position, distance size, what happens when using umbrella or a soft box or a rogue diffusion panel or you bounce that kind of stuff? What happens? We're going to show it to you instead of talk about it and so that's, what we're going to do first, so to start with what I've done is I have a camera right back here and this camera has just a flash on top of it, and what I wanted to be doing here is I'm going turn on my camera and my flash and kelsey's gonna bring out the tether cable so we can make sure that everything is tethered up. I got it tendered up sounds like something I should say before you head out in the morning until they're up right now arizona, we say cowboy up, all right, so what we're doing here is I want to show you what happens when you zoom your limbs so right now I have it set tio just normal mode so what we have is we showed you day to that when you zoom your lens as you zoom your linens your flash zooms with you and so I want to show you in real terms what that means so I have my camera set tio an aperture value of three point two just a wide open aperture I have my shutter speed of two hundred were shooting in manual mode and my eyes so is two hundred ok? And so also what we're going to do is it's going to get dark in here so we can control all this light so all the video lights are going to go off here so we can really show you these things so those of pop off here in a second but I'm going to do is I'm first going to take a picture of this wall so I'm trying to show you the illumination on the wall back here and if it is evenly illuminated or if it is not evenly eliminated so can somebody grab that light right there? It would be awesome all right, so that your pop enough so I'm gonna first take this wall and uh take a shot of it in those lights air somebody's going to get john, we'll get those they will magically go off awesome all right? So it's getting dark very dark in here all right? And we're doing this because we want to really make sure that we have as little ambient light it's possible to show how this works. So this is twenty four millimeters, I'm taking a picture and you can see that the light is evenly distributed across that wall. You see that the wall has light all the way to the edges, all the way to the edges if I zoom in so I'm assuming my lens to seventy millimeters, I'll take a photo so I take that photo and you can also see that that light is evenly distributed now. I had my camera on manual focus mode, so I think it's out of focus because I forgot tio focus it, but you see it's, the light we're looking at the light is evenly distributed. I just had it actually focused there even distribution of light um, lao let's watch what happens when we do emanuel zoom so remember yesterday we said, hey let's, d'oh! Compare power outputs, apples to apples so when I have my lindsay zoomed all the way out, I'm going to take my speed light and I'm going to make my speed light zoomed, although we in this far as it will go one hundred five millimeters and I'm going to take a photo and this is where you'll see the big difference between those two different lights, the pro photo light that had a big blast of light that could illuminate everything and it's been like, you see, there is not an even distribution of light when we zoom in to get a lot of power. And so if this was a group setting, for example, we would have big problems with this, because we would have bright area in the middle, in a dark area around. And so yesterday, when we talked about being realistic with your flashes, if we wanted to take this zoom and take it back out, let's, take it back out to let's, say, twenty four millimeters that's a really wide distribution of light, so lots of light going everywhere you can still see with this, we have a dark area when this picture pops up, look at the very top right car of the set to see how it's getting a little bit dark so we're still not getting like everywhere. I will take my little pop out when they throw that on there for an extremely wide angle, so I've taken this little guy pulled it out, let it drop down, let me take one more shot here, and you can see here in the studio that lightness went all over the place I'm sure that didn't show up on the video but like this whenever it's now we just fix that corner okay, so that's that's what this the zooming does for it so we do get a lot more power when we zoom in but I mean a lot more power when we zoom in but we're losing the even distribution of light we're going to lose that it's only show you one more thing that I think is pretty amazing, you know? Zip over here. I'm gonna grab this. This is called a rogue. Um this little rogue I hear is a flash bender and it has a diffusion panel on the front and so what I want to try to do is is have an equal mix of power and even illumination. So on my flash I'm going to zoom it to manually zoom it to fifty millimeters came annually is giving that to fifty millimeters. So that's going to give me some punch in my flash and then for even distribution of light going to put this on life flash just zooming over here like this what I'm going to do here is now this large source of lights going to defuse the light watch this this is pretty crazy take this picture and look how we have when this picture comes up we have a nice um, it's a good way had a nice distribution of light on that wall. And so by using this large modifier like this were able tio maintain some power and get a nice, soft distribution of light instead of having a really hard like we're getting a soft like, we're going to show you more of that when we start shooting groups. But this little rogue soft box basically, is what this is, really we'll make a huge difference. Okay, we'll show you one more thing, renee, switch over to nikon for this, and I think we're okay with turning on the studio's lights for this next demo. I think we'll have we'll be able to do that so people at home can see me, I'm not going to so dark. So what were you going to bring out a nikon camera? And we're going to show you some stuff that nikon does that cannon treats a little bit differently way had time, I'd throw the pro photo out here just to show you that it has even distribution at that full power. It would little light up everything. So again, these guys, they're not magic. Okay, so what we're gonna do is we're going to live you this camera and, um it's pretty cool so I'm throwing on live you hear fun thing with live use I can't see unless I'm looking at the tv all right awesome so you could see all of the settings that I have someone take my shoulder speed up to about two hundred just so we could uh take the power of the ambient light down so you see I'm just getting rid of the ambient light okay doing it um going turn on my flash have my flash set to just normal um even distribution here the zoom is set to zoom with my lens just like the cannon did but what I want to show you I'm not going to show you that we can manually zoom in and it will change because we've already seen it but nikon speed lights have something that can and speed lights don't so cannon speed lights treat their distribution of light with just zoom nikon speed lights have the zoom in addition to that they have something else and it's uh if I push the zoom button on this speed light you can see that now I have this little icahn right down here this is an espy nine ten and different speed lights do this a little bit differently different night constant like some of that little switch on the side but what we can do is we can change the illumination pattern of the flash so right now if I push this you can see this little icon right here changes so it goes from no icon through a wide icon teo little these little beams coming up so what that is is right here where there's no icon that is a even distribution so that's an even distribution if I take a shot there you can see we have light that's evenly distributed fact I'll zoom way out take another shot even distribution of light if I push this once I have a wide distribution of light are normal distribution of light there take a picture you can see that we get nice coverage but we have a little bit different coverage if you look at the upper right hand corner that's different than one that I think is the most significant though so we have even wide and then we have another one that is center waited so if we want mohr of the light to go into the middle and have a nice sort of fade out at the sides we can do that as well. And so these all look pretty good but if you look closely you can see that the center of this is a little bit brighter then the outside it's a little bit more white than the outside it's a very subtle thing and so you have the ability to also zoom solves in this guy in so you can see that I'm assuming that in so we could do that just like we did with the cannon but then from that zoom then I can change how that works and so I'll put this social of it wider distribution of light so I'm zoomed in but you can see it's a little bit whiter so you can you can have a little bit more control with the nikon see light as to how that light is distributed so that's the zoom stuff I want to make sure that we showed that there's something else I want to show though and that is a question that we have our jim sorry question from the internet from fashion tv would you use that zoom function creatively tio replicate a snoot type of yes absolutely and so when I want to add a vignette dark sides then yeah I'll do that so you can it's great for portrait photography especially some fashion looker if you want to just get rid of some distracting elements in a background isolated subject yeah it once you know it's there the music creatively in and have it have a blast so thank you singapore for that question ok we have another question for is it or get ok so we want to talk about next is the position of light I'm gonna grab the white board here and so kelsey has ruled that out for me this's very this is key key key critical to understanding light, the position of light matters, and it matters a lot. And so I'm going to go through this very quickly, and then we're going to show it and so serious back there somewhere, right? Yeah, I see. You're waving. Ok. Er, morning. So, uh, sarah's back there, okay, so if we look top down so this is the top of your subjects had now subject can be a person subject should be still life. It could be mountains. It could be anything for our application. We're going to talk about shooting a person, but it could be anything if your camera is here. Cameras here and you have a light here. We're gonna make our lights this little circles and arrows. The light is coming this way. If that light is if that light is in alignment with your camera so let's, stay right here. The light is going straight to our subject. That is called front light front light, and it will illuminate the front of your subject evenly. And so you'll get low contrast. What that means is there's. Not really. Any difference between the brightest and darkest side of your subject, it's just really flat light it's not very interesting light. And if you notice that's where your flashes on your cameras right above the lens, and so if you have your flash on your camera, the light is always front light, and you're always gonna have low contrast light you're not gonna have on your subject that you're eliminating with your flash, you're not gonna have a lot of contrast, and I got a lot of interest is going to sort of fall flat when you move this light over here and now, it's coming this way, what you're doing is you are illuminating the side of your subject, ok? And so this is called sidelight, and what that sidelight does is now you've got this side of a subject that has illumination and this side that doesn't, and so what that does is it creates high contrast, and it creates shadows, it creates more interest, it creates depth that creates form, and so moving your light to the side creates higher contrast. And if you keep moving that light around and you have backlight so light coming from behind, what that does is it creates a silhouette and you get maximum contrast, do you get a silhouette just a bright light coming in the dark front? So you have this being illuminated and nothing else, so normally what you'll do is you'll mix and match so you'll have maybe a light over here to forty five degree angle, and that gives you some contrast, but not so much that it's, unhealthy looking he'll add, maybe a light back here as a kicker, teo, add some highlights to his subject. Maybe you'll need a reflector or something over here to fill in some of that light to change contrast, and if you look at the portrait like this, you can see that the light has been moved to add a brighter side to the face and darker sort of the face to get mohr contrast, and then we had a light coming from behind to add this silhouette, but it's not a silhouette because we added some light in the front up here, we've added a little kicker lytle highlight from behind so where your light is really, really matters. So what we're gonna do to really show you this, kelsey is going to help me out, we're going to get rid of that panel. I'm going to put my camera on a tripod, so, john, can you help me with this nikon here? The reason we're using the cannon is because we can tether with it so that the nikon we can't tether and I can't really see them shooting, so we're going to take the night kind of way. I should a lot with nikon so don't don't think that I don't love nikon I do but it doesn't tether the same way that cannon dust okay, so sarah, come on out in fact yeah, come on out here, sarah's tall so I'm gonna have to do this number right here, okay? All right, let's have you take a step forward? It's a couple steps forward. Ok, perfect. Perfect. All right, so the first thing I'm going to do is I'm gonna leave them the flash on my camera and I am shooting um just a portrait and I'm going to make sure that I'm shooting at about f ate the reason I'm doing that is because I want to make sure that I have nice no ami like we've turned back on all of our stuff I'm resetting this from the demon we just did and I'm going to take a photo and this is front light front light okay that's going to pop up and you know what let's let's have you take just a step this way so we don't have that picture right in your back of your head take a step this way there you go good just like that perfect look, I'll be one more here front light now what we see here on sarah when we have this next picture it pops up the illumination on her face notice it's, even there's no contrast it's the same illumination here as it is here, it's the same across and so what we want to do is we want to be able to change how that looks and so to do that also noticed this this light is coming, it's going pasture and it's just illuminating this wall. What if we don't want the wall to be eliminated? We have to get the flash off our camera so what we'll do here, we're going to get rid of this like no, don't do it. So kelsey is going to bring out a flash and I'm going to turn on my e to so many initials to remember it's just difficult. Ok, so now we have this already set up for remote control. And so kelsey let's have you bring that we have to take a step left. Sorry. So come on number this way. Kelsey let's, bring us at about a forty five about right there. Let's, bring a little bit closer because you have to make sure we can see it. Okay, a flash? Yes. Ok, so you're in front of cameras it's affecting thinks all right, so we're going to take a shot really fast here, this is light from the side it's a little over exposed or ninja got a little bit excited here so we'll have to use flash exposure companies should bring that down to get a proper exposure but what we're showing here is that by moving that to the side notice we're starting to get shadows here okay these air not pleasing shadows by the way notice these shadows are really hard so they go from shadow to nothing immediately that's called hard light we'll get to that in a second also this shadow here is this coming to a a place that we don't want it in somebody's face we're gonna get to that when we talk about fortunes but we're going to do is we're going to keep going so let's go and move this to the side so it's it's definitely side light ok so we have sidelight here there's going looking right at me and now look what happened vince and this, by the way is one of those uninjured problems that we're gonna have when this pops up here you can see that we have high high contrast why is her face over exposed? We should know this by now. What is the reason? Nobody no, yes, but why is the pre flash getting it wrong? Because what it's trying to meet her your flashing that such unable to lens that pre flashes bouncing at such a weird angle yes, and when it looks at the scene is looking at the whole thing I was looking at everything and what it's saying is the whole thing should average out to medium gray and the only thing that it's seeing is this little strip of her face in the side of her face that's the only thing that the flashes illuminating and so it's trying to compensate for this and make this entire thing average out and so it's not working. So this is definitely one of those times when the when the pre flash and through the lens meeting is going to get the meat oring wrong because it's on ly illuminating a small part of the subject only a small part of the entire frame and so the entire frame is expecting to average out to middle grade and it's not so watch this I'll just show you how we can affect this if I get really close or if I had a camera that consuming a little bit more a little bit different lens then this the theme or of her face I can get the more of this this light I can get the better it's going to get it the exposure okay so it's still not there yet because we have all this darkness is trying to balance that out but the more I can show the camera of the flash, the better it will get the best thing to use is flash explosion compensation or just manually meter what you're doing so you get away with them okay? We're supposed to be talking about position of like ok, so we have we have sidelight that gives a super high contrast will show you that one more time and then sarah let's have you stepped forward I want to come back here and then kelsey let's put this right behind sarah and we'll see if this works because remember that has to see this it will probably bounce off the wall so I think it will work and then let's see what kind of media ring we get out of this we're gonna take a picture and there we have a new flash yes, because he's going to see if we can twist that bounce it off the wall we'll try it looked right at this area. All right, so this is that super super high contrast I was telling you about where we have very, very high contrast. You know, with this the light is just lasting because it's it's so dark, so again gtl stupid it doesn't know or trying to accomplish here and so this is a situation where you really want to use flash exposure compensation or better yet manual manual mode the tamar levin method would be great for this kind of stuff okay position of light flat light sidelight gives you contrast where you're like gives you more contrast so sarah, come on back here. We're gonna do one more thing, so stand right here. So we have talked about how light changes when you move it this way, right when you move it this way um there's something else that happens if I have my light here? Okay. Let's say I have my light here we'll see if I can get this to see so kelsey, you might have to be moving this so kelsey's gonna come over here and and sort of point this at my camera. If I move my camera in position to my light, we will also have issues. Okay, so if I have my camera right here and I take a picture that's front like right front light it's a little bit to the side so we're going to get this really amazingly horrible shadow that pops up horrible shadow watch this the flash stays in the same place I'm moving right now. What? What just happened now I am sidelight that becomes sidelight now because this is coming to the side of her. So instead of the light moving, if the camera moves in relationship to the light, you achieve the same thing so it's always the relationship of the camera and the flash, the camera and the flash will determine if it's front light sidelight or backlight. So some people, when they first start out, confused this and so sarah turned to the side they think that create sidelight when it doesn't she just moved, but the light didn't move. Okay, so it's always the relationship between the camera and the flash that create contrast or eliminate that contrast. Okay, so the other thing I want to show you that's really important is the size of the light the size of the light really matters. So these lice easel speed lights if you've noticed, we have the shadow right here on her nose and notice the shadow just stay stops that's called hard light, so what we're gonna do is we're going to throw a soft box on this flash. This is the last light soft blocks, which allows us to just quickly pop it on their sort of nice, and it was like, uh, nice that's what? We had this bracket on here when we were shooting with the flash if you're wondering like, what is that we knew were going to do this? Okay, so we'll put this basically to the side, same kind of position that we had it before let's move this just a little bit here we go and move this into the soft bucks just to hear all right, so now watch what happens we're going to take a sidelight photo but now we have a soft box we really care about the shadows that's what we care about the shadows or what we care about so in the shadows pop up, you'll see that they're softer but we can even do something else to see how that shadow fades away so we change the quality of light by changing the size of the light okay, the larger the source of the light, the softer the light is now there's something else that's very, very important there's something called effective size and that means that if I have this light really close so this state right there really close I'm not gonna make this fire it's really, really close like this? Okay, so let's do this so that the camera concede to come right this way? Yeah, someone attorney this way like that. So we have this really close what's happening is this part of the soft box is froing in front of her? So when I have to be at one of these cameras here to see it, so yeah, so this part of the soft box is illuminating all around, right? And so they're this isn't just having light coming straight out lights going in all different directions, so it is illuminating this side of her face it's eliminating all kind of things and so we wouldn't have it that close but it's killing shadows effectively okay if we move this farther away the farther away we move this less light that's able to wrap around okay so let's have you stand right there sarah awesome words like stand there move there go there so light that's close is going to be soft if I move this light way back here that light is going to become very hard not very hard but much harder and so we want to prove it we're gonna have this light really close kelsey's gonna have to help me with this I'm giving the camera operators connection fits by doing all this stuff like uh it's alive and awesome so you have this very very close from right here okay, so sara take half a step back way yeah and look me this way okay really really close light okay. So that's nice and soft to see that moving sort of softly off right here will come off nice very very soft transitions ok, so kelsey listen move that way over maybe where jim is? Yep, awesome. We're not gonna take out any cameras ok, so now we have that flash way back there and let's see if it has enough to get to where we want tokyo rio is not gonna flash it might not even flash drat drat so um yeah or list tio yeah let's grab a pocket was your plus three two of them you know the planning on this is awesome. Yeah. So that's that's what we're gonna do you wanna prove that out here next so why we're waiting on this? Are there questions ready for us? I'm getting the questions ready from w h photo they ask I notice that mark has a lens hood on his camera when he was working indoors why do you use it indoors? It doesn't help you uh love that question so lindh's hood blocks light and light is light it blocks light from entering into the front of the lens and that causes lens flare and so you know as I'm moving lights round especially kicker lights those can come into the limbs but there's that's one reason is like having a linds hood on uh the other reason that's really important is this that's it I know you like what are you doing that kind of stuff so you could abuse your lends a little bit people are fainting here. Um what the linen suit on don't try that at home but yeah, sometimes when you're working especially in the dark or zipping around, you'll just a bump here lens on something and so having a linds hood is just that ed added little extra protection I know you're like please stop um I would never do that it's a can and it's fine eso thea the region is I have a lot of different lenses and I don't like to lose my limbs hoods in the best way for me to keep track of him is to have it on my lens and so really the only time I take this off my lind is if I'm doing street photography um and I want to not intimidate somebody with the lens that looks really big and so but other than that I'm almost always have that on there okay let's see if this is going to fire do we have ah meters so we can meet her this as well kelsey it's like of course I have a meter of course of course it is that at full power john manual mode full power yes, I put it on manual full power it's right here kelsi it's on the table it's on full power yes, I almost want to a couple more questions. Sure. Okay. Full power listen listen it's really fast to keep going so I'm gonna meet her this meters at three point six I was at eight so you could see that the power went down considerably so we'll go down to three six actually let me see if that's what I said two hundred is ice or two hundred no it's not so it's at five it's a five okay so now we'll do this now the light is at a great distance from where we were before we'll take this shot and we're just a little this is about as much as we can get out of it we can see that this chateau so now if you can zoom in really really tight on them on her nose that shadow on her nose but you can see that that went from a nice soft shadow we have the technology yet keep going over there you go look at that shadow on her news so it went from nice and soft to hard so the distance of light from the subject makes a huge huge difference in soft and hard light so if I wanted to have soft light at that distance I need to have a larger light modifier big big umbrella or maybe several soft boxes stacked together something like that yes could you since you're limited by the power of the light if you could you take like a like a multiple cold shoe head and at multiple speed line yes yeah you can add when you add speed lights it's if you had a speed like that meter to ef five let's say and you had a second meter that meter to our second life that metered f five when you turn both of them on it doesn't still meet her at five because one plus one is not one it's too said the more speed lights you can add them or light it's going to travel to your subject and so yeah those brackets that have two or three or four flashes for this kind of stuff really really help out yeah let's have a couple more questions all right questions from uh drew fraud junior from spring from virginia I noticed a lot of the pictures taken are from the waist up with same lighting set ups work for full body pictures they want because of the fall off so we have a couple things the reason we're doing that here with this workshop is because we don't have much room only at all the lights and the cameras and everything were pretty tight here on dh so I've got to keep things sort of portrait level and the other reason is to add light for me head to toe well usually have to add a couple of speed lights or have a larger amount of fires or maybe sometimes put those vertical like we did upstairs only shot yesterday on the seat on the roof the roof still sounds weird so yeah they won't work exactly but if you noticed when I did the the demo on the wall so thanks sarah for now I think we're good for this this is when I did the demo on the wall we had the light was illuminated horizontally we had that sort of square box right here and so if you had somebody standing and you wanted to fully illuminate them well the square box doesn't really makes sense and that's why I like to take my flashes and make them vertical instead of horizontal okay or defuse the light cool one of our regulars sam cox is asking about the level of the light in relationship to the the height of the model and whether you recommend that height about head height you want to go lower or higher? Yes. So come on out, sarah always fun have a sarah on standby so, sir, we're gonna have you face this way and then kelsey can you bring that umbrella out? We're good. Okay, so we're not going to shoot with this because I want to keep moving along but if I have the light down here so we look at these cameras here five the light down here obviously this light is a shooting too low. Um if I bring it up we're gonna have more light on her face but just like we had a front light and sidelight for contrast we have contrast vertically as well. And so when having faced this way and let's pretend use your imagination that this light is right here I'm gonna put it there because I want to block the camera from the light but if we have the light down low like this what we're going to get is if this were over here where we have light coming underneath the chin of our subject and it's gonna look like candlelight campfire kind of a natural light in the contrast is going to be it's going to be higher contrast because we're effectively making sidelight. But it's it's, vertical sidelight, not horizontal sidelight once we take this and we move it up and it's in alignment with where our cameras shooting for lindsay's here, now we just reduce that contrast. Now we have flat light again, and as we move this light higher, we're increasing contrast again because now we have light hitting the top of her head, not the bottom of her head. So now we're getting shadows down here underneath her eyes and so you can take the shadows, and they're always going to be opposite of where the flashes so normally what I try to do is when I'm illuminating a subject, I'll find where my camera angle is, and then from that camera angle, I'll go over forty five degrees and then up forty five degrees, so forty five degrees over forty five degrees up, and I usually get a nice light, and the thing I'm looking for is we'll going to get them when we do portrait so well, we'll save that for portrait.
Ratings and Reviews
Gary Hook
Mark's wealth of knowledge combined with his engaging and 'fun', experimental approach to teaching is a winner. I learned a great deal but what truly reinforces the learning is that he actually shows what he is talking about. He gets a question and quickly sets up the practical demo for the answer. Brilliant. Given that this session took place some time ago ( but by no means diminishishes the tremendous learning value) the lessons and knowledge are based techniques that will stand the test of time; however, if I was advising Mark on his teaching techniques, the main are a of 'focus' would be to be more effective with his demonstrations. He holds the back of the camera up, makes his point quickly and then moves on, just as the video is locking on. Great idea to talk about what button you are pushing, but when your fingers are obscuring the 'learning point' it diminishes the effectiveness of the demo. Overall great course which I will watch parts again and highly recommend it. Thank you PS Give both Kelsey and John and huge hug as they are all-stars making things happen!
Alexander Svishchenkov
Great! I'm so thankful to you, CreativeLive, for providing this great opportunity to learn an important subject of photography - Speedlights - from the professional Mark Wallace. He is such a good teacher and explains everything in real-life situations and on slides. As he fires his flash, I instantly see the resulting photo on my screen, so this is theory combined with practice. I'm in fact watching you from Belarus, and it's midnight, so I'm fighting with sleep, but I can't get myself away from the screen. this is my 1st CL experience. I'm very grateful for running a rewatch of the previous Day the following morning, so I woke up and saw what I'd missed. And it's totally free! Thank you so much for a true first-class education!
Aussie David
Truly a fabulous class. Mark has such a gift for taking a complex subject and making it so understandable and fun at the same time. Mark is easily one of the best instructors out there. Highly highly highly recommend this class.
Student Work
Related Classes
Lighting