Create Shallow Depth of Field Using Strobes Outdoors
Lesson 10 from: Strobe Lighting on LocationJoel Grimes
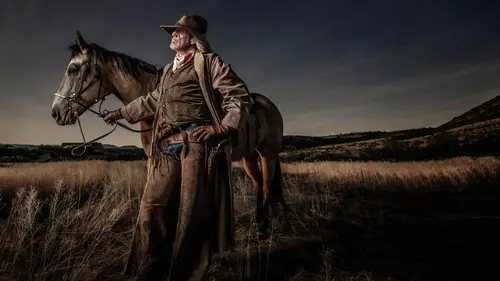
Create Shallow Depth of Field Using Strobes Outdoors
Lesson 10 from: Strobe Lighting on LocationJoel Grimes
Lesson Info
10. Create Shallow Depth of Field Using Strobes Outdoors
Lessons
Class Introduction
06:48 2Develop your Artistic Vision
20:22 3Learn Strobe Basics
19:21 4Which Strobe Is Best For You?
17:36 5Strobe Questions Answered
15:33 6Balance Strobes with Ambient Light
14:27 7The Sunny 16 Rule
16:12 8Choose the Right Modifier for Strobes
28:02On Location Shoot: Overpower Sunlight with Strobes
24:01 10Create Shallow Depth of Field Using Strobes Outdoors
23:49 11On Location Shoot: Portrait in the Shade with ND Filter
21:19 12On Location Shoot: Portrait with Sun on the Shoulder with ND Filter
17:48 13On Location Shoot: Portrait Using Strobes & Wide Angle Lens
14:41 14Shoot: Use Strobes with Props
17:07 15Shoot: Shooting into Sun with Strobes
22:27 16Shoot: Increase Strobe Power while Shooting in Sunlight
10:46 17Understand 32 Bit Depth
20:03 18HDR Bit Depth with Strobes
16:36 19How to Use the CamRanger for HDR Portraits
33:35 20On Location Shoot: Setting Up the Lights in Boxing Gym
13:55 21On Location Shoot: 3 Light Edge Portrait with Strobes
21:45 22On Location Shoot: Portrait Using Top Light with Strobes
18:10 23On Location Shoot: Create a Dramatic Portrait with Strobes
19:26 24Strobes & Textured Background for Character Portraits
09:44 25Shoot: Set-up the Gear for Portrait
16:07 26Shoot: One Strobe Portrait with Gray Backdrop
26:30 27Shoot: One Strobe Portrait with Textured Background
13:32 28Shoot: Using HDR for One Strobe Portrait
08:55 29Setting up Post Production Workflow
16:02 30Photoshop® Workflow: HDR Boxing Gym Portrait Shoot
14:35 31Photoshop® Workflow: HDR Portrait with Stitching
37:51Lesson Info
Create Shallow Depth of Field Using Strobes Outdoors
All right, so what we're doing as we're moving on from the basics and it has been kind of basic, I mean, for some of you maybe have said look, I know all this stuff, all right, okay, now we're gonna move into maybe a little bit of an arena that you don't know. Hopefully you don't know 'cause something new. I can tell you that I'm doing some things that I didn't do five years ago. I've been doing this a long time, right? So, that's my goal. Now, I missed two slides at the very end of the last session and I wanted to just real quick refer back to them. I kind of mentioned this before. If you look at the natural world around us, everyday lighting is not very good. Okay? So, you have to get to the point where you as an artist can understand what good light looks like. At least for your vision as an artist. So, one of the goals that I have is that if you say I am a master of lighting, well that would probably refer to the fact that you know how to control light and you know how to make ligh...
t look really good on a subject's face and that's what you've done, you've learned that. So, I've painted houses in college, spent four years, actually longer than that but painting houses, when I first started, I slopped paint over everything and with time I got better and better at painting and I got to the point where I could literally walk into a room, probably your house, and I could tell you if it was done by a professional or if you did it yourself 'cause if you did it yourself, the chances are it looked pretty sloppy. A professional does a really good job, right? So my eye was trained to see the difference between sloppy paint job and a good paint job just like when you get to be a good photographer and you know how to master light, you understand good lighting and bad lighting 'cause you've trained your eye to do that. So at first you may go I don't know what good lighting is, right? But with time you will. So, that's what the goal is is to keep going through and practicing until you understand. All right, so now we're gonna move into a little bit different arena, it's still understanding strobing, you know, working with, you know, your ambient, your daylight, and strobes, all that stuff, but now we're going to add a variable to the whole scenario that gives me a new option, right? A new option which is to throw the background out of focus. Full sunlight but get a shot of the field. So, let's take a look at that. So, if I'm going to overpower the sun, maybe when we said sunny 16 rule, so, f/16 is a small aperture. So, for 25 plus years, I have been shooting strobing outdoors around probably between an f/11 and f/22 aperture. Sometimes up to f/32, especially when the media formats, I used to be able to go to f/32 but 22, f/16's pretty small aperture. Now, if you understand optics, now I'm not an expert, I don't have a PhD in optics but I had met someone who did and I got kind of a chuckle because I was explaining some things and he was like wow, you know all that? Well, I don't know a lot about optics but I do know this: that when you stop all the way down, small little aperture, you get diffraction and what that is is because you have this little iris that has these little blades on it to make a small hole, light's coming through there but it hits the little edge of that iris and it bends like bends a little bit and it degrades the image. So, you get more depth of field but you get a little bit less quality of overall image. So, I've known that for years but outdoors I've had it stuck with f/11, f/20, f16 to 22. But, for the most part, you know, it hasn't really been in the world but now I have the ability to go and get to my sweet spot if I want. So let's say I really want the best optics possible, it's gonna be a billboard, there's gonna be a, you know, 20 by 30 inch image that's for some museum which I've done, I've shot a museum. Actually, it was eight by 20 feet, I had to do an image once and they come to you and they say we want the best optics possible, the best, you know, I'd probably stitch it today but the point is is I know now that I would probably avoid a small aperture for that shot, okay, you know. And you guys know the sweet spot in your lens, that's two to three stops from wide open. So that's around f/8ish, f/7.1, somewhere, it depends on your lens. A 1.2 lens is gonna have probably around f/5, six is gonna be your sweet spot. There's a lot of information on the web you could probably look up sweet spot on the lens or DP Review used to actually review lenses and show you a graph that, you know, you could kind of have a little interaction of a scale so you go wide open, it would go blue is sharp, yellow is less sharp or, you know, and it would show you that as you stop down, your whole overall image would go from yellow to blue. Maybe yellow in the center a little bit and then it'd take the yellow out and go complete blue then you go past your sweet spot and it starts to go back to yellow again, showing that you're losing degradation in your image. So, you could find out your sweet spot of your lens if you did optical tests but usually, like I said, around I call it 7.1 f/8, somewhere around there. So, if let's say I was going to shoot a scenario and I wanted to get to f/8, I'm strobing outdoors, well now I can do that because I have the ability to go and use ND filters but what I wanna do and what I really wanna use ND filters for is to get to wide open. Now we know that wide open is gonna give me some aberration meaning that's not gonna be my sweetest spot of my lens but generally aberration falls in the corners. So, if I'm doing a portrait, corners are out of focus, right? So, usually if I'm doing a portrait, the aberration's not gonna really show that much, so whitest aperture, a portrait, you know, and I'll show you some pictures here but I have ability to go from f/22 to f/2.8 like that with one ND filter and I can get out or I can go straight from f/22 to say my sweet spot or f/8 to my f/2.8. So, here's an image I shot, it's cropped in because that's the key note but it's, again, in the water, shooting 2.8 with a six stop ND filter overpowering the sun and then it's shallow in the front and it's shallow in the back. You're cropping a bunch of it out. But I now have the ability to get that really cool soft background look and I stumbled across this teaching a class in a Texas school and I was outdoors giving a demo, usually you have your class of 26 students or attendees and then on a Thursday afternoon in the evening you do this blowout shootout and I was sitting there doing a scenario with a model, she was in this fountain, I was overpowering the sun, explaining the sunny 16 rule, all this stuff and some guy comes up and he says to me, what would happen if you put an ND filter on there? What would that do? I'm like nothing, why would you wanna do that? And then he and I'll keep talking, excuse me, well, what would happen if you did an ND filter on there? I'm like why would you wanna do that? He goes couldn't you like go from, you know, a small aperture to a larger aperture? I'm like yeah. Well video people use it all the time, right? Video. So we did it right there on the spot and I've been using it ever since. So, was I brilliant? No. But I capitalized on the fact that someone came along and sparked that question or whatever. I learn a lot from people asking questions so that's why someone said today I don't know who walked in, I said, I'm Joel, I'm the instructor today, you in my class? Oh, they said they thought I was one of the attendees. But the fact is is I am actually one of the attendees, I'm one of the learners, right? I'm learning all the time and hopefully you guys will ask a question and I can learn something from, it'll spark an interest. So, I've been using ND filters for that specific reason to get me a shallow depth of field or go from f/22 to my sweet spot on my lens. So here's another scenario, it's a 2.8, shot with a 7200, 200 millimeters, outdoors, complete full sunlight, and I'm at 2.8 aperture and so it's kind of a fun thing. So, here's another one. Let's see, what did I say on the bottom of that? Oh, okay, so I know that my aperture count. So, here's what I do. I know some of you, I don't do very good at counting apertures in my head 'cause I'm really bad at math. So what I typically do is this, I know that my aperture is set up at third stop increments. Your camera has the option: third stop or half stops. So, I know that if I go and spin my aperture three clicks, one, two, three, that's a full stop, okay? So what I do is let's say I'm at f/8, okay? And I wanna get to 2.8. What I do, instead of counting it in my head which is weird, I know, I can't visualize that, I just turn my camera on and I go to f/ and I just go one, two, three, that's one stop. One, two, three, two stops. One, two, three, three stops. And then I know I'm at 2.8. Does that make sense? So I can do the same thing from f/22. Just make my clicks and I know now I'm a six stop, six stop from f/22 to 2.8 six stop, three stops from f/8. So, that's easy for me to go and put a three stop on here. I'll explain this in a minute. But three stop and just like that I've got that. Now, my strobe was putting out, if I'm at f/8, and I wanna go from f/8 to 2.8, my strobe it still has to be out an f/8 power onto my subject. If I'm at f/22, my strobe still has to put out f/22 light 'cause I'm blocking everything. I'm blocking, it's covering all of the variables, right? So, but I know that if I have a three stop, six stop, 10 stop. Now, 10 stop I probably won't use for portrait. I do 10 stops all the time with long exposures and stuff outdoors to get 30 second exposures but there might be a scenario if I'm at one point, if I have a 1.51.2 lens or an 85.1.2 lens, I might need a 10 stop to get my, you know, that wide. Hopefully I'm not shooting at high noon, I'm shooting at a little bit of subdued lighting but the ability to just have my fixed stops works really good. All right, so someone asked already, what about variable ND filters? I've tried them and most variable ND filters have just little clicks or not clicks but just little like little dots on the thing, you know, so you're supposed to, it's hard for me to know a three stop, six stop, 10 stop, right? It's hard for me to know that exactly, I'm spinning I'm like am I at three stop? You know? I can't guess it. For me, I can't guess it. So, someone showed me a variable that actually had I think clicks but you're gonna spend a lot of money for a variable ND that's probably that quality. So, I find it easier to use fix stop filters, okay? That's just me. Now you maybe have a solution better and there maybe something on the market. I've actually talked to a number of the manufacturers that do the, you know, filters and stuff and ask them about things like that but maybe down the road someone will build something that's, you know, easy to click, click, click, click, click so I know my stops on my ND's. A variable ND is basically two polarizers working together. And someone asked about a polarizer. A polarizer could work but it's only going to be about a stop and a half, somewhere around there. You're blocking the light, yes. I would say this, you'll watch me when I do my, I think they kept it in, I'm doing my calculations in my head on the field and I screw it all up. Completely. I botched it. And so, what does that tell you? I'm not very bright. No. It tells you that in the field you get all these variables and you're under the gun and of course the cameras pointing at you and you're trying to talk and everything goes wrong, right? So, under the pressure sometimes you get but I know on the back of the monitor if it's working or not so I can adjust it accordingly. So, you could, in fact do a variable, spin it, shoot a few pictures, get it close to what you want, but I like to have this fixed. So, again that was asked and luckily I put it in here for that. Color shifts. So, ND filters are not easy to build, I mean in terms of manufacturer and so, there's all these articles, years ago when we were doing landscapes and people, you know, talked about the ND filters. They talked about color shifts and all that stuff. Now, with digital and the capability of just fine tuning your color balance a little bit. It's not as bad as you'll deal with in films. In film, you know, what you got and what you got and you had to later, if you could get it out, take it out. It was a challenge. So, color shifts are going to be an issue on every ND filter that you purchase. The thicker the filter, the higher number of f stops, probably the greater the color shift. So, I have all sorts of, people say what ND filter do you recommend? Well, I don't have any stock in ND filters. If I did, I'd recommend, get the Joel Grimes ND filter. No. This is a three stop Tiffen. Tiffen is probably not the most expensive out there. Quality, I mean, they're good. I have, I think it's a three stop B+W, no six stop B+W, but that's a pretty good brand. German made, I think. And then I have the Heliopan 10 stop. Now when I bought my NDs a couple years ago there was a shortage of ND filters, I don't know if they, you know, what it was, but all of a sudden you couldn't get, I couldn't get three of the same brand. I have 82 millimeters, that covers pretty much all my lenses. So I was like going, okay I gotta buy, you know, a B+W with three, a six stop, and a Heliopan at six or 10 stops and a Tiffen at three stops. If you are concerned about the color balancing, you might do a test and you might find that there's a way to counter it just like that one little, you know, if you can do, maybe do a custom white balance through one of them, you know, there's some ways you could probably solve that little bit, but I actually like the color shift and you may ask how's that possible if you're colorblind? And that's why I like the color shift, I don't even care, I just do it. It's like, oh that's kind of cool, that's got a good look. You know, kinda de saturates a little bit, you know. So I'm not worried about the color shift, if you are then find a way to solve that problem, it's not a problem for me. You may have a issue, but I think you could fix it pretty quickly in Photoshop later. But every one is gonna have a color shift. I would, there's, I battle with this question, or this option all the time, so I'm gonna buy a filter. One says three stop ND, let's say it's $100 dollars. Then all it had the same brand, same everything, three stop, multi-coded for a $180 bucks. You're like, is it worth $80 dollars extra for multi-coding? Does anyone ever had that, you know, option in front of them? It's like, ah, is it worth the extra money, right? And so, here's what I would do. Because if you buy three of these round filters you're getting into, you know, I think the three, this is about 40 bucks Tiffen. Then you go to the six stop, B+W's gonna be probably a hundred and something dollars, 120 bucks, or somewhere around there. Then you go to 10 stop, it's gonna be around 200 bucks, I think, that's about when I bought 'em, they may have dropped in price, I don't know, or gone up in price, who knows? But so you get a couple hundred bucks invested in three filters, so you go, that's a lot of money right? And then I bought the square ones here, and again I had to invest a couple hundred bucks into each one. And so, it's a lot of money, but I would do this, I would first find out if this is something you wanna do. You know, maybe you say, hey, does anyone have a three stop, a six stop, I can borrow? Go out and shoot it, you go, I love it. Then go invest your money into it. And then if you're gonna use it all the time, you might want to invest in the multi-coded one. A multi-code is gonna probably be a little bit better glass optically, right? Is that true? I don't know. It could be just how manufacturers love to have you push the button 'cause you think I gotta have the best, right? And it could be they're made in the same factory, and I've been to factories where, I won't mention the brand, but I was shootin' for a big company and they said, here's a line of cabinets that are low-end and over here we have the same cabinet but we just kind of re-name it and put it in a bigger box and charge more money, right? 'Cause you want the best, right? You'll pay for the best. There's always someone that'll only pay the cheapest, there's always someone that'll want the best. And so, who knows if you're really getting, you know, what multi-coding means anymore, I mean, every glass should have some kind of multi-coding on it. But my point is this: I'm not an expert on the ND side of color-balancing and all that. There are people who have written complete articles on this whole thing, so find, maybe seek those out. There's some people who will swear by a certain brand so I can't give you that information. I can tell you that I know B+W and Heliopan are good companies and then you go online too and it's really confusing, it's 10 stop, so what they do is they have different numbers when you go buy 'em, they rate 'em like a certain rating and you get, look in the fine print and find out, oh that's a 10 stop. They'll call it, I don't even know what it is, some term and, you know, 0.303, what does that mean? I don't know what that means. And you look at it, it's really not, it doesn't really correlate, at least for me it doesn't. So read the fine print before you order, push go, or go to a camera store, a local camera store, and ask the right questions and you can get what you want. So I have the round ones, circular ones here, and the other day when I was doing this live shoot you'll find out and you'll see it in a minute, I didn't have my, I have two step ups. This was tucked in a little pocket. That would fit on my 35 millimeter 1.4, couldn't find it. So I shoulda had it. And this will go from 82 to 77. So, you should have a couple step ups, so the theory, a three stop, you can focus through pretty easily, you don't need to, this is designed for focusing. So, if I got a six stop and kind of semi-shaded light like this was six stop, no, yeah, that was six stop in Iceland and I was trying to focus then put the filter back in. So, I came up with this is a, this is a, the company, I'm trying to think of the company here, View Filters. So, View Filters I believe is a company, the Mac group handles it, I don't know if they make it themselves but they handle it and they have this little system, I took it all apart, okay? And I took my black photo tape and I made a hinge, this is a zip tie, okay? This is a clip from Office Max. I went all out, see? And I wanted a way I could swing it. So, you know how you slam up and down? Takes too long. Can't do it. Tried it. So, I took off the front little, I just unscrewed the front little slots, and made a little hinge, okay? So I can focus and then shoot. Focus, shoot. You don't need to do that on a three stop but on a six you probably do. Some of the cameras, you know, if it's a Canon, it'll do pretty good with a six stop but I wanna make sure that it's in focus so sometimes I'll actually focus through a six stop and then sometimes I'll actually just double check, make sure, open it up, focus, and then shoot. So if you're shooting at a 1.4 or a 2.8 with a long lens, your depth of field's like that long and you don't want that to be out of focus. Nothing's worse than a perfect picture but out of focus. The only thing that's good for is a demo of how not to do, you know, a bad photo, right? That's not worth anything. So, this is my little system. For 600 dollars I'll build one for you. So, you can use the round filters but as I say in my video, every lens is a little different and so my 51.4, if I literally take this and put it in front and tap it, just literally, it goes out of focus 'cause that front element is literally moving. Or that front part of the lens. On this is internal focus, you can bang that all day long and it won't change the focus. On my 3514 I just demoed, it's a pretty stout lens, it seems like it doesn't change, they work perfect. So I can go up and just use a round filter and just tap up in front of it and get it right up against the lens. You don't wanna have a lot of light coming through, right? You don't wanna put it out here 'cause light comes in. You wanna cover up the lens. So you hit it and just cover up the lens and shoot. It's a little bit kind of hokey but that's how I work.
Class Materials
Free Download
Bonus Materials with Purchase
Ratings and Reviews
Christopher Langford
I love Joel, even though I'm not a big fan of his style. He's a great teacher, really down to earth, and best of all, humble. He's a true professional and knows the business. Even if you're a seasoned photographer, I believe you will pick up some great tips throughout this course. What I enjoyed most from this course was learning Joel's thought processes and how he takes on challenges.
Dana Niemeier
After seeing Joel at Shutterfest 2016, I am a fan. He is intense, but that is inspiring. I especially like the segment using ND filters as I live in Florida where bright sun can be an issue! His teaching method sets the student at ease. You see him make mistakes and then figure them out! Makes us believe there is HOPE for us in the learning process! I also bought his commercial photography class as an add on. Great to see him work and think on his feet. Thanks CreativeLive for giving artists this platform that reaches out to artists around the globe.
Gilbert Wu
I did enjoy the class despite not being used to the American product placement culture. The British say “the proof is in the pudding”, Joel’s pictures are fantastic and create drama. He has the eye. I like his very down to earth approach which is far better than many youtube photographic charlatans. Apart from the techniques he shared, one very important thing I learned from this class is “Be an artist and not a technician”. If you want to learn from people who can take better pictures and more confident and experienced in his/her work than you, Joel is one of those people.
Student Work
Related Classes
Lighting