Lessons
Class Introduction
06:48 2Develop your Artistic Vision
20:22 3Learn Strobe Basics
19:21 4Which Strobe Is Best For You?
17:36 5Strobe Questions Answered
15:33 6Balance Strobes with Ambient Light
14:27 7The Sunny 16 Rule
16:12 8Choose the Right Modifier for Strobes
28:02On Location Shoot: Overpower Sunlight with Strobes
24:01 10Create Shallow Depth of Field Using Strobes Outdoors
23:49 11On Location Shoot: Portrait in the Shade with ND Filter
21:19 12On Location Shoot: Portrait with Sun on the Shoulder with ND Filter
17:48 13On Location Shoot: Portrait Using Strobes & Wide Angle Lens
14:41 14Shoot: Use Strobes with Props
17:07 15Shoot: Shooting into Sun with Strobes
22:27 16Shoot: Increase Strobe Power while Shooting in Sunlight
10:46 17Understand 32 Bit Depth
20:03 18HDR Bit Depth with Strobes
16:36 19How to Use the CamRanger for HDR Portraits
33:35 20On Location Shoot: Setting Up the Lights in Boxing Gym
13:55 21On Location Shoot: 3 Light Edge Portrait with Strobes
21:45 22On Location Shoot: Portrait Using Top Light with Strobes
18:10 23On Location Shoot: Create a Dramatic Portrait with Strobes
19:26 24Strobes & Textured Background for Character Portraits
09:44 25Shoot: Set-up the Gear for Portrait
16:07 26Shoot: One Strobe Portrait with Gray Backdrop
26:30 27Shoot: One Strobe Portrait with Textured Background
13:32 28Shoot: Using HDR for One Strobe Portrait
08:55 29Setting up Post Production Workflow
16:02 30Photoshop® Workflow: HDR Boxing Gym Portrait Shoot
14:35 31Photoshop® Workflow: HDR Portrait with Stitching
37:51Lesson Info
Understand 32 Bit Depth
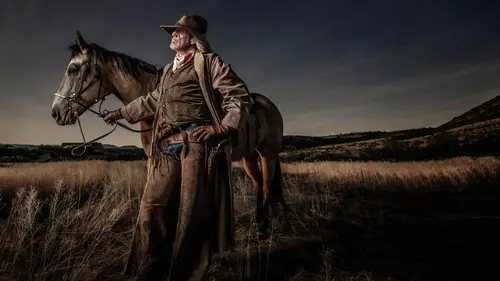
Why is 32 bit so important? So we're gonna go through 32 bit and we're gonna talk about bit depth. It's not super complicated, and there's people that are really smart that know all about this and I've learned some things from them, but I'm gonna kinda explain it on an eighth grade level here so you guys can understand it. That's about all I can explain anyways, on that level. But here's an image we shot of Rod, that was HDR, that was shot three clicks, an under normal over and we have a whole demo on that. That's actually the bonus video there, but we've got Rod in two other scenarios, and we're gonna show you the live or the video of when we shot that on last Friday. But, and of course, I'm gonna go and show you guys how to process those images in Photoshop and do my magic, I call it my magic, but you know, the Joel Grimes treatment, and we're gonna go through that from start to finish. Okay, so that's coming up this afternoon. So here's another shot of Rod in the gym, and so let's d...
o this. Here we've got Robert, one of my subjects that I tested this on, we're gonna do this scenario right here later this afternoon, a live scenario with our subject Ryan, he's a rapper, he's got tatts, big beard, I mean you can't get any better than that. So he's a great subject, and I'm gonna do this shot, this type of scenario, we're gonna shoot it on a gray background, it's a little pop up gray background, and then I'm gonna get that gray background, which is a 50% value to go into Photoshop, and with one little blending mode, (snaps) in a texture I can blend it right in the background, it's really a cool technique. And so I've been doin' that for a number of years too, it's really kind of fun. So let's talk about bit depth. This is sort of a little bit of a arena that I don't think a lot of people know much about, and even the people that are experts, when I say experts, people that have PhDs in whatever, in bit depth, they all don't agree. There's some things they don't agree, 'cause I've given, there's Rick Burris, he teaches in Phoenix at Scottsdale Community College and I'm sorry I don't have his website in front of me but, he has given me a lot of insight on bit depth. He's a smart guy. He makes complex things very simple. I've gone with him, with his lead, and then I've given a demo and then someone's come up to me and said (growling). They're smarter than the smartest person on the planet, they know something that, you know. So not everybody agrees, but here's where we agree upon. When it comes to bit depth, it is not where you end up, it's where you start. The more bit depth that you have when you start, the more you can beat the image up, the more tones and value you're gonna have when you start using your sliders and doing your levels and doing all your stuff. And then people come to me all the time and say, you know what, I share everything in 8 bit, so what's 32 bit do? Well we're gonna look at that in a minute. It's not where you end up, it's where you start. Today, it is true that we end up a lot with an 8bit file, JPEG, we share that on the screens, in our monitors and whatever. But if you go to print something, you're gonna print on a, I use the Canon printers, the inkjet printers. I want these gorgeous prints that wanna hang in a gallery or in someone's home. You wanna print from 16 bit. You're gonna get better transitions, colors, values, all that, so the printers now do, most of them work in 16 bit. If you send your image to a lab, they print in 8 bit. I talked to a lot of them. Why? And it's because their whole work flow is based on 8 bit 'cause it's faster. And so, if you want the best quality for fine art printing, you need to find a printer, or get a printer that you can print in 16 bit. Can't print in 32 bit yet. That's down the road, I'm sure at some point we'll be working and doing more and keeping our files in 32 bit, but right now 16 bit is typically what our goal is to at least hit and end up in 16 bit and then, of course with the web, you go to 8 bit. Let's talk about, here's an HDR, and again, I'm showing an 8 bit on a monitor, but these are clouds and I'm getting details in areas I wouldn't get detail in if I shot one capture. Let's talk about what bit depth really means. Bit Depth is the amount of information that's represented in all your colors and your tones and this is in digital image. So the problem that we have is this. Ready? HDR has a bad rap. And the reason why it's a bad rap is because of a program called Photomatix. It's not Photomatix problem or fault necessarily but Photomatix was the first, I think user friendly program out there for the masses that would process an HDR image and what they did was, they gave you all these options for tone bit mapping. And so I always say, HDR is not about the neon, tone bit, posterized, funked out, neon whatever you know, images that we can associate with HDR. That's just the tone bit mapping that people or that programs like Photomatix are, yeah Photomatix gave you and people ran with it. Oh cool, (laughs) you know. Oversaturated colors or neon posterization look. And so when people say you hear HDR, that's the first thing they think of is those kind of images. It's unfortunate. So, what HDR means of course is a High Dynamic Range. What it's doing is, it's creating a latitude that you can't get with one capture. 'Cause if you go one capture, has a limit to how much latitude you have and so this is, again this a little bit confusing but the, if I in fact I could capture a 32 bit imaging camera, I wouldn't need HDR. HDR is just giving me more bit depth. So when I started out, my first digital camera was a 12 bit capture. And then, now we have 14 bit captures. There's a few cameras out there on the market like a really high end medium format cameras that will capture 16 bit and we say it, we hope it's true 16 bit. A lot of times manufacturers say things and it's 15 bit plus something right. You know, so I don't know all the specs on some of these cameras but we have to trust them that if they say it's 16 bit it is 16 bit. Or if it's 14 bit, it says, your camera says, or your manual says it's 14 bit capture, it's 14 bit. So, the more bit depth you have, the more latitude you have, the more colors and tones and values you have represented in that digital image. So, when we hear the term HDR don't think of that neon posterization look okay. It's just giving more latitude, more information and so, a lot of people come to me and say, "You give HDR a good name." Right, I hope so and I do my tone bit, I say tone bit, my middle grungy, you know my portraits. I do some grunge up look. But really, I want the cleanest file I can get. So how do I get that? Photoshop, Photoshop is my go-to program right now. It gives me the cleanest file and if you're an architectural photographer and you want your clients to have a clean architectural image, I talk to a lot of architectural photographers and I say, "Are you shooting HDR?" "Oh no, my clients would never go for that "funked out neon, posterization look." I go (grunts) "You don't have to have that. "Go to Photoshop and process it "and you'll get a better, cleaner, file." If you process in Photomatix it always does some, even their most neutral setting is still too much for me. And so it's unfortunate 'cause I think, it is a good program, it was a good program for those of us that were at first starting out in HDR. I'm gonna show you how I do all my HDR's in Photoshop. Coming up, we're gonna show that session. So I'll show you how to do that. So now that we can get past the HDR funked out, neon posterization concept, here's an image I shot. It's in camera, it's not a composite, it's shot on the streets in Bakersfield. Harley Davidson I got two strobes overhead. I've got the ability now to capture an over, under and a normal exposure. So I've got my shadow detail and my highlight detail all covered in one, it'll end up to be one capture. It'll be blended together and so that's a clean file folks. I've done a little bit of the Joel Grimes, you kind of funked in a little bit to it but really it's a pretty clean file. All the details there are where I want it and now, this actually in this scenario, I could set my camera, to I could change the ISO on each click and we're gonna talk about the ISO capture in here in a minute. But, so I'm bracketing my ISO, not my shutter speed. So, that's how I got, over. Remember we started yesterday and I said that, ISO covers both variables. Your strobe, your fast duration and the time exposure. Where, shutter speed would only, if I bracketed HDR shutter speed right now, my background would give me a variable, bracketed scenario but the bike, the strobes would be the same exposure every time. So by bracketing ISO, I'm now mixing both the scenarios into one. So, again it wasn't because I'm brilliant at figuring this out and I'm probably the first, I say this and I don't know but I'm probably the first on the planet to do this because it was really the cam ranger that gave me the catalyst to go, I can bracket ISO. But in this scenario I actually could do this by hand. Meaning that I wouldn't have to use the cam ranger. For portraits I have to use the cam ranger to allow me to bracket that sequence fast enough 'cause it does it automatically. So, I have not found a camera, yet, that truly brackets ISO, in manual, in a scenario to use like a strobe portrait. People come to go, "Hey my Sony brackets ISO." And I we, or whatever. "My Olympus does brackets ISO." And then we get in there and it never seems to work and I don't know what the problem is. There may be a camera on the market. When Canon asked me, when I became Canon Explorer of Light I got to meet the two, two guys that were like the big product development guys and I sat in a room with them for an hour and they said, "What do you want?" And I go, "I wanna be able to bracket ISO "on HDR in camera." And they're like, "Why would you wanna do that?" And so I explained it to 'em. So who knows, down the road, camera companies might start allowing us to bracket ISO in camera so we wouldn't have to use the cam ranger but right now we have the cam ranger, I'm gonna go through all the settings on that, show you how amazing that is. Cam ranger does a lot of things, other than bracket ISO which make it really fun to use in the field and teach long exposures, all these things, it focuses. I can focus from my iPhone. I can focus my camera, sit in the car keep warm, have my camera set up at a beautiful lake and I can focus and shoot and everything. But, does a lot of things. But what I'm saying is here I have the ability to create a 32 bit file that gives me really amazing transitions in my skies, grays, things that normally don't do so well with a lower bit depth okay. So have you ever done this? You create an image, specially like a gray sweep. You got a model on a gray sweep. You bring it in and you look at the little stair steps on the gray end in the background. That's because you don't have enough colors to represent that transitions. Not enough values. The more values you have, the smoother the transition. So, one of the things that people, even people that I try to convince, the power of 32 bit. They're like, "I'm not sold yet." So here's what I tell 'em to do. You know the Ansel Adams kind of the when he took up and put a red filter or an orange filter on his camera to make the skies really black, really dark. The Ansel Adams look was he, that was his signature, dark skies, drama. Try to do that with a digital file okay. So you go in, like I made that dress, that red dress black okay. Do that with a blue sky okay? And do it in 14 bit. Go in there, take that blue and convert it to black and white. Take that blue slider and make that sky black. The black, the darker you get that sky, it starts to, in 14 bit, it'll start to fall apart. You start getting noise. Do it in HDR, bring in a 32 bit. Take that slider and pull it over and make that sky black, it's like smooth as a baby's bottom. Now how do I know that? Well I raised four boys. (audience laughter) I know what a smooth baby bottom looks like. I mean, it's like, it's like butter. That's how smooth that black is in that sky. So that's the true test of 32 bit is when you start to do things to it that you wouldn't normally do. Just a standard portrait, maybe you wouldn't go that far. But yesterday, I did on Anna, I did make adjustment in black and white, by taking that slider and pushing it. Had I done a HDR of her, that transition would've been even smoother on her dress. 'Cause there's only so far I can go before I'm like, oop, noise, okay. So that's a true test of 32 bit. When you start to beat it up. And so, you can't use 32 bit all the time, or bracketed ISO HDR. But when you can, you're gonna end up with a file that's amazing right? So that's the beauty of that depth. So like I said, most cameras, capture in 14 bit. And 14 bit's not bad. We're gonna look at some charts here in a minute, some numbers but I'm gonna show you why, 32 bit, I hope you're a believer of 32 bit. I feel like I'm in a revival. You know, you're gonna be, saying "I believe." At the end of this okay. And here's Cliff, we shot Cliff, last, two years ago, with his, the back of Cliff, sorry Cliff I got the back of you. That's the best part of me. And that's Cliff's Harley, and that Harley is shot on location, in front of this little barn, and we did 32 bit, we strobed it and we got, I got all my tones and I kind of did a little grungy to it. But, so an HDR, you have to get at least three captures. An under, over and normal right? So you get that range. I typically bracket for portraits, somewhere around one stop increments. So, a one stop under normal, one stop over. Depends on the scenario. I might go, the cam ranger gives you a one stop, I think one and a third, one and two thirds. So sometimes I go one and one third, one stop and a third, depends. But you wanna get that range okay and then, when you put that into a program that blends them all together, that's when you build your bit depth. So you need at least three clicks. When I do a landscape, scenario. Or like this background I probably did it two stop. Under, normal, and then a two stop over and I used to do five clicks in one stop increments and then, I can't remember who it was, came to me and said, "What are you doing five clicks, do three. "Do it with two stops on each side." And I was like, "What, you need at least one stop increments." And so I did all my tests and I discovered that, a two stop, normal and a two stop over. Or a two stop under, normal, two stop over with three clicks, gave me a really good files. Now I've come up to people and they say, "I do 12 stops." I'm like, "Are you serious?" So you may in your exploring, or you know bit depth. You may say, "Joel, I've done all these test "and five stops, in one stops works better or whatever." So, don't go by what I say necessarily. My experience says that a three clicks with one stop or two stops under and over make a pretty good file to work with right? Now if I'm an arena, like a stadium and the lights are on, I don't normally shoot 'cause usually I build my own lights in my stadiums. I add 'em into Photoshop but if there's some scenarios where I go, "A two stop range is not enough." And I will go and make, in my camera's got all set up on my menu preview or presets. So I can do a seven stop, range (fingers snap) just like that, by just clicking one, couple of things on my camera and I get that covered. And then later I don't to have use it if I don't want it. But sometimes I'm like, "I'm gonna just make sure "I cover it here." So that's my advice to you. Is if you get in a really tough scenario, you might go a little bit more on your range in terms of your HDR. But, you gotta get at least three okay.
Class Materials
Free Download
Bonus Materials with Purchase
Ratings and Reviews
Christopher Langford
I love Joel, even though I'm not a big fan of his style. He's a great teacher, really down to earth, and best of all, humble. He's a true professional and knows the business. Even if you're a seasoned photographer, I believe you will pick up some great tips throughout this course. What I enjoyed most from this course was learning Joel's thought processes and how he takes on challenges.
Dana Niemeier
After seeing Joel at Shutterfest 2016, I am a fan. He is intense, but that is inspiring. I especially like the segment using ND filters as I live in Florida where bright sun can be an issue! His teaching method sets the student at ease. You see him make mistakes and then figure them out! Makes us believe there is HOPE for us in the learning process! I also bought his commercial photography class as an add on. Great to see him work and think on his feet. Thanks CreativeLive for giving artists this platform that reaches out to artists around the globe.
Gilbert Wu
I did enjoy the class despite not being used to the American product placement culture. The British say “the proof is in the pudding”, Joel’s pictures are fantastic and create drama. He has the eye. I like his very down to earth approach which is far better than many youtube photographic charlatans. Apart from the techniques he shared, one very important thing I learned from this class is “Be an artist and not a technician”. If you want to learn from people who can take better pictures and more confident and experienced in his/her work than you, Joel is one of those people.
Student Work
Related Classes
Lighting