Micing intro & Kick Mic Techniques
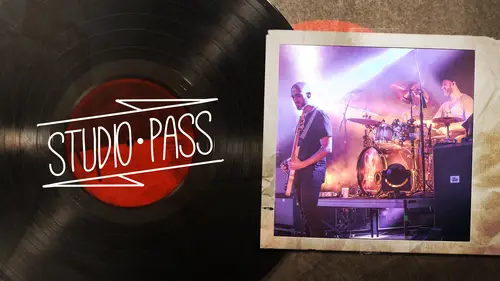
Lesson 9 from: Studio Pass: PeripheryAdam "Nolly" Getgood, Matt Halpern
Micing intro & Kick Mic Techniques
Lesson 9 from: Studio Pass: PeripheryAdam "Nolly" Getgood, Matt Halpern
Lesson Info
9. Micing intro & Kick Mic Techniques
Summary (Generated from Transcript)
The topic of the lesson is miking techniques for the kick drum in a recording studio.
Q&A:
How many microphones are typically used when miking a drum kit?
There can be up to 20-22 microphones used, including ones inside the drums, pointing at the drums, above the drums, in front of the drums, and even outside the drum room.
Why is it important to have multiple microphones for metal and rock music?
Having more inputs allows for more flexibility in balancing levels and processing the sound in post-production.
What is "mixing yourself" as a drummer?
It involves being able to control the dynamics and volume levels of each drum hit while playing, to ensure a balanced performance.
What are the essential microphones for miking a kick drum?
The Shure BETA 91A is recommended for capturing the attack of the drum, and the AKG D112 is used for its strong punch. Another microphone, like the Sennheiser e602, can be placed outside the drum to capture the overall sound.
How are the microphones positioned inside the kick drum?
The Shure BETA 91A is placed in the center port of the front head, while the AKG D112 is positioned slightly angled towards the shell of the drum. The outside microphone, like the Sennheiser e602, is placed close to the point of the head that moves the most.
Is there a benefit to isolating the kick drum with a blanket or tunnel?
It can be beneficial for editing purposes and minimizing bleed from other drum sounds. However, in a rock setting, it is not necessary and can add to the desired sound of drums in a room.
What is the instructor's personal preference regarding kick drum sound?
The instructor prefers a more open sound with some resonance of the kick drum in the room mics, as it adds to the overall sound of drums in a room. However, it is a personal preference and can vary depending on the desired sound.
Lessons
Class Introduction
02:08 2Learning Drum Tone
08:10 3Drum Head and Shell Selection
10:07 4Matt's Signature Snare
04:37 5Tuning a Snare Drum
31:44 6Tuning Toms
18:56 7Tuning Drums Q&A
13:00 8Drum Feel and Cymbal Selection
06:58Micing intro & Kick Mic Techniques
11:58 10Snare Micing Techniques
07:10 11Shell Micing Q&A
09:43 12Tom Micing Techniques
07:51 13Microphone Placement - Overheads and Room Mics
19:55 14Soundchecking the Drum Tones
33:45 15Drum Micing Q&A
11:55 16Working With Tempo
17:42 17How Drum Parts Evolve
09:48 18Preparing for Recording as a Drummer
12:49 19Writing Drum Parts
17:02 20Recording Drum Samples
13:53 21Tracking Drum Takes
19:31 22Comping Takes and Q&A
16:37 23Mix Session Intro
06:56 24Mix Session Organization
06:35 25Top Down Mixing Approach
28:51 26Mix Bus Compression & Saturation
21:11 27Mix Bus Q&A
14:32 28Mixing Drums Intro
06:59 29Mixing Kick Drum
35:00 30Mixing Snare Drum
20:53 31Mixing Toms
09:14 32Mixing Cymbal & Overhead Mics
15:39 33Mixing Room Mics
25:22 34Mixing Bass Guitar
35:57 35Mixing Rhythm Guitars
13:33 36Mixing Lead Guitars
22:57 37Mixing Synths, Pads & Samples
06:30 38Mixing Vocals
31:56 39Wrap Up Q&A & Final Thoughts
10:13 40BONUS VIDEO: Micing Guitar Cab
06:20Lesson Info
Micing intro & Kick Mic Techniques
Miking a kit is a really involved process. There's so many microphones. We did a little bit of pre-production and got some rough tones and I think we have 20-- Two 21, 22, microphones going, including microphones inside drums, microphones pointing at drums, microphones above drums, microphone in front of drums, pointing at walls and even there's a microphone out in the hallway. And all of this is gonna hopefully capture a cohesive picture of the drums which is gonna be really powerful but also really balanced over the kit. For some styles of music you get away with using one mike, two mikes, three mikes. There's also some techniques that are great for that. For metal and (faint speaking) you need to have, or rock in general I would always prefer to have more inputs, to give me as much flexibility of balancing levels, being able to mix levels really well after the fact, and process things really heavily in a way which you can't if you have only limited microphones. You have to use e...
very single microphone that you record afterwards in the mix, but it's good to have them there for every eventuality. Sorry did you-- Well I was gonna say too, I think a lot of drummers can also work on something that I call mixing yourself, where it is very important to work with a producer who knows the kind of mikes they want and how many and how they like to do it, as you're describing, but I think, I'm sure in you're experience it helps to have a drummer who also knows how to sort of change the dynamics and the volume levels of each thing that they're playing so that the whole performance is balanced. And in the past you alluded to John Bonham in the beginning of everything we're doin' today, and he was recording a lot of times with two microphones in a room, but yet, it still sounded very even. And there's a lot of drummers who've worked really hard on being able to sort of control their own faders, as Mike Johnston would say, like each limb is a different fader and you have to learn how to set it there right way. So as much as the microphone and having the options of different mikes can help you, it's very important to not overlook the fact that the drummer also needs to have that sort of control. Yeah, well as we said at the beginning, this is a little bit about the (faint speaking) so it's not just the drums themselves, but it's the drummer as well. You know, some producers might wanna come in and particular move things around especially messing with cymbal heights. As I mentioned earlier, I really don't wanna mess too much with Matt's setup. Thankfully, he's a pretty big guy. He's a very tall guy with really long arms, so naturally the kit's really spread out. But the cymbal's aren't really sky high. You see some drummers with cymbals really high, and that's how you prefer to play, so that's what we're gonna work with. I think we we're gonna start with the kick drum. Yep. So, I've actually gone ahead and already put some microphones into the kick drum, but just to break it down. Generally, when you're miking a kick drum, you wanna have something that's gonna capture both the attack of the drum, and something that's gonna capture the resonance of the drum. The way that a kick drum is though, if you were to mike the batter side, the side of the drum which is actually being hit by the beater, you're not gonna get a whole lot of low-end. It's not like the Toms which we mike from the side that is being struck. You could put a microphone on that side and some people do, but it's not really gonna capture both the attack and the resonance of the drum. The typical way to do it, is to insert a microphone into the drum. In this case we've opted to use a center port in the front here to be able to do that. That's kind of a maybe old-school looking approach and it's something which I've been doing only fairly recently, but for me as a recording engineer, I really like what it does, because it allows the air a really direct passage out of the drum, instead of it being kind of offset down to the side. The point of the batter head which is moving the most, where the beater is striking, is gonna just fire air straight out of the port. Obviously, it's a little bit more complicated than that, but it again, creates a drier sound, and means I use less muffling in the drum. The other thing it's easier to place microphones that have a line of sight to the beater without having to get really far into the drum. If you've run an offset port then you kind of have to fiddle around and look from the other side and use an angled mike stand. It can just be a little bit more complicated. We've actually got two microphones inside the drum, and I've wrapped the cables around one another. I'll pull them back out again, just to be able to show you. As you can see, it's a little bit of a nightmare working in such confined spaces. So the first microphone which to me is almost an essential microphone for tracking rock and metal is the Shure BETA 91A. A lot of people use these for live sound. Fewer people use them in the studio, although I'm certainly not the only one to use them. They're a condenser microphone and they literally just sit in the bottom of the drum. Being a condenser microphone and we'll get more into microphone types later, they have a very, very good amount of transient detail which is capturing the initial attack of the drum. And this is gonna provide a really nice representation of a kind of slap attack of the beater side of the drum. There are dynamic microphones which are designed to have quite a naturally clicky sound, but I find because they are quite slow to react to the transient information, they tend to sound quite soft, despite having the frequency range that you're looking for, and it's not really what I'm looking for in a kick drum sound. It can be great for live use. You know, you can still get a really good sound with them, but in my opinion this is probably one of the best microphones you can use for any kind of rock or metal, kick drum sound. However, it does almost always like being supplemented with another microphone. In this case, I'm messing with the AKG D112, which is, I think it was the first purpose-made kick drum microphone ever to come out. I have a real love-hate relationship with this microphone. In many ways I actually hate how it sounds. But it's very moldable, and we'll get to hearing it later. It kind of sounds like it looks. It sounds like an egg to me. (laughter) Does an egg have a sound, like broken egg? I don't know, maybe eggs just sound like this microphone, on the other way around. I don't know, it's a very hard sounding microphone, that the punch is really strong. I don't really like the overall EQ capture, but because it's got such a good representation of the attack, you can actually EQ it very heavily and do some very drastic things to it, and end up with something that retains that attack, but has a better frequency response. We might try a different microphone in there later, once we see how this sounds. So the combination of those two microphones is gonna give me a good, sorry I'm just placing that there. A good representation of the attack portion of the drum. It's also gonna have plenty of low-end. The kick drum is producing a lot of low-end, and because we haven't muffled it too much there's a fair amount of bass information resonating inside the drum. But another mike that can be really cool to throw on a drum is a mike on the outside of the drum. There's many different approaches to doing this. Some people will use a reverse wide speaker, they're called subkick devices. Those are great but in my opinion, they tend to be very loose. They kind of have like a long decay to them, which isn't necessarily what I want for metal styles. And I think it can be nice to have a microphone that picks up more of the whole overall front head sound of the drum, but those microphones tend to be very limited in bandwidth. So one of my favorite microphones to place outside a kick drum is the Sennheiser e602, which I'm gonna show you here. This one's an older one. There's two variants of them. There's the original one like this and there's a mike II. They're both great. This one I just happened to get for very cheap. It does have a little bit more low-end which I love. It's probably got more sub-low-end, than than any other kick drum microphone I've come across. It's quite a cheap microphone, but to me it's an absolute winner. Some people like to use very expensive condenser microphones, outside the kick drum, and they're great, but I would probably reach for this one almost every time. So hopefully between these three microphones, we're gonna get a good representation of the extreme slappiness from the Beater-91, and more of a rounded kind of rock-kick sound from the D112, and then a load of low-end with some extra resonance coming off the front head from the outside microphone. Placement-wise, I tend to start with my microphones about a third of the way into the drum. It depends on the depth of the drum. If it's a very shallow drum, then sometimes you physically don't have space to do that. With an (faint speaking) drum like this, there's plenty of space. And what I try to do with the two inside microphones, is I try to line up the capsules. So, it's only a rough thing, but later we'll look after we've recorded a segment to how lined up the way form is, ensuring that the sound kind of hits both microphones at the same time is gonna give us the best phase correlation and phase is a huge issue when you're recording drums and we're gonna get again, more into that later. So that's gonna be my starting point. My personal preference for the D112 is not to point it completely square to the beater. I think what we'll do is start like that, and once we start hearing what the sound's like we'll do a couple of AB tests and show you what happens if we kind of adjust the angle so that it's facing more down towards the shell of the drum. The outside mike, I like to get close to the point of the head which is moving the most, so I don't go right to the edge. That's not gonna have that much low-end. It might sound cool, but I am trying to get a decent amount of low-end. I'm not having to put it in front of the blasted air. Not that it would damage the mike, but it's just gonna be more of a direct sound. You're gonna get more of the beater attack. I'm kind of tryin' to block the beater and pick up more of the sound of the head, itself, and that's gonna be really quite close up to the skin of the drum, probably something around there. I generally keep it a little bit lower. (faint speaking), I'm not very picky with that. It's not gonna be super-loud in the mix or anything. And a combination of those three microphones, hopefully gonna give us a really good kick drum sound, combined with the good tuning and head selection. But we'll come back to that once we're hearing things in the room. I have a question. Yep. Just about the bass drums, specifically. I know a lot of producers would tend to like kind of create a tunnel with it. Yep. With like a blanket, or they'll put something over the kick drums. Yeah. Is there a benefit to that versus doing it like this where it's open? There is. There's a few different ways that, that can benefit. One is, kind of if you're dealing with a drummer who isn't necessarily the best. By isolating the kick drum more you can edit things in a way that you can't if the kick drum is projecting really loud into the room mikes and overhead mikes. If, for example, the drummer is not hitting the snare and the kick at the same time when they're supposed to, it can be very difficult later to edit that without really bad artifacts. So minimizing the amount of drum that's coming into the outside environment is better. The other reason might be if they're using microphones that pick up a fair amount of the kit sound on the outside or perhaps like the outside microphone, they want to place anything up to six feet or more back from the kit, and that would give you more isolation. With the kind of drums that we're gonna be recording, and me knowing your drumming, I'm not worried about your kick drum playing. And I don't mind there being some resonance of the kick drum in the room mikes which we'll hear later. It's a bit more of a rock approach actually, but I like that. It's just my personal preference. I've sent isolated drum tracks that I've recorded to fellow-producers who I really look up to and they've been like why is there so much kick drumming in your room mikes, I don't like the sound of that. But to me it's drums in a room. I like the sound of that. But yeah, it really is up to whatever you're trying to do. I definitely say experiment with it. It can sometimes really change the sound of the microphones outside the drum, either for the better or the worse. You're just gonna have to experiment and see. For the purposes of this. We're gonna leave it open. You can see what's going on. We can move the microphones really easily. Generally, I wouldn't even start to build that tunnel until the microphone positions are set. It is annoying to maybe not know if things might have moved inside the drum, because they're hidden by the blanket. So I like to have more easy access to them.
Class Materials
Bonus Materials with Purchase
Ratings and Reviews
Connor Smith
I haven't even finished the course and already my mixes have improved dramatically. Night and day difference. I haven't watched the portions with Matt as I'm using drum samples (GGD specifically), but I have no doubt it's great. Matt is always incredibly helpful and is a brilliant drummer. I thoroughly enjoy listening to Nolly, he's very articulate and his approach to audio engineering is flat out brilliant. I'm so happy I purchased this course. Before my mixes were good (balance and things of that nature) but lacked life and energy. I just wasn't getting the professional level sound I was searching for. Now, I am proud of my mixes and actually think they're getting to the point where they sound professional and don't sound like they were produced by a dude in his bedroom with about half of year of recording and audio engineering experience. The metal genre is difficult to mix as there's a lot going on and the "current metal sound" is very crisp and clear while still being very heavy and punchy. It isn't 80s dad metal where guitars are hissy and flubby. lol I am a huge Periphery fan and it's a privilege to watch Nolly share his knowledge. I really enjoy his approach as its very simple but very effective. He doesn't have insane mixing strategies, he just does what works and it's applicable to any DAW and is helpful for almost any genre of music. Brilliant course!
a Creativelive Student
This was an amazing course! I loved hearing from both Matt and Nolly on their thought process behind drums in general. I love the point they drove home about getting a great source tone. That seems to be forgotten in a lot of recordings and they try to fix it in the mix. Jolly did a fantastic job of making it look "easy" to take already great sounding source tones and making them really shine! Cant wait to put these concepts into practice in my own projects. What a great source of knowledge here. Thanks for this great class!
Adrian Gougov
Best course and overall learning experience I've had in a long long while. Nolly and Matt are superb. Nolly is an astonishing mixing and recording engineer and a great teacher. Not only does he explains his methods carefully and in detail, but also lays down key concepts in an understandable language. Definitely worth the investment if you wanna learn how to mix modern heavy music. Definitely worth the investment if you wanna learn how to track drums properly. Definitely worth the investment if you wanna see one of modern metal's best drummers track a whole song from start to finish. Props to Creative Live for bringing this material to us.