Lesson Info
10. Snare Micing Techniques
Summary (Generated from Transcript)
The topic of this lesson is snare drum miking techniques.
Q&A:
Why is the snare drum miking important in capturing the kit sound?
The snare drum is the focal point of the mix and needs to be loud and aggressive.
How does the instructor reduce bleed from the cymbals?
By using a hypercardioid microphone, such as the Shure Beta 57, which rejects sounds from the hi-hats and cymbals.
What microphone does the instructor use on the top of the snare drum?
The instructor starts with the industry standard Shure SM57 and then switches to his personal favorite, the Shure Beta 57.
Why does the instructor use a microphone underneath the snare drum?
To capture more presence from the snare wires, the instructor uses a Sennheiser MD 441, which has a more extended top-end response.
Why does the instructor recommend trying industry-standard microphones first?
They are reliable and many amazing records have been made with them, providing a good starting point for beginners.
How does the depth of the snare drum affect the microphone placement?
A thicker drum head blocks the sound of the snare wires, so it's important to have a microphone on the bottom. A thinner drum allows for more snare wire sound.
How does the angle and placement of the microphone affect the sound?
Placing the microphone closer to the edge picks up more overtones and creates a brighter sound, while placing it closer to the center picks up more attack and creates a darker sound.
What is the instructor's main priority when setting up the microphone?
The main priority is reducing bleed from other instruments and cymbals, which allows for more processing options to achieve the desired sound.
Lessons
Class Introduction
02:08 2Learning Drum Tone
08:10 3Drum Head and Shell Selection
10:07 4Matt's Signature Snare
04:37 5Tuning a Snare Drum
31:44 6Tuning Toms
18:56 7Tuning Drums Q&A
13:00 8Drum Feel and Cymbal Selection
06:58Micing intro & Kick Mic Techniques
11:58 10Snare Micing Techniques
07:10 11Shell Micing Q&A
09:43 12Tom Micing Techniques
07:51 13Microphone Placement - Overheads and Room Mics
19:55 14Soundchecking the Drum Tones
33:45 15Drum Micing Q&A
11:55 16Working With Tempo
17:42 17How Drum Parts Evolve
09:48 18Preparing for Recording as a Drummer
12:49 19Writing Drum Parts
17:02 20Recording Drum Samples
13:53 21Tracking Drum Takes
19:31 22Comping Takes and Q&A
16:37 23Mix Session Intro
06:56 24Mix Session Organization
06:35 25Top Down Mixing Approach
28:51 26Mix Bus Compression & Saturation
21:11 27Mix Bus Q&A
14:32 28Mixing Drums Intro
06:59 29Mixing Kick Drum
35:00 30Mixing Snare Drum
20:53 31Mixing Toms
09:14 32Mixing Cymbal & Overhead Mics
15:39 33Mixing Room Mics
25:22 34Mixing Bass Guitar
35:57 35Mixing Rhythm Guitars
13:33 36Mixing Lead Guitars
22:57 37Mixing Synths, Pads & Samples
06:30 38Mixing Vocals
31:56 39Wrap Up Q&A & Final Thoughts
10:13 40BONUS VIDEO: Micing Guitar Cab
06:20Lesson Info
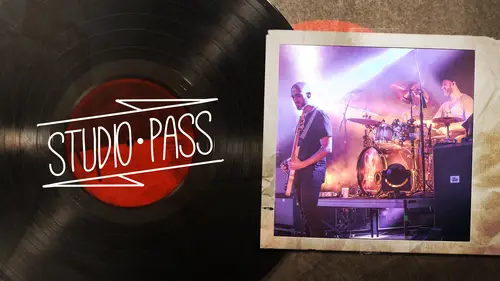
Snare Micing Techniques
To me, the snare miking is probably the most crucial part of capturing the kit sound. The snare is always going to be the focal point to me of a mix. It's got to be super loud. It's got to be super aggressive. And it has to be processed quite a lot before it sounds good, in like the way that a commercial rock or metal record sounds, so a bit part of recording the snare, for me, is reducing the amount of bleed from the cymbals that comes in, especially from the hi-hats when they're being played open. To start with, we're going to use the industry standard Shure SM57 on the top of the snare, and we're going to record some stuff with that once we get to playing, but then I'm going to switch to my personal favorite mike on snare, which is a Shure Beta 57. That has a hypercardiod polar pattern, if you guys don't know what that is, it basically means that the front side of the pick-up pattern of the mike is more focused, and instead of rejecting sounds behind the microphone, it kind of rejec...
ts sounds that are about 110 degrees off axis, I think. So physically what this means on the kit is I can bring the mike in, instead of coming in underneath the hi-hats, like you sometimes see, but then also getting a whole load of china from that side of the kit, this allows me to position the mike in such a way that it's kind of facing towards Matt, away from the cymbals, but it's also rejecting the sound of the hi-hats, and of the toms, not that toms are normally an issue. The one thing to be aware of is that a hypercardiod pattern on a microphone means it does have a bit of pick up directly at the rear, so it's not really a problem here. This cymbal is way out of the way, but if there was for some reason something really loud behind it, you'd hear it coming back in. For the purposes of drum recording, though, I love hypercardiod mikes. They really help cut down on that bleed, and it means that I can process the snare track so much more to achieve like a really powerful, almost sample-esque sound, without having to reach for samples. Anyway, I think I kind of put the cart before the horse, there, 'cause I think I want to talk primarily about how you mike a snare drum. Sometimes you can get away with just having a mike on the top of the drum, which is going to pick up the attack from the stick hitting the drum. But for the kind of music that we play, we quite often want more presence from the snare wires underneath. So, for that reason, I tend to put a microphone underneath. Down there I have a Sennheiser MD 441, which is another hypercardiod mike. I really like the sound of that microphone underneath the snare, because it is a dynamic microphone but it tends to have a more extended top end response, so it's really good at picking up the kind of articulation of the snare wires, and it's also really fat sounding, and typically that place, if you were to put your ear down there, is not a particularly pleasant place to listen to a drum from. So a slightly fatter microphone tends to be more flattering, and it picks up more of the body of the drum. And compared to maybe just putting another SM57 under the drum, which is fine, but if you compare it to that, I find that that's a far more pleasing sound. Something worth saying is I've come into this session with a lot of my own mikes, and this is something that I really like to do. It's part of what we're talking about, which is being prepared, and being able to walk into an unfamiliar situation and still get results that are going to be really good, and knowing where to put the microphones as well, because you have hands-on experience with the microphones, so I'd say it's very important first of all to get out there and try the industry-standard microphones, like the SM57 on the snare, the D112 on the kick. Get used to how that sounds. Get used to mixing with those sounds, because nobody could ever tell you they're bad microphones. So many amazing-sounding records have been made with those, and when we get to the toms, the 4-21s are kind of the industry standard that we're not using, but once you start to really get to grips with that you can start to specialize and find things that work a little bit better for what you do. They might be really exotic, they might be really simple, but start with the basics, and go from there. Something I'm also going to talk about. We spoke a little bit about the depth of snare drums earlier, but the depth of the drum and also the type of head you're using on the top of the drum is really going to affect what that microphone on top of the drum hears. The difference between this head and a thin, single-ply head is really quite drastic when you put a microphone on it. You hear a lot less of the snare wires coming through, I guess 'cause it's blocked by such a thicker drum head there. So, when you're using a thicker, more durable head like that, it's really important to me to have the bottom miked. A thinner drum, just by virtue of reducing the distance between the snare wires and the microphone, you are going to hear more of it on the top. To me, there's a sweet spot, a really thin drum, you kind of can't control the relative balance of the tone of the drum with the snare wires, and if it's too thick, then the top mike is just really going to sound like a timbale almost. It's not going to have any real bit to it at all. So this snare is 14 by 6, which is, 14 by 6, 14 by 6 1/2, 6 1/2 probably is like the most common snare depth these days. Even up to 7 is really good. To me a 14 by 8 drum, which you do see, generally too deep for what I like. In terms of angle that I'm coming in on the snare drum, you can get very in depth with just perfecting the exact amount of the steepness of the angle coming down on the drum, and kind of where on the head it's pointing, whether it's more in the middle, or further out towards the edge. They are all going to sound really different. And, you know, if you have time to really refine that to get exactly the right tone, you'll find that as you move towards the outside edge of the snare, you hear more of the overtones, and you get a brighter sound but not necessarily more of the stick attack, whereas going more towards the center is going to pick up more of the attack, but be a generally darker sound. As much as you can perfect the sound with that, I know from experience that, you know, sometimes snare mikes have moved pretty drastically on sessions that I've done and I haven't noticed, and after the fact the snare drum still sounds great. I'm not saying that it can't be perfected with placement, but when I'm setting up, I'm thinking more about isolation, the bleed, you know, making sure that the mike is kind of pointing in towards Matt, rather than at the other cymbals. I generally kind of point towards the center of the drum, if not just a little bit closer. Again, that's going to help reduce bleed that's going to come in from the top of the microphone. That to me is the main priority. If I have reduced bleed in the microphone, I can process it so much more to make up for the maybe slightly inadequate sound. I say "inadequate." It can be a very subtle difference anyway. But that really is my priority, and maybe that's an unpopular opinion amongst some engineers, who I know really like to refine the sound by a very precise placement of the microphones, but for the purpose of coming into a studio and just getting a sound going straight away, I know what the microphone should look like for the kind of sound that I like, and especially working with Matt, we've miked his kit every day on the road. Well, you know, our sound guy does that mainly, but we refine all of that together. We've done it thousands of times. Uh, mid set even. Yeah, mid set. And, like, I know this drum really well, I know this head really well. I know that that's going to sound good without hearing it, to be honest. But we'll get to hearing the other microphone on the top of that once we get to hearing some sounds.
Class Materials
Bonus Materials with Purchase
Ratings and Reviews
Connor Smith
I haven't even finished the course and already my mixes have improved dramatically. Night and day difference. I haven't watched the portions with Matt as I'm using drum samples (GGD specifically), but I have no doubt it's great. Matt is always incredibly helpful and is a brilliant drummer. I thoroughly enjoy listening to Nolly, he's very articulate and his approach to audio engineering is flat out brilliant. I'm so happy I purchased this course. Before my mixes were good (balance and things of that nature) but lacked life and energy. I just wasn't getting the professional level sound I was searching for. Now, I am proud of my mixes and actually think they're getting to the point where they sound professional and don't sound like they were produced by a dude in his bedroom with about half of year of recording and audio engineering experience. The metal genre is difficult to mix as there's a lot going on and the "current metal sound" is very crisp and clear while still being very heavy and punchy. It isn't 80s dad metal where guitars are hissy and flubby. lol I am a huge Periphery fan and it's a privilege to watch Nolly share his knowledge. I really enjoy his approach as its very simple but very effective. He doesn't have insane mixing strategies, he just does what works and it's applicable to any DAW and is helpful for almost any genre of music. Brilliant course!
a Creativelive Student
This was an amazing course! I loved hearing from both Matt and Nolly on their thought process behind drums in general. I love the point they drove home about getting a great source tone. That seems to be forgotten in a lot of recordings and they try to fix it in the mix. Jolly did a fantastic job of making it look "easy" to take already great sounding source tones and making them really shine! Cant wait to put these concepts into practice in my own projects. What a great source of knowledge here. Thanks for this great class!
Adrian Gougov
Best course and overall learning experience I've had in a long long while. Nolly and Matt are superb. Nolly is an astonishing mixing and recording engineer and a great teacher. Not only does he explains his methods carefully and in detail, but also lays down key concepts in an understandable language. Definitely worth the investment if you wanna learn how to mix modern heavy music. Definitely worth the investment if you wanna learn how to track drums properly. Definitely worth the investment if you wanna see one of modern metal's best drummers track a whole song from start to finish. Props to Creative Live for bringing this material to us.