Lesson Info
8. Shoot: Choosing a Modifier - Diffusion and Grid
Lessons
Day 1
1Studio Essentials: Shutter Speed
15:50 2Studio Essentials: Flash Exposure
22:26 3Studio Essentials: White Balance
21:15 4Light Principles: Inverse Square Law
26:46 5Lighting Patterns
15:29 6Shoot: Demo Lighting Patterns
28:06 7Quality of Light and Modifiers
09:59Shoot: Choosing a Modifier - Diffusion and Grid
13:40 9Shoot: Choosing a Modifier - Umbrellas
31:01 10Shoot: Choosing a Modifier - Softboxes
21:08 11Shoot: Choosing a Modifier - Extra Stuff
28:10 1210 One Light Set-ups: 1 and 2
17:07 1310 One Light Set-ups: 3 to 5
18:16 1410 One Light Set-ups: 6 to 10
15:57 15One Light Set-ups: Pop Quiz
21:21Day 2
16FAQ for Purchasing Studio Light Part 1
31:00 17FAQ for Purchasing Studio Light Part 2
25:36 18FAQ for Purchasing Studio Light Part 3
43:53 1910 Two Light Set-Ups: 1 and 2
24:29 2010 Two Light Set-Ups: 3 to 6
25:24 2110 Two Light Set-Ups: 7 to 10
22:30 225 Two Light Set-Ups: 1 & 2
13:27 235 Two Light Set-Ups: 3 to 5
33:37 245 Basic Three Light Set-Ups: 1 & 2
21:05 255 Basic Three Light Set-Ups: 3 to 5
25:52 265 Intermediate Three Light Set-Ups: 1 to 3
17:14 275 Intermediate Three Light Set-Ups: 4 & 5
12:58 2810 Common Lighting Mistakes
16:46Day 3
29Solving 12 Common Problems of Studio Lighting: 1
39:29 30Solving 12 Common Problems of Studio Lighting: 2 to 6
37:25 31Solving 12 Common Problems of Studio Lighting: 7
15:50 32Solving 12 Common Problems of Studio Lighting: 8
25:51 33Solving 12 Common Problems of Studio Lighting: 9
16:19 34Solving 12 Common Problems of Studio Lighting: 10 to 12
26:11 35Portrait Lighting: 1, 2, and 3 Lights
14:51 36Beauty Lighting: 1, 2, and 3 Lights
18:06 37Lighting Groups: 1, 2, and 3 Lights
15:53 38Lighting for Drama: 1, 2, and 3 Lights
24:19 39Your First Studio Lighting
38:46Lesson Info
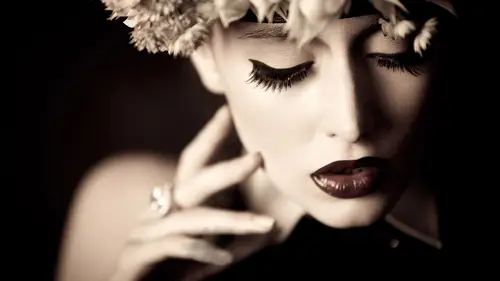
Shoot: Choosing a Modifier - Diffusion and Grid
So there's the tiger by the way everybody and we did the intensity of light and we did um uh inverse square law notice how the modifiers make a difference there's no grids on these the modifiers I did not love my subject at any time you look at how some of them because of the way the light's focused it doesn't reach the background it focuses it in the back or becomes totally black so all these things kind of worked together so you choose a lot of fire the use of the things you're thinking about first while you're thinking about the mood of your photograph are you going for something contrast and dramatic and you're thinking about the subject skin you want to flatter the subject try to help them look their best and then also just considering features that you might want to be controlling on flattering for the subject all right, so here are some things to keep in mind silver smaller or grids and we'll talk about what these are have more contrast sharper at edges and shadows brighter high...
lights and more focused like this is the general rule try to keep those things so if you see a modifier and you're holding two side by side if there's a wait umbrella going to be my white umbrella holder thank you if there's a white umbrella for a silver umbrella silver will be more contrast e than white and the silver is goingto have more defined shadows and we'll have more speculative highlights the white will be a little bit softer but then you make it more complicated because of size right? So right now this is going to be a little bit smaller smaller light sources have a little bit more contrast still this is going to be more contrast e like this the super sparkly silver so this if you see silver and you're comparing between silver and white go for the silver if you want more contrast want to throw the light further you want more dramatic shadows go with white if you wanted to be a little softer throwing less light ok on the other side so if you want soft, go for white, larger light sources and with the fusion so for example that's perfect if you want a giant soft light source here's one this is an awesome lot of fire that is very inexpensive so this is kind of a cool tool if you think you want a lot of large soft light or you're shooting groups this is a west caught seven foot shoot through umbrella you actually shoot through it. So remember how I said before your light source is small except for when it hits the diffusion panel so now would you point that right at them that's how larger light source becomes because it hits the diffusion panel or hits this material and it spreads out and telling you've got this giant light source so this is diffusion and its large so this is going to be extremely soft and the reason that this is kind of a cool modifier if you want really soft light is it's only ninety nine dollars whereas like everything else in photography is more than a hundred bucks like everything even like little cf card yet so anyway so this would be an example so thinking in your head over and over again whereas so I wanted something more contrast e it would be this one I'm sure michael short business where this would be it would throw more light it's bigger but it's filled for so it would have more definition to the shadows brighter highlights darker shadows it's like those of the type of things that you're considering it's perfect okay uh you find my little treasure it got it perfect okay and we'll go through umbrellas a little bit more so diffusion in general diffusion is that semi translucent material used to spread out light and can I have the octo box the rapid box over there diffusion khun go on a lot of different things for example I can add diffusion on the front of my beauty dish to soften that life so this right here is diffusion material on the front of the soft box and we'll talk a little bit more if you guys ever seen them in her diffusion and even having her diffusion. So okay, it's, all this address it so diffusion could be added to a lot of things. The next one is something called a baffle. So if any of you ever bought a soft box and in the inside you see that there's another little piece of fabric, little blake piece of diffusion. You don't know what to do with it or when to use it. It's really much more important for big soft boxes? Because here's, what happens? Do you get a giant soft box? Okay, but it's, not it's, not super deep. And you've got your little strobe head the light by the time it reaches the diffusion panel, short spreads out, but it doesn't have enough room to really spread out, so there will be a hot spot like a brighter area in the center of your soft buck. So I just have, like, the three by four one uh, so this one isn't really that big. It won't make that big of a difference to it, but let's say you have a four by six or a big soft blocks. You'll still get a like a really hot spot in the middle which is not good if you're trying to maybe late a whole group of people you want the light to be as large as possible it doesn't know that oh it does perfect so what this does I know right when you're awful okay this is perfect so what this does is the light hits that first panel and spreads out and then now it's a larger light source moving forward towards the main panel so he just gives you more even spread across the whole front of the softball which is going to be important if it's for group or if you really want to get the most out of a large light source if you've got a huge soft box with no inter diffusion you might just be really getting a hot spot in the center and if you're trying to go for soft light you want to spread it out so this is something called inter baffle a baffle it's another piece of diffusion so let me do one more before we wrap up this section okay so the last one the last thing that is part of modifiers that you might want to know about is something called grids and there are tons of different types of grids there are grids for soft boxes for example there are grids for beauticians there are grids that stand alone and how grids work is they help to focus the light and it forces them out in one direction? Perfect I like that can hide so when you change it see that shows him and see how you can't see me depending on what angle it's at its forcing the light out all in one direction there's a couple reasons why you care let's say that four over here we're going to talk about strip lights later sometimes you don't want the light to spread out everywhere you're trying to contain it to a very specific highlight or you don't want it spreading around and hitting all the walls thiss will give it more control or in an instance of this you saw how I made the background go black by adding the grid because the light couldn't spread and hit the background or it actually focused like in so if I'm lighting her instead of it lighting from head to toe for her now it'll just light from the middle of her body and I didn't know about grids for a long time and I think that's the role I'll wrap this I'm going to demo what that looks like uh I didn't know about grids for a long time, but they're really good for dramatic effect and so for example I'm gonna have you stand up and just move the chair just somewhere to the side a little bit okay, so this is what a grid has for an effect I'm going to shoot her more less full length let's test this out I'm gonna get all the way down to our feet okay partner still doesn't look too bad ok so she does get a little bit of light on her feet I'm gonna light enough to take one more shot she's live from her head and she still is getting to see the spill on her feet here that you've got this little halo at the bottom because the latest hitting the floor and you guys can see it with your bare eyes where the light's hitting let me lighten this up for one more again okay and the basically the darkness behind her is the shadow cast which we're going to talk about how to not cast shadows on your background so right now florida ceiling she's getting some light but we're gonna add a grid over there being short I never get these on my bill perfect okay so now what you can see with your bare eye it's a little bit difficult with these lights the light from the beauty dish is not on the floor anymore it's just basically lighting and add a pointed towards her it's basically a little wobbly it's just lighting pretty much her faith to the middle of her body but doesn't mean anything till I show you something show you kind of what that that looks like one more try and then we angle just towards her a little more. Everyone kind of pointed off of her face perfect here, go. Okay, so watch all I did was add the grid and so the light is all centered right around her face barely hits the ground and the background will get much darker. So grids for main light focuses the light and it gets rid of something called fall off, right? I mean, it increases falloff makes it more dramatic so the light hits my hand it's still there, it's still there and then it'll get dark by here, whereas with a beauty dish with al sigrid, I'd have light on my hand to the floor, so it just focus is everything in gives you more contrast for in effect like this. If you're going for drama or more focused light, more control over the light, you would consider grids from abby do what does shoot through mean, ok, so when in that particular umbrella or even think one, I think, um, when you point the umbrella, you're actually pointing at your lights at your subject, so the light is going to shoot through the umbrella and it's the umbrella that's lighting her balance umbrella is you flip it the other way and it will light the inside of the umbrella and kick back at her it's going to be like a softer, more diffused light source to be shoot through and I will demo those in the next segment ok fantastic and a question from photo maker with some votes on this one I assume that all these light modifier considerations hold for product photography as well as portrait photography is that current yeah all the supplies no matter what the same quality of light the same direction of light although if your product photographer you'll definitely want to get into scrims a bit most likely and we won't really get into that too much in depth but that's a little bit of a homework assignment for you all right great. Any questions in our studio here? All right, one more from our sara fulla our grid and modifiers specific as far that fits to your brand of lights do you have to match your brain of lights to the modifiers? Yes ok so that's a good lead out for all this so I'm so modifiers we'll go over back to grids but I'll say so modifiers like many umbrellas are almost universal almost like a lot of umbrellas you're putting that the shaft of the umbrella and it'll sit whatever lights however give us easy speed ring over there now or any of this you hear this works perfect um however pretty much every different manufacturer makes a different way that the modifiers connect to the light so one of the reasons that I really like pro photo is because it's so easy how there's go on is this is attention ring and so I loosen it and it slides on and then I can flip this over too tight in it other brands you've got a lineup too little not knob things and then you gotta twist it and you gotta lock it in place and I can't handle it so I like this for that reason which creates a problem because every different brand has a specific what they call a speed ring or a specific mount and so this is a speed ring, for example for a soft box so some soft boxes well, many soft boxes you khun just by the soft bucks and then as long as you have the right speed ring how it works and they just fit into the holes actual soft box itself could be propped up by the speed ring so there are many soft boxes that as long as they can fit into the speed ring, it doesn't meant matter the brand but then some aren't like that. So it's like you kind of have to do your research on them and for grids grids you have to buy for the specific modifier there aren't like any universal grids over depend on brand and so it all kind of makes it a little bit more complicated than ideal
Class Materials
bonus material with purchase
Ratings and Reviews
BolesMA
If you're on the fence about this class I can easily answer your concerns. BUY IT. Lindsay provides top notch professional education while keeping things interesting. Her words are precise and direct. I actually felt GOOD just watching and learning. I mean, like someone surprised me with a cupcake kinda GOOD. After the class I could immediately see improvements in my photography. The best part is that I learned enough to see the wrong in my setups. Knowing what's wrong is just as important as knowing what's right. She is funny, easy going, energetic and filled with knowledge. I would also highly recommend her Posing 101 class as a must have addition to this course. I feel like I have learned more than I could possibly use. I will be going through this course over and over again just to make sure it all sinks in. There's THAT MUCH she offers that you will always learn more with each time you watch. I hope this helps someone make the decision to up their game. That is exactly what it did for me.
Jason Ashley
I loved this course! Lindsay spent so much time with explaining each set-up in-depth that anyone picking up a camera could understand how to accomplish their lighting goals. This course covered so many unique (but, most likely to come across scenarios) and how one would approach the challenge and how to successfully accomplish with incredible results, not average-sub-standard or basic results, but above entry-level standards, high-level, money-generating lighting expertise! ZERO laziness in her explanations to the point where she is constantly refining her course in the middle of the 3 days. Her passion gleams throughout each days lessons with so much energy. You know she really wants her students both in-person and through the screen to be successful in whatever type of lighting they choose to dabble in. I am so happy, I have bookmarked, and i'm so happy and fortunate to have this course to reference for hopefully –everrrr. Thanks!
Beatrice Palma
Hi, I am Beatrice from Italy. I think this class is superb. I finally understood what are the guide lines to follow, I tried for years but never found such a good explanation. Lindsay is a wonderful teacher, she explains in a simple way, she shares a lot of knowledge and she shows in practice what are the results of every single choice. Thank you so much, it was really amazing and super interesting!!!!
Student Work
Related Classes
Lighting