Lesson Info
2. Color Sharpen Techniques in Photoshop
Lessons
Class Introduction
01:45 2Color Sharpen Techniques in Photoshop
10:12 3Batch Retouching Photos in Photoshop
07:20 4Resolution, Sharpen, and Magnification in Photoshop
10:42 5Retouching and Adjustments in Photoshop
17:26 6Color Correction and Adjustments in Photoshop
10:43 7Color Modes in Photoshop
16:03 8Spot Healing Brush in Photoshop
07:53Lesson Info
Color Sharpen Techniques in Photoshop
The most basic thing you do in photo shop is you're about to type in text or paint with a paintbrush or do anything else, and you need to change your foreground color. That's the color usually paint with. That's the color your text will boot when you start typing in and all that you do that all the time. Well, a lot of people that are just starting in photo shop, they click on their foreground color, and the color picker comes up when you're in the color picker you're like was pretty simple. There's the basic color you want in this vertical bar, and then you pick a shade of the color from over here. But what if you want to pick white? What I see a lot of people doing is they say, whites up here in the corner, so I'll just go up there and grab it and send the click OK, and they start painting or typing in text or anything else. But know that if you pick white by just going up there to the corner, you should properly inspect what's going on with these numbers down here because this is ho...
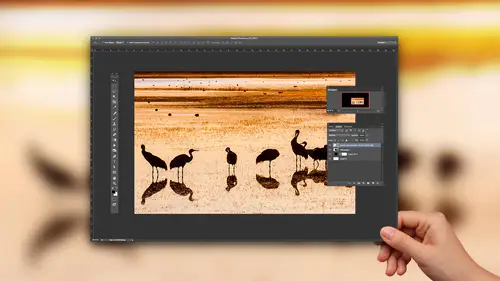
w much ink it's gonna print your white with. Does that sound like it's white? If you ever picking white from within the color picker, be sure to drag beyond the corner, meaning your mouse isn't right in the corner where you think why it is. It's beyond it, because if you're just the tiniest bit off when you go up to there to the corner, you'll find right here it shows you how much ink he would use to print it. With that you don't have white. It might look like white, but that can cause an issue when suddenly you print your image and you think the edge of your picture is just going to disappear on a sheet of paper because it's white out there on the edge. But, no, you have about 3% gray in there, so you can see exactly where the edge of that document ends and where the white sheet of paper begins. So the best way to reset your foreground color toe white is there's a little icon down here. This guy that resets those two colors and then if you needed white in its sitting here at the bottom, you can hit the little double arrow to switch from around. There are keyboard shortcuts for both of those. It's D all by itself for default in X to exchange those colors de an ex. So that's one thing you want to get used to when you're first. Starting out is to make sure using photo shop in some way where you're sure you're getting solid black in solid white. Now that was pretty non simple. So now it's get into things that you're probably doing already, and you don't realize it. Here is an image that I'm opening in camera raw. Most the time when you get into camera raw, you are just double clicking on a raw file, and it sends you in there. In this case, it happens to be a gem peg file in orderto open a J peg file in camera. If you're here in bridge, you go to the file menu and there's a choice called opening camera, and it has a keyboard shot Shortcut of command are so any time I have a J peg that I'd like to open, I just type command are, uh, I'm gonna start off with a, um, what he called a raw file, though, and here's I'm gonna show you a stupid move that Photoshopped does on its own. It needs zero input from you and you're already doing it. And if you don't fix it, I think the quality of your image is going to go down. Here's what it is when you open a raw file on camera. There are a bunch of icons going across here, and if you click on them, you get to various sections of settings in camera. One of those looks like two triangles, and it's the detail section under the details section. You'll notice that if you have a raw file, it is automatically sharpening your picture. Which is a good thing because raw files came directly from a digital camera. In most digital cameras have a filter right in front of the sensor that actually softens the image a little bit. It's softening it to avoid getting what's known as more ray patterns. More a pattern can happen when you take a picture, especially a fabric where you can see the weave of the fabric and you'll see a weird pattern showing up. Have you ever seen it where you take two screens like what you have in a screen door and you move them like this on top of each other, and you get a weird kind of interference pattern. Have you ever seen that or not? That's amore, a pattern. You get a similar thing. The fact that your camera has a filter in front of sensor softens the image a little bit to prevent. That means that it's useful to sharpen the image if it's a raw file, so the default setting for sharpening is 25. Big deal. That's great. But here's the thing that I think is a stupid move. There's a setting down here called Masking in the default setting for masking is zero. When masking does is it determines how much of your image will be sharpened, and you can see visually how much of your image will be sharpened by holding down the option key, which is all TEM windows and clicking on the masking slider in what it returns, White will be sharpened. Looks to me like everything's gonna be sharpened, isn't it? Well, what if you didn't have this picture? Instead, he had a landscape image, and in that landscape image, you have a blue sky. The blue sky doesn't have a single cloud in it. What detail would be in that blue sky that is truly worth sharpening? If there's no bird flying by, there's no cloud up there. It's just a blue sky. What's gonna be in that sky is noise from your digital camera or, you know, the sensor dust specks you get well. Should we sharpen all that stuff? And if you have a picture of a person in your photograph, if you sharpen every single detail within their face, you're gonna make them look older. I would like to make it so it doesn't sharp in detail, less blue skies, and it doesn't sharpen every single feature in somebody's face. So most of the time, when I open an image in camera, regardless of what it's off, I glance at the image and I asked myself, Where is there no useful detail? A blue sky would be an example. You don't see any texture in it. You don't see any whispers of clouds. You just see blue. There's no detail in this image. It might be the very front of this area here because I can't see any we've of fabric or anything else. But here's how you deal with it. There's a masking slider. You hold down the option key, you click on it and you bring it up. Whatever turns black will not be sharpened, so if you a picture with just a blue sky in it is part of it, you want to bring this up until the blue sky turns black. By turning black, it won't be sharpened, but any areas that still have the little white lines on them and thinks those will be sharpened, and that will be where all the rial detail is. If you have a picture of somebody with skin in it and you happen to bring it into camera now this happens to not be a raw file. If it's not a raw file, you should know that if it's a J peg, the default setting for sharpening is actually zero. It's only with raw files that has turned up, but if you ever open it regardless of the J peg or a raw file and you apply any sharpening, just remember the default setting for raw files. It does sharpen. The image is come down here to masking hold option, bring it up and tell your skin. Starts looking a little bit black, and by doing so, it's going to make it so all the slight variations in the skin are not emphasized. If you emphasize those areas, people look older and same when it comes to any noisy images, especially, we have a blue sky or anything like that. Go in there and bring up masking. You can even change the default settings. If your APP default settings right now, you could bring up that masking, setting up into maybe seven or eight. Somewhere in that general area, there's a menu near the upper right of camera where you can say, save his new defaults, and then every time you open an image, it would have the masking turned up at least a little bit. But that's one thing that, especially when it comes to raw files, are can instantly create problems that you don't like, especially when it's noisy and you're emphasizing the noise everywhere. But let's talk a little bit more about sharpening. Here is an image I'm gonna sharpen, and it's not that I'm gonna try to make this image look good I'm gonna actually overdo it just to show you one particular thing that happens in what happens is when you have more pastel colors. Just not mega vivid ones. You could have issues with sharpening. I'm gonna over sharpen this image just to show you what happens. It doesn't matter what sharpening technique you use. This will usually happen there. I'm starting to get it. This is way over sharpened. But do you notice how the the color changed? If I choose Undo before after. Do you see how much more vivid became in many areas? Well, that happens any time. Your sharpening a picture whenever you sharpen a picture depends on how you sharpen it. If you sharpened it directly, meaning you're you have that layer active. You went up to the filter menu in your sharpened right. After you're done, go up here to the edit menu and choose fade when you choose Fade. There's a menu right here. You want to set it all the way to the bottom to a choice called luminosity. What luminosity will do? Is it enforce the sharpening to not mess with your colors? Meaning don't make my image more colorful and when I choose that colors will go back to normal in this will happen especially, you have some mellow colors touching each other you'll find right on the edge is that becomes more vivid. So I went to the edit menu and chose Fade, and I said it toe luminosity. Now if I applied it in a different way, let's say instead I went up here and I converted that layer into a smart object. That's what lot of people would dio before coming up here in sharpening that. And it doesn't matter what your these choices you're using. If that's how you sharpened your image, then in your layers panel, you're gonna find the name of that filter sitting right here in the layers panel. You'll double click in this area instead, and again you'll change the menu to luminosity to prevent any kind of color shifts. The Maine time you need to be concerned with it is when you have kind of mellow colors touching each other. There's right where they touch, you're gonna find it becomes more vivid, and you would know it's happening unless you zoom up really close on your image. I over sharpened mind to make it more prominent and easy to see. But any time I'm sharpening color image, I almost always do it in luminosity mode, so it prevents color shifts.
Ratings and Reviews
a Creativelive Student
I loved this class - Ben is a really good teacher and the class is full of great easy to follow advice.
Bonnie
First off, the title cracked me up. The course was very good, easy to follow and Ben's a great instructor.
user 12004e
Excellent! Much better than I thought it would be. Invaluable.