Lesson Info
5. Retouching and Adjustments in Photoshop
Lessons
Class Introduction
01:45 2Color Sharpen Techniques in Photoshop
10:12 3Batch Retouching Photos in Photoshop
07:20 4Resolution, Sharpen, and Magnification in Photoshop
10:42 5Retouching and Adjustments in Photoshop
17:26 6Color Correction and Adjustments in Photoshop
10:43 7Color Modes in Photoshop
16:03 8Spot Healing Brush in Photoshop
07:53Lesson Info
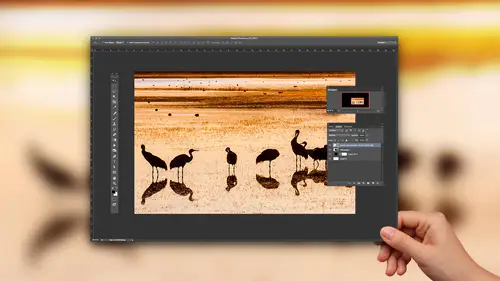
Retouching and Adjustments in Photoshop
one simple one is if you ever sharpen an image, uh, don't be zoomed out so you can see the entire picture because sharpening happens in such a small area of your picture that you can't see what it's doing when you're zoomed all the way out so you can see the entire image. Always zoom up to 100% view when you're sharpening if you really want to see what's happening. But if you're gonna printer printing press, you should know that it won't look quite a sharp when it actually gets printed so it can be useful to view your image at 50% view. You know that number that's on the top and that kind of gives you, Ah, uh, somewhat of a simulation of what it might look like after being printed on a printing press. You're seeing just a little bit less of the detail that's truly in it. Let's see, when we talk about adjustments, it's gonna decide what picture to use this one. Talk about a combination of retouching and adjustments. Let's say that I'd like to adjust this image in some way. I'm gonna do ...
it in a way where it just do something that's rather obvious, and that is I'll make the image black and white with a black and white adjustment. It's not truly what I'd like to do to this image, but I need to do some sort of adjustment where it's visually obvious what I've done. Then I'm gonna come in and start doing some retouching. Afterwards. I come in here and a zoom up on the image and inside that something needs to change. Maybe I come in here and I just need to lighten up these little areas, retouch them out, maybe get rid of some of the, um, pores and other things, whatever it happens to be. If I end up adding a layer on top of my image, which is commonly what's done and then you come in and use any kind of retouching tool in this case, I'm gonna use something called the spot healing brush. Um, with the spot healing brush. I come in here and try to use it, and if I try to get rid of like a shiny spot on the nose or something, first off, you'll find that it often won't be working too much, and that's because there is a setting in here. Uh, up here. Do you see these? What I call higher, Higher Olympics. Some people call them icons, but how obvious are they? Um, sometimes you'll find this is a check box. Sometimes it will be an icon, depending on your settings. But this means work on all the layers so that you can start with an empty layer, and it can still copy from something that's on a layer below. And if I used that and try to do something on this image, just come in here and make a little change in our nose. I got really, really little shiny spot, and I keep doing a little change there. Any time I do retouching on the top of my image, we're gonna have a problem. And that is what if I decide that I want to change the settings for the adjustment that I applied previously? If I come into this adjustment layer and I start changing the mix of what I'm doing, you see what just happened. My retouching stands right out because if you ever apply retouching above your adjustment layers, then you're kind of locked into those adjustment layers because any change to them will make it so That retouching that's on top is not going to change its appearance. But you're changing what's blow it, and it's not gonna match. So if I wanted to retouch this image and I had an adjustment layer in it like that, I wouldn't put it at the top with my retouching. I'll throw that away in what I do instead is I put it directly above the background where right there, then there are certain features and Photoshopped that get in your way. But oftentimes what'll in doing then, is if I come in here right now and do this, retouch it that I can turn this on and off and it works fine. I might want to be better it retouching as far as the tools that I use. But if whatever retouching ideo is done below the adjustment layer, then the Justin players sitting up on top and it does fine, you can change the settings that are used in it. You can do whatever in this retouching will still blend in if you end up having any tools, like the clone stamp tool that have a setting right here. This says, What can it copy from? You want to set this to current and below. It gives you the choice. Set it to current and below. What current and below means is copy from the layer you're currently working on. Whatever happens to be in there and also include whatever's underneath it, that's all you can copy from bid. Ignore anything that's above it. If you ignore anything that's above it, it means it's ignoring the adjustment layer. So if I come into this image and make any kind of a change, well, I got option Click that tell where I'm coming from. If I make any kind of a change to retouch my image, and I later turn off that adjustment layer, do you see that that area retouched is actually in color? Whereas if instead I used the choice called all layers, all layers access if all these layers were combined into one piece is if I What's notice, flattened the image, and that's what it's gonna copy from If I flatten this image, wouldn't it be a black and white image? So now if I come in here and copy from this area and use it to recherche over here. It might look fine to begin with, but if I turn off that top layer, do you see how there's a problem? So what do I want to do to prevent that problem? I always want when I'm in my retouching tool. If it offers the choice of current and below, I want to use it. A lot of people instead, use all layers, and that's when it's going to copy whatever your result looks like when you combine all the layers together and so you're kind of locking in what you have on that top most layer, and it's concrete's, um, issues. So if you ever do you re touching on the layer directly above your background layer, see if you can use a setting called current and below for all of your retouching tools to prevent problems. Another thing related to AH adjustments is it's very easy to lose detail in your image and not know that it's happening in this hat is specific to color pictures. If you ever adjust the color picture and you're trying to make the image mawr colorful than it is beforehand, if you push it a little bit too far. You're going to start throwing away detail. Let's see if I can show it to you. I'm gonna do an adjustment layer called hue and saturation, and I'm gonna move up the saturation slider and watch what happens to the most colorful part of this image, which I believe to be the red area here when we first got started, you know, if I were to zoom up on it, can you see texture in there like little scratch marks or fold marks or whatever they happen to be within the tip of it? I can see some of that down, and here I can also see little hints of texture. But if I bring saturation up too high, you'll find that a certain point that detail starts going away. Can you see where it's missing from? Right here? I'll bring saturation back down and you see that there used to be detail in there. So if you over saturate things wherever the images Mork the most colorful, you might start to lose detail. It's called saturation clipping, and there are a couple different ways to figure out when it's happening. The first is to go to the window menu and open something. Noticed the info panel. The info panel will show you a bunch of numbers. You want to look at the numbers that readout RGB. If you move your mouse on top of the most colorful area of your picture and you look at those numbers, if the numbers have not reached their their maximums, the maximums at the lowest range would be zero, and at the highest range would be to 55. If they have not hit those numbers, then you still have detail. But if you're saturating your image and you move your mouse onto the most colorful area and you notice that any one of those RGB numbers has hit either to or his hit zero in the most colorful era of your picture, then you're most likely losing detail there, and you might want to back up back off on your adjustment. So if I take this particular image and get that info panel to be open, put it up here and I start bringing up my saturation and I put my mouse on top of this. If you look in the Info panel at the time you're making an adjustment, you'll find that there are two sets of numbers. The left set is what your image had before you applied the adjustment. The right hand side is what you have after. And do you see the top number under RGB where it hit 2 55? That means it maxed out, and it means we're starting to lose detail here. You'll also sometimes see it hit zero in this part. Do you see where the one for green Fergie has hit? Zero. Where is before that It wasn't it. Zero. When it hits 2 55 or zero, you're starting to lose detail. So how might I use that? Well, if there was something in my image that was important, that was really vivid. It's ah, flower or something like that, and you can see the texture within it. You can see the veiny kind of appearance within that flower. Well, then, when I have saturated, I would saturated to the point that I visually like it. When I'm done, I would hover my mouse over it and see what happened to the RGB numbers and just see, did they hit zero or hit 2 55 And if they did, I might need a zoom up really close to see if the detail is gone and to see if that's a problem if it is a problem that back off on it. But it's what's known a saturation clipping. There is another way to tell if it's happening, and that is, if you go to the window menu, there is a choice under here called Hissed a gram in In the History Graham saturation clipping will show up where I don't care what the shape of the history ram is over all this bar chart. What I care is the absolute ends. If you have saturation clipping, you'll have tall, colorful spikes on the end. Tall, colorful ones. Do you see the green one on the far left and the red one on the far right. If I turn off this adjustment layer before they were nowhere near is tall. What? That tells me, as I probably already had some clipping mini and already lost a little bit of detail, just the original picture. But the process of doing this gave me more, and I don't care about anywhere else except for the absolute ends If I were to lower saturation in this image and I still have that available, you would see that eventually those spikes would go away. This spike is not at the end. It's near the end, and so it means it's no longer clipped on either side. So I would mainly look at that when you are doing something critical where whatever the object is, it's very colorful, and you need to see the detail in it. I mean, who cares if the logo and you don't need to see any detail on that? But if it's a flower and you could see the texture just when you're saturating, move your mouse over there, see what's going on and see if you unknowingly ah, lost some detail there and it doesn't mean you have to always have detail. It just means when you know you've lost some, zoom up and see if it was important and you could turn on and off your adjustment to say, Was that detail more important than having it this colorful? We're not all right, more about adjustments. Um, if you adjust in an image and your original photo look pretty dark like this one in the shadows looked relatively dark. If you end up adjusting, it doesn't have to be in camera raw. But I'd usually start all my images in camera, and you end up bringing up shadows to bring out a good amount of shadow detail. If you ever max it out, bring it up to 100. Then you need to do some extra steps on your image on most images. If you ever bring this slider called shadows up to plus 100 don't think you're done first off a tip, if you will wish it could go higher if you wish you could bring that up to 120. We can cheat. Weaken acts is if we can push it that far. If you ever max out the shadows slider. Just go up to the exposure slider and push it the same direction. You wish shadows would go until your shadows air as bright as you'd like him to be. And then the only problem with doing that is the exposure slider affects the entire picture, and if you are using shadows, you were usually expecting that toe Onley affect the dark areas, so to compensate you bring the shadow or the highlight slider down a little bit. Bring the highlights back to where they used to be. Anyway, if you have your shadow slider ever maxed out, always zoom in on your picture and inspect the dark areas. If you ever have it up to you're gonna find that you're gonna have some noise in this image. I can see a bunch of noise in here. You see the noise, so any time you end up bringing it up 200 you're not done. The first thing you want to Dio is in camera. Go to the detail tab. That's when it looks like two triangles. And first we want to make sure we're not exaggerating the noise. Do you remember earlier I mentioned about sharpening and camera, and by default, it sharpens everything? Well, if you look at this particular portion of the wall that's being shown here, do you see any useful detail like the detail of stucco or stone or something that would actually be from the photograph? I don't always see his noise. Well, that means that with default settings, it's exaggerating that noise, and it's gonna look worse when you print it because of the sharpening, So the first thing I do is go to the masking slider. I hold on the option key click and whatever's white will be sharpened. When I look at the image I just stashed myself. Where is the useful detail? And I don't think it really any in this wall down here. This is all useful to you, telling to see shadows and highlights on leaves, and here where the edges of things are, that's useful detail here. There's a little kind of, ah, what may be a stain on the wall that's from this vent leaking or something. Then that could be useful detail. I hold on the option key. I bring up masking until the areas that do not contain useful detail turned black right about there. But do you see where the white still is showing up? It's in all those areas where the detail was actually usable. It was from the image itself, and not from the noise that the camera was giving me. So in this case, I needed to bring up my masking all the way to 75 which is quite a high setting now. If you double click on the slider to re set to its default, and if I do that, you can see the before and after. Here's before you see that pronounced noise. Here's after and if you can see it on this screen that well. But before it's more pronounced after, it's less that's just reducing sharpening. We haven't done anything to try to eliminate the noise yet. After that, the next need to come down here to the noise reduction section in right here there is a slider called luminant because there's two different kinds of noise you I need to get rid of. One is luminous where the speckles of noise air just changing the brightness of your picture, which is what we have here in the other kind would be. If the speckles you see in your image are different colors, then you'd be down here on a slider called Color. So I'm gonna bring up the Luminant slaughter and just see if I can reduce or eliminate that noise. Just it's not that I try to completely get rid of it. It's I bring it up and tell the image. It's not annoying anymore around there for this image, and now that looks a lot smoother to me. So the stupid move is when you're in camera, you grab this shadow slider because you have an image with a dark part of the image. Looks pretty are dark. You crank it to 100 which is fine to do, and then you click OK and you move on and you never zoom up to your image 100% view to notice the consequences of that. Because it's not that bringing shadows up cause the noise, it's the digital cameras capture more and more noise in the darker and darker areas of the picture. It's all hiding in those dark areas, but those dark areas looked like they were almost black, and so you couldn't see the noise once you brighten it up. So it's more of a normal brightness. It's easy to see the noise that was already in your picture, and we just need to deal with it.
Ratings and Reviews
a Creativelive Student
I loved this class - Ben is a really good teacher and the class is full of great easy to follow advice.
Bonnie
First off, the title cracked me up. The course was very good, easy to follow and Ben's a great instructor.
user 12004e
Excellent! Much better than I thought it would be. Invaluable.