Making Your Quilt Sandwich, Part 1
Lesson 14 from: T-Shirt Quilting: Warm Up With Your Life StoryDiane Gilleland
Making Your Quilt Sandwich, Part 1
Lesson 14 from: T-Shirt Quilting: Warm Up With Your Life StoryDiane Gilleland
Lessons
Day 1
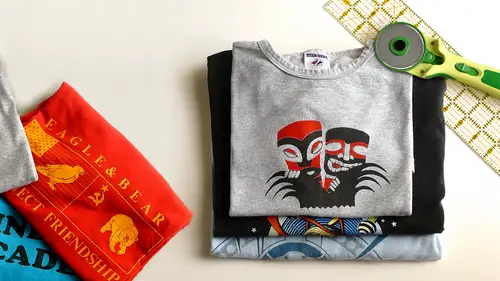
1Turning T-Shirts into Usable Fabric
28:15 2Organizing and Measuring Your Patterns
19:51 3Building Your Quilt Skeleton
25:03 4Stabilizing Your T-Shirts
22:28 5Creating Quilt Blocks
33:40 6Quilt Design Process
31:22 7Sizing and Layout of Your Quilt
32:42Sewing Machine Basics
19:22 9Sewing Odd-Shaped Blocks
10:35 10Sewing Your Columns Together
18:52 11Cutting Your Sashing Strips
24:49Day 2
12Planning Your Backing Piece
23:49 13Cutting and Sewing Your Backing Piece
26:09 14Making Your Quilt Sandwich, Part 1
28:07 15Making Your Quilt Sandwich, Part 2
19:16 16Tacking and Tying
34:48 17Seam Quilting
30:00 18Creating Your Binding Strips
26:11 19Attaching Your Binding Strips to Your Quilt
36:30 20Finishing Your Quilt
30:54 21Hand-sewing the Opening Closed
29:20Lesson Info
Making Your Quilt Sandwich, Part 1
So while you're finishing that I will talk a little bit about batting then if that's ok most of that is listening and then we'll all cut our sample batting in a moment so the batting is the layer of the quilt that gives it its warmth because it's ah it's just a nice thick mat of pressed fibers that as you wrap the quilt around you or you cuddle under it will trap the heat from your body in between the layers of fabric batting all obviously is also the thing that gives a quilt it's nice cushiony texture for t shirt quilting what I like to dio is I like to use a low loft cotton batting there's actually many many different styles of batting in the world somewhere made of polyester somerwill bad ings some are quite thick some are very thin like this one and they all have different uses and different quilters prefer generally different kinds of batting for this style of quilt because it's already pretty hefty because we've stabilized the t shirt fabric so much I like to work with a pretty t...
hin batting because I don't want to add too much more dimension and make it extra heavy so the brand that I highly recommend for this kind of quilting is from a company called warm and natural and it's called uh well actually any of most of their batting zehr great, warm and natural I'm sorry that's why I'm having a brain blip there the name of the company is the warm company in the brand of batting is warm and natural so this is an unbleached cotton and it's been needle punched which is probably pretty hard to see in the camera but there's a little bit of a texture to the surface of this what's happened is they've lane the fibers out and then they've punched them with a siri's of needles and that helps fibers bond together and that helps keep this batting nice and stable and the warm and natural has also been pre shrunk which is a feature I really love about it so I don't worry about pre washing the batting at all I just buy this prewashed batting and I can use it with my prewashed fabrics and I've never had any issues with shrinkage at all if you're a quitter that likes a thicker batting there's no reason you can't use it in your t shirt quilting it's absolutely legal to do so some people just like a puffy or quilt I would say in that case you know follow whatever instructions come with your batting in terms of how it's to be laundered some bad things they really do want you to pre wash and also your batting will always have instructions on it that tell you how densely it needs to be quilted in order to keep the batting stable through many washing lt's so when you buy any brand of batting always examine the packaging and get that million many of them are like between three and six inches depending on the kind of batting that just follow the manufacturer's instructions there okay? So far, so good so for a quilt you're a batting like you're backing needs to be about two inches larger than your quilt top and luckily with batting we don't need to worry that much about the question of grain at all so we get teo use the very simple method here of using our freshly cut backing a little bit like a pattern piece I'll just spread this batting out on the table or if I were working at size I would spread it out on the floor you want to get everything is flat as possible and then we'll just cut with scissors to match the edges of the two pieces it's a good moment to mention that you can buy batting in two different ways it comes packaged in many stores in pre cut two sizes that match standard bedspread sizes so like twin full king and queen or some stores sell it on immense rules and you can roll it off and buy it by the yard. Either thing is just fine when I make lap quilts with t shirts what I usually do is all by a twin size pack which will easily give me enough batting too give me that thing for a lap size quilt and then I usually have a little bit left over that I can use for extra things like the extra projects I came up with for this course the pet quilts and the pillows and the trade it's stuff like that so I like using that method because I like having extra pieces of batting around. Another thing you khun d'oh is you can actually peace smaller pieces of batting together so if you have made a couple of t shirt quotes and you have a couple of almost big enough pieces of batting left over but not a single piece of batting that's the right size for your current project you can always go ahead and so those together and just put them in the center of the quote since there in the center of the quote, nobody will ever know that it's been pieced it's very easy to d'oh it's just a matter of placing the two layers side by side and you're selling machine and selling as exact stitch over them or a lot of times I will just so that six eggs stitch by hand it actually doesn't take much to hold the pieces of batting together and since you'll be doing quilting and binding, those really do the work of cementing the two pieces of batting together so the seam that used to sew them together in the first place it's not that important structurally if that makes sense and you know if my batting hangs out a little bit on some ends that's all going to go away later in the process it's not a big deal at all because you're obviously using free scissors there which we rather the cutting tools so you don't have to be so precise with this with the batting you really don't I figured you guys have had enough precision for a little while, okay? So we will have our backing and are batting to the same size now, right? And then we'll have our quilt top, which is slightly smaller, so a couple points to make about what this means at full size, right? So this is very ergonomically nice to be able to do this in one shot on a tabletop when you're working with an actual size quilt it's you're crawling around on the floor or maybe if you have a couple of big tables like this, you can put him side by side and create for yourself a big enough tabletop toe work with but it's a lot to wrangle. So you definitely want to not rush these steps of your quote process because you're going to be spending a lot of time smoothing fabric and trying to get these pieces to align correctly just placing a quilt top in a centered way at full size on a piece of stacked backing and binding is itself a kind of a big project because the pieces of fabric or heavy and unwieldy so take this slow and never russian when I'm when I'm working at this stage of a quilt, I make sure I don't have anything else I'm trying to do with that time and really give it my full attention. Why don't we go ahead and let's sandwich this quilt up? We have enough time before our break so here's, what that looks like we're going to put these three layers together in the exact configuration that they're going to be in in our final quilt, and then we're going to hold them together in a temporary way so that they can move together in the quilting process without coming apart or shifting. So as I mentioned before, I typically do my quote sandwiching at home on the floor, and I do a lot of crawling around. You can also use a big table if you're going to work on the floor super good idea to run the vacuum or sweep a little bit before you start putting your beautiful fabric pieces down and make sure you have a work space where you khun move around the entire perimeter of your quilt, so if you're working on the floor, make sure you can crawl around the whole thing because you'll want to reach it from all angles. So let's start with the backing because that's the first layer we're going to put down you want your backing to be very wrinkle free for starters because once we've built this quote sandwich, we basically can't really make any additional changes to the quilt like we're getting into permanence now and so we want to make sure each piece is ready to be quilted when it gets laid down so let's press are backing nice and flat and this is where the question earlier asking if using water to get fabric very, very flat is a good idea and when you're at this stage of the game and you want to get all of the wrinkles out of a backing fabric that's a really good time to employ a squirt bottle or a little spray starch or something to really get this is flat is you can't michelle giant do you ever use it spray do sieve to hold everything in place when you put your layers together? I'm glad shell that you brought that up actually, because that is one of that is a different method of basting that I'm going to show today it's not one that I used personally um but let me explain that in just a moment in the context I think that would be better is great, okay, all right, so here's my wrinkle free or mostly wrinkle free backing fabric what you want to do is get this very, very flat and here's where I love to employ a little bit of low tax painter's tape the pieces that you guys were working with here in the studio are plenty small enough that this step is not necessary for what you're working on, but for any full size quilt laid out on the floor on a table, this is dandy. So what? I d'oh it's, I just start with a piece of tape and I just literally tape down the edge of the backing. I tape it right to my carpet at home, you can tape it to any hardwood or tile floor. This tape is very non damaging. It's it's a low tap tapes will won't hurt anything, but what it allows you to do is allows you to just lightly stretch your fabric so that it's nice and taught. So I began at the top and bottom relative to me, and then I begin the two other sides at their centers as well, and so I'm just taping down. I usually tape the first piece, right where it's sitting in the health stretch the second side just a little bit, so see how nice that's getting in the center and then I'll do the corners. Okay, so that's looking pretty good and if you need to, you can also come in in the spaces in between those initial tapes and just do as much taping as you need tio to get it nice and smooth. And if we were working at full size, I would definitely be using all of these pieces of tape because a bigger size pieces a lot harder to get wrinkle free like this. Here's, another very important piece of this puzzle that I really should have mentioned before I set it down, so everybody make sure that you're paying attention to this. This backing fabric must be faced down at this point. So if we were working with the giant backing that we made earlier, what that would look like this once we spread it out way, we'd be looking at the back of the scene like that because you definitely don't want this hanging out on the back of you finished quilt. This needs to be to the inside, right? Everybody's ok, with that right now that we have the backing down of our sandwich, let's, add the second layer, which is the batting. So this is another good moment to make the distinction of working at full size versus working at this small sample size with the sample pieces of course very easy for me to just go oh look I'll just lay them on top of each other and that's all there is to that but when it's you know, seventy by ninety inch piece of batting that's a very different universe so I'll show you the technique I would use if I were working at size because it's a better illustration but before I can put that batting down I need to get it wrinkle free just like I did with the backings you want to have every layer is nice and smooth and flat as you can get it so go ahead and quickly pressed the wrinkles out of this batting material is well I would use backing materials that could have any impact on the fabric that's a really good question of whether to add steam to the batting I typically do not simply because I feel like it makes my iron stick a little bit not literally stick but the steam sort of hangs it onto the backing I find that it's a smoother experience of pressing when aiken just slide the iron around like this but I bet there are a lot of cultures are out there that would disagree with me on that and I think either method is pretty legal so when you're working at full size this pressing that we're doing takes a very long time so making a quilt sandwich is not only a pretty long time consuming activity it's fairly athletic one as well generally with a large piece what I do is press in sections of since we happen to have a nice giant piece of backing here let me show you what that would look like a full size I would basically take as much with as I could fit on my ironing board I would start at the top I would press the section I could fit on the ironing board please note that I'm doing this very rapidly and incompletely so that I don't take too long to do it but I would cover this whole section and I would get it wrinkle free and then I would advance it down a little bit like so and then I would press the next section that fits on the ironing board like so and then I would advance again and do that again and then I would have the other sides when I would bring that around and do the same thing on the other side there are quarters in the world who have made actual ironing table so they'll take a table top this size that I'm working on for demo and they'll actually put padding and stretch fabric over it and then it becomes an entire ironing table which is like do you have that wooden floor and an extension cord? So I I can't be on a carpeted floor no on the floor. Do you put any padding on your hardwood floor? But you've never heard your floor, so it can't be bad it's like behind two years all they figured a tunnel out of there you go all right, so here's, my batting, which I've pressed out now again, this is super easy tow line up, but if I were working with a full sized piece of batting, what I would do is I would full the big monster into quarters like this suddenly that becomes a lot easier to match up with the backing because then I only have to match up this much of it and then I can unfold it and unfolded from that is way easier both sides of the batting does it matter which sides down on a rich sites up? I have never found it to matter which side is down or which side is that? I'm sure if there's quilter author who disagrees, they'll let us know because you know there are a lot of quilters who go much deeper into the technical process of this than I am in this class, so if you if any of you have suggestions on which side of the batting you prefer to have that please share we'd love to hear it the's air excellent deep questions you guys are asking in the studio by the way really appreciating that. So then the next thing you're doing when you're sandwiching is an inordinate amount of hand smoothing when you're operating at full size imagine yourself crawling around all around this quilt and doing this for a very long time and that's what it looks like a full size interestingly, I use it iphone out where I was like a fitness tracker, so I track whatever you guys are walking or whatever I did that day and I am so mad that there is not an exercise entry for santo shake it quilt because there should be it's an athletic activity for sure. Now the last thing that goes over this, of course, is my quilt top and generally speaking by the time you're a tw sandwiching stage your quote tops been folded up and stored somewhere for a little while, so it's generally got some recalls in it and so guess what that needs to be pressed as well? You can press from the back of the quote if you want to, but sometimes I find it easier just to get out my pressing cloth and press from the front and I do the same thing as I just did with that big old piece of backing fabric I do it in sections and just as with the full size batting and the full says backing pressing this big quilt stop peace at full size takes quite a long time if you were to have deep wrinkles in any of these three layers before we sandwiched them and you did not press them out what's likely to happen is that your quilt will just end up with lumps and bumps in it and when your machine quilting in particular you can end up creating sort of pleats and little folds and nixon your quilt that air kind of unattractive. So that's, why we go to all this pressing trouble while we're putting these layers together? How are students doing for you? Kind of because I'm a little bit wider than that. So does that matter? It's like that pirate thing? It's really more of a guideline? Okay, if I were doing much fancier quilting, then we're going to do here lot of quilters actually use a three inch margin instead, so if we were going to be very dense, feathery, swirly quilting, we'd want even more fabric there. Yeah, they're going another way if you're gonna quote to the professional level that's why you need that al I d or lee added maybe apologies they haven't announced that correctly does the ironing the batting make it less fluffy and therefore will the quilt be less fluffy we've got a follow up question them from another viewer saying, do you ever put the batting in the dryer with a damp try? She to take out the wrinkles to keep it fluffy? Uh, second question first that's a dynamite idea I've never even heard of that. I'm totally going to try that at home now, and the first question doesn't make it less fluffy. No, I have never experienced that. Now I use a low loft batting so it's already not that fluffy. If you were to use a thicker or like a polyester batting that's a whole other sack of potatoes in terms of pressing because a because it's plastic you I certainly don't want to put a hot iron right down on it. I would recommend following the manufacturer's instructions for that manufacturer in that case may very well recommend the dryer sheet method something without an iron to get the wrinkles out. And then what I find is the wrinkles just come out of this cotton batting and it doesn't lose any loft at all. Okay, so we have our top that's ready to go in the middle, and once again, if we were working at full size, I would do the exact same thing with the quarter folds it's, just so much easier. To get this sort of two inch placement if you're only working with a quarter of the quilt at a time you know another thing I've seen people dio instead of that because I've seen people actually roll up their quote top so again this would be like a very large rolling project but then you can place the role at one end and unroll it so either of those methods is fine you can also try to do this with a giant full size quill I'm just saying it takes a long time to do debbie shaking her head no way how do you know what how do you do with sandwiching deadly what's your favorite method? Well, I'm I'm following along here and I'm thinking, you know, I pretty much do it the way you're doing the doing the layering and quot into quarters and yes, I crawl on the floor to kind of sort nobody has a table that big right wait you have a gardening tip? Yes I love what that, um have you ever heard of a product called mary ellen's? Best press it's kind of a light alternative spray starch okay and it comes uncensored for those who can't deal with sense and it comes scented in all sorts of flavors which is always fun minus favorite ocean breeze and spray it on your seems as you so and it makes your seems more chris and I even press I don't pre wash my fabric that question came up earlier. I don't pre wash unless anything else in the quote had to be pre washed like the t shirts so yes, he would pre wash the back but then I would spray it with best press and that gives it a crisp and it makes it easier to cut and it makes your seems more accurate and it's just the lovely and it smells great. Makes your son room smell really good, so I use it to press everything along the way. Mary allen's best mary alice best. So where do you find that to pick little stores? Yeah, I don't. I haven't looked in big box stores, so I don't know if they carry it, but it comes in a little spray bottle and then you can buy the refills by the gallon. Oh, that's what I do that's great. Thank you. Yeah, it really didn't you susan brought it to her last week off some. Yeah, it's really nice way to keep your fabric nice and crisp so whenever you go to so everything goes together much easier. That's great. Thank you for sharing that you love that, say that's what I mean, like everybody has these great it's and there's, so many quilting products out there and yeah, there's, that it would take a lifetime arm or to even try I'm trying to buy them all a little bit of it, you're working, I'm working about it, that's your goal? That is an admirable goal, but so I want it. I want to come back to the question about spray binding, although I'm gonna wait to take the basting step with this quote sandwich until we do have our break. So let me give you the tiniest preview by saying that the basting method I'm going to show you in the next segment involves using good old safety pins and that that is just one of a myriad of ways to based a quilt. Basting is just a matter of taking these three nineths flat layers we've created and temporarily holding them together while we do our quilting and are binding steps. And so the basting spray that was brought up by a comment or a few minutes ago is one of the many ways that you can do a basing its a low tax spread, he said that you would spray down as you were laying these layers out, so when we put down our backing, would spray that low tax free on it and we'd lay the the batting down, and then we'd spray the low tax spray on the batting and we lay the top down. And then we wouldn't have to do any safety, pinning or any other kind of basting because those layers would stick together, and then the first time you wash the quilt that spray will wash away. There are many quilters in the world who adore this basting spray. I personally don't use it because I work on a carpeted floor, and I don't really like the idea of the over spray getting in my carpeting and I have a cat with very long hair that loves to lounge on, said carpeting, and I don't even want to think about like the cat hair stuck to the carpet implications of that many of them are made to have low fumes and be environmentally responsible. There's a lot of different kinds of this product on the market, so absolutely, if you know you have a hardwood or a floor that you can mop after you're basting process feel free to give it a try and know there are a lot of people who really dig that stuff, so and I think jake here that's a pretty good place for us to pause for our break. There any further questions coming and I can answer will do that to appreciate all the questions thank you so much for everything you've been sharing not only in the ask tab but also in the chat rooms that can has been working very hard behind the scenes today it's always great to have a with some creative life here in san francisco and she's been helping you with your questions and keeping coming we'd love to hear from you definitely not the next segment we're going to be talking about tacking tying and the actual scene cruelties what's coming up next yes so we're going to we're going to start the next segment by pin basting this quote which will not take very long and then we're going to start launching into three different methods of quilting and I've tried to choose three that are, you know, arrange from no special equipment and very easy to do by hand on up to a little more challenging and we're going to have to do some machine wrangling and some quote wrangling so that way you'll be able to pick the right thing for your quote project and you can even mix and match these techniques according to what you like to do so we'll have fun and well quilt are quote tops together in the next segment we got a lot more comfort looking forward to this subject looking for to see the sandwich or coming together we lost our overhead cam there, a second book, so maybe we can throughout the course graphic there for just a moment. But so is looking really good. I mean, just coming now. The tie dye. Nothing you've used here's really called some looking for to see this one coming together. I do love a good tight. I sure doesn't is right.
Class Materials
bonus material with purchase
Ratings and Reviews
Arlene
This was a really fabulous class with an excellent instructor. It took us from a pile of t-shirts through every step to a finished quilt. There was a lot of time spent in design which was great, since t-shirts are highly variable in color and design. The second half of the class was all about basics, including information on backing, batting, and quilt top. Then making the "sandwich" with several options on basting. And then quilting (fancy, which was discussed but not included), hand tie and a couple of machine quilting options. Then binding. Each step was explained and demonstrated. Options were very often given, with easy, non-stressful techniques encouraged. This was a excellent class and the instructor was really awesome. Questions were anticipated and thoroughly answered. The instructor was always helpful and pleasant. This course expects some basic sewing machine knowledge, but you definitely do not have to be an quilting expert to enjoy this class and end up with a wonderful quilt.
user 08dcb9
Diane Gilleland is a fantastic teacher. One of the problems I always face with quilting classes is that the teacher seems to forget that everyone is at a different ability. I love the way Diane goes slowly enough for beginners while at the same time adding tidbits of information that even an experienced quilter could appreciate. Her "laid back" approach is appealing and non-threatening, which made for a very comfortable learning experience. It is such a wonderful idea, to be able to save the memories of your t-shirts, by making them into a comfy quilt.
user-33438f
Diane was fantastic! I am fairly new to sewing and have taken a tee-shirt quilt class before, but Diane's class was so much more informative, helpful, easy to understand and professional. I can't say enough good things about the class and how impressed I was. This was my first visit to creativelive, you can be sure it will not be my last. Thank you