Lessons
Lesson Info
Blend if and Vignettes
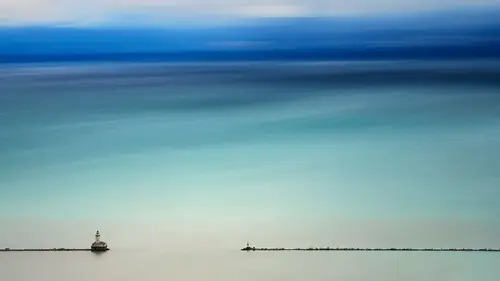
This is in Saint-Emilion in France, this is a really cool little town if you're ever out in the Bordeaux area. It's about forty minutes out, it's really awesome. It looks like this, obviously, because you're seeing it, but it's got a fifteen hundreds' feel and a lot of the newer age businesses that are in there have, their signs aren't, it's not like they've got a McDonald's sign just sitting there in the middle of the city, we don't really see that here in America. I like to do vignettes and I like to do my own custom vignettes, I don't really like to use the typical vignette that you would see in Adobe Camera Raw or Lightroom. I like them because they have the ability to protect my highlights because you see a little highlight protection slide, or as you move it up, your highlights show through, but it's still not what I can do and I know that. I'm going to make a new layer here and I'm gonna press Shift F5, if it'll work. Shift F5. On this laptop, my Control button and my Shift butt...
on are the same size. Shift F5, and I'm gonna fill that with black, press Okay. I'll start with a black base, this is essentially the vignette because vignettes are a deeper, darker tone. I'll start with black, I'll even label this Vignette, not spelled like it sounds, I can spell it today. Vignette, and I'm gonna put a mask on there. Press B for my Brush tool. You're gonna paint with black on a black layer? Well, I'm painting with black on the black layer to reveal the stuff underneath because that's what a mask does, so I'll just paint right here, just boom. Maybe I'll use my mouse for this so I don't have the lock on Effects there, something like that. That's a really good vignette, right? No, no, there's more. I like vignetting that happens from a lens. I actually don't correct for that, because I think that natural vignette looks really nice, but sometimes I take it to another level or, if there's an image that doesn't have that vignetting from the lens on there, I will put that vignette on there. I do it manually like this, I'll drop the opacity of this to about here, but the whole point of a vignette, you want the viewer to get absorbed into your image, you want them to just fall in it, love at first sight. There was a vignette around my wife when I met her, that's what we want in these images. We want it to be subtle, this still isn't that subtle. What I suggest about vignettes, if you use vignettes, if you're not comfortable with using them or if you don't have an action already built to make this automatically for you, is make the vignette, walk away, go get some coffee, come back and if it looks like you used the vignette, drop the opacity a little more. It's still a little too high, drop that opacity a little more. Now I'm going to double click on this vignette layer and what am I gonna use? Not Bevel and Emboss, this is a Blend If class, come on now. Get with it, we're going to put that color overlay on there so we can see, this mask, we started with pure black. We dropped the opacity down to about 30-something percent, and now we're going to use Blend If to specifically protect our highlights, so I'll go to the blending options, I'll bring this down. The reason why I protect my highlights and I protect them really hard is because, has anyone in here ever done HDR? I used to have a whole blog devoted to HDR. I was an HDR junky, it was called everdayhdr.com. I could not get enough of it, it's when I fell in love with photography, but now I know there's certain things you just don't do with HDR, one of those things is taking your highlights too far because it creates something called tone compression where you're trying to tell Photoshop, or whatever it is that you're using to make that HDR image, that this area of white, we need as much of it as we can, but if there's nothing there, it's gonna start adding a yellowish tinge to it and look like a yellow snow type thing and we know to avoid that, so what we need to do with this is the same thing with the vignette. If we just put a vignette over top of a highlight and then protect the highlight, that highlight area is gonna start getting some of that dingy quality to it. To protect that highlight, we bring this down and we press Alt or Option to split and feather that over. Now, the only place that vignette is affecting are the darkest dark areas, transitioning into the mid-tones with a nice split and feather across the way. We'll press Okay on here, we've got the color overlay on there so we can see it, and now is that vignette as evident? Not really. The cool part is this, if I put a Curves adjustment layer on here, this is so cool, and I turn that on, watch what happens, see how that vignette starts to get stronger because now this vignette is like a hybrid, it's fluid, it's liquid, it's saying, "Okay, as this changes I'm gonna to change, too, because that's how cool I am, because I've got Blend If attached to me, I've got that magical pixie fairy dust, whatever you want to call it," it says, "You can do anything you want as long things are darker or lighter underneath." It has a mind of its own, essentially, it just follows whatever is underneath it, it gets darker and it gets lighter along the way.
Ratings and Reviews
Teresa Trimm
Wow! Great course!! Lots of good information about using Blend if. Blake has a great sense of humor and he makes the course fun and interesting while making sure that you learn something that you can use. The course was created in 2018. In 2021, this information is still very valid and helpful and I definitely recommend it.
Robert Staser
Super helpful! Another powerful technique made easy. Blake is super laid back and throws wonderful bits of comedy in with the class!
David Rachlin
Photoshop has so many features, it's hard to wrap your head around it. But Blake Rudis explains things so well, and with such a delightful sense of humor, one cannot help but learn something terrific. The "Blend If" function is powerful and useful for so many photographs. I will most likely watch the lessons over and over again as I experiment with my own work.