Lessons
Introduction
03:09 2Gear
26:41 3Aperture, Shutter Speed: Knowing Your Camera
04:53 4Shooting at Blue Hour
01:34 5Creating Harmony
04:54 6Conveying Emotions
04:14 7Telling Stories & Developing a Personal Style
06:30 8Staying Motivated & Pushing Past Creative Blocks
12:32Trip Planning & Location Scouting
13:16 10Field Day: Working with Models
18:08 11Get Out & Shoot
01:54 12Pre-Shoot Prep
01:49 13Transferring Files & Making Selects
11:37 14Editing Part 1
19:49 15Editing Part 2
27:18 16Instagram Carousel
06:19 17Masking
04:28 18sRGB vs Adobe RGB
05:55 19Presets: Switzerland
12:06 20Presets: Iceland
19:50 21Presets: Desert
11:57 22Phone Editing
04:29 23Archiving & Online Backups
02:35 24Delivering Files to Clients
07:15 25Develop Your Style
00:56 26Managing Your Life Budget
05:08 27Building a Solid Portfolio
10:55 28Ad Agency vs Client
02:09 29Finding Brands That Fit You
06:59 30Talking To The Right People
09:07 31Creating Value for a Brand
03:12 32Saying No
01:53 33Getting What You’re Worth
09:49 34Paid To Travel The World?
01:18 35Decks & Moodboards
04:42 36Taking Steps to Accelerate Your Career
01:45Lesson Info
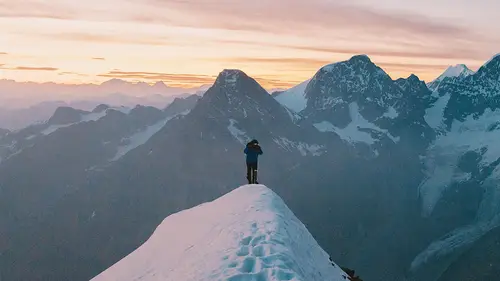
Presets: Iceland
(bright, airy music) (shutter click) So now I wanna talk about editing a portrait. It's a different animal as a landscape. First off, it's different because you're dealing with skin tones, you know. This is Benjamin Hardman from Iceland, he's a good buddy, and I chose this photo because it's very flat, flat light, and it's challenging for some people to edit, so I wanna show you how I do it. You gotta be careful with how you edit your reds because you're gonna affect the blues. So if you go crazy on the blues, his face may become red, and we don't want that. So, let's get started. First off, always what bugs me is a photo that's not straight, I don't know why. Looking pretty straight now. (hums) Maybe you should look at, you know, the two ends of the ruler, based on the horizon line. We're good. So he crops a little bit down here, but we don't need to show his camera anyways. So this crop is pretty weird, there's a lot of sky. So I'm gonna go ahead and make it four by five already. T...
hat'll be more fun to work with. I'm gonna go ahead and align my upper third on the horizon. Now I like having his face here, his eyes just near the corner of my top thirds. Yep, I like that, and leaving a lot of room for his eyes to go somewhere, you know, we don't feel trapped. So there's a lot of room to his right, 'cuz he's looking that way. Simple, but important. And I don't wanna crop this thing. Let's go. So, first off, white balance. I can probably use this here, the white of the boat, there you go. I usually go with pretty straightforward white balance, the way it was. Bringing these highlights. So we see what the shadows do to his jacket, they just make it pretty dark. So we go ahead now, and as you go don't get too bogged down about how it looks. You can fix that with the curves again. You can fade this and just it'll look better. So we're noticing something, his face is becoming pretty red. That's fine for now. He'll just be a redman for a little bit. My blacks look better now. We can move on. So here, his face, I wanna fix it right now. Get this blue, this hue towards something more lighter color. That's more accurate. I'm gonna play with the water. So we're good, it's not affecting his face a lot which is good. There's not much red in it. I wanna make this water pop, I just like when my water pops. I love blue. Luminance, I don't touch much. Just back to my curves again. Hustlin'. (mouse clicking) Alright, my highlights. I usually tend to make them blue, it's a pretty blue moment so I'm gonna make it real cold. He was cold on this boat, right, and I want people to feel that. Alright shadows, really don't wanna warm them too much, maybe just a touch of yellow. See what it's doing to his face, I'm good. That's too green. And again I just try to edit as fast as I can, 'cuz I wanna move on and go shoot, but, I'mma take it easy here. (mouse clicking) Yeah it's making his face a little red. We're gonna fix that after, with the Radial Filter. But honestly, I don't want too much of that. I still wanna cool this down a little more. That's better. Sharpening. It looks just a little motion blur. It was shot at pretty fast shutter speed but it's just a moving boat in the middle of a storm. Sharpen this a little more. Putting a bit of masking, always. Okay, now I don't wanna touch my profiles, I like this vignette down here, see, it's just crazy what it's doing. I'm gonna leave this as it was, I like this darker spot here. Leads us straight to his face. See he's becoming red again (laughs). I can balance it here a little bit, oof, now he's sick. (mouse clicking) Pretty good shape now. Alright, let's fix his face. Still too much going on on the colors. Double click to reset everything. Lower my clarity here. And I don't try to, you know, to be 15, 16, 18, 20 dm. I don't get too precise on this, because the goal is that I just wanna make it a bit more abstract. More grainy, bring some sharpness into his face. Fix the color. There you go. Take some saturation down, maybe cool it off a notch. Oof, no. Just a little. I'll play with my white balance, see what it does. It's between red and sick, so, let's just keep it. Good. Alright. Maybe bring here a bit of contrast. Just want that face to really pop because it's what makes this photo, it's his prepared face. (mouse clicking) I bet Dehaze will do something. Nope. (mouse clicking) I feel like we got the face to pop out a bit more. I do love this light up on the beanie, and I wanna work on that, because I think it's beautiful, the way the wool takes the light. Again, I'm gonna reset everything here. I just wanna make this pop a little. It's worth making it pop. (mouse clicking) Yeah, like that. Let's see the difference. You know, just more texture up there, I love it, 'cuz it's wet, it just shines well. Kay, now, I'm gonna finish it off with some creative filters. There, we see the light's coming from pretty much everywhere now. Bright. So Dehaze just gives us bit more texture in the back there, which I like. And then I'll blow it up a bit. I wanna keep it even. Yep, maybe a little brighter. (mouse clicking) Yep, we're pretty good here. I'm tempted to add some grain. Dunno why, I just feel like it's already a bit noisy, I wanna add a bit more of the grain. (mouse clicking) I like to have my roughness at zero. I don't like big grain. I just wanna give a bit of texture to it, just a little more. Yep. That's pretty subtle. And people have different ways of adding grain with masking, but I don't wanna spend, but I like to keep it pretty simple. Don't wanna spend too much time on it. So overall I'm happy, I think his face needs a bit more, we just need a bit more punch in this image. Right here. Yep. Like this. Alright, let's finish it up in Photoshop. A couple of things that attract my eye: this red thing here, this thing here, and this antenna is not too bad 'cuz it kinda parallels the direction of his body. So we'll try with and without. First, I wanna get started and get rid of this thing here. With my Stamp Tool, I hit S, make it a little smaller, my harness pretty low, I just hit Alt, select my source, so it's a pretty straight line, so I can't really go wrong. So it's not the same darkness here, you see, but don't worry about it for now, and that's just because of the vignette of the lens, that we have this issue. We can balance it after with another tool. Alright. Pretty rough as we can see. I like to hit my Patch Tool here, this one. And then... (mouse clicking) Oh man. Maybe we were a bit ambitious on that part. Alright, that's fine. It's all trial and error. See how this does. It's not doing a very good job, let's see. And we see it because we're pretty zoomed in, let's see when we zoom out. Yeah no, we can still see it, see with the Stamp Tool what we can do. (mouse clicking) Honestly, a pro editor would be like "no", but, with some stamp toolin', I feel like nobody's gonna notice this. (mouse clicking) And we can spend, you know, 15 more minutes doing it, but, is it worth it? I mean I like the image, but I don't think anybody's gonna ever notice it. We've been pretty close. We don't look at it, we'll look at here. So, up to you, depends on your style, you can spend time on it, you could not. If this is gonna be printed on a bus stop, maybe you gonna clean it up, but this is mostly gonna live online, and if I ever need to put it somewhere, I'll re-edit it. Now the rod. Same thing, it's not about being perfect on your first pass. You can Patch Tool it. Let's see what it does. Good job. And just here we can see it. That's worse. So we can go a little smaller. It's trying to sample from the sky and that's not good. Oof. This one, this two different textures meet, the Patch Tool is kinda lost. Let's see what the Healing Brush Tool does. There you go. That's better. This one, the Spot Healing Tool has saved my ass many times. I mean look at that. Perfect. So we can tell here there's been a line. Let's give it a little more. We can tell that it's a bit brighter there. (mouse clicking) Again we could spend a couple days on it. (sighs) (mouse clicking) I think we're in a better place now. I can still see the line when I zoom out. Let's bring back our friend the Patch Tool. (mouse clicking) This is the conflicting area. No, not working here. (mouse clicking) We really wanna get rid of this line. Alright, and you know, sometimes I get too crazy on a section, I feel like I can't go any further, take a break, and I go somewhere else. Get rid of this red here, for example. From the lens. Stamp Tool will be key here. (mouse clicking) And we're good. Alright. Take a big picture out of it. We can still see something up there, so let's just keep at it. (mouse clicking) Vignette always makes it interesting to edit these. (mouse clicking) Zoom out, how are we doing now? Better. So now if you didn't know this is here, we wouldn't see it. You could fine tune a little bit here, just going down so it's less obvious of a line, but I think we're good. We're done. So now, I kept Layer 1, Layer 2 with my bits, you can see the before and after. I like my antenna, you know, maybe I wanna keep it. In this case, I'll just make a mask here, and these. Have my B to get my Brush a little bigger, and draw on it, and keep it, while still keeping, you know, this is still here, this is still removed, the red is still removed. I like the antenna better. It just closes the image on the left. Alright. Now hit Command + Save, saving as a .tiff, and that's going into our Lightroom, right here, next to the other image. And Voila. So we can go ahead and, you know, we can go ahead and save this as a Preset, and apply it onto other images, but for the purpose of this I'll just copy the edit, and just throw it on a different image from the set. How about this one? (laughs) That's Christian, he's pretty stoked to be on that boat. It was a rough day there. Alright. So, a bit intense reds, but at least what I did is copy the edit from this photo, threw it here, and because the reds are a bit crazy here, I can go ahead and save them. But I wanna show you that you don't always have to do presets, you can always copy and paste your edits, I'm sure you do that. But if you don't, also a good way to save time, without creating another preset here. You don't want this to fill up too much. Alright, that's it for editing.
Ratings and Reviews
David Corrochano
There's a lot of useful information on how to start up your bussiness or your carreer as a photographer. Great advices, he shows his personal workflow, from the beggining of a shooting till the end. That was what I was looking for. The editing process maybe could be reduced in only one chapter. Worth it.