Lesson Info
8. Gallery Prints
Lessons
Lesson Info
Gallery Prints
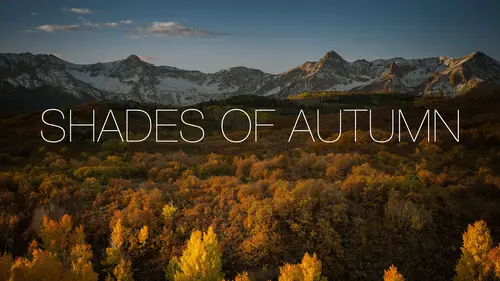
And last one so let's do a, let's do a little gallery print kinda like the one that I showed you earlier on in the class there. I'll open up a photo. Couple of little tricks for you here is if you're gonna do this type of a, a gallery type of a print which we're essentially adding a fake mat to the photo right? We're gonna add some white space in some area that we can sign below the photo. It's nice if you know, a lot of people do this online. Whenever they share a photo online they'll put this around there and it just gives a consistency to your work too. So we wanna put a white matter around that so what we'll do here is I'm gonna make sure that my background color, down here, is set to white, and I'm gonna choose the Crop Tool, and then I can go over here and I can extend the edges of the crop. Now, I can do it that way or I can hold down the Option or Alt key and extend them that way cause it'll do both sides, like so, and then I'll bring in a little bit more space down there at th...
e bottom. So now I've got some area for some text. Here's where we're gonna break one of our rules alright? We're thinking professional, we're trying to tighten up our space and everything like that well, you walk through an art gallery, walk through anything, any type of a fine art exhibit, and you will see letters spread out across everything. You know there's just something about the elegance of the letters spread out so we're gonna take that, that thing that we learned earlier on and we're gonna throw that away, and let's go down here, let's type in, I'll just type Kloskowski - I'll see if I can get my whole name in there. No this can be my last cause I just know it's not gonna fit. Move that down and then font choice, very, very important here. Of course Comic Sans is one of our go-to's, (audience member chuckles) where is it, (sutters) I might not even, maybe I don't even have it - there we go. I mean, you can never go wrong with Comic Sans so it's a (chuckles), no. So to me, you know, we can go script with this. I'm actually gonna go Trojan Pro is a nice one, nice little surf font there, and you'll notice one of the neat things about Trojan Pro is I type this in all caps but I just do my first, it kinda looks all caps but not right, cause it gives the first letter that you capitalized in there. So that's an option. You know what I feel like I gotta add my name into that, my first name. So now, here's some small little things that will help this look better cause I could just tell you I see these shared all the time. First thing that just makes it look like argh is it's big, okay? Less is more in this case so, Command or Control + T for your transform, change your font size, however you like to do it; less is more in this one alright? Small. Next one, go to our Type Tool. Remember how I said if you just press select your type here, just double-click, or double-click on your T Tool there, remember how I said just have to remember that keyboard shortcut so I've selected all the text, and now I just hold it down, and go all the way across the photo. Alright, there's something weird about about what it does to my T's. Maybe that's why, maybe that's why I didn't type in my first name cause I've done this before. There's just something weird about, look at what it does? It's gotta be something in the font that's why we're gonna get rid of it. If you don't have two T's in your name don't worry about it (laughs). So that's an option right there and I know guys, I honestly I would even free transform and make this a little bit smaller, and then go over here and just spread that out, all the way across the bottom like so. So that's one thing we can do with it. Another little trick you know, reduce the opacity, kinda blend it in a little bit. And then another trick that you'll see is to take a script font and kinda put it behind it with a really reduced opacity. So let's go, I'll just take my last initial K, and I'll use that Nautica. You guys know about the glyphs? So certain fonts, see this little bar that pops up down here? See what pops up next to it? So certain fonts have offsets, offshoots of their different lettering. So here's a K, I could go with that K, I could go with that K. I've found some really weird ones; let me type in the word N. Yep look at this. That's kinda neat too. I don't have a N in my name but if I did I might use that. So we'll go back over here to K, I really like that one. It's got the little curly thingy; it's the official term for that by the way. Alright so we take that, we go down here, it's still too big so free transform, kinda put it right into the middle there, and then drag it below your font, and then just reduce the opacity to help it blend into background a little bit, like so. And then this is nice guys because what you can do is you can save this as a PSD file and then just go open, find another photo here - of course I can't find another photo. Come on, alright, let's use that one. So just go open another, I can paste it in, it's obviously too big, although that looks kinda neat. Leave it, and then just kinda paste this in. You might have to change the sizing in your document but drag another photo in there. I can go to the Crop Tool, I can use the same little trick that I did before, add some space down here at the bottom, and then I have my type layers, I can just pop them down. So save that as a little template so you don't have to keep going in there and doing it over and over again. Maybe this is beyond the scope of what you have time for but I see type sometimes it's maybe just a white field, and some bold capital letters, and the image is showing through on the letters - do you know what I mean? I think I know what you mean. Do you like, Or is that like more complicated to you? Is it almost like they'll they'll hide part of the type behind part of the photo? No, no it's more like your photo is, the photograph is on the lowest layer, top layer is all white, but the letters are all knocked out so you're seeing the photo through. Oh! I can do it, well yeah that's a neat one here. I think I kinda know what you mean. Let's use let's use this one as an example. So we can go, let's take a, we'll do a blank layer on top of your photo and then we'll go over here let's... I'll do black, I'll fit it with black. And then I got that script, oh no okay. Let's go ahead and bring this in. I'm just holding down my Option + Left Arrow key. Then free transform it super big. Am I going in the right direction if I can make this, yeah. So we can free transform that, make it super, super big like so, and so we have a couple of options to do this. There's of course you can mask, you can try to mask this. The easy way for me to do this is I Command or Control click on the word Niagra, which puts a selection around it, hide the layer, go over here to your fill layer, and then so, the way this is gonna work is is if you have a selection, if I add a layer mask, what's selected stays. So what's gonna stay? If I add a layer mask right now, that stays right? But if I Option or Alt click the layer mask, the reverse happens. So something like that? Mmmhmm, totally. Yeah and the nice part about putting it on a layer mask is cause I could've also, I could've gone over here and I could've just hit delete, and that would do it too. But the nice part about putting it on a layer mask, again just the rule of thumb cause I know it gets a little confusing, if you have a selection and you clicked a layer mask, what's selected stays. If you Option click or Alt click the layer mask, the reverse happens. So now you get that but the cool part about putting it on the layer mask is if I unlink that chain right there, if I unlink the chain, I can now go to my mask, and I can move it around. If I don't unlink the chain then what happens is that I move the whole background with it. But if I unlink that and I click on the mask, if I click on the black then of course that goes with it. But if I click on that layer mask in now I can move so yeah. Thanks. Thanks for asking, that was a good, I need to add that to the class - that's a good one. Yeah. I just have a quick question about the previous image you were working on when you had the glyph menu come up. How did you do that cause I have fonts I know that have glyphs and I go up to some menu to get to them, but I've never seen it pop up. It pops up, I mean for me it pops up if I use for certain fonts. Like you'll see there's a little... So that was automatic? Well yeah there's a little bar down there. But if you don't see it there you can go over here to Window and go over to your Glyphs panel. Yeah I always went to the Menu but I've never seen it pop up. Yeah sometimes it's... Maybe some setting we have different. Obscure this little, little bar, it won't pop up unless you hover over that bar too. You see that little bar down there so. Follow I got a, check me out on mattk.com is my website so if you ever wanna stop by. I do, it doesn't really have much to do with this class but I have some Lightroom, some free Lightroom profiles in big packets that I put on sale for this week for CreativeLive but the main parent site's mattk.com. The profiles you can check out on the slash profiles and I do lots of training and stuff over there, so if you wanna find out more you can swing by and say hi.
Ratings and Reviews
kasmath
Yeah! I was so excited to find another class by Matt Kloskowski at Creative Live! Matt is an amazing teacher who comes up with all kinds of ideas. He is clear, concise and easy to follow. He has a wealth of knowledge that he loves to share and his enthusiasm and love for his students comes through in his teaching. I have his Lightroom Course and am so happy and pleased with it because I have learned so much!!! I highly recommend this class of Matt's and hope you will love his classes as much as I do!
Audrey Agin
Good Teacher. Gives good practical ideas to add Fonts to your photo project & is not distracting. Thank you.
Cheryl Tarr
I loved this class. Matt provides a very clear explanation of different techniques to add text to photos. Short and sweet!