Lessons
Lesson Info
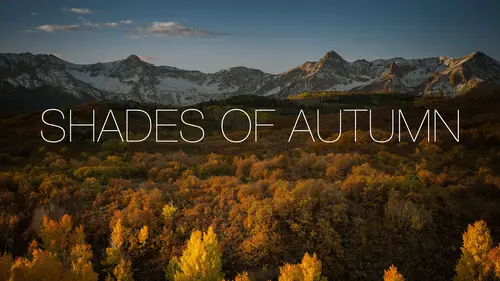
Solid Color Bars
Next one we got the color bar example. So lot a times what I'll do is I'll add some type of a... It's almost, it's like the brute force, brute strength, brute force way of doing it. You're going to say, "You know what? There's nothing I can really do to get type to look good on the photo, so I'm going to use this technique to just put a color bar somewhere onto the image and make it work. Kind of almost builds off of a little bit of what we were doing before. So you know, let's grab this photo, and I'm going to go. I want to put... I don't want to sign my name, but I want to put like maybe my logo and just maybe Matt Kloskowski Photography on it. So I'll grab my type tool. Matt Kloskowski. I can't seem to spell it right today. Make it a little bit bigger. So I want to put my name somewhere down here toward the bottom. So that's obviously... You know, I mean if I wanted to leave it there I could. I usually like to offset it in some way. So we could use our gradient technique for this. I...
t wouldn't work bad, but a lot of times what I'll do is I'll make a new layer below the type, and then I'll take the rectangular marquee tool, and I'll click and drag, and I'll just make a bar. All right, and we can fill it. I mean the sky's the limit here. You know, you could try that little Adobe color app and find different colors from the photo to fill it. You could use your eye dropper tool and go click around and find different colors from the photo to fill it. A nice way to experiment is actually... You can do it in a different way than I did, which is if you use your shape tools. If you got down here to your rectangle tool, I can click and drag and make a shape. All right. And it picked up my foreground color, but the cool thing about experimenting with this one is that I can go just double click on the shape layer over here, and now I can just go and just click around. And I can see what different colors. That's not good. I can see what different colors look like. Just as I click around the photo. So just kind of it's a little bit more of a visual way to do it. So I'm kind of... I'm feeling a little yellow. I'm also... Green's not bad. I kind of like the yellow. That's not bad too. Let's go yellow and let's go somewhere in the mix of a yellowy green. There we go. Something along those lines. And then you've got your text on top of it. A lot of times I'll kind of reduce the opacity a little bit, but that's kind of meant when you want to show it all. Like you really want to show it off. Right? There's getting your type. There's a purpose for getting your type to just flow through a photo. Kind of make it seem like it's kind of unobtrusive. And then there's times where this is your name. You're going to post this on social media maybe. Could be a Facebook cover. Could be a lot of different things. There's times when you really want it to be bold. This is one of those bold techniques because it doesn't fit into the photo, right? We're not using the photo in any way. Like it's pretty obvious we're adding text to this, but, again, this is when you want that text to be a little bit more, to stand out a little bit more. Do that like for just a signature for a photograph for example or if you want to use that in multiple images and just kind of like create something and then you paste it in for if it works with the background I know that. So if I hear the question right it's, "How can I take something like this and use it for like make it in a repeatable way that I can use on different photos?" Good question. So let's say as an example. And I'm going to... Here, let me change this a little bit. Let's make it a little bit more bold. And let's say we're going crazy with it. We're going to go right to the edge. Ah! We're going to go right to the edge with it. Spend some time. Make it. Maybe you're going to put a logo down there. I'll go to my bar. Command or control T for free transform. And let me tighten that up a little bit too. Kind of center it. So let's say, let's say I got that. That's kind of how, that's kind of how... You know who does this? You guys? Tamara Lackey, she's a photographer out of North Carolina. She's been to CreativeLive a bunch of times. If you look at Tamara Lackey's work when she posts photos online, she does this exact thing. She grabs a color from the photo and she puts her logo. She puts it all over sometimes. She'll put it in a bar on the left hand side. Sometimes the bottom. Sometimes the top. Wherever it fits for the photo, so I don't know Tamara's workflow. I don't know if she does what I'm about to do, but she does this exact technique. So we've got our little bar kind of built down here. What I would do is just save it as a PSD file. So just, you know, file save. Save it as a PSD file. The other thing that could help is if you shift click and select both layers, you can group these into a little folder like so. And so now if I save this as a PSD, when I open up another photo... So let's say I open up this photo. I can open up my PSD file that's got my little template. I can click on that group. And there's like a secret handshake to make this happen, so you can see I can move this around. If I click and I drag over the title bar... You see how it switches? You can't let up on your cursor yet though. If I move the cursor down over the photo and let up, it pops in. It's one of the most convoluted, undocumented shortcuts. 'Cause there's no visual cue, right? You're like, "All right, I'm good. I click and drag. I'm over here. Oh yeah? I still see nothing 'cause I'm still pressed down with my cursor, but as soon as I let go it pops into the photo here. So now you can see that group came over, and so now I can drop it into that photo. And then I can go into the group and pick a different color. So that's a way that you could do it. I don't use them a whole lot, but just 'cause I don't have my internet with me all the time and whatnot, but in the Creative Cloud there's a libraries panel inside of here too. Probably past the scope of this class, but you can save little documents and graphics into the libraries panel, and then you open up your library panel, and you can just grab these little graphics and drop them in too. So if you go to your window menu to libraries, that's the place where it would be. All right, so that is our... That's a color bar example. A couple other things that I'll do with that sometimes a few off shoots are... I'll go ahead and here's a portrait. So I'll use the rectangular marquee tool. Again, just kind of drag down there and then just click around the photo. That's actually not bad. I was going to kind of go with the silvery blue color, but I almost like the skin tone too. So you just click around the photo and grab your type tool. And then just put your name photography. Resize it. Drop it down over here. All right, let's just put your name. How's that? And then now we'll start to mix and match. So if I liked an opposing color for this, then I go here and I could choose a darker opposing color. And it would offset my type, but we can now start to mix and match some of the techniques. Remember I told you about the little drop shadow technique? So I like. I kind of like this light color. I like the light text. I don't want to use black. You know, I don't think black text would look good here. So then I can go double click on that layer, go to the drop shadow. The nice part about it is for the most part it remembers your settings, so I don't have to go through there and do that again. But now you can see that helps offset that white off of that color bar too. So that one helps. And then the other thing that you'll see helps is sometimes I'll go in and I'll drag. All right, let's use the shape tool for it. I'll make my bar like so. Again, pick a color from the photo. If it's the right color. Like, "Ah!" I kind of like the peachish color for this, so if you decide to go with a color from the photo, it's tough to have the photo itself and that bar kind of bleed into each other, so what I'll usually do there is I'll make another rectangle. Just a thin rectangle. And I'll fill it with white. And I'll kind of just go and tuck that in there as a separator. And then, again, just put your text down over it. So that's another good one too. All right, let's see here. We also have another way to do this would be the blur. So I don't use this one as much, but it definitely has its uses. So what you do is it's usually the nuances of the black, and the white, and the contrast that make it tough to put text over a photo, right? 'Cause you're going to have one solid color text, but you're going to have all of these different colors behind in the photo. So what I'll do is I'll select a portion of the photo, press command or control J. All right, and you'll see that will pop it up onto it's own layer. So now I have this portion of the photo. The only thing that I have to do to make this little technique work... If I go. I'm going to add a blur to it, so I'm going to go to the field blur in the gallery here. If I add a blur, what you're going to see is as I increase that blur... You see how it starts to spread out beyond the boundaries of what I selected? So the only trick to make this work is I just have to put a selection back around this. I just used the command or the control key and click on it. So to put the selection. That's going to restrict what anything that I do. So now if I go filter and I go down here to blur gallery. Come on. I go down here to blur gallery. I'll use the field blur, so now as I increase that, now I get that little blurry spot. You'll see that one use quite a bit. Actually I see that online a lot. I see social media graphics use it all the time. So what you're doing is you're at least creating more of a continuous, not totally continuous, toned image, but more continuous than it was before. So you click okay. Wait seven to ten minutes. (audience laughs) Come on. I didn't know a blur was that intensive. Sometimes I think my computer senses when it's on in front of people, so it just decides to take a long time. So how are you guys doing today? (Matt and audience chuckle) All right, there we go. And then just deselect. All right. And we grab our type tool and you know. I mean we could go a lot of different ways with this. Probably try white and just you know. Photography whatever text or logo you're going to put here like so. And then this would be another good one to go in there and add that little drop shadow on the other side of it too. So the blur technique, again, you'll see it a lot out there. I don't. It's not one of my favorites, but it is a pretty popular one. The other one I didn't show you guys. Here, I'm going to go back to... Let me run back to the gradient one. There's another good gradient one I didn't show you. Especially when... Here, did I? No gradient example. Ah, we'll go back to the original one. So let's say... I'm going to separate these. I'm going to put them on two different lines here. Little type tip for you too guys is if you go into that window character panel, you could also control the spacing between your lines of text. All right, so there's that setting right there. So that's the leading. And I would probably justify this one to the right, which there we go. And we'll bring it over here. And so just an offshoot of the gradient text and the blur. The blur trick made me think of it because actually I use this one a lot. Is I'll grab my rectangular marquee tool, and I'll make a rectangle like that. And, again, do it on a layer below your text. Press G for your rectangle tool. I'm going to set the foreground color to black, and then drag it across there. So that's a nice one too. I use that one quite a bit. I probably wouldn't... Make my text a little bit smaller. I just want to get some breathing space around the edges there. That's one that I use a lot. And, again, start to think at how you combine some of the techniques. Any time you drag a gradient, or a color bar, or a blur, anything, anytime you do that if you don't like the way that it interacts with the rest of the photo, you've got a mask, or your eraser tool, whatever it happens to be. And I can kind of go in here and adjust it a little bit. And you've got opacity. So there's nothing saying you can't use the two of them together to just kind of finesse it a little bit.
Ratings and Reviews
kasmath
Yeah! I was so excited to find another class by Matt Kloskowski at Creative Live! Matt is an amazing teacher who comes up with all kinds of ideas. He is clear, concise and easy to follow. He has a wealth of knowledge that he loves to share and his enthusiasm and love for his students comes through in his teaching. I have his Lightroom Course and am so happy and pleased with it because I have learned so much!!! I highly recommend this class of Matt's and hope you will love his classes as much as I do!
Audrey Agin
Good Teacher. Gives good practical ideas to add Fonts to your photo project & is not distracting. Thank you.
Cheryl Tarr
I loved this class. Matt provides a very clear explanation of different techniques to add text to photos. Short and sweet!