Lesson Info
18. Mark’s Favorite Modifiers
Lessons
Class Overview
05:08 2Getting a Grasp
03:55 3Pop Quiz!
03:57 4Quality of Light
20:41 5The Effective Size of Light
35:07 6Creating Contrast with the Position of Light
24:51 7Controlling Shadows (1+1=2)
06:29 8The Inverse Square Law
22:04Angle of Incidence and Reflection
13:24 10Specular Highlights
26:26 11Parabolic Shapes
18:22 12Dynamic Range
08:54 13Creatively Correct Exposure
12:03 14Metering Is Not An Exact Science
32:21 15Flags and Reflectors
32:05 16Let’s take another look at modifiers
11:12 17Reshoot Challenge
46:44 18Mark’s Favorite Modifiers
40:32 19Pop Quiz Review
14:23 20Class Wrap-up
03:34Lesson Info
Mark’s Favorite Modifiers
it's time to have some fun with some of my favorite light modifiers. And so, you know, I have a bunch of favorite light modifiers. So I decided I would just choose to based on their versatility and those two are the light motive 190 centimeter parabolic umbrella and also a beauty dish with the grid. And so let me talk to you a little bit about why I chose those mainly. Well, I love the beauty dish because I use it for so many different things. You can use it for hard light, you can use it for soft light, you can add a grid to control the light. You can illuminate almost full body shots. You can do contrasting stuff, You can do so much with one light modifier that it's one of my favorites is in my toolbox all the time. And then the light motive 1 90 centimeter, it's not on the stage right now we're gonna bring it out and uh it's something that you can use to do all kinds of stuff. And well, we have sort of a trick up our sleeve as well that we're gonna show you. So we're just gonna sort...
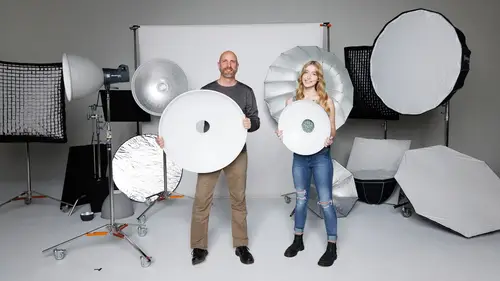
of play see what we get. And I want to show you sort of how I work when I'm using light and light modifiers. So I think we're gonna do is start with this beauty dish. But before I begin, I want to tell you something because we're live mistakes happen and uh, you know, I was fiddling with my light meter and remember I said, I think I've done something, something is wrong. The values are off. I don't believe my light meter, I was saying that my last session and certainly in the break, I took a look and I had accidentally changed the I. S. 02 50 On my light meter, it should have been 100. So that's why all the values were off by a stop or so. And so yeah, now it's back to normal, it's working correctly. I just messed it up human error. So if you're watching those, if you rewatch those sessions and you see me going, what the heck? It's because I just forgot that I touched the touchscreen somehow some way and change the ISO values. That's what happened there. But you know what? That's how we learn. We make mistakes and then we go forward. All right, Quinn is here And what we're going to do is we're gonna play with this beauty dish. So, this beauty dishes about, Oh, I think it's about 16, something like that. It's got a grid on it. And so what that's gonna do is it's gonna make the light really, really directional. This is gonna be hard light, but because the effective size is large, it should be a little bit softer. I've mounted it on a just a normal light stand and then I've got a little arm on here that I can use to control this. So the thing about this is this is one of those light modifiers that when you use them, you're going to get results that clients like models, like portfolio shoots, All that kind of stuff is just a winner pretty much every single time. So what I'm gonna do is I'm gonna do just a really basic one. Light shot. Maybe we'll add it some fill light here, but I'm gonna start by putting this light sort of close to Quinn. I want to shoot underneath this light, so I might have to rotate that grid just a little bit, so I'm gonna shoot underneath. And what we're gonna try to do is I want to try to sculpt Quinn's collarbone and so Quinn you might have to move your collarbone around a little bit, we'll sort of see how that works. I'm gonna turn on my modeling light just to get a look at this. Now, what's happening here? I'll just take a quick photo so you can see exactly what's happening in these shots. Um One of the things that you're gonna see is the light underneath her chin might be pretty hard. So let me go in here The meter to that f. 14 and see if I fix my light meter. So F 14 on my camera, You come over here. F and I'm going to do collarbone and just perfect, just like that. Excellent at 14 bam. Oh, now take a look at this shot. What we have here is we have really, really restrictive light, we have this really defined shadow underneath her chin and so I'm gonna try to reduce that and get a little bit more um get little bit more of her face in the shot. So the way I can do that is let me grab my tripod here just to hold my camera. The way I can do that is I'm gonna try to shoot down just a little bit so I'm gonna put my beauty dish a little bit higher and then Quinn, I want you to look up into that and I want you to lean forward a little bit so like maybe put your hands on your knees like this. Yeah, and then look up then I'm going to go like this. So we're just changing the pose just a little bit and I want you to try to stare right into the middle of that. I need to first meet her this again, flip 16. That is really, really bright, but it's okay, so I'm changing my angle of view. There we go. Yeah, good. And now look right at me if you can. There you go, great at me. Okay, let's take a look at these two. I think my angle of view is just too high on these so looks like I'm looking way down on Quinn. So I overdid it, I overdid that. So let's have you sit back just a hair. There you go. And I still want you to look up. I'll take the power down. How about that? So you're not blinded quite so much, is that better? Okay, Quinn is crying a little bit like I can't. There we go. 12. So we're at 13 now and then we'll do the house out even better. Okay, Much better. Okay, now we're F 13. Any time the model starts to cry, you know, you're doing something wrong, so okay, so there you go, I like that and then look up at that and try to put your head straight with your eyes and look straight into that. So just tilt your chin up. There you go. There you go. And then tilt your chin down just a little bit, a little bit more, a little bit more. And now look at me cabell. Okay, these are fun. So the thing that I don't like about these is we just have too much light under her, under her chin. It's two directional. I need to fill some things in because she's looking a little bit like it's too shadowy. I think that's what it is, the term I'm looking for. So I'm gonna create what's called clamshell light. So I'm gonna take this reflector and I'm gonna put it as close as I can to you. So I don't want to touch you, but you move this down a little bit. Mm hmm. Here we go, put this down, just a little bit. Okay, we're gonna see if we can get this shot exactly the way I want it. Okay, look right at me. There you go. Beautiful. We're getting there. We're getting there. We need a little bit more like bouncing off of that, off this um white reflector. So I think what I'm gonna do here, because I'm gonna change my light by taking off this grid, Take the grid off, that's off. Okay. And then the other thing I'm gonna do here is on this beauty dish. There is a little disk that you can put on and maybe I can move this so you can see me putting this on there. Mhm. So you can put this right in the middle and it blocks that center light. It's just gonna change the quality of light. So that should soften things up because I think what we were getting. It's just way too hard. It lights too hard. All right, So now Kapali let me meet her that light and I think we're going to get to the place. I want to be much faster. Okay. F goes to 11. Okay, so now let's try that. Beautiful. Uh look what happened. Look what happened bam e Okay, that's the joy of having the ability just to quickly change things before. After what did we do? We just took the grid off. That's all we did by taking the grid off. What we were able to do is get that light coming in underneath her chin. We got these beautiful catch lights in her eyes. And because we put that little diffusion, that little deflector in the center uh eliminated that hot spot that we were getting and we just get a beautiful, beautiful portrait with one light and reflector. So now what we can do is maybe we can even move things back a little bit, move this back a little bit and I think we can even get more of Quinn, more of Quinn sounds like a tv show and now it's time for more of Quinn. Tonight's episode. Quinn is going to be talking about who knows? Okay, so there we go. I like to smile. Finally I got a smile from Quinn. Look at that look how beautiful these are. These are just nice and soft and wonderful. Hey, look at that. I like that. Yeah, you're totally allowed to smile. You're absolutely a lot of smile. Let's have you look that way. And what I'd like you to do is take your hand and brush your hair. There you go. It's like that. There you go. And now just slowly look over at me. There you go. Perfect. Okay, let's just see what happened. It's just so fun. This is so fun. The joy of this light is that it's so easy to get great imagery and once you have it set up and you have something that you like, what you can start doing because you can do exactly what we just did. You can start playing. Um and and working with the subject because really what you want to do is you want to forget about the light, you want to forget about the camera and you want to be having an interaction with your subject. And so that's when you're really gonna start getting great photos. And so that's what I love about this beauty dish is that you can get there really, really quickly. So the other thing I want to do here is I'm gonna show you how versatile it is, not just for head shots, but for mid length shots and maybe even a full length shot. So what I'd like you to do is stand up and we're gonna get rid of your stool here. It's going to get rid of that. We're gonna have you stand about right here, We're gonna see if we can cast a little bit of shade a little bit of light on the background. We'll put this little modify over here. So I'm gonna do is I'm gonna use this in a way that's a little different than most people. So I want to raise this up, raise it up, I'm gonna move over here and this is really fun. Okay, so this is really high. We'll see if this works. I haven't done this in years. Um and I'm gonna change my power output on my meter using this guy. Okay. All right, here we go. So that's a meter. This we want us to meet her about 10. So I need to take that power away up. That's eight. That's still eight. Okay, we're almost there. That's 11, that's 10. So we're only about a third stop between her face and her belly and power. So we should get a nice sort of even late fall off. So let me just try getting there you go. Beautiful, Beautiful. Look at. Oh, I gotta change my, What do we mean that we added 10? Yeah, so I didn't change my aperture value. Okay, so there we go. Beautiful, and then turn a little bit toward the light the other way, yep, like that. Great, Great. And then turn towards me, just a bit perfect. That might be a little bit too high, it might be a little bit too high. So what I can do is I can lower this. Just a hair, can move this, just a hair. And we're just using one light modifier to get some shots that are great. I don't know, can you see this? This is the pose we like. So we're gonna see if we can get that media this again. It's a 14. So we've changed things again. So go back See here, let's see the shot that we just took. That's a beauty dish. It's like a great little uh glamorous shot that you could have her catalog work whatever it looks really cool With one light intended for portraits. It works excellent. See how that works, lowering the light just a bit and it just works just works great. Let's have you look at that light and turned just slightly toward there you go. And now look just with your eyes toward me. So, keep your face toward the light. But just with your eyes. There you go. There you go. All right. We're able to get shots using this beauty dish that are close up, full length. You name it. This is a light modifier that just works. It's fantastic. Okay, So what I want to do next is I want to bring out the big gun. So, I want to have a light modifier that's pretty big. And this is something that you can use for more full length shots, catalog shots, group shots, stuff like that. And so, um, Quinn, what I'd like you to do is go you have a dress, right? Run. We're gonna have a dress. And what I want to show you is a light modifier that has different layers, different levels of awesomeness. So, we have this guy, it's pretty big. This isn't Ellen from light motive. It's 120 cm and it's big. It's very big. And so it's big enough that you can shoot in front of it. You can do all kinds of things. It has inside it has this front level of diffusion. It's got another level of diffusion inside of that. So, depending on how much diffusion you have, you have soft light, medium, soft, hard light. You can do catalog work. In other words, you can take all those out, you can shoot a full length shot on white. And so what we're gonna do is we're gonna have Quinn and address and we're gonna try shooting some of that. So let me move this out of the way while she's getting ready and I'll move this. This is a light modifier that is so versatile that. Well, you can do almost anything with it. Headshots, full length shots. You name it? All right, Quinn is coming out in a second. Quinn is the master of quick change. It's like really fast. Okay, this is fantastic. Ah That is a wonderful dress. It is wonderful. Okay, so here's what we're gonna do. Turn this guy on 6.3. Take it down to about 3/4 of full power. Still pretty beefy. This is a 500 watt second light that I have in here at the L. In chrome E. L. C. 500. What I'm gonna do here is I'm gonna loosen this just a bit and tilt it down so it's pointing toward Quinn and then Quinn. What I'd like you to do? Yes, I'd like you to come about right here. So we're still about six ft from the background and then I'm gonna move this and I'm gonna shoot to the side of this. So I'm gonna be at the side of this. Um Yeah, camera two. You can see that. I'm to the side of this right here. So we're gonna have light that's directional but soft, very directional but soft light. Let's meet her. This see how much light is coming out of this guy. I need to raise it up. I'm seeing just a little bit raise up that light a little bit. Hold on, I there we go. That's better working in the studio as a workout. Quinn grew what happened there the same. I know, look at that. We're the same height and somehow She magically grew. OK. F 11 is where we are. So I want to just shoot this f. 11 and let's see what we get with this light modifier. F 11. The reason I love it. Is it so forgiving? You can do a lot with it. So it's full length shot. That's so cool. Um I really like how that works is in the shot just a little bit too much. Let me move it out just a hair and drop down F 10, just like that and you can shoot all day long here. So really, I should be shooting with maybe a 200 millimeter lens and that looks great if I want to do maybe mid length shots. Perfect. She's just a little bit toward that light. Just a little bit. So just turn towards the light. Just a little bit There you go. Yeah. And then I'm gonna come in and get even a closer headshot. Beautiful. So this giant light modifier allows you to get soft, Beautiful directional light and you really don't have to worry too much about what you're doing. You can just get in there, get some beautiful shots and it looks great. So if you had maybe a background that was different color, that would work great. If you want to add kickers, that would be great. You can do all kinds of things with this light modifier and the reason, Well, the reason it's so wonderful, these big light modifiers like this. If you don't have to work so hard, you could just set it up and shoot and you're always gonna get wonderful stuff. So, let me show you some other things you can do with this light modifier really quickly, because there's some special thing and I'm about to show you that I think will blow your mind. I don't even know if you know what's coming. Okay, so we can take this diffusion out. And what happens when we take the diffusion out as this light becomes more speculator becomes more directional. The inside of this is uh it's got little bumps. So we're scattering the light. But it is parabolic. In fact, when I'm standing here, the audio changes from over here, it's really wacky, You can here in the studio everything changes because this is scooping up everything we're gonna leave in this, what this is doing is it has a little patrick here to sort of consume that hotspot, so it doesn't show up. So I'm gonna turn this around again, so we'll turn this a little bit and we're gonna try again. In fact, I'm gonna move this back and we can use the inverse square law to see if we can get nice, even illumination. That's good. I'll hit my light meter. We were at F 11. Now we're F13, so we just gained some power even though I moved back. So taking out that diffusion, we have more power coming out, and so that's gonna work pretty well. So let's take a shot and, wow. Oh yeah, I have to change my I have to change my aperture, I keep forgetting to do that. Okay, so we do that. Look at this, the speculum highlights have changed, look at her dress, how it's got that sheen on, its got that shine on it, that's coming from the speculum highlights. Look at the background, it's just sort of even know shadows. It's really wonderful. We'll do one more shot Powell. That looks fantastic. We're gonna do one more thing here with this light modifier before I bring out my special surprise and that is we can go in here and we can take out the internal panel. Yeah, and taking this out, it's gonna give us maximum contrast. Maximum speculate highlights, It's gonna give us a little bit of a hot spot, it's gonna give us max punch. So it's a third look. Mhm. Okay, so that's out. Mhm. Now we're gonna look at that one more time. This is really cool. Bring this back. This is great for catalog work. And so what I mean by that is so this dress needs to be in the catalog. So Quinn why don't you go close to the background about maybe a step or so? So this is something we need to shoot where we have everything had to toe evenly illuminated. So that's F 18 18 as so much light. And so now let's go in here, take this guy, Make sure I just that f. 18. And we're gonna shoot head to toe Powell and you can see head to toe is illuminated. But because it's so hard this light, because we took out all this fusion, you can see that shadow to the side. So what we could do is we could use the same modifier to have that shadow. We could put in all the diffusion, we could sort of eliminate that shadow. It's our choice. Let's have you come up here to that spot. I'm gonna meet her. This That's F 28. That's way too much. So we'll take this down a little bit F. 11 like that. Okay, let's try f. 11. Wonderful bam. Oh, it's just wonderful, wonderful light. We're allowing the background to drop out just a bit that's really, really cool. Okay well as cool as that is, what I wanna do is I want to talk to you about. Well something crazy. This is pretty big. In fact, let's do this. Quinn. What we're gonna do is I'm gonna have you maybe stand in front of this so people can see sort of the size, the size of this, right? So this size allows us to wrap around, we can do all kinds of things but just stay here for a second. I might disappear for just a second because I have something to show you when I said that's my favorite light modifier. Well it is but I got something else. Don don don don't get this, did it? Uh I hope I don't knock something over. This is my favorite light modifier. It is huge. It is huge. This thing is, I can't even jump up there and touch that thing. Let me see if I can move this. Have you seen this? Yeah, sort of is gigantic. Okay, this is 100 and 90 centimeters which is six ft ish. I think so, step over here, we gotta move this boy thing in and I'm gonna move this out and we're gonna do what's called overkill where we use way more power than we possibly need. I'm gonna move this over. Where, by the way this is a man photo arm that this thing is on and I can use these cranks to crank it up. I can crank it down, I can move it side to side. I can move it up and down with something this big. You really need a beefy stand. So we've got about maybe £ of sound bags on the bottom of this. So it's, it's very well weighted and were safe. Okay, so do I need to show this to you face to face so you can see it? I don't know if I can, maybe you can see. There you go. That's huge, huge. So why would you have, why would you have this? You have this light modifier? Well, the reason you would have this light modifier is specifically for catalog, work group photography or highly specialized portrait photography. You can do some really, really amazing things with this because it's so big, you can actually shoot inside of it, you can have you and the model inside this thing and the light is totally surrounding you. It's really fun. So my friend abscess a sent me this and I'm borrowing it from him and um he's used it for many, many, many things and so it's been treated with love for many years. So what we're gonna do is in abs honor. I'm gonna try to shoot something that I don't know is a little bit different. So we're just gonna play with this just a little bit. Um so I'm gonna try some things that I have never tried before in front of a live audience. Um like trying not to knock my camera over. This thing is huge. I don't know if I've mentioned that. It is very large. Very very, very large. Okay, it's coming over. So the first thing I want to do is I want to see if I can lower this, something like that and we might shoot inside this. So Quinn, we're gonna try some crazy things, some crazy crazy things. This clearly is not a light modifier, you could put in your in your garage. The other thing I've learned about this is you have to turn it on before you put it way up in the air, which I forgot to do. So I have to lower it way down just as I can get to this head. Okay, now it's on. Okay, great. Now I can remote control it from my camera because it's got the sky ports built in. So it's got the wireless remote control. All right, I feel like I'm at the gym. Okay, so let's see what happens. I'm gonna get inside here. Yeah, Okay. I don't know if you can see me. I'm inside this thing. So Quinn, I want you to come pretty darn close right there we're gonna see if you can wrap the light around you and so to do that. The first thing I need to do is I need to turn on my remote, make sure it knows that that thing is up there. So let me make sure it knows. So this guy is going to search for any new light and that is a 1000 watt second light up there. So this is searching to see if it finds it, It finds it. CLC Pro 1000 pal very, very powerful. I can change the power level with this controller, so I'm gonna take that down. So it's not quite so, wow, it's punchy, isn't it? I feel like I'm getting a sun tan. Okay, let's let's go in here and see if we can meter this light and see what we get. So this is just wrapping around. I've never done this before. By the way, this is a new thing pal that's F seven, which I sort of like, in fact, I'm gonna have you meet her this with me standing here so we can see F eight. Okay. Yeah, So I was blocking the light. So we're F eight now. So, what I need to do, turn on my camera here and I'm going to start tethered shooting. Great. Okay, so here we go, We are F inside this. Mm. Learning about all kinds of things. This is gonna be perhaps beautiful. Perhaps we're getting a suntan. Look at that. That is a headshot. It's just wonderful that light wraps all around her. But notice what we're not getting. We're not getting a tiny speck your highlight. We're getting me, you can see me, you can see the entire light and me in her eye, which is really cool. I'm gonna overexpose this just a bit Again, my creative creatively correct exposure. 7.1 here, I'm gonna go down to 6.3, so two, third stop overexposed, and now we're getting dreamy, dreamy light. Let's have you take two steps back, two steps back. What I'm gonna do is I'm going to raise the um raise this up just a little bit so it's more directional toward her. Here we go, two steps back. Excellent. I'm going to be inside that again. Quinn, I'm gonna have you meet or that once I get inside here, so go ahead and meter that. 6.3. Okay, great. We've got 6.3 now. Mhm. So here we go. Excellent. Just like that. Yes, like where you're going with that bam. And look, in fact, I'm gonna go a little bit lower with this. Excellent. And then I'm gonna get a tight headshot. There we go. Great. Look how this is just I love this. Like, look what this does for her cheekbones and her smile. We're seeing these soft, wonderful details on her face. We can see there's no shadows anywhere just sort of surrounding her. The background looks wonderful. Let's have you take almost all the way back to that and then what I'm going to do again. I need to meet her this. I'm gonna increase the power quite a bit. Okay. And then let me meet her this light to see where we are. I mean, it's just cheating. It's just cheating. This kind of light is just, It shouldn't be allowed. I accidentally am at 6. again, so we'll play with that. So now I can just stand back here and take a shot and look there's no shadow. None. It's beautiful. I'll do a nice wide shot here. Let's just see how this illuminates the whole background. It's crazy, insane what we can do with this. This is a specialty light that is made for exactly what we're doing right now, catalog work group shots. Big, big spaces. In fact, I think we're done playing with this for right now. We might do one more thing. In fact, before I show you the end all, let me try one more thing. If if I can do it, I don't know that. I have enough height on this. Let's try it. Let's try it. I don't think I can raise this up high enough. So actually, maybe I can, maybe I can Give Me 1 2nd. Bear with me. I'm gonna try one more thing. I might need your help. So, what we're gonna do here. Yes, I'm gonna take this and I'm going to and do that and do that. Okay, I forgot I can extend this. Look at this arm. It's crazy. Okay, now I forgot I could do this now. Let's see if we can. I'm holding this stand down. You're holding it down. Yeah, this is not gonna work. Not gonna work. We don't have enough room, but darn it, darn it, darn it, darn it. What I need to do is have there's a a uh stand that's pneumatic, That would have lifted this up about Another six ft. That's what we needed. But oh, well, we were not able to do it. That's okay. That is okay. All right, so, we lift this up this way. There we go. And then this guy goes this way. All right, so, what I wanted to do is have really directional light down, but because this stand is just not it's not gonna be able to hold that kind of wait, well, you know what? Looking at this, I'm not gonna give up on it yet. Not giving up on it yet. Lower this down, something like that. Okay, come over here, Come over here, come here to me, stand right there right there. Let's see, Powell 14. Okay, I don't know what I'm going to get. I have this crazy idea in my head if this works great. If not, that's okay. All right, just look straight forward, you see. Yes, it is working it is working. Look what we're getting there. Okay, I'm just going to back this up a little bit. We need a more of the seamless in the background. All right then. Just stand right there. That's fantastic at 13. It's fantastic. Come over here. This is the kind of shooting. I like where I don't know what I'm gonna do until they do it. So I want you to try to we have to uh the shot ends right here. So try to put your arms something like that maybe crossed both of them. There you go. Almost like it's freezing cold and then just slightly turned towards me just slightly. There you go. There we go. Ooh, this is great. I like that. I'm gonna change this just slightly. Okay, These are cool. one more. 1 more and then look in there. There we go. Perfect. Okay, yes, okay, I can start playing with this. You can tell when I love a light modifier because what happens is I tend to go crazy and start shooting. So let's just look at these and that one we can get rid of. These guys are very similar. I like these. In fact, I like this one even better. I think I like the verticals even more than that and if I had to choose, That's the one I choose. Maybe even zoom in on that looks almost growth of pro earing ish. Look at that. Look at the skin tones so amazing. Okay, Quinn thanks. I want to show you a real live example of how you would use this thing and so Sierra don't come to the computer just yet. I want to show something that we did between here. It is okay we did this between takes and this is probably gonna be the thumbnail, one of the thumbnails. So we wanted to make sure that we had a shot of means here and all the light modifiers for the thumbnail and the promo of this class. And so this image was shot with one light modifier which is this gigantic like motive light modifier. And this is a real life example of maybe how you would use this to have a very, very large space evenly illuminated with one flash. Sierra took this photo and there's a bunch of other ones here where were messing around and getting some stuff and just trying to figure out like what would we do? But all of this stuff shot with that one giant like modifier. And so if you have something like this where you have to show a big space, lots of people a group, whatever. This kind of a light modifier makes sense. Okay, well that's us playing with light modifiers. We have something to do though in the next session and that is well there's another pop quiz
Class Materials
Bonus Materials with Purchase
Ratings and Reviews
user-a07413
Wow, Impressive with lots of information on light modifiers. Lots of variations of use and the bonus material. Mark is very good as a teacher. Glad I purchased the subscription plan so I can see the other Mark Wallace classes. Now to go to work and use the information.
Paul
I've heard much of this before, but this class really does a good job explaining and demonstrating the principles and techniques it covers. Mark is certainly quite knowledgeable, and he makes the material accessible and easy to grasp. It does cover quite a lot of ground, and while others may go into more detail, I think this class is great for building a good foundation.
Mario Furtado
Mark and his crew did an excellent job in this class. Now I am eager to see Go-To Lighting Setups and Studio Lighting Essentials. Congratulations.
Student Work
Related Classes
Lighting