Groom and Groomsmen Posing & Lighting Techniques
Lesson 18 from: Wedding Photography: Capturing the StoryRocco Ancora, Ryan Schembri
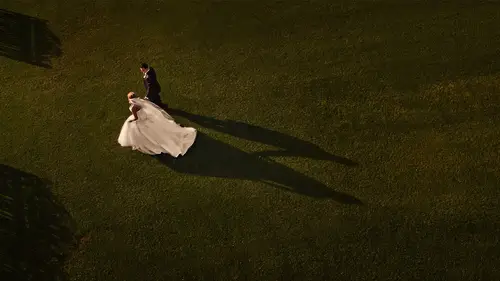
Groom and Groomsmen Posing & Lighting Techniques
Lesson 18 from: Wedding Photography: Capturing the StoryRocco Ancora, Ryan Schembri
Lesson Info
18. Groom and Groomsmen Posing & Lighting Techniques
Lessons
Class Introduction
04:18 2Define the Goals of Wedding Photographers
15:04 3The Importance of Wedding Photographers
11:42 4Shooting Philosophy
09:22 5How to Build a Shot List - Bride, Groom & Formals
22:42 6Tye the Wedding Story Together
07:19 7Capture Stories in Wedding Pictures
05:53 8Get the Right Exposure
16:20The Theory Behind Lighting
10:19 10The Power of Short Lighting & Backlight
30:08 11Shoot with Low Ambient Light Indoors
05:25 12Seven Fundamentals of Pose
13:56 13Continuous Light Sources for Indoor Photography
25:36 14Use Available Light for Indoor Photography
35:06 15Flash for Indoor Photography
18:59 16Outdoor Photographing with Available Light
20:27 17Group Posing & Lighting Techniques
12:22 18Groom and Groomsmen Posing & Lighting Techniques
11:43 19Couple Together Posing & Lighting Techniques
16:21 20Creating a Memorable Client Experience
12:40 21The Power of a Same Day Slideshow
12:07 22What do Couples Look For in Wedding Photographers?
05:51 23How to Successfully Interview a Couple
05:11 24The Importance of Wedding Photography
09:07 25Example Couple Interview
22:49 26A Workflow That Works in Lightroom
09:34 27Workflow Overview in Lightroom
19:28 28Manage Wedding Images in Lightroom
21:30 29Export Pictures to Animoto
04:28 30Color Correcting Images in Lightroom
14:09 31Optimize Images Through Lightroom
13:35 32Color Management in Photoshop
03:04 33Rocco's Skin Retouching Technique
33:27 34Image Toning to Create Distinct Looks in Photoshop
24:27 35The Value of a Wedding Album
05:27 36Traditional Design Elements in a Wedding Album
19:05 37Magazine Design Elements in a Wedding Album
20:04 38What Makes a Good Wedding Album?
07:47 39How to Sell the Wedding Album to Your Clients
10:37 40Wedding Album Workflow
08:13Lesson Info
Groom and Groomsmen Posing & Lighting Techniques
Earlier today we created depth using light, but also we can use, we can create depth you know, using depth of focus. In other words, you know, if you want to bring attention to a specific area, we can shoot a very shallow depth of field and focus on one particular subject. And then use perhaps maybe a long focal length to really bring in focus to one particular part. One perfect example is that if we construct, say, a groomsmen shot, we can stagger the groomsmen around the groom, shoot very shallow, and the focus on the groom. Maybe we should set it? I'll set something up And you'll shoot it with a nice long lens. I think that will be good. So, girls, you can all have a rest, I just need the men. (mumbles) Okay, so in this shot, the focus is going to be the groom. And the three groomsmen, which are probably the most casual groomsmen I've ever, ever seen at a wedding. Good on you guys, you've set the standard, I love it. So, we're going to bring focus in through the groom, but just stag...
gering you around the groom, so that we'll shoot a very shallow depth of field, and bring attention to the groom. Okay, so that's, um, so let's position our groom first. The groom's going to be at the very very back. So, I'm going to get you, Chris, almost near where that wall is. Keep going, right back, right back, that's it. And just leaning up against that. Yeah. Just hands in the pocket. Beautiful. Nice. Okay, now, Mark, we're just going to get you just into probably about there. So, just have a look at angle. What's going to work. About there is good. That's great. Get you on the other side of this. Just on the other side of that. Back, back a little bit more. That's it. And lean. Lean in. Yeah, how's that, how's that? Yeah, come across a little bit more. Perfect. Okay, we need the one more groomsman, probably foreground here. Just here. Just there. Come closer to me. And just turn in this way. That's it, hands in the pocket. And your job is to look directly over there. Okay. Mark, looking at this way. Okay. You're looking at Mark. And the groom is looking straight into the lens. Now, in this shot, We'll do this shot first to show it and then we're going to bring some emotion to it. Alright? I'm just going to mask out this light a little bit. So, we don't have any. Across of your mate. That's good. Chris? Down the barrel. So, the rest of you guys are just going to be out of focus shapes. Okay? But obviously we know what the shapes are. They're your groomsmen. So let's have a look at that. I think we can compress this a little bit as well. Yeah. Absolutely. Cause you can't really shutter on a long focal length. And yeah, just if we can, guys, if you from us going back, compress it to Chris a little bit more. So, just step over to Chris a touch. Back a little bit. Back a little bit more. There you go. Perfect. Yep, that's good. So, just compressing, I just want to compress the shot a little bit more. Bring it in a little bit tighter. And, actually, mate, just there can you come across a smidgen? That's it. Good. Yeah, that's it. Nice. I really need to grow a (mumbles) You do. We're going to get you elevator shoes. It's a must for every photographer. How's that look? It's better. It's better. It's better. Yeah, so we just brought it a little bit closer together so I could use a longer focal length to compress the group a little bit more. I'm using quite a shallow depth of field as well, so it's three point five, so, I'm really throwing out anything that's obviously anything that's close to the lens. But, I just want to really focus on him. And get right in there, so, that's the purpose of the image. Now we're going to bring emotion to this. And by emotion, I mean, this is a groomsmen shot. They're probably all friends. This is why they're in the bridal party or brothers or whatever. There's an element of fun about that. It's not going to be an emotional shot. We don't want them to cry. We don't want them to do anything of the sort. So, Ryan on your cue. Can you do me a favor? Turn your chin that way. That's it. A bit more. No, you're good. You're good. And eyes down a little bit, mate. Looks good guys, alright. Yeah guys, hold it there. On the count of three, I want you to image Ryan running around naked trying to take this picture. Oh come on guys it's going to be funnier than that! It's definitely going to be funnier than that. (Whole room chuckles) That's good. That's good. That's good. So what we should see, we got that expression. We got that energy to it. And it's just a nice way of bringing together the guys. Just in a very different, sort of, mood or sort of scene there. But, I mean, we could literally keep going with bridal parties in different posing, different combinations of things all day. So, it's really just limitless in terms of what you can do. We're going to move on now. And we're actually going to move down into this little hallway here. Just with the groom or bride and groom, you think? We'll start with the groom, I reckon. And then we'll work it from there. Yeah, absolutely. So, Chris, just come down. So, what we're going to do, I mean, we've got you know, window light far down the end of this corridor. Which is really intriguing. The issues that we have at the moment, is that we all got a lot of ambient light. We got a lot of tungsten light. Which really isn't adding anything to the shot. Okay, so we've got a, you know, light that we want to accentuate. We want to make a little bit more dramatic. So, the first thing we do, I'm going to switch off the ambient light here. And we're going to put Chris right at the bottom of the stairs. And the shot will actually shoot down here. And we're going to focus at the end of the corridor. So, so, Ryan, I'll get you to shoot it and I'll set it up. So that way we can just move a little bit quicker through this. Because there are a lot of things we want to show you. So, just come on down. We're going to switch this light off as well. So, what we got here, essentially, is this beautiful, beautiful window light, okay? So, having this window light, there's direction, okay, and we want to be able to use that to the best of our ability. So, the idea is to position the groom somewhere here. Okay? So, with a nice relaxed stance. And perhaps directing the gaze towards the direction of the light. So, once again we're working perpendicular to the light. So, we don't have the window behind us when shooting in this direction. Which is the safe bet. Because I've got nice beautiful even lighting here. But what we want to do, we want to create highlight and shadow, which is what we discussed with our particular lighting style. Okay, so, Chris just position yourself there. Turn your body away. That's it, perfect. And this, that's great. Good. And just, slightly towards me. That's beautiful. Perfect. And just looking in front of you, out there. (Mumbles) That's nice. That's awesome. The other, also, useful thing here is that we have a glass panel, okay? Which we are actually going to use as a reflection. So, Ryan's going to shoot through this and we're going to get a really nice sort of funky thing. Jesus, grab, grab the reflector just to kill that for me. We're going to just kill that light. Yep. We'll just grab the reflector up here, somewhere. Thank you, Christie. Thank you. So, Chris, I need you to just lean into that. That's it. Chin up a little bit there, mate. Yeah, perfect. Hold it there for me, buddy. And, Mister Cameraman down there. And just in there. That's it. Beautiful. Awesome. Stay there for me, buddy. I'm just going to come in a little bit tighter as well. So, actually, as we're shooting these guys and it's coming on screen, but we just got such beautiful light down the bottom into that corridor. It's lovely. And so, I might need you back a touch, Mr. Camera person down there. Beautiful. I just want to use, I do want to use this reflection, but Roc, you know what you got to do for me? Is, I want, you need to just bend that bottom part out. And I'll crop it. I'll do that and then we'll do one with the ice light just, um, lighting, re-lighting this as well. Sorry about this. That's alright. So, let's just uh, do that. Okay. Actually, you know what? I need you to um, I need you to kick the bottom of the frame out for me. Then I'll crop you out. Hey Christie, do you mind giving us one more hand? Hold that? Oh yes of course. Can you give us one more hand here? Yeah. I just need you to kill, might need two hands, sorry. Just kill that, that's it. Yeah, just kick that part to me, Roc. Not too much. See, we're going to get a nice, beautiful reflection in this, which is -- Nah, too much. Get a bit. (mumbles) Go back? - Yeah, small bit. Maybe you need to get closer to the glass? Yeah that's it. Maybe take the lens hood off? The idea with the new reflection is to get that camera plane as close as you possibly can to the reflective surface. So, in this case, we've taken away the lens hood, on the lens, and we're just working as close as we can to the glass to get that reflection. That's it. Okay, hold it there, mate. Just, actually, do me a favor buddy? Move a bit closer to the window for me. Aww, too much mate, sorry. Come back. A bit more. Back a bit more mate. Kay, just let that go now. And Roc, do you want to grab the ice light for me? Yeah I'll go grab the ice light. Be back in a sec. Hold it there, mate. Perfect. So, hopefully, you'll see in a second here that we've got, thank you for that, Christie. That's lovely. Thank you. Yeah that should be all good now. Yep. What we're going to do, Roc's going to go down in there. And we just want to place a little bit of separation light so that um, just to kick him off that background a bit. So, we're going to come in from the other side with this, with the ice light. Yeah, and you can already see it. It's going to be good. Roc, you need to get back though. Yeah, that's good mate. This will just open up that, that dark shadow in there. I'm going to get a bit closer. Yeah, that's good. Perfect. Lovely. Lovely, lovely. Beautiful. Fantastic.
Class Materials
Bonus Materials with Purchase
Ratings and Reviews
Jerry Willis
Ryan & Rocco, in my very humble opinion, are THE best wedding photography instructors in the entire industry! I've been watching their work for years now, which just so happens to win a most grand-scaled competitions, and they somehow continue to keep getting better! I first drilled Ryan at WPPI inquiring about what made his workshop different from all the others. His response, me paraphrasing, "If you're looking for tools to learn, come to my workshop. If you're looking for inspiration and smoke blowing, don't come." That's exactly what I needed to hear. Straight tools, no fluff. THE BEST photography workshop I've EVER taken, by far. You want the best photography education, learn from the best. This CreativeLive workshop is the PERFECT complimentary refresher and companion to what I learned! Thank you so much for having them! It's not the same as the workshop, which it shouldn't be, but they ARE reinforcing many things that have slipped my memory! I'm for sure buying this! :-)
Neeraj Arora
WOW!!! I have started a few CL courses but not finished as I got distracted by "life" and it took me a while to get back and finish them. But these guys!! They were simply superb. I finished this course really fast. Amazing artists, they explain things so well, Ryan is such a charmer and engaging teacher, Rocco is a fountain of knowledge. I am an enthusiastic photographer with aspirations to start my own business soon. I learn't so much from this class that will help improve my photography even if I don't become a professional wedding photographer. Great job guys, keep it up. I will need to come back to the lessons and I very much appreciate the key note pdf. All CL courses should include the slides like they did here. Thanks CL.
user-3a41db
I am a newborn photographer by trade, but I really want to venture out and photograph more weddings so I decided to purchase a wedding class on creative live. Of course when I typed in wedding, quite a few classes came up. But when I saw the image and title "capture the story" I was definitely intrigued. I've always been touched by the photographs that have emotion and that's what I'm passionate to photograph! Always a little nervous when you purchase a class because you don't want to feel like it was a waste of money, but this knocked it out of the park for me! Thank you to Ryan and Rocco for explaining so much, showing the pull backs, and moving your subject and explaining why! This has opened my eyes so much to how beautiful photographing a wedding can be and not so terrifying as I've been making it out to be. I'm really so thankful to hopefully being a great wedding photographer and making more income for my family, while having fun creating something beautiful
Student Work
Related Classes
Wedding Photography