Lesson Info
26. 11:30 am - Proofing Part III
Lessons
Day 1
1Pre-Show
13:51 21:00 pm - Bride and Groom Getting Ready
46:59 31:45 pm - Gift Exchange
25:16 42:15 pm - The First Look
15:32 52:30 pm - Bridal Party Portraits
19:03 63:15 pm - Family Portraits
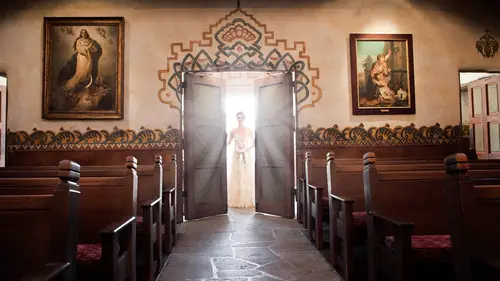
15:04 74:00 pm - The Ceremony
17:575:15 pm - Interviews: Craig Swanson, Father of the Groom
17:38 95:45 pm - Traditional Cambodian Dance
11:03 106:00 pm - Interviews: Wedding Planner, Bride and Groom
15:39 117:00 pm - First Dance, Toasts and Cake Cutting
31:29 128:15 pm - Bouquet/Garter Toss and Fireworks
15:22Day 2
13Day 2 Pre-Show
06:57 149:00 am - Getting Footage Ready
1:24:17 1510:45 am - Portraits Coverage
16:51 1611:15 am - Ceremony Coverage
36:48 1711:45 am - Reception Coverage
25:43 18Day 2 Wrap-Up
03:29Day 3
19Day 3 Pre-Show
00:51 209:00 am - Joe's Gear Bag
18:57 219:15 am - Rich's Gear Bag
10:05 229:30 am - The First Edit Part I
20:49 2310:00 am - The First Edit Part II
26:00 2410:45 pm - Proofing Part I
25:29 2511:15 am - Proofing Part II
21:23 2611:30 am - Proofing Part III
20:16 2712:45 pm - Editing The Album Photos Part I
15:51 281:00 pm - Editing The Album Photos Part II
19:46 291:30 pm - Editing The Album Photos Part III
11:33 301:45 pm - Editing Questions and Answers
32:42 31Thanks + Credits
06:38 322:45 pm - Interview with Shalia and Teurth Part I
30:30 333:15 pm - Interview with Shalia and Teurth Part II
15:25 34Day 3 Wrap-Up
04:04Lesson Info
11:30 am - Proofing Part III
The other thing to keep in mind, I guess, is these are called. We call them proofs for a reason. You know these air for the client to see all of them color corrected, but they're not tweaked like 150% thes air, the proofs for them to look at and then they choose the images for their album. And when they've chosen those images, those are the ones that we give extra extra attention. Teoh. So that's partly why I can be a little bit of loose, loosey goosey and kind of five fly by. My seat is because they are just proofs. That being said, I'm doing a lot for proofs. I'm doing a lot to make them where we want them. We obviously want the client to see them the best they can see them. So I'm gonna bring down this exposure for all of this. But I'm also bringing this down, and I don't want that to come down. So we're gonna use the brush tool once again to bring this in, and it's okay if there's a little bit of a vignette effect here because I kind of like this having a little bit of a halo, mayb...
e just a little bit. So I'll bring down the adjustment of this whole brush by clicking over there, bringing the flowers just a little on under there, and we should be in good shape on that. Let's see if I could bring the contrast. Just the exposure. Just a tiny bit. I mean, you know, these days this stuff comes out of cameras. So great. I'm telling you, a few years ago would have taken a bit more effort to get these files to, you know, really look as natural as they can. But nowadays, I'm just so happy with the cameras there. Just the color balance is really, really good to begin with. So a little bit less work, huh? I didn't use concealer that day. All right, Rich Lena. Lena has a great question. She's wondering if you have any secret presets. No, I mean all the presets air Pretty much. These are the ones that I use. I only have a couple one for black and white. And then these little vignette E one's secrets. Not really. There's an action that I'll use in a photo shop that won't be secret. either because I'll use it. That being said the action that I use in photo shop for those Wow, we're kind of extra images. I don't really know how it works, So we'll go through and I'll try and figure out on camera how that's what the steps of the action are. I can pull down the action and we'll see what goes on. But But I don't really even know how that actually works. Probably Ghazi and blur kind of thing that then I reduce using the racer tool and using the opacity of the layer. We'll get into that in the next segment, but nothing really secret. I mean, you know, Yeah, nothing. These air all out of camera. Get rid of the info for a second because I want to go to see what's going on here. Um, this image. I'm gonna crop up a little bit so that we have this little thirds rule. This thing is kind of a pain in the butt. Now, in Photoshop, it'll be really easy to grab out. But let's see if we can do it here, cause this will save us a few moments bringing it into Photoshopped. So This is the whatever the hell. The healing stamp, I guess, is what it is considered in light room. Just try and grab it. Healing also a huge pain in about a large learning curve to try and figure out how to use healing. Because if I got if I get even the slightest bit of his hair and there, see what it does, it does this really strange blend e out So you don't want that? You got to be really careful. You can use the arrows to do a little micro adjustments so that he doesn't get in there. Let's wait for it to load. There we are. And then that thing is out of there. I do suggest clicking and dragging this because, um because if you just click it, sometimes it doesn't know where you're going. See, it's grabbing this little bit of this thing and pulling it up into here, and it tries to do his best job. Thank you much very much light room. But I do prefer finding your spot here and then dragging to where you know it's gonna be cool, and then you wait for it to load. Check it out see if there's any kind of awkwardness is about it and just go from there. So that's not too bad. I don't find it too distracting. Maybe this little spot here again, you can go crazy doing this stuff. Like how far in July. Zoom until I'm ready. All right. So here we go with this, we're gonna bring her up. I'm gonna leave the sides on types because we want that little bit of a natural kind of vignette feel. Maybe we'll bring him up just a little, but not too much. Her expressions kind of goofy, So I don't know if we're gonna end up using it, but it's nice for now. Okay, So this one, I think I am in a crop in a bit because this guys not really in the shot, and I don't know if it really lends too much. I'm gonna tilt out a little bit too. Yeah, I don't know. Maybe maybe we'll just get rid of him entirely, and we'll see what this looks like. No, it's not too bad warming up a little bit, bring down the shadows and a black here and then up with this actually will bring this down because we'll just do the brush and then she is pretty dark and muddy. So we're gonna bring her up a little bit in the background. That's probably fine. Maybe the highlights a little and go back to Black will be in good shape. I like this shot a lot. I think this is really cool. There's a lot going on. Um, this one's a Joe is a good shot like this. We're going to go ahead, and we could color balance this. This also lends itself to black and right White Really well, just because there's a lot going on and the color maybe a little distracting. So let's color correct it. And then, you know, if we want to try it in black and white, let's just go ahead and do it. This shot does not really need very much. So black and whites a little under Bring it up. I think that's pretty cool. Okay, bridegroom hanging out of Brighton, her her uncle hanging out of your groom. We got this going on. Can you explain what your processes with mixed lighting when your color correcting. Okay, let's go. Let's just skip out of here I'll show you one that is mixed lighting. So there's all ceremony stuff, so we're not gonna have too much of that. Let me go to It's in your This is the stuff we're gonna be working on later. Um, some of the nicest stuff. But let's see, we got some really funky light down in here. Okay, let's go with this one. So OK, this is an image where Joe is using that phrase. The light, the video light toe. Light them up a little bit, but it's not really affecting the light too much. It's still all kind of purple in the background. But let's go ahead and color. Correct this image because we do want it to look right, and we don't want it to be. I mean, sure, this is how it wasn't shot naturally. But I'm gonna go ahead and see how close we can get this natural skin tone and see the background is definitely more magenta. For sure. I'm not too concerned about it, Honestly, because the subjects here, I want them to look really good. I don't mind too much that these guys are purple in the background is kind of cool However, I do want their skin tone to be kind of close to where it's supposed to, because it's just more pleasing to the eye. So that's it. I just went extreme with the tent down until it got to a point. Obviously, when I bring that, these guys are gonna get adjusted. But they were already pretty purple to begin with, so it actually worked out pretty well. We'll do a little bit of that thin vignette, and then maybe we'll just boost the contrast. A tiny bet. Yep, there they are, the first dance and ah, let's see, we just check here. That's a little bit more of a version, but let me see if I can show you the before and after. So there is before there it is after and, you know, it's like I got the skin tones pretty close to where they need to be. I want to see if I can find another one. That's kind of mixed lighting, as you're saying. I mean, this one's not to mix. It's all pretty magenta. Um, no, there's one here. Here we go. Here we go. Okay. So here's the image. Unread touched. I think and here it is after I've done all the adjustments to it. So in order to get there, I'm looking mostly at her, worried about her skin tone because it's kind of wild looking. So we will go ahead and adjust out some of this Magenta, bring up this warmth a little Here, we'll see how close I can get to the other image that I've already worked on. See how consistent I am is a re Thatcher. Oh, gosh. We're going to use that post crop vignette to bring it in a little bit more. I'm gonna under I'm gonna black down so I could get some more contrast. I'm gonna continue to bring down the exposure for a second because we're gonna bring in this brush. So we're gonna get her, and then we're gonna get the bride and groom in the background because I want to make sure that we can tell what's going on. I love that she's pointing up with them, too. That's kind of like kind of lucky framing. All right, uh, let's see what's going on here. I'm just going to go in and adjust a little bit of sharpness because it is a little out. Bring up these radios in detail, just a tiny bit, Not a big deal. And then we can even do a little bit more of the contrast. Okay, let's see. So I already done this other image before. Let's see if I'm any clothes to where this other image is. What's the difference? Pretty close. I actually think I like what I just did. Mawr the air, both adjusted images. There's the difference. There's the fly by your seat stuff right there. The vignettes a little stronger on this edge. And this image. Where is here? It's a little bit still lit up. Obviously the contrast is a little bit less. But yeah, I think you know it's not that big a deal. One or the next one. They both look pretty good. This one actually does probably look a little bit better color. Let's see again. This is a little bit more purple, so we might end up going with this. This one I had adjusted yesterday. That's Ah, a little bit of I guess it's considered split lighting. Let me think. There's another split bite kind of thing, cause yeah, this is split like because I mean, yeah, there's a little bit of you can see it in here. It's different. It's just gonna have to be that way. Unless you go black and white. There is gonna be purple in some spots and natural kind of flashlight or whatever it is I don't even know to flash fired in this shot. Why don't we find out? Richard and I noticed that you have virtual copies of a lot. Oh, that's this actually sorry. Yeah, that is, um the virtual copies in this particular instance is for display purposes for our show because I wanted to show these images before and after. Um, again, I'm gonna do this more in the next segment, but having a virtual copy isn't necessarily part of your work. Not usually. No. I don't usually do virtual copies. The only time I will is if there's an image that's just like so cool that I wanted to be black and white and in color. I'll do a virtual copy, and then I'll do a black and white conversion, and we'll give them both. But for the most part No, I don't I don't need them. Really. For most of the stuff that I dio. So let's see. I'm gonna go back to the ceremony and let's let's see how fast I can go. If I can just do this and not talk as much, maybe we'll see how fast I can do these next bits. Um, we were in here somewhere. Right? Okay. So Okay, here we are. Let's just go for it. Speed Ridge speed. I don't think I'm gonna be able to do it, but, hey, we're not at that time. Of course, the computer I'm at the will of the computer at this point to here. Going here will go down like this, boost this up a little bit, a little bit of warmth, and we are pretty good. Maybe a little more contrast, So yeah, Not necessarily. And we're fast. I know that this image is similar to this image, so I could just like that one. Then go back to this one, hit previous, wait for it, and then we get poor more or less. The same adjustments actually get exactly the same adjustments. He's a little bit brighter than he was in the other one, so I'm gonna erase some of the brush off of him. Don't Don't. I love this shot. This is Joe shot freakin awesome. Awesome! Awesome shot. So we're gonna go ahead and bring it down. We're gonna feature the bride with the brush. Come on. We're gonna zoom in right down to her face. So you see, I'm doing that. I'm just kind of clicking, clicking and then getting it way down in there. But because I was zooming in the whole time, it doesn't look like I just did. Her phase kind of has a natural Grady in. We might bring her in a little bit, too. And then we might contrast it because this is nice and colorful. This and this pretty close. Let's try it. Let's try previous or sink. Okay? Actually, yeah, that works. We'll just leave it because that's pretty cool. I might do a little bit of a crop because there's a little bit more headroom going on. So a crop down to this light, I could leave this light in because it's also kind of an edge of the image. But I'm gonna go in crop down to this light because I want him and the framing to be a little bit less head room E head roommates, a new phrase I get no Oops, I did the wrong button. I did 10 when I meant to do contrast. Another cool shot of Joe's here. Uh, Maryland loves to make fun of Joe. He loves glassware, and so we'll get some really cool stuff of a lot of glassware. And she's like, where the people but But they do workout. I mean, this is cool. Whoever placed these glasses in this light knew what they were doing because I even got a shot of it later, too. Was just like to to Well, that this is just a cool little detail. Bring this highlights down a little bit and we'll leave it. This image needs a little bit of exposure. Actually, I'm not gonna not gonna crop too much. Maybe a little bit of these highlights up top. Bring him in with the brush. It'll come out now using the brush. A lot does slow down the machine. So if you don't have a super fast machine, you have to be aware that the more you use the brush, it typically takes up ram from your machine and you'll start to bog down a little bit. You can fix that a little by, you know, hitting the restart. Restart the computer a couple times in a row. I find doing that sometimes helps. I'm not an expert on that, but that's something I use if it starts to bog down a little bit. Having a good machine is obviously really, really important. This computer has eight gigabytes of RAM, the one we have the studio has. How much did we get on that computer? It's something close to 32 gigabytes of RAM, which is probably more than we need, but who noticed? So having a good fast machine is a big deal rich. I notice you're not converting a lot of them to black and white is not something you're gonna go through and do afterwards, or it's just you do it by feel as you go. Well, partly that's because I did. The edit in Maryland didn't do the edit. She does pick the black and whites probably better than Ideo. But yeah, if if you know, if a bunch of these have been picked out the black and white, then I would have just gone ahead and done them right now. Sometimes we pick him later. Sometimes I pick him in the moment. You know, like, if I'm going through and I'm like, you know, if that one should be a black and white, that's kind of nice and color, but, um, yeah, sometimes I'll just do it here as a prerogative, like, I'll go Well, you know, uh, yeah, maybe Maybe we don't need both these to be in color, and I'll just go ahead and do it. And usually when I do it all market with this number six so that we have it marked down is red and black and white. And then later we can figure out if we need this many black and whites, but, yeah, normally, they're selected out ahead of time, and I'll be doing them here. And actually, you know what? I don't do them. If they have been all selected. If there's, like, 20 or years images marked with the red symbol, I can just go in. Let's just Let's just pretend right. So we got this one. Mark, read this one, Margaret. Okay. We'll have this on my right. And like this one right over here. Yeah, I will do a few of these. Okay, so then I can go library. Or I could do it right there. I could hit the red ones. We got him. All right here. Lined up. Just select all, or Well, I guess I'm kind of doing this out of order. But so we turn this one in black white by hitting creative, black and white. The setting that I have select all of them sink. There is. I want the same things sink that were sink earlier when I created that action that preset, not white balance. Not exposure, because these images air shot at different exposures. But I'm gonna leave the rest of these selected cause this is part of the preset clarity tone curve. Yes, I do some clarity on Maybe I didn't. But sharpening, I definitely do. A little bit of sharpening on the black and whites just cause I can You can get away with it a little bit more color, obviously for sure. And the noise reduction? Sometimes I bring up the noise reduction of my actions. None of this other stuff needs to be done, So we're gonna leave all the rest this out sink um it will go ahead and do that. Um, if I was a ton of them, then I'll go back out to library and I will select all of them or they'll already be selected. And I'll build the previews for them so that I can then go through quickly. These have already been built. Well, actually, no. They're building really quickly because I just did it. But then, you know, then I can just go through the black and whites separately from everything else and make sure that the exposure is worry things to be and do anything else that I need to do just to those. And then those will be done ahead of time before I go in and color correct some of the other images. I'm not super consistent with that. Sometimes it'll happen after or sometimes it's just happen is part of it. But I typically like to do the black and whites ahead of time so that I can see how the images flow. Because, you know, having black and white images in with color images does affect the flow of the event. Um, when the clients looking at them one after the other So just go ahead and do these right now. Just cause we have the moment, do a vignette. I'm gonna bring it down. It's way too much. So we're going to reduce it, and then you get just a little bit of actually, that's kind of a little bit away. No. Is the wrong one year. Yeah. There you go. So you get a little bit of a vignette of her coming down the aisle, and then we got this one. This one could use that little edge, that rim of the vignette. So we're gonna go ahead and rim this, and maybe she's a little bit too far out, so we'll bring her back a little bit with this brush tool whenever it decides to lewd purchase. So fascinating to see you work your working so efficiently, quickly. And you're extremely consistent. Like especially seeing the one image from you know, you had edited yesterday today, and it was like, spot on. It was pretty close. Really impressive to see you. Your master at your craft. Awesome. Very much. Well, I have one last question. What we are seeing from the way you post process all your work and how you're editing. It's very clean. It's very truthful. It's very simplistic and true to the moment you're not over processing, are adding crazy presets on top of presets and then tweaking it. So a stylized like with a a specific tone that's your own. You're keeping it very truthful. Is that something that is specific to photojournalism? I think it's specific to photography myself. Um, I think that the images should look like photographs if they start going to the moon or to Mars or something, or a super CB ed or, I mean, even see. Peotone is an artifact of a photograph that's been left out for years. I don't we don't we don't ever do C B A to our images because these air digital they've been shot last month. So to me, doing like a CB atone Super action high contrast. I mean, if it's requested, sure, but But the reason they hired Joe is because they want photography. They want the images to represent the moments not necessarily to be over the top extreme. Um, so yeah, that's that's kind of our I am on it just like that. We wanna present the images as they were shot. And, you know, that just means that we got to shoot him, right? Because, you know, they have to look good to begin with in order to make him into this kind of a simple adjustment set up.
Class Materials
bonus material with purchase
Ratings and Reviews
Carlos Zaldivar
Joe Buissink, Thank you for share your out of this world wedding photography its be on great,I just love it. I look up to you every day I do a wedding. I have yet to meet you but some day I will. I took conclave in April 2013 and wished you would have been there. My favorite wedding photographer is Denis Reggie which has become a friend I just love his work also. Between you and him both of you I look up to and hope some day I can be as great of a photographer just like the both of you. I just love to be a wedding photographer. Thank you for share such great information and course. Carlos Zaldivar Carlos Zaldivar photographers www.carlos-zaldivar.com
Jessica Lindsay-Sonkin
This is one of the more slower-paced courses I have taken on Creative Live. I ended up watching the videos over a span of about 4 months, but enjoyed every moment of it. Watching Joe and Rich work is a beautiful dance. I love Joe's philosophy and he instills a calm spark in all that he does. The way he looks at angles, approaches situation and works with his clients is mesmerizing. I highly recommend this course if you are looking to be inspired by wonderful philosophy and to gain valuable insight through watching a master in action.
Student Work
Related Classes
Wedding Photography