Frequency Separation
Lesson 11 from: From Shoot Through Photo Editing: Wedding Portrait Retouch in Lightroom and PhotoshopPye Jirsa
Frequency Separation
Lesson 11 from: From Shoot Through Photo Editing: Wedding Portrait Retouch in Lightroom and PhotoshopPye Jirsa
Lesson Info
11. Frequency Separation
Lessons
Class Introduction
02:07 210 Tips and Techniques for Shooting Wedding Portraits
22:14 3Shoot: Groom Portraits
21:28 4Shoot: Bride Portraits
25:07 5Shoot: Wedding Couple
10:58 6Post Processing Workflow Tips
11:51 7General LR Base Tone Recipes and Batch Processing
27:42 8Cloning and Simple Compositing in Photoshop
13:17Lesson Info
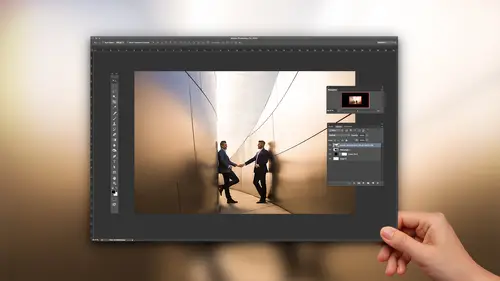
Frequency Separation
Let's just show you all frequency separation because that's kind of the last piece of the puzzle when it comes to where we end re-touch, okay? So, in the cases that we're blowing up something, in the cases where we have a lot re-touch to do, in the cases where it needs more than just that, what we've done so far, that's where we go to frequency separation because it's a very simple technique that it's incredibly efficient, when you're inside of Photoshop. So, let's do that. I'm gonna go back to, okay, so, let's go this way. We can get to virtually the same place with frequency separation, so if you want to you can run that first action of, you know, doing your thing, and if you need to do frequency separation, you can do it at that point, or you want to just skip it and go to frequency separation, you totally can. What this does, and I've included a little guide right here. Why? Because it's really funny, every time I learn something, I try and learn the why's of every single thing, be...
cause when I learn why something is done a certain way, I can remember it better, okay? Always try and learn the why's. I've read every technical manual I can find, and I can't find the why's as to why these settings are those settings, and so this is the one time, and because I can't, like, know the why of it, I have to have it written down, so I always have this written down. We have the actions in the studio, and stuff like that, but I wanted to walk through this step-by-step. And, I have it written down like on my desk in case I ever need to modify or create a new frequency separation action, I just write it down. So, I'm gonna walk through the process right here. But, this is the actual steps. When you're working on a 16-bit image, if you're working on an 8-bit image, there's different settings and actually, my good friend, Julia McKim, Julia McKim Kuzmenko, I think that's how, I probably slaughtered her last name, so I'm gonna say Julia McKim, she has an amazing guide on frequency separation online. It's on fstoppers, actually, it's a really cool guide, and it has the 8-bit settings, it has everything that you need. She's an incredible retoucher, and I think she also does tons of tutorials and everything. So, anyway, so let's do this. Let's jump back into, I'm gonna take the unedited image, or the unPhotoshopped image back into Photoshop. Okay, so, we're just gonna go back to this same image. Okay, so what we're gonna do is, what frequency separation is is we're separating color values from texture values, that's it. Simple as you need to understand it, to make it work for you, that's all. So, what I'm gonna do is label this, and let's not do, like, crazy children names, and I know my kids would love it, but let's just go with something realistic. High frequency and we'll label this low frequency. Okay, and what we're gonna do, is we're gonna select the low frequency layer first. We're gonna go up to Filter, Blur, we're gonna go to Gaussian Blur, okay. I'm gonna bring it over, actually, let's just zoom out a little bit, okay, what we wanna do here is adjust to a pixel value that knocks out detail, and here's my rule of thumb when it comes to this setting: you wanna set this so that the detail is knocked out without having color bleeding over itself, or bleeding over other areas, does that make sense? People always ask, how far do I go with my Gaussian Blur when I'm doing this, frequency separation, that's it. So, for example, if we look at the eyes, what's happening is that black is bleeding over. Do you see how the lash of her eye, the black is now bleeding over other areas of the lash, or, like other areas, so if we look at the outside edge of her skin, the color of the skin is now bleeding over the background. So, we've gone too far. So, what I usually do is dial it back until you've killed most of the detail without getting that bleed. So, this, by the way, will vary depending on the resolution of your camera and the photo going into Photoshop. So, if you find that you're uploading a high resolution image that's like 50 megapixels and you're running at like 25 pixel radius, that makes sense because it's a really high-res file. So, you have to up the value, okay? So, just kind of keep that in mind. Press Okay. Now, this is the confusing part. You're gonna go select the high frequency layer and what we're gonna do is go to Image, and go to Apply Image, and I'm gonna see how much of this I can remember from my memory, so we're gonna go Select the layer Low Frequency, Channel, I want, I believe RGB, we're gonna Invert this, I'm also going to go to Add. I think I remembered. Ha. (claps) Who'd have thunk it? Okay, Scale two, Opacity 100, Preserve Mask, and Transparency off, Offset zero. Let's just double check, let's look at the slide real quick, and just double check. I always like to double check to make sure I got it right. Okay, so, yeah, we've selected the low frequency layer, RGB Invert on, Blending Add, Opacity 100, Scale two, and I wish to goodness that I could, like, figure out why those settings. I'm the kind of annoying person that when I buy a piece of software, I'll call the technician, and be like, why does it do this? I actually did that with Photo Mechanic, I called them up and, like, why does it do this? Can you tell me what's happening behind the scenes? And he's like, really, you wanna know that? I'm like, yeah, absolutely, anyway. I'm gonna have to call Adobe and ask them. Why? Press Okay. Flip this back to Linear light. And guess what we have now? If we group these two layers together, by pressing Control + G, selecting both layers, Control + G or Command + G, turning it on and off, do we not have the exact same thing? Is that not the exact same thing as our background layer? Yeah? But watch this. If I go and hold down Alt + Option, click the eyeball, this layer is only texture, this layer is only color. So, if I feel like her chest is too saturated, I'm gonna press B to bring up my Brush Tool. We're gonna select the Low Frequency layer. So, let's just do this: I'm gonna label this as Color. Label this as texture. Select that layer, press B to bring up your Brush, go down to a one percent flow, and watch this, I can go and grab, I'm gonna hold down Alt + Option, is this working? Yeah, there we go. Okay, I'm gonna sample a layer, an area of color that I like, so like right here. I'm going to paint it right over here. Okay, sample an area that I like, and paint that. I'm gonna increase the flow just so you guys can see this a little bit quicker. So, normally when we do this, you'd go to a pretty low flow, but let's keep it up quick. Okay, Alt + Option, sample, paint, sample, paint, sample, paint. What we want this do is kind of create a nice graduation, I don't wanna remove the shadows. I just want to, oh, I need switch this back to Normal. My Blend mode was on Penlight. Let's try that again, there we go, okay. So, this is why we go one percent because that five percent was too much already. So, I'm just gonna go quick over these areas. Okay, so see how it brightens up too much right there? So, let's go to one percent. My numbers aren't working on my keyboard. Everything else works, the numbers don't work on my keyboard. Is that weird? Okay. Now, this is the beautiful part about this. What I've just done is, I'm literally painting color over the image, so if we turn this on and off, so watch this. That's the shift that I just made, right? But, I didn't affect any texture. Every bit of that texture was left in place. Does that make sense? So, now, check this out: if I wanna do, like, retouch? Let's just say I wanna remove some of the texture, I can select the texture layer, I can literally sample, and just, oops. When you're sampling on the texture layer, make sure that you turn off Current and Below. Go to Current Layer only. Okay, and now, all I'm doing, I'm not affecting any colors, I'm literally just changing texture. So, I can go through, like, this entire thing at a blazing fast, oop, why is it not sampling? Stop doing that. Alt, there we go, there we go. Okay, so you can sample and just remove anything you want. Now, if you have a big job and you're like, okay, I need to remove, like, strands of hair, and that kind of stuff, like, look at how quick this is versus, we can target color, or texture, and remove and adjust and do anything we need to. So, when you have strands of hair going across, it becomes very, very simple to do that. When you have a baby's skin, like, if you're doing newborn stuff, and you have, you know, a baby when they're first born, a lot of times they are a little bit jaundiced, like, their skin is very different shifts in color, sometimes they have rashes, sometimes they have blemishes. I can literally just paint a color from a good area right over the other one, while retaining texture. And then, I can go and modify texture as I need to. So, this is as far as we would go on the retouch side with most of our images, is frequency separation. A really easy way, you separate both things out so you have just texture, just color, on different layers, you can work with them as needed. (no sound)
Class Materials
Bonus Materials with Purchase
Ratings and Reviews
Pamela Richardson
I would absolutely recommend this class. I watched this class by chance on the rebroadcast, since I am not a wedding photographer. However, I learned so much that I was amazed. I do take many many photographs of friends, family, and at events, although my professional speciality is landscape. I will be able to improve my photographs of people substantially thanks to Pye's course, because I learned so much about how to pose subjects, how to work with a variety of backgrounds, lighting, and then the photo editing. I can apply the photo editing to all of my photographs, not just portraits. I really liked Pye's comprehensive explanations of each step that he was demonstrating, for both the portrait session and the photo editing. I really appreciated Pye's clear demonstrations of how images of people can be improved, and am eager to apply his examples to my own work. I appreciated Pye's absolutely outstanding presentation skills, as he had slide show already prepared, with the list of tips and associated mini tips for every step of the process. I learned so much about equipment (such as lighting and flashes), additional software, printing and publishing services, and more. Pye's presentation pace allowed me to make notes and absorb what he was saying. My friends and family will also appreciate my increased skills at retouching photos of them!!!
user-a2f1eb
loved this class! lots of good info and it was great to see a small version of his normal shooting process. He presents it in a very fun and entertaining way making it not just educational but also enjoyable to watch!
Sean
A+ Fantastic course. Quick work flow is a real weakness of mine. Pye did a terrific job. I must admit, sometimes I fail to appreciate the top caliber of talent CreativeLive gets. There are a log of great Instagram photographers that don't make money. CreativeLive gets top tiered working photographers, which is key. I know I'll need to re-watch so I can implement what Pye taught.