Lessons
Day 1 Pre-Show
05:29 2About Us: Post Theory
19:41 3FreePreview: Tools We Use
22:15 4File Management
22:24 5Photo Mechanic
17:02 6Building Proxy DNGs
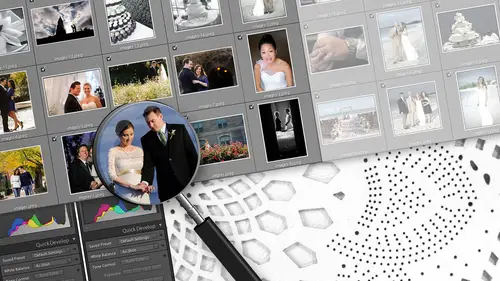
31:18 7Metadata in Lightroom
38:49 8Catalog Editing
36:37Lesson Info
Building Proxy DNGs
I just wanted to just give a quick shoutout. We have received a lot of contacts email, Facebook messages, etcetera over the last day or two with Susan talking about us and us being on today, we want to talk to all of you. I promise we will get back to you. But right now we're at creativelive. Eso Our email is a little bit behind, so we will get back to you on that. And for those of you that have any Photoshopped questions and you're wondering if we can help with that Our colleague Sam Taylor is a Photoshopped guru master. So if you're interested in that stuff, which is a little different from what we're teaching, you can reach out to less than we will get you in touch with him and make sure that he can answer your questions about that. Right? So now the fun begins. I am so excited. This is going to change your life. So whatever you're doing, sit down. Watch the segment. This is gonna be the best. Okay, so let's let's actually talk about how we can speed things up specifically on. We've...
talked a little bit about incremental speeding up like using photo mechanic, getting things organized, doing everything the same way every time according to your own operating manual. But this is where the real speed comes in. Yeah, there's one key area that we can we can focus in on. And this is called proxy editing. This isn't a concept that we've actually made up. This is this is a legitimate thing, and we're gonna go ahead and call. This is the future of how digital photographs are gonna be edited. The concept itself has existed for quite a while with video editing. So if a lot of your into digital video editing, you probably going to see some similarities to this concept because it's existed there for a long time, and it's taking a little while for this to work its way into digital photography. But this is the future. It's this proxy editing, and this is what we're gonna talk about today in order to do that, and you take a step back from this and sort of explain what we're really talking about here, and this is not meant to be scary or intimidating. What we're talking about is metadata. Everybody's familiar with metadata we used the word enough. We know what this is conceptually, when you have a shoot and you call it something when you put the bridegroom's name into it, you have the location, the date this is metadata we're all familiar with. This is a concept, right? When you're getting into it and you want to add tags like you know, Jane Michael Four seasons. Maybe you add the names of some of the other wedding professionals that you're working with, so you can find those later. That's kind of what we primarily go to when we think about meta data, right? So what's interesting about that? What's cool in what we're again familiar with is that applications can see this metadata information, and it can tell you things about your photo that you otherwise wouldn't know by just simply looking at it in your file browser. So, for example, you can right click and get the properties, and it tells you the dimensions and the camera, the aperture. These are all familiar metadata fields. So again we're used to these things. This is this is familiar, so we're kind of building on this a little bit with interesting Now is in light room. Every adjustment that you make is also metadata. It's just metadata. This isn't like Photoshopped. This isn't like, you know, a graphics editing program that you're used to. This is just metadata information. So every single time you make an adjustment exposure temperature, white balance, a spot at it, brush literally. Everything you do in light room is nothing more than a field of metadata saved in a database saved in a file. That's all it is meditated. So your camera type your aperture your eyes, so the amount of exposure you added the amount of black levels, you added. It's all just this one huge umbrella of metadata information about your photograph. So in that respect, you could kind of think of light room as a recipe book. The catalogue of Light room doesn't hold your photos. It's not. It's not a container that holds all of those things. It's more or less just a recipe book that has a list of all the things you want to do to your photos. So if you told it, I want to add two points of exposure and I want to, you know, increase the contrast and Then add this and add that it's a recipe. You know, it's a recipe that needs to be run against. You're raw photographs. I'm gonna say something. Now listen carefully. So when you're in light room, you aren't really editing your photo. You know, you're really not. I know how this sounds like ridiculous, but you're not. You're not really. You're not really editing your photo. You're just creating a recipe. All you're doing is you're creating that list of steps that you want light room to apply your photo at the time you hit export. That's when flight room actually takes all of that stuff that you told us to do. And it bakes it into that photograph into a finished product. So it executes the recipe that you have executes created. Exactly. You're creating a recipe. Not until export does that recipe actually get executed. Right? So it's a recipe book baking it in. So we actually have. Do we have that? We have a little We have a little visual aid. I think we thought we would do a quick visual to kind of illustrate what we're what we're talking about and also make that visual be ready Hard because I get to do the fun stuff can tell we like food. Wait a lot. Food seemed like a good demo. All of a sudden, I'm really hungry. Way thought it might be a little much to ask creative life for sushi's way. So when you're in light room, you have all of these ingredients, right? And you have a recipe. So when you're actually ready to send the photo out you want, explain this one, make the sandwich. I can't talking to you. Come, come on. So this plate, this this is a sandwich is a completed saying, What if somebody said to you like if you ordered a sandwich off the menu and that's what they gave you be really upset, right? Think of this plate of wrong greens as your raw photos coming out of your camera. And interestingly, it's kind of funny that we're doing this because we've all had that client that comes back and says, like, Can I have your all files? Um, and my answer is always No. But after I say no, I usually say to them this would be like asking your cater to just bring the ingredients for your dinner and just leave the matter at your reception. Asking me to give you the raw files is basically like asking your caterer to give you chicken and beef stock and whatever else it is that goes into that recipe, but without actually making it. So I'm a real stickler about that. But these are This is your raw file. This is your profile, and it's not refined and it's not finished, and it is not. It does not have that recipe baked them. And if you want to make a sandwich now, you need to know, how do I make a sandwich where we do to this to make a sandwich? So there's a series of steps. You know, there is a specific border that a certain number of ingredients that she needs. It needs to go in a specific order, and she needs to make the sandwich look a certain way. If we were to write down every single one of these steps as she's doing it and create this recipe, this becomes your leg room catalog. It's just recording what those steps are, so it's not actually changing. It's not making it. It's just recording it. I think it was really, very seriously. All right, here we go. So, bam! I made the sandwich. Now what we've done is not exported. Creativelive. Look what they're doing here with a watermark. Their watermark on here. So we thought we would use this visual to show. Okay, so this if this was your wrong greens, your raw files coming out of your camera untouched, Unrefined, unfinished. It's still a sandwich. It's still a photo. That's your finished photo, right? This is what you present your client. That's what you bring us your at the sandwich. But you need a record of how to do that. And that's what the catalog is. That's all it is. It's just metadata. And the thing worth noting here is if you get this sandwich and then you say, Oh, I forgot. I hate tomatoes. Sorry, Tomatoes. Everybody doesn't like you. I'm sorry. You could always go back into light room. You could pull all of these ingredients. Look at them again. And you could side no tomatoes because maybe you didn't want to do that many shadows. Or maybe you needed to up your exposure, and you could just export the sandwich again for the file. Really? Look at it. And now you have a different sandwich again. Same ingredients with the key to the room is nondestructive, right? The key difference between this and photo shop is I haven't destroyed any My ingredients when I created this new sandwich still have the ingredients can still make another sandwich as many times as I want. I think someone in the crew has dibs on the sandwich. Yeah, let's get Tyler is sandwich. So does that make sense? And it was a It was a stretch. We like food, So yeah, you know, anywhere I can get some food in there. So we raised this issue of light rooms, not really editing my photo. It's just it's just creating this recipe. It's creating this, this list of steps of adjustments. But when I'm in light room and I see my photo changing what's happening, it's not editing my photo. Then why is my photo change? So this could be a little confusing, because when you're working in my room and you had exposure, the photo actually changes in front of your eyes. If you run a brush across that, it actually changes so it's a little bit confusing to think that it's it's still really not changing, not editing it. But these changes are still occurring anyway, right? So I'm saying you're not really editing your photo and you're looking at the thing and saying, Well, it looks like I am I think you might be wrong, right? What's actually happening is light Room is in real time trying to figure out based on the adjustments that you are making, what your photo will look like when you exported. It's a really time simulation. It's a Ziff. Jen was designing this sandwich recipe in the sandwich was appearing and changing and reappear e and changing in real time in front of its like the wind around Icann's website. You go in, you move the furniture around. It's not It's not really happening in your living room, but you can see what it would look like in theory, right? So light room is taking all of these adjustments that you're asking it to make. It's looking at your raw ingredient photo, and it's applying them in this preview in this space that you see in front of you in real time as quickly as it can try to keep up with the adjustments you're making. But the problem is, it's doing that against your original raw file, which, as we discuss before, every time there's a new cameras getting larger and larger and larger with more pixels. More more data, more information so that previews getting slower and slower. So light rooms now having what's happening is this big file. Every time you hit an adjustment, it's thinking, and then it's making the preview and you're sitting and you're slumping and you're getting sadder and more beaten down because the files are big. They're so huge that it takes light room longer. It's not light rooms. Fault Light room didn't know the D 800 gonna come out at 36 million. So, yeah, probably cried in the corner. That and it's true. So if you you know, you could certainly try and build this huge supercomputer that could handle this intensive processing, but it's not practical. So when you're actually looking in light room and this is we're going to kind of take another step back here and really assess what what we're looking at when we're working late room that preview that you see in the develop module marked by this this red X that is orange X that we got on the screen on a typical 27 inch monitor that you would get on an I Mac. It's set to a factory resolution. It has its its screen dimensions that you see if 60 by 14 40 that space in the interface of light room that you would put your photo in so you can see the entire photo full. Full size is actually no more than 1.5 million pixels that space. So this X 1.5 million picks is if you would calculate with times height, that's how big that space is. That is the equivalent of a 1.5 megapixel image. So if we were back in the nineties way all had 1.5 megapixel digital cameras that would basically be a full size one. The one of your phone and it would be full scale full size. The reality is you're dealing with photos on let's say, D 700 that are 12 megapixels, 12 million pixels. So these two screens here using this is what I'm using to illustrate this point. The interface is set essentially the same. You're zoomed out to see the entire photo, but one screen has 1.5 million pixels and the other has 12 million pixels. You're seeing the same thing, but your computer is having to work 10 times harder in one version than the other to keep up with all the adjustments and renderings that you're making me tired. Just even a little more light on this for the 12 million pixel immersion, which is slower, which takes light room longer to do things you consume in 1 to 1 on this image and get into the detail. Right, Okay. But you're probably never going to do that in light room because most of the time you don't. And if you want to, you would do it in photo shop anyway, because it would be more accurate with the 1.5 million pixels. When you're just looking at the whole image, you basically you're looking at the exact same thing. The only difference is you cannot zoom in 1 to 1. Is this making sense? Because I know this is a little bit of a complicated concept. I want to make sure that this is an understood thing. So when you put together with the fact that we've we've selected and colder images and photo mechanic had the ability to go 1 to 1 to check focus, check sharpness now they were in light room. Really? We're not looking for those things. We don't have to look for this things. We check them already. We can remain at this zoomed out global view, our picture to make our adjustments because that's what we're really concerned about is the temperature and the white bounds issues and their global things. Global things and even a local adjustment brush typically is being done in light room on a global basis, not zoom really tightly in because it's not what light room is good at. Do we have any questions from you guys about this concept? So for explaining it pretty okay, I think that makes a lot of sense, you know, just saying specifically what? Why you use it photo, which was a question I came in with. Why? Using photo mechanic I supposed to light room and what they're both really good at. And you're basically just saying this is for global for the big picture. Not anything extreme one on one, because you're not gonna be able to see it at that 1.5 megapixel racial. Exactly. And that's a brilliant point, using the different software for what it's good at for what it does quickly and when it does well. And light room is good for post processing, high volume of images. Photo shop is good at going in and taking out my laugh lines. Okay, so before we get into the actual mechanics of doing this, we wanted to take a quick second here and actually see if they're in questions about the introduction of that God. 12 million pixels versus 1.5 million pixels. So in the terminology of light room and the preview, which preview type are you talking about to use as the most efficient method? The overall preview that we would recommend is a oneto, one of what light room would consider to be It's 1 to 1, but it's a 1 to 1 of the 1.5 not of the 12 million right. If you took the million full size and you did, let's say a minimal or the in between. There's a couple different levels of previews that you could do a light room. You still don't get the benefit, the performance benefit, that we're actually gonna talk about its preferred to still do the one toe one preview regardless. So how do you change from the 12 million to one point? That's the way it sort of made sense. First, I don't want to accumulate too many like too much confusion, because then, by the time we get into that, people don't know what we're saying. What we're actually going to do is we're going to leverage this concept of the fact that all we really need to look at is that 1.5 million pixels on screen, a 1.5 megapixel photo, essentially. So let's build proxy D and G's proxy edit. That's what we're actually we're gonna proxy at it before we do that. Do you all understand what D and G's are? B and G is essentially a form out for raw file, and it is a no open source. And that's the reason why we used Angie's, Aside from this proxy issue is because we know that it's not proprietary sewn icons, files and canon styles and Fuji's files. They're all proprietary formats. And when we make the conversion to DMG, we basically have the ability to have all of that information. It's no longer proprietary. So in theory, in the future, if they stop supporting a particular type of file, we would always be able to get information out of the Angie's. That's kind of why we were always, you know, sort of loving on the DMG speak. There's another really big reason. And so now that we've introduced this concept that we can work with a file that is essentially a scaled down version of our original wrong, you can't scale raw files. You know the raw file. It comes out of your cannon, the nef, the CR twos, the Fuji's. They can't be scaled. They're they're literally locked into the way they are. And it's because of the nature of raw files. They're not really photos there. Blocks of data, more or less, and they're meant to be processed and run through some kind of an application that could tournament a photo that we all understand that block of data can be scaled, can't take it from 36 megapixels of 1.5 megapixel. You did something in between that can do that. That's where this DMG concept comes in. This is an intermediate file format that we can leverage that concept with. Do you want to mention about the difference between what happens with metadata with the NGOs versus raw file? Yes. The other interesting concept about RAWs versus D and G's is that you can actually embed all of your metadata. Remember, we've been talking about metadata. All of that metadata can be contained in the DMG, whereas with your traditional raw file, enough scr w whatever the 21 is you have what's something that's called a sidecar file in X and P C, where we got our name. You. Can you have those separate as separate little sidecar files, so to speak, said the dean. I like GMG because it's like a little envelope, but it holds everything on, and I like the neatness of that. It's a totally different concept in your life room catalog, because this DMG literally is now package that holds your photograph as well as all the metadata, all the metadata the admitted that you put in there from your shoot the metadata from your camera that it puts in there as well as all of your late room adjustments. You said you wanted your white balance to be a certain amount. You want your exposure to be this amount. It's in that little DMG file. It it could be packaged in there. And this is actually a critical part of this of this concept that we're gonna go over. So in order to do this, we actually have to build proxy D and G's. We have to build these files that are scaled down versions of our original raw files. Now, Adobe has already had this this plan really in motion for a number of years, and they have now built this concept into their DMG converter. If you run their applications DND converter, you can actually see, and I'm gonna switch Converter. Is that free? It is a free operate. Hey, something's free. DMG converter. I'm gonna switch over to and actually show you the application itself because we have a copy of it here. Uh, this is 8.1. Anybody's asked are looking or interested these things. All right, so DMG converter as of I believe Version six or seven. Adobe introduced this concept called lossy compression. This is what we're talking about when we're talking about these proxy D and G's. You have the ability to take a raw file as a source and create a D and G. That is a compressed version of it. And you can define how big you want that DMG to be by pixel count by megapixel count. If you don't use this lossy compression, you can create a full size DMG file full size. We're gonna talk about that, too. But this is how you would actually take that DMG file and make it small the way that he showed you so that it would be the size that appears on your screen while you're editing right so you can now choose under lossy to do pretty much any signs you want. You could you could pick any one of these things and they have different, different purposes, different reasons for us. It just so happens that because the interface in late room is really only displaying an approximate 1.5 megapixel image on a 27 inches 27 which is pretty common, we're only gonna create 1.5 megapixel D and GS, So this will take mine. 50 Meg, 36 megapixel. Raw for my D give me 1/2 Meg 1.5 megapixel D and G. Very, very, very tiny file. So that's what this application is for because we don't need more data than what can fit on the screen in that interface and for what we might as well, right. So we might as well go with minimum data that will work for editing purposes. Right? So this is a two part process. We're making the these scaled down versions, and we're making the full size both from our raw files. So we have wrongs we have scaled down and full size DMG. There's a reason we're doing all of these things, But this is how this is. This is happening. You can use this application. Like we said, it's free from adobe. Um, so you would select your source, right? You select your source folder. In this case, obviously, what we're selecting as our source is Wait, you making right? So Jen did the calling earlier on Susan's shoot. We have our directory structure built. She moved all of her selects into the master raw folder. So these are the pics from photo mechanic that we want to work with. So before we even loaded this into light room, we're going into prep these files to go into light room. And this is actually step three on our If we want to refer back to our whiteboard. For those of you were trying to see where we're at, it's either a portal or a ring of fires. It is a ring of fire. So we would select all of these raw files as our source of these are the original full scale, full size images. And then we actually have a sub folder set up in our project, specifically toe hold our proxy D and G's. So this is one of the sub folders that we've pre built in our project. Right at the beginning of this phase, it's empty. It's what's waiting for all these files to go in. This is one very, very specific components. I'm not mixing these with my Ross. I'm not mixing them. A tips like these get their own folder. They stay there. So now you know what that proximity and you know where that made it. Beginning is all about. It was always there, waiting for us to do this process way Have this automated now. But this is how you can do it at home, you know, easily and for free, right? Absolutely. And then some. Like I said, Dobie has had this a long time in the making. So this is it works very well. So you change your compression, your lossy settings, you make these proxy de Angie's and then you go back again. Turn off this compression this lossy compression run against your raw files as your source again. You can use these raw files multiple times to make as many proxies as you want or, says Cmgi's. It doesn't do anything to those files. Yeah, you could make a many sandwiches as you want, and the raw files will still be sitting in a master world afterwards. So again we pick our raw file is a source, and now we're gonna take and make our full sized Angie's. So we have full scale D and G's proxy D and G's and original source raw files. It's a two part process in the D and G converter. So again, all these things go into their separate sub folders and everything is kept well organized, so we won't actually run it. But we've run this. We've set this up. Everything is in its in its it's someplace everything in its place, everything this place. So I'm gonna switch back to Do we have any questions about this part from you guys and maybe from the Internet in a minute before we actually, yeah, take the next step and start importing any questions because we're gonna move on to importing question. I'm just wondering what the difference is between the full DMG from this process, as opposed to the light rooms version of allowing you to convert to D and G. Nothing, it's actually it's actually the same. The difference here is the work full of itself. So light room is still using the same technology to take your raw file and make a D and G. The difference here is were actually breaking the process out of light room much in the same that we we've done photo mechanic to use the calling as opposed to using later. We're pulling the process out of light room, and we're actually defining specifically where they go in our sub folder structure. And there's a very big reason for doing that. Um, light room has started to introduce this concept of proxy editing by allowing smart previews in light Room five, which is a big thing. You have always been able to create D and G's and light room, but you don't have that fine tune control of where they go and how you use them, so they are essentially the same. They just don't go in the same place where get structured the way that we would want them to get structured. Question from the Internet. Okay, awesome. Lloyd is asking how much data loss when going from a proprietary file formats such as any F to the DMG file format. Ah, lot of people are really hesitant about having DMG files and the confusion that goes along with, you know, changing it to what your camera shoots Teoh archiving for the longevity of software programs. Right there is. There's a lot of debate about the raw versus DMG format. There is if you went from a full size raw to a full size DMG, there is a. There is a very small amount of, I guess, what's called headroom loss or quality loss. It's difficult to say whether you're it's something you can really notice if it's something that's really gonna affect your photograph. I can tell you, though, for a fact. If you go from a full size raw to a scaled down Los E, d and G, it is absolutely not the same. It is you have now taking a huge amount of data, and you compress it down in a very small amount of data. So in no way are we encouraging using proxy D and G's or the scale D and G's as your delivery right. We're using them on Lee as a proxy for editing purposes and in terms of the loss, you know, the minor loss of data that you would experience and again, like John said, There's a lot of debate, you know, and I'm not. I don't work for Adobe s, so I couldn't give you an exact information. But I can tell you that for me again, going back to a point that I made earlier about delivering a high volume of images within a limited period of time. To me, the small amount of data loss is an acceptable thing for me to be able to use the system and to get my workflow going much more quickly. I think if it was a photo, that was a personal photo that you were doing for a while print because you went to Joshua Tree and you had something awesome that you wanted. You know, if you feel like that data, that little bit of data loss is important. Then you could always go with something like enough when you're doing, like, a personal project, type of type of issue. Right. And the other thing to remember about this, too, is we're using these DMG files. Four are editing workflow. We're not actually saying in any way that you should use the DMG for your long term archival as a replacement to your raw. So, in fact, once you start breaking down the workflow and all the components that we've got our folders, you could still keep your original raw files. You could still make use of those. In fact, if you wanted to export from them, you still could, right? We're actually gonna talk about how you can pull meta data out of the finished D and G's, and you could then use that to apply it back to your Net files. So there would be a work around, even for somebody who is concerned about that little bit of data loss. Yeah, way did definitely want Get in the debate of the pros and cons of Ross Danger because it's there's a lot of information about it in Yes, it is technically correct that there is some compression from a raw to PNG. We're simply using them as part of the workflow. They're just They're just a tool there, a function. So what you choose to keep long term. If you want to keep your RAWs index and peas great, you want just the tiff files, I'm gonna keep just the d and G s great. So there's there's different reasons for that, and it it applies differently. Different injuries industries to because of wedding photographer me not want to keep you know, the original raws. But if you landscape photographer does it right, and then there's always the pros and cons of what file for amounts to be supported 10 years from now, sure that's a long debate. So I know that was a long answer, but I hope that it clarified a lot. I think that absolutely answered a good job. You guys, Um, one more quick question before getting back to your content. Um, automation, you keep. You're giving us the steps that we can utilize and do for free on her own in terms of structuring our folders. And you keep mentioning at an app this is automated. Yes, that way. Yeah, we This is early on we mentioned that we when we started doing this work, we did a lot of this stuff manually, and we started creating these little scripts, these little routines to help speed things up. John would send me emails at three. In the morning, try this experimental things. Eso We started working with a company that makes a lot of automate, er actions for the Mac environment. And we're now taking those things and really wrapping them into an application, a proper application that people can use. And again, it is going to not just do the little automated things, but it's also going to guide you through workflow from start to finish. We're very excited about. So not only does it have a buying, you know, steps for the workflow, but it also has at key points some of these things, like creating these d and G's or, you know, working with some of the metadata. Those will be automated steps. So that is on our website. It's under software.
Class Materials
bonus material with purchase
bonus material with enrollment
Ratings and Reviews
Misty Angel
AMAZING! Jen and John are humble pioneers in their expertise of business, photography and workflow! Sharing their workflow secrets, along with offering their manual, presets and brushes (via their website) has already been an enormous timesaver in my own workflow! The workshop will get you THINKING and FOCUSED on how you manage your time, considering all that goes into running a successful photography business. While they focus on weddings, this is applicable to ALL photography! The introduction of the DNG proxy process is critical to optimizing LightRoom's functionality! THANK YOU! Love the process, the delivery of the workshop and their honest method of sharing their brilliant business structure!
a Creativelive Student
This workshop is fantastic. Being a creative is not synonymous with being organized, and this course has helped to begin to bridge the gap. I love how easy it is understand and follow. If you are looking for help in getting and staying organized, this course if for you. P.S., I purchased the Sidecar Post LR presets, and they are as good as advertised as well. Definitely as class to add to your CL collection.
Tracy Hope
They show a great workflow that can be modified as required. It shows the benefits of being organized and how not to have 3 versions of each photo clogging up your back up files. it shows how an editing company can be efficient and I have learned a great deal of how to speed up the work flow.