Lessons
Day 1 Pre-Show
05:29 2About Us: Post Theory
19:41 3FreePreview: Tools We Use
22:15 4File Management
22:24 5Photo Mechanic
17:02 6Building Proxy DNGs
31:18 7Metadata in Lightroom
38:49 8Catalog Editing
36:37Lesson Info
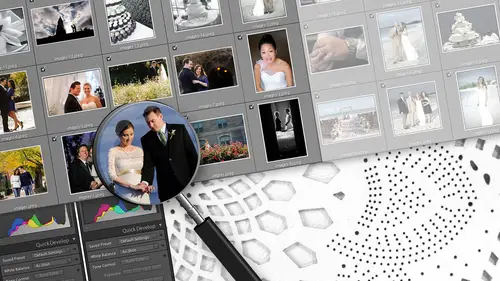
Catalog Editing
we started obviously with the project folder we did in just light since we didn't really in just we talked a little bit about culling and photo mechanic and how we use that. John gave you kind of a blazing ring of fire view of proxy editing and how proxy D and G's get made. We moved on to the light room import. We talked about metadata and how you're not really editing your betters and light room even though you kind of are editing your photos in light room. We're gonna move on now and we're gonna actually do some editing. We're gonna talk about dicing up a wedding, making it manageable, breaking it down into pieces. We're gonna go into editing some of Susan's images from the last couple of days and how we edit those. We're going to supplement that with some other images, and she has just a smaller body of work. This time we're gonna talk about noise reduction, which has always kind of done my head in until recently, when we kind of worked on it and kind of made a breakthrough. So we'l...
l talk about that, then we're going to get back to proxy D and G stuff show you how to bring this whole thing full circle so that you can understand how to do the magical swap out on how to get all of those edits into the full sized Angie's. We're gonna talk about black and white editing export delivery and back up in archive. So stay with us. We're gonna bring all of that around in the next couple of hours. Yeah, perfect. I guess we can get started. All right. So to reiterate a little bit of what we've talked about before when were editing we're still following a basic set of rules that we've established for ourselves. We documented these rules, this part of our style guide. It's part of our operations manual, and we always want to be kind of aware of what those rules are because those define our workflow for us. So when we're in light room and we're dealing with this huge number of photos and all these adjustments have to be made, we're never confused. We don't know where we are. We don't lose track. We don't know what the steps are. So can keep this simple. By the way, I mean this. The set of rules and the workflow that that you create for yourself in light room needs to be very, very straightforward. So ours is very simple when we have photos and light room that are unprocessed meaning, even if they have an import preset applied, even if they have some light adjustments to them. We don't consider them done until we mark them with a flag, and that's it. So that's our concept. We use the flagging feature in light room to Mark Don versus Not done. The other thing that we do is we make use of the color labels on and again. This is going back to the keyboard, which will show one more time just toe just to refresh. So we have a flagging key that's flagging, done, not done, and we have color keys. There's four of them available in light room. We make use of the blue color label for black and white. It could be any color you want. It doesn't really matter. Light room allows you to use whatever you want for any specific purpose. If we're going a round trip into Photoshopped or some other application, maybe HDR color effects assigned those applications their own color and use that same color every single time. Because that builds in this consistency that every time you take a quick glance at your catalogue, you know exactly what's going on and where photos need to go. So for us again, blue is for black and white flag for marking. Um, we also have all of this stuff working with our smart collections, which we talked about a little bit earlier. So the smart collections are set up to keep track of what we brought in or catalog what we've processed and what's left to do. So in this example catalogue that we're gonna use today we've got a total of 218 photos. Our to do smart collection shows 218 photos, and we haven't marked anything for black and white. We've unprocessed anything. Yet at this point, this is a brand new, completely fresh new catalogue. So the other thing that we do when we actually start our processing, and this should help a little bit to alleviate this sense of just overwhelming numbers when you start out in your light room catalogue in the library module, this is typically what? You're looking at this huge grid view of all of your photos. So the question is where to start, and that's always the biggest problem. Um, I'm gonna switch actually the one more catalog just to kind of reiterate the point here even more, he's gonna pull up one of my own full weddings. Because, like we said, seasons photos, we're gonna show those. But she didn't really have a full wedding the way that you typically would. So we pulled one of mine, which will kind of help you see. You know what? A 700 something photo right to 70 66 photos. This is a real wedding. This is wedding, Jen. Sean, She ingested. She called. We did the proxies. We've loaded this in. This is ready to add. It would be pretty awesome if these clients were watching right now, because I haven't delivered the sweating and thats a few weeks ago. We better get started then. So why it's here? I'm gonna make John edit it. The things asking the way that these photos are imported into light room by default, he's by capture time because that time information is embedded in the raw files. And for us, that's the smartest way to keep your photos organized. Because when you're in photo mechanic doing, you're calling doing your renaming. You're also doing your times thinking you can make sure that everything is locked into place as far as the time sort orders that when it comes in the light room, you're done. It's perfect. When you go through the Siri's from top to bottom, it is literally from the first frame fired to the last in the event, so you want to make sure that that's occurring. If if all of these photos are out of time sync order, you're probably gonna want to go back and correct that before you start moving forward, because it's gonna make everything that much more complicated to deal with. Its a pain when things are out of order. And the other thing is, you know it's confusing to the client. You know you don't want to confuse the client when you deliver the images, and this again is why, When I was in photo mechanic, I did the renaming and the renaming in sequence. So in theory, photo one is hopefully numbered 001 Whatever the convention that you decide to use. But for me, that makes it easier, because it means that you know, whether I sort of my file name or capture. It should be the same once I've adjusted the capture times properly. And that's an important distinction. Because if your file name sequence matches your capture time sequence, it doesn't matter how it sorted. Because, remember, we're talking about metadata applications. Read Metadata says, and Folio. Read the metadata of your files, and it will apply a sort based on metadata that it sees in the files. If your files are named in one order and their time sink in a different order and you tell it to use the time seeing, you're just gonna get a jumbled mess. So locking them both to gather simultaneously, alleviates virtually all those problems and make sure that they always sort. So when we're in this library view, anyone actually start editing like to really start taking a swipe at this, and you might want to just make the thumbnails a little bit larger. Just said that it's a tiny bit more apparent. I don't know how big people can see it, who are watching. We can do that. This some. And for them I know there are a little bit further away from the monitor. If you can see this kind of what we're looking for. There's two methods t going through an editing and both work. Well, it's more of an issue of what you're comfortable kind of getting your head around in dealing with this catalogue of this size. And it also depends on whether you have multiple shooters and things happening simultaneously. Right? This is the collected resume technique, and I think we're gonna question about using quick collections, and that's where this comes into play. What I typically like to do is when I load a wedding, I'm gonna look through it. I'm gonna scan through it, and I'm gonna start Just looking at these thumbnails at this of you may be smaller, maybe a larger whatever you're comfortable with actually seeing more or less what's happening. I'm not looking in great detail in Just try to get a sense of what's happening in these photos throughout the course of the event. I know there's getting ready photos here at the beginning with both the groom and the bride So I'm already thinking myself. Okay, this is in two different locations. There's two shooters. There's two different cameras. Rooms need to be aware of that. There's two white balance is going on. There may be a Nikon and Canon. Maybe 29 counts. Two cannons, I don't know, but I know it's two different things. That's an important distinction when I go through when I see these blocks and this is kind of what I'm looking for as I go through this gallery, see these of not only same situation or point in time in the catalog, but kind of the same photo. You know this photo, this photo this put all these in Siris are the same photo, right? She's getting into her gown. I've got her in front of the window. Bridesmaids were back there doing their thing. This is all the same lighting. I'm not adjusting. I don't even use auto eso because I don't like it. So with my photos, they're all basically the exact same settings in a situation like this, unless I've seen something that I need to adjust for. So not only are these in the same environment with the same white balance shot by the same camera, potentially, they're probably gonna have very, very similar exposures. So I know that as a transition from photo photo, the difference in the adjustments between them is gonna be very, very minimal. So what I want to do is actually start taking a key frame perspective on this. I want to actually start looking at this block of photos. Start with one of them, apply it how I want it to look. And then I can start replicating some not all but some of those settings and adjustments that are critical to it, like white balance to the rest of them and carry all of that four through the suppose and just pick up. A little speed is ago from photo photo. Instead of reinventing the process every single time a photo carry forward. Some of that information, that adjustment stuff that I've done and this is what we refer to. This is what we're referring to when we say smart copy paste, copy paste willy nilly throwing settings on to the next photo. That's photo is not going to help you. It's just going to mess things up, make it more difficult to determine what the photos look like. But when you're going through a very similar Siri's with similar camera settings, you can use copy paste your advantage because smart copy paste means I'm smart enough to see that all these photos air similar. So let me paste the settings on and then make some minute adjustments as needed. If any of the images might be a slightly slower, faster shutter speed, slightly changing, you know a little bit of your settings. But if they look this similar, Copy Paste is gonna get you, like 95% of the way there, right? So what we'll do is we'll take an obvious block of these photos, and we're going to make use of this concept in light room, which is called a quick collection. And that's what this is right up here at the top. This is a built in collection of light room. You don't have to create this. You don't define what this is. It's just a built in. It's meant a temporary location for files to sit. So we're gonna make use of this and really start to isolate these photos so we don't have to deal with or look at the rest of the stuff. I take his obvious block of photos. We've mapped a key to it. We're gonna hit, collect, and this is what happens. We switch from this great view of all 760 photos instantly into this quick collection. And we All this means is we've isolated these photos into a workspace. They haven't physically moved. We haven't re folded them. If they belong to other collections that they're still there, everything about them stays the same. Except now we're just simply ignoring the rest of our catalogue. And we're just working on this. So once we have them in here, we can switch over to our develop mode and actually start applying the edits to the first photo. And you're making sure as you do this that you've collected very, very like similar photos again, the logic can be they are all pretty much the same photo. Or if you want to get a little more complex, you can start picking photos that are still in the same scene. Maybe they're shot by the same shooter, but they're not necessarily the same exact photos that at least allows you for some consistent white balance as you go through. And speaking of white balance, I just wanted to make a point to the people at home that are watching. We've got monitors running through TVs running through feed onto your monitor. So if what you're seeing looks a little off, it's probably just a feature of the fact that it's being passed there. A couple of different medium and your monitor may be calibrated differently, so just keep that in mind if it looks green to you. It probably doesn't look green to us, right? So we're gonna, as we add it, we're probably gonna make commenter. But how we think the photo looks and it's basically how it looks to us on this particular monitoring, which is all the more bigger reason that you should be calibrating because when you're using a monitor that is calibrated, you know your color is at least accurate what you're saying, So that's what we'll do. We'll take this first photo in this series on, and we're gonna start applying some edits to it. We can see from the history from the import we applied an import baseline standard preset, so this was done initially import it applied, actually, as we look a few basic adjustments, which these are things that we found over time. And I'm talking about over dozens and dozens of weddings that we did the exact same things over and over and over as adjustments to photos as a first step. So we wanted to make this the new baseline since we were doing these things all the time. Save yourself the step, just have it done and then start from there, right? So we've programmed these things into the preset, into the import preset and just as a quick you know side. Now we'll show what that looks like by the because I know that some people probably want to see that making a presets very simple. You go to the preset panel and you can add a new preset with the plus sign. And what happens is this dialogue pops up with all of these options. These are all things that you can do to your photo. Their adjustments and what it's doing is it's looking at the current photo this photo, and it's looking at the current adjustments here, and it's asking you of all of these things that are applied to this photo. Which ones do you wanna lock down into a preset. You don't have to do them all the minimum. You have to do one, obviously. So what you could start doing is picking and choosing which of these adjustments you want to save into which presets. So if you actually wanted to go in and say Look, I just literally want to make one preset that doesn't nothing but adjust the clarity. You can take a photo, adjust the clarity, how much you want, make a preset check the clarity box. And there you go. You got a preset for clarity. So that's what we've done. It gets a little more sophisticated because when you start building a series of workflow presets, you want to make sure that when you apply something, you don't undo something you've done before. So you start with an import preset and lay down a baseline preset and do a style preset and realize that you've kind of unraveled, you know, started with what you started with an end of having to redo a bunch of work. So and sometimes these things air. Sometimes there is a little bit of an evolution of these things. You know, the preset that you are using your import preset. You may find that as you improve as a photographer as things change, you know? Hey, now all your photos aren't under exposed, so you don't need thought explain. You don't need that exposure part of that preset anymore. I mean, you can definitely keep an eye on your images and see whether that precept remains relevant, you know, relevant to the work that you're doing. And so, you know, one example of this of the stacking that we've put in place is that you know, if you're not really to the point where you can start working in your basic development, you know adjustments start with a blank. You start with more or less a clean slate. So we have an import preset, which literally is a blank. It applies lens correction and a few other things that you're not normally gonna make changes to on every photo, and it more or less leaves the photo blanks that you could just start editing. And then, you know, we created these baseline presets, which are these are your standard adjustments. So we've got one. That's for a standard normal photo, which more or less normalizes it to a decent look. Um, assuming that photo was good out of camera to begin with. But we also have variations of it, and this is again going to that stacking concept of these keys. We've been overexposed and under exposed version of the preset. So based on the standard, we applied a few tweaks to the priest said, That's OK. What if the photo was slightly over exposed? What kind of compensation would we want to do to it? And then we lock that down to a preset right. Same thing for under. And I think this is probably one of the biggest common problems that photographers will have. I mean, sure, you get you nail your exposure a lot of the time, but, you know, you run outside. You kind of forgot that. Now you're outside. You don't need to be a 100 so maybe you overexposed a little bit. These things are pretty common. So we wanted to make sure that we use the presets to address these common things again is all about speed having a short cut for moving faster on our common problems. Right? So the result here is if you were to use the import blank preset and then applying a standard baseline preset as your next step, What you've actually done is the equivalent of our all rolled in one import preset, exact same thing. Only this time they're broken out individually so you can see it. And you can actually manipulate it and refine it how you want to. So that's how you make a preset just is a little side there. That's how we built ours. They come in phases. So we've done the import preset first imported the baseline at this point, you know, because we've done a lot of these basic adjustments what I'm really looking for first is the white balance to me. On my monitor, the photo looks very, very blue. So we're gonna actually start addressing that. And this is where we go back to our home home key layout on our keyboard, and we're gonna just start editing and applying adjustments. So as you can see every time I hit the key, these things are popping up in history. You know, we're adding temperature. A little tent to get rid of the green, uh, shadows look a little blocked up. And actually, I can tell, even though my monitor may not be fully calibrated, began going back to this work tribal concept. This, to me looks very, very, very dark, like it's almost gone. And I can confirm that for my hissed a gram, because that's blocked up quite a bit. So I know that if I want a bright in this photo op, or if I wanted to bring the shadows back, I've gotta deal with it. That that's that's actually what's happening. So do that. Bring the shadows up a little bit and keep in mind the order that you do these things in doesn't matter, because light room when it exports is gonna apply those adjustments. So even I may have started out with temperature. I've adjusted a few things in my shadows. I got back to temperature a little bit. Maybe I thought the exposure was off. This order from top to bottom is nothing more than a history. It's not the order that light from applies it. Win it exports. You don't control that light room controls that. So if you want to go back and forth and back and forth and certain sliders and settings. It doesn't matter. That's exactly what it's designed to do, so you can feel free to do that. And then as we go through, I mean again. We're on a monitor that's not really designed for this. But as we go through, we can quickly map a key that says, OK, let's look at before and after just a za reference point, see how we're doing. We warmed it up a little bit and there's a little pasteurization on that screen. I don't know if that's your TV screens. Little that's not the way it looks to us. So at this point, let's say that I would say that this photo was was set. This is perfect. It is how we want it to look. But we have the rest of these photos in Siris that we want to work with. Well, I know that from photo photo, the exposure may not necessarily be the same. We're not in a studio environment. We don't have controlled lighting just because it's in the exact same environment with white balance, maybe the same with exposures. Not so one of the things that I want to pick up and carry from this photo to the next is that white balance work that I've worked so hard to try to get balance just right. So we'll go through here when you copy. The first dialogue that comes up is this box and this is again just like the preset. It's asking you, what of this photo? Do you want to pick up of these adjustments as your copy and hold temporarily? You have to be very, very careful what you pick here. Yes, Ugo. If you pick the wrong things, you will undo a lot of your work and you will start to cause a lot of confusion because you're taking things from one foe that only belong to that photo. Carry him to the next. A good example of a really big mistake is something like a spot removal. You don't want to take spot removal of a dust spot in the sky and paste it on to the next 20 photos of your bride. You know, because it's just not, you know, it's not gonna be in the same location, even a couple of different photos that were similar. If you have a dust spot, it's gonna be in a different location, so don't copy pay spot spots. In fact, any local adjustments? Any brushwork? Spot removal, cropping local brushes. Calibration is one of them. Let's see Lens corrections. Another. If you were in the exact same scene, you had two cameras on you with two different lenses and you shot the same photo with two lenses and you copy lens correction from one to the other. You're gonna alter the photos and you definitely don't want to do that. You don't want the 24 calibration to go our lens correction to go onto the 85. It's not gonna work, right, So we're gonna uncheck. One thing that does remain checked, by the way, is the process version. This is kind of important because once you define that process version, it's it's the same for all photos, because that's what belongs to light room at the moment. So we're gonna make sure that we check what we want. So I want the white balance. I'm gonna go ahead and take the basic, the basic tones, because I'm gonna assume that these photos are very close as they go from photo photo again. The reason you pulled them into this collection is because they were similar, right? I am gonna go ahead and take the tone. Curve tone curve is generally used for contrast, for making the photo look punchy. You're not punching. That's kind of how we use it. So I'm gonna assume for a series of photos that I do want to carry that information forward. Um, sharpening doesn't necessarily matter in this case because all of our photos at this stage have the exact same level of sharpening. So as long as you're aware of it, you can uncheck it. You could not check it. Um, the color adjustments. We're gonna take those split toning. You have to be careful with this as well, because split toning can be very, very specific to a certain series of photos. If, in this case we're applying it, we're gonna go ahead, imply and copy it and maintain it all the way through because you don't want to set it for one and then forget it for the rest. So we'll turn that on. Brushwork will turn off. We're gonna make sure of that. Noise reduction is the same as sharpening. It's one of those things that's just already applied. Every photo has it, so whether I copy and paste it, it doesn't really matter. So at this point, this is the data that I'm gonna carry from one photo to the next. So we'll grab that will move to the next photo, and then we'll paste well paced. And there we go. So what's happened is it's taken all of that white balance and toning and basic exposure stuff that I've done and applied. It doesn't mean I'm done, and I just need to simply move on. Or it doesn't mean I'm going to select all these photos and paste all of that information across all of them. I want to make sure, as I'm looking at this photo, that it still looks as good as it can. And this is the big difference in we're not going into the library greed of you and just simply pasting across hundreds of photos and then walking away. I still may make some fine tuning adjustments because this exposure may not be quite the same where it may be a little bit, you know, a little bit different. Maybe maybe she turned, and there's a little more shadow that you need to take care of. But at this point, when we do this in real time, you know I'm copying. I'm going here. I'm pasting. It's applying its a little bright. I'll darken it. A couple clicks move on. So in real time, you know we're pasting a couple clicks. That's pretty much good. Maybe a little warmer right of now. Don't move on. This is the pace that were kind of picking up like you're pasting. You're making this view fine tune adjustments, and it's hard to see in the camera. But basically what we're doing is I see that this photo from one to the next is just a very, very slightly changed. In the exposure on my keys. I have a shift exposure, which does a very fine 0.1 to the exposure. So instead of hitting a full third stop, which is way too much, I can now find tune it to appoint 1. point one kind of really dialing and where I want it. When you're on a calibrated monitor, you can see that like you can see those subtle shifts differences so keeping on the watch for him, you know, as I'm going through these. And if it was a trend like if the first image that I took of her, if I had slightly over exposed it or slightly under exposed it, most likely I would have tried to adjust the 2nd 1 and then the rest would be consistent. So he might have to copy and paste from the 1st 1 and then realized the 2nd 1 needed some exposure. And he might copy the settings one more time because the remaining ones in the Siri's would be closer to the second image that I took in the first image I took in this place. In this case, I probably didn't select the 1st 1 if I was off exposure wise and I had several to choose from. Yes, like I use the sink setting. How do you differentiate between the two or are they the same? Um, we don't I mean, this is This is basically the extent that we would use any synchronization at all. We would we would use a key frame. We would copy up. It's it's settings. We move to the next photo paste. It down a just move to the next one. That's that's literally all we would do. And we do the copy paste because as we're on the keyboard, it's just fast for us to paste quick adjustment paste Quick adjustment as we continue to move forward. Because this sink is like automatic, it just goes from one to the next to the next to the next, and you're not analyzing each one then for the fine tune setting, so that makes sense to me. But because then you would go back to your sink images, correct and see whether any of them you have to go through them again. To see, like this one might be a little dark. This one might be a little too bright, whereas we're kind of doing that simultaneously as we paced the settings that make sense. Yes, it's kind of an efficiency of movement because we want to stay in the develop mode. We want to stay with this series of photos. We want to look at one, edit it, copy it, and just remember that we copy that and keep moving from photo the photo as quick as we can, making sure we apply the work that we've done, move to the next one, apply the next one and just keep this kind of cycle going. Were controlling all of it that we're not letting light room sink. You know, SYRIZA photos, and then having undue stuff like I don't like, have to apply something and then undo it and then apply and then do it, and I never want to go back right? I only want to go forward. X Question That makes sense. A lot of people on the Internet, there's or e d. B Jamie Marion Ran H. Josh Jones and Heather Mason were all wondering, What's the difference about copy versus Sink? Why not copy faces and not sick? Or What's the difference between copy pasting and sinking? So spot on? Yeah, hopefully about answer. I should answer that really quick, and I don't know if this is the right place to ask the question. Let me know if you can answer it later. Maybe, but in the quest to be more efficient if you're noticing that, you know there's certain things that you're doing right. I mean, you do a pre set, but can you also speak Teoh shooting and camera, right? Like using your white balance or your camera adjustments like contrast and sharpness in Cameron. Does that carrion Since your shooting and raw, I'll answer the second part of that. You want to take the first part. But the the adjustments that you make in camera like sharpness are not being applied to your raw files because it's just for your preview on the back of your kids for your preview. Or if you not doing that, yeah, we're screen just decided to change. If you adjusted sharpness in camera, it's actually getting applied to J. Peg. If you were to actually render a J peg or shoot J. Paige Rather. So it's gonna take those adjustments settings and actually bake them into that J pig, which means you don't get that control. You don't get that fine tuning, um, the other comment about about white balance and camera. It's interesting because raw files to give you a lot of flexibility. I know that Susan and myself, we both tend to use the cloudy setting on our Nikon cameras when we're taking a photo that we expect will be delivered with A with a warmer tone to it. I don't use that inside because tungsten plus cloudy makes very orange photos. But I think that when you have a sense of what the images that you are delivering look like when you can say okay, when I do my outdoor portrait's that the bride and groom they are slightly warm or they're more neutral. That can help you kind of just take that shortcut of setting it in camera. And the good thing about raw files is when you said it in camera. If you make a mistake by going into the hotel lobby and shooting five photos of the broads, Dad seeing her for the first time right after you were outside, you can fix that, so it gives you that flexibility. But it does let you kind of dial it in. If that's something that you want to dio, And I've kind of gotten into the habit of doing it now, and I think that it's good to play with your camera and to do things like that, you know, to kind of help you get a little closer to what the image is gonna look like when you deliver it going back. Maybe a step or two, but a couple of people are still a little confused if you are using. If you're editing the small DMG before the full size Dan G or the raw, what happened to those Ross? Good, good questions. So we are. We're at step five. So? So the rods are safe. Nothing's happened. Teoh hanging out they are about Drink somewhere, right? Okay. Raws air sitting in their own folder right now, The only folder that we've brought in to light room is our proxy D and G Boulder. So this particular folder is what, like, drawing poorly know where this is? The only thought of that light room can actually see right now at the moment are the proxy DMG. This is what we're applying the edits to because as we pull up this proxy file, it's very quick to render its very quick to apply those adjustments. We can see what we need to see to make those adjustments, but it's only getting applied to these files. So we're editing the small day Angie's now and later we're gonna show you how to take those edits and apply them to the full size D and G's before you export your final images and doesn't have anything to do with the ex MP file attached. Okay, so there is an ex MP file attached, you know? Okay, but not to the proxies to think. But we've created a way to kind of extract the X and P so that if you wanted to have that, you could Where we will demo that a little bit later. That is gonna be just wanted to clarify. Like, what? Files and with the past. And how is happy using edit fast so that we could take the edits and apply them to the full sized Angie's later. And we'll be able to also extract X and P data. But by then, you may not want Teoh when we get to that. Okay, I get it. Yeah. And I guess if we went to the white board, we would be saying that we would probably pretty much address that question in step seven. So that would be the Indiana Jones swap out. Or if you like the sandwich analogy, we're making a really, really, really small sandwich right now and then make a really big one leader right recipe. A quick question. We have someone who's following along so Josh Jones's following along step by step with you as you go along and does he have my photos? I'm just getting e. I think he's working on his own wedding. Good, good. He's multi time yesterday. Actually, I love it. It's also the wedding yesterday, and he's appointing him right now. And he's noticing that after rendering 1 to 1 previews from the proxy D and G's, the Sliders air much faster, but he's still experiencing roughly a second when switching from image to image in the develop module. You have any tips on reducing this time, even after one? The ones interesting. Yeah, does he say which hard drive He's working off Josh, Which driver you question a couple of people had earlier? What should they be working on? Yeah, I can tell you it's the The process is It's in that worst. You make the party D and G's. You load them up, and as long as the 1 to 1 previous are the last thing you do before you start making your adjustments, it means that light room is as up to date as it can possibly be. on a 27 inch IMac from mid 2010 2011. We have several and we have a 2010 2011 2012. I can tell you on the oldest and slowest I'm act that we have that the time between photos from when you hit next is instant. I mean, there's a very short blink of loading and the photos ready. So we have all of our mxnet s STS. Even though the proxy files are very small or very quick, SST is that much quicker. So and that answers the question of what should they be working off? Ideally, a solid state drive. Or I guess, the fusion drive with the new ones that are few. That fusion Have the SST built in right because that is the fastest, smallest, most expensive but fastest drive. And John? Yeah, Josh is, um, on a solid state drive, Still takes a second, says there's a very small loading box that pops up from image to image. Really, we'll see. I mean, you do see the thing that's this year. You see the load in between photos, you know, as you go through, I can tell you that our our work season is much, much faster. This is still probably a factor of three or four more times faster than what it would normally be with a full size raw file. Um, are like I said, our work drives on our Mac machines are always cleaned off. It's the only project that runs on right. Machines are meticulously maintained. We don't run anything else while we're editing, but we are running light room on rsst. We do run light room on the SST. I don't know. Three applications and the projects all live on the SST right, and the I Mac is more or less a generic stock machine was nothing else on it. So all that being said, I can tell you the result is on that kind of machine. It is. It is instant between the photos so that you can see here like it's it's not. There is a little bit of a lag. You can see the load screen, so it's not fully fully optimized. We're also tethered to an I Mac in a different room that could have something to do with it, too. So getting back on track because I know I want to hit there was. I know there's a question about quick election. So remember, we've taken a series of photos. We've shown how to copy paste between them. They're still sitting in their own collection. So we've applied the It's All of these were done. Our workflow step is we mark them done there. Picked This goes back to the flagging that we discussed before its flag. It's done. It's start showing up in that collection. It's not flag. It's not done exactly so But let's say in one of these photos, I decided because they're all the same. It's the same pose. Same shot, same. Look, I want to mix it up with some black and whites, so I'm gonna mark one or two of these black and white, so I could do that now and then. What I can do is hit resume, and I'm basically kicking them out of my quick collection. So I cleared out. This quick collection aren't me, I think is in the way I've cleared it out. There's nothing left in the quick collection, and it means all those photos were kicked out there back in the General Library, and I've actually got Smart collection update that shows I have two files marked for black and white. I don't have nine files marked complete, but I do have nine files that need some noise reduction because my smart collection is picked up on the fact that I've marked something done. It's really not done. It needs noise reduction. So this is constantly keeping up with my workflow and what I'm doing. So that's how we make use of the quick collection. It's it's just it's literally what how is named?
Class Materials
bonus material with purchase
bonus material with enrollment
Ratings and Reviews
Misty Angel
AMAZING! Jen and John are humble pioneers in their expertise of business, photography and workflow! Sharing their workflow secrets, along with offering their manual, presets and brushes (via their website) has already been an enormous timesaver in my own workflow! The workshop will get you THINKING and FOCUSED on how you manage your time, considering all that goes into running a successful photography business. While they focus on weddings, this is applicable to ALL photography! The introduction of the DNG proxy process is critical to optimizing LightRoom's functionality! THANK YOU! Love the process, the delivery of the workshop and their honest method of sharing their brilliant business structure!
a Creativelive Student
This workshop is fantastic. Being a creative is not synonymous with being organized, and this course has helped to begin to bridge the gap. I love how easy it is understand and follow. If you are looking for help in getting and staying organized, this course if for you. P.S., I purchased the Sidecar Post LR presets, and they are as good as advertised as well. Definitely as class to add to your CL collection.
Tracy Hope
They show a great workflow that can be modified as required. It shows the benefits of being organized and how not to have 3 versions of each photo clogging up your back up files. it shows how an editing company can be efficient and I have learned a great deal of how to speed up the work flow.