Lessons
Lesson Info
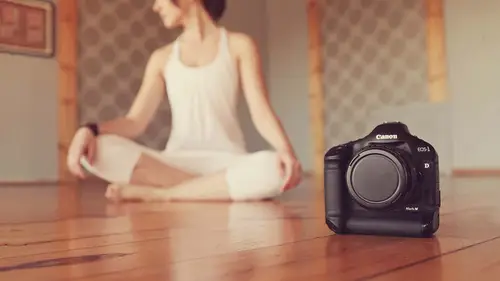
Day 2
So before we get started with movements and things today, I wanted to take the time just to give you one of my tips for actually using tricks. I wouldn't necessarily say their yoga moves, but, um, we'll call them young moves for now. But yogurt for your eyes, because our eyes are our gold mine. You know, when it comes to photography, we know it's brutal on our body, but it's brutal on our eyesight as well. So we're constantly trying to look at things far away and then look at things close up. And when we look at things close up, whether it's our IPhone, the back of our computer or I'm sorry, the back of our camera or computer screen looking at things closer is when your eye muscles are contracted. So you get eyestrain when you're looking at things that are closer to you. So one of the techniques that I do when I'm looking at the computer and this is something that you guys can try out every 20 minutes or so, look about feet away for 22nd and it just gives your eyes a minute to relax. ...
So just try to keep that in mind. We call it the 2020 20 rules every 20 minutes. Look 20 feet away for 20 seconds, and it just gives your eyes the chance to relax, because again, you lose your eyesight and photography. Not gonna have much of a career, is a blind photographer. Um So one of the other things that I'm going to help you guys do is learn how to relax your eyes because we don't think about our eye muscles, but you can learn to relax them. So what we're going to do first is learn to relax our eyes. So what we're gonna do is we're just gonna rub our palms together, kind of create some heat in our palms and then just cover our eyes with, um and you just want to cover your eyes so that you're not letting any light in so that your eyes, your pupils can dilate. So what you want to do to relax your eyes is you want to picture and imagine that you are looking far away at something and what this will do is help your eyes to relax and imagine looking at your hands and then imagine looking at something far, far away. So what this does is help you feel your eye muscles. Relax and contract, so continue trying to look at something far away. Think of maybe a boat or a train far off in the distance and then do figure eights with your eyes. So actually, moving your eyes around and figure eights and what this does, it's relaxing and then stretching your eye muscles. So relaxing by picturing looking far away and then doing figure eights with your eyes actually stretches your eye muscle so you take your palms off your eyes. But doing an exercise like that will just help. Relax your eyes, Um, and it's gonna help you see better, and it's gonna help you photograph better on the job. So make sure that you're taking care of your eyes as well, and that's a really great way to do that. What we're going to get into next is a breathing technique, and it's called three part breathing. It's a really great way to just take amazing deep breaths. Whether you're sitting at your computer, which normally sitting at your computer, you tend to take more shallow breaths because you're not really concentrating on it. So what we're gonna do is we're gonna breathe into three parts of our bodies. When we inhale, we're gonna read into our stomach first, then our lungs and then our chest, and then when we exhale, will do the opposites. You exhale from your chest, your lungs and then your stomach. So you push the air out kind of top to bottom, and we bring in bottom to top. So let's try that. So we're going to take a deep breath, inhale into your stomach into your lungs and then into your chest. Inhale as much as you possibly can, hold it and then exhale first to your chest, your lungs and then actually push out through stomach. You can even put your hand on your stomach to really push out the extra errors. To try that one more time, I'm gonna breathe in. There were a stomach. Our lungs are chest, get as much air as you possibly can and then exhale chest lungs and then push the rest out through your stomach. So that's a really great breathing technique, and we're gonna even do a little bit more with breathing techniques over the next two days. Um, just you have a variety of ways to de stress and to get some oxygen flowing into your body. So we're going to get started with some physical movement here. We're gonna loosen up the back. And what we're doing with breath today is we're gonna intrav in Jasso style yoga and vinyasa style. Yoga has movements and you have a breath either in or out with every movement. So we're going to start a little bit with that. What we're going to do is we're going around our backs back and even just doing this, it's fantastic, you know, spread out your shoulder blades, really stretch your back out there and around over an arch up, so it's kind of like a wave. So the breath that goes with us, we're gonna exhale back, keep exhaling exhaling than when we arch your back. Inhale up, keep marching, keep urging back, then exhale rounds. This is a few times really get a good movement. You can go at your own pace here, inhaling in the arch, exhaling in the rounds, and this is a great way to loosen up your back, bring air into your body and warm up your spines Couple more inhale and exhale Inhale And then come this So we're going to do a twist with the breath now to Sergen Inhale arms up exhale twists and push all the air out of your body Inhale up to center Exhale Push all the air out Great More times inhale up and exhale twist inhale up and exhale twist This is also massaging your organs to kind of ringing out all the toxins whenever you twist That's really great. Just keep going more inhale up and exhale Excellent. We're going to turn long ways under maths We're going to keep going with this movement with breath So you're gonna place your hands behind you doesn't have to be right next to a little bit behind if this is uncomfortable for year risks and might be, um, this is actually really great stretch for your wrists and a lot of our risk tense former constantly on the computer. But if this is too much for your wrists, your shoulders feel free to flip your hands the other way or side or wherever it is that is comfortable for you. So what we're gonna do is we're gonna inhale. Bring our hips up in our next back. Exhale forward, fold over your feet. You do this at your own pace. Everyone's breath. A little bit different but inhale. Remember your yoga breath you're inhaling. Theory knows an exhale forward folds. I just do this a couple of times. Unit at your own pace. Inhale back number. Inhale. Lengthen The're knows ex Healthier Knows making that Darth Vader noise good. Couple more times. Just keep going at your own pace is really getting the muscles engaged in your core as well. It's stretching your back, especially your lower back. Nice. Let's do one more inhale back. Exhale forward, right? Come to neutral. We're going to the same thing, but we're gonna put the soles of our feet together while we do. It will get a little bit more of a stretch and hips this way and engage some more of our thigh muscles. So same thing pushing of your hips. Inhale back and exhale forward or any a nice tip. Stretch with this. Just keep going this way. Inhale back and exhale forward in hell. Do three more at your own pace. You can really see how the breath helps warm your body up. We're not even doing that much physical activity, but we're all starting to get warm. Over here is the breath really helps. Circulate the oxygen and get the blood flowing to your body. And after your next exhale, we will come to center. We're gonna warm up or back a little bit more. We're gonna come over it all. Force. Make sure that your knees are right below your hips and your wrist or right below your shoulders. You don't have any strain we're gonna do. It's called cat cow and again using our breath. So we're gonna exhale round your back as much as possible. Really? Pull those shoulders away from your ears and then inhale arch. Your back neck goes up as much as you like. Don't over stream and then exhale rounds. Do a couple of these inhale arch exhale rounds you steam or at your own pace in him? Arch deep, deep breasts here. Really? When you're rounding, push out all the air so really engaging your muscles, stretching them out Well, it's getting a lot of air circulation. Nice. When you're ready, will come back to neutral bringing onto our first downward dog from here. So go ahead and push up to downward Dog and just shake your legs out. Kind of loosen your body. Here you go. Up on your toes. Down on your toes. Get comfortable. Nice, Good. We're gonna step between our hands and then come up to stand. One of the biggest parts of a NASA is what's called the also flow or some salutations. So we're going to do them slowly first, and then we will start doing them with breath with each movement. So it's do it slowly first, and inhale our arms up nice and then exhale Swan, dive down to the floor. This is your forward folds. You can let your head hang here for a second since we're going to stay here for a minute, you go ahead and neither grab opposite elbows where you could put your hands behind your calves. I really liked doing hands behind your cats because if you just pull a little bit on your calves, you really stretch the upper back the bones as well as the muscles. They're nice. So we're gonna inhale. Come to a flat back and your flat back. You might have to have your hands here on your thighs, your knees, your calves, wherever you need to be. Just get your back flat. You might be here. Whatever works for you. Good, sir. Inhaling here and there were gonna exhale. We're gonna put our hands down right outside vour fee, and you can either walk back to a high push up position or you can do a little jump if, if you like, they were going to come down. If you're a beginner, a great way to come down would be to put your knees down first, then bend your elbows, keeping your elbows pretty much touching side, and then come down till your chin touches the floor. If you're a little bit more advanced or have good tries that muscles, you can keep your feet up and come down to what's called chattering A. So you hover here good. And they were gonna inhale to an upward dog. And you can keep the topsy your feet on the mat hips off really big. Inhale here and then pushed down your downward facing dog Nice. And then we'll step forward between our hands and come Fantastic. So we're going to those exact same movements, but with a breath reach once they're going to go a little bit faster. But it'll, uh, really get a heart's pumping here. So inhale up and exhale Swan Dive down, inhale flat back Exhale Seiko back and you go all the way down to chattering in your exhale and inhale upward facing dog Exhale downward facing dog Great. Take a few breaths Here. Big, deep inhales Spread your fingers and your toes wide Try to get your week evenly distributed and all your hands and feet We're gonna come forward to a plank. This is a great core exercise. Oregon does. We're gonna put a right hand in the middle Nice. And then we're gonna turn over. So we come into a side plank. If you were feeling wobbly, you can put your feet not stacked on top of each other, or you can put one of your knees down so wherever you feel comfortable, but you want to keep your G's up. If you're feeling more advanced, you can put your knee here, your foot up by your knee, where you can grab onto it. Great. Come back to the middle. We're going to flow through this. So exhale down chattering Go inhale foreign face dog Exhale down facing dog. Great. Take a few breaths here. Good. It's come to our plank again this time. Put your left hand into the middle. You're gonna turn towards the back wall. Great. Remember, you can put your knee down if you'd like Still working your core if your knees down or you can bend your foot up or grab your foot Great. Let's exhale down to Ted around Death in hell Upward facing dog Exhale downward facing dunk and let's go ahead and Walker jump your feet up, Inhale all the way up and exhale prayer. Fantastic. She'll be feeling pretty warm by now. Let's do that flow again. So let's inhale up and exhale down. Inhale flat back Exhale, jump to chat around us or walk whatever works for you. Inhale upward facing dog. Exhale downward facing dog. So we're gonna come into our three legged dog. You're just gonna lift your right leg up? It might be here. Maybe here. Thank you. Whatever works for you, make sure that you're not coming forward. You want to keep the downward dog stance great. And then we're gonna soup our rating in Come to a plank position with your knee bent. Really Gonna get the core here. So push back outside like a dog and then come in to a tucked plank. So let's inhale back. Exhale forward. Great. Inhale back. Exhale forward. It's one more inhale back Ex health forward Nice and inhale down there facing dog good. Going to the same thing on the other side to go ahead and lift your left leg and take a deep breath in and exhale Come to plank Took your knee and great inhale back up Exhale tuck in hell three legged dog Exhale tuck in hell three legged dog Exhale tuck and then back out This read like a dog and great, Let's take a little flow here. So from a downward dog you just go to plank and then exhale down a general in hell Upward facing dog and exhale down. We're gonna go ahead and bring our right foot in between our hands Come to our lunge position. So for your lunge position, you want to keep your heel off the back leg off the grounds. Anyone have 90 degree angle here? If this is too much for you. A lot of times this is too much for my knee. You can put your knee down. If not, keep it. Street hips are forward. Arms are up. Take deep breaths here. One more deep breath. Keep your gaze forward. Great. And put our hands down and we're gonna exhale. Chatter. Rhonda in hell. Upward facing dog Exhale downward facing Nice. Let's go ahead and bring her left foot between our hands. I'm Dorlan Jenner other side Come on up. Remember, you can put your knee down if you'd like. If you're feeling a little wobbly, separate your legs a little bit. Great hips go forward. Hands up. Try to keep your shoulders relaxed, even though your arms are up. Deep breath in and out. Great Biggin Hill and Exhale. Hands down, chattering Inhale upward dog and exhale downward facing dog. Great. Let's come down to her child's pose from here. Let's give ourselves a breath. All right, we're gonna push back, tore down on facing dog. Neither Walker. Hop your feet up between your hands and let's just forward fold here another way that your hands could go in a forward fold. You can grab onto your big toes. Call yoga to lock here. So your forefinger in your middle thing around your big toe, he just uses to kind of gently pull down, stretch out your back muscles, or you can actually step on your poems if you'd like. You can have your legs a little bit bent here while you're bending over. Remember, this is to really open up your back. She your head? Yes. Figure No. Really. Open up your back. Yes. You move your hands from wherever they are And slowly, slowly, slowly inhale rounding up. Great. Let's give ourselves a little back bends. So we're actually just going to shoot our hands up? You can interlaced, um, keeping your pointer fingers up and then just a little arch back. Deep breath in Z, breath out. Hands to prayer. Fantastic. So we've done warrior one and warrior to yesterday. We're going to go into warrior three today, and it's a balancing post. So again helps bring a lot of that. Focus helps you concentrate. So where your three all we're going to do is we're gonna put our weight into her left leg and you can leave your hands at your sides of because his easiest way to go into it at first and we're just going to tilt forward at the same time. We'll bring our right leg back. Look at something in front of you and your warrior three. It might be here. Try to keep a flat back. That's your main goal. If you can get parallel to the floor. Great, keep your back like the one that's up. Keep it flex. So really engages all of your leg muscles and helps you balance. If you'd like, you can shoot your arms forward or bring him out to the side. Jenny Arms forward is definitely more difficult. Couple breaths here. Really? Use your breath to help stabilize yourself and inhale up nice. Let's do the other leg, so put your weight into your right foot and spread your toes. Give yourself as much ground as possible until forward, bringing your left leg back flexing that left leg and one side might be better than the other, so you might feel more wobbly on this side or stronger on this side. Deep yoga breaths. Feel free to bring the arms out if you'd like or shoot them forward deep breath in and breath. One more deep. Breath in and exhale. Come on up. It's a really great post for strengthening your whole core and your legs. When you strengthen your core your legs, you're gonna get a lot less tired on shoots. We're gonna do a little hamstring stretch. What we do is a standing split, so doesn't have to be a full split. No worries about that. But we're going to go into a warrior three. Let's put our weight on her left leg. Bring our right leg back, going two or three and then just keep going down. So this might be what your standings, What looks like you have your hands down or you make a little further or wherever you are of your feeling. Balance. Play around. Put one hand on your on your ankle, even switch to the other. Maybe do both. Nice and inhale up right. Let's try that on the other side, so put your weight on your right leg. Start to tilt forward into your warrior. Three. Bring your left leg back, foot flexed and then fold over into your standing, split wherever it is and play around with your balance a little bit. Nice inhale great balancing guys. All right, So what I'd like to do, we're going to come too many Straddle stance, facing the front wherever you're comfortable. Here, try to keep your feet pointed forward. So not quite ballet. Second position, but few pointed forward. We're just gonna lean over and take a few breaths here again. Great for loosening neck and your backs. Feel free to go to yoga toe lock here, if you'd like. Or you could put your hands to your cat. I'm sorry. Your yes, Your cats bending over Really loosening you're back. Think about relaxing your back here. You need to bend your knees a little bit. It's totally fine if you'd like. If you want to really go for stretching, you can put your hands through your legs kind of inch them back. It's kind of a fun stance. Great. Let's inhale. Come on, that we're gonna go to side angle, so we're gonna go to the right first. So let's take our foot and point it towards the right. On what you want to do. You put your arms out first. You really want to your hip to kind of pop out to the left because we're going straight over. So imagine yourself between two panes of glass here and you don't want to lean forward. You don't want to lean back. Just want to go straight over and you might stop here. You put your hand on your thigh, your shin. You feel further If you'd like to. You can separate your legs. If you need a little bit more room, go down to your foot if you'd like, or although down to the floor. If you want to bind here and wherever you are, make sure that your chest is up as much as you can and the your left hand around to your right. Like great. Take deep breaths here. Remember, if you can't take deep breaths, just back off a little bit, so you can is really engaging the muscles in your core and stretching your lower back side of your your core greats. Take one more deep breath in and out and inhale coming up. Great. Let's put both of our feet forward and we're going to straddle forward again. We're in lean forward, but this time clasp your hands behind your back first we're going to do a shoulder stretch at the same time, so hinge at the hips. Try to keep your back street, and then when you're done there, come on over. Let your hands go as far as they can over your side, wherever that might be to get a great shoulder stretch. This is stretching the muscles that we particularly use when we hold the camera in front of the shoulders there. This is great stretch for that deep breath in and he breath out your next inhale. It's come up slowly and will come to our other side angle. So put your left foot out great hinge over at the hips, give herself a little lean out and then come down, keeping your chest open and up. You don't want to let dump forward and keep it up as much as possible. Gaze up towards the ceiling, and wherever you'd like to come down, make sure you can take deep breaths wherever you are. If you'd like to bind, bring your right arm back. You can put it around your left leg, deep breath in through nose and exhale, Fair knows, and inhale and exhale one more inhale and exhale and inhale your way up slowly. Fantastic. We're going to do another balancing pose. Great for focus for balance. So we're going to start putting our weight and tour left leg there. A few different, Um, a few different places. You can take this pose. The 1st 1 we're just gonna pull up our knee a right knee and hold onto it with our right hand. You put your hand on your hip. If that helps you balance or you put it out to the side. If that helps you balance, let's start with the bent knee. First we're just gonna open our knee and gays over to the left, creates a sort of opposition with the weight of Ernie and then the weight of your hand. Great and then come forward. Let's put that leg down. We'll do the other side just like that. So putting all of your weight into your right foot really spread your toes. Anchor yourself there. Hand on your hip if you like. Spring your need to the front, and the most important thing to keeping your bounce here is to gaze at one spot. You put your right arm out and then your knee comes out, and then, as you move your gaze, move it slowly. If you whip it around, that kind of makes you lose your balance. So slowly bring your gaze of your right hand. Come on to the center. Nice. So we do this one more time, just going to a little bit differently. So put your weight into your left leg. We're going to go into yoga toe lock, so you're just going to grab your big toe with your index and middle finger. And this might be where you want to stay or you can straighten it out. And this might be where you want to stay. Feel free to stay here or, if you want to go a little further, you put your left arm out. Start moving your keys over to the left as you extend your right leg out to the right. Engage your core here, helps you keep your balance and breathe good. Come back to the middle. Nice, really come to the other side, so anger your right foot down right hand on your hip and grab your left toe yoga toe lock are some sides are better than others This is my weaker side. So straight in your leg out in front of you, Make sure keeping your back straight. It will be hard to keep your balance if you're coming forward like this. So nice straight back if you'd like. Slowly open up. He likes the left and then change your gaze to the right. Engage your core deep breath in and breath out. Come back to the center and foot down and kind of shake out your feet, but definitely get some little cramp sometimes. Great. So we're going to come down to a squat position. So a lot of people, Depending on where your attention is held, you might be able to just come down and squat. If this is too much for you, you can use one of your blocks and put it right behind you and kind of sit on it, use it as some support. Remember, you can make it a little taller story if you'd like wherever you are. So you want to be in this position, but you don't want to be straining any part of your body, so just come here, use your elbows to push your knees out A little bit and come in a prayer to kind of brace yourself here. Just take a couple deep breaths in and out and then and out We're going to twist here. It's gonna be a great twist that's going to help our upper backs Open up. We'll put our left hand down. Keep your left hand down with your left arm against your left leg. This will kind of help keep your body open. You can come a little lower if you like. The lower you go, the more this left shoulder is gonna open up. So get wherever you like, and then we're gonna twist open so you might be up here. That's fine. However, you can go to get that opening in your back and deep breath in. Keep your gaze up, Andi bread deep breath in and deep breath out. And let's inhale back to center and we'll go to the other side. So put your right hand down, let it push open your right leg and twist over to the left deep breath in and really try to open up the left side of your body breath in and deep breath when were inhale and exhale great. We're going to come into one of my absolute favorite favorite hip opening exercise. It's called Lizard. So what we're gonna do is we're gonna turn towards the front of our map, kind of still sitting are squat. Position are right leg is going to come up by our hands. You put your hands out little bit in front of you, lean forward into the right leg and then you're back. Leg comes behind you. Um, for me personally, I choose to keep my foot flat because putting too much strain on my knee and this position bothers me. But if you can keep your foot up and your knee up, we will get more stretch in that left hip so you can stay like this and get more stretch. Or maybe if you have any problems, you can put it down. So remember, listen to your body, whatever works for you. So you're here If you can go to your forearms and you're kind of really open up both this left hip flexor and the right hip. If you want to open up even more than this, you can take your right leg and kind of tilted out so normally are foot flat down. You can tilt this foot out and really open up your hip. So if you'd like, feel free to let your knee go out to the side and with every inhales, think about lengthening every excel. Maybe going a little deeper. It's a deep breath in through nose and out there, deep breath in and deep breath out. This is really great for your hip. I remember about that reading the pain. A lot of us get pain in our feet on our knees because our hips or type So doing these hip opening exercises, we're going to really help reduce the stress and pain and not only your hips, but your lower back knees and feet as well. Great on your next inhale. Let's slowly walk yourself back. You can put the right back. So are in all fours, kind of shake out for a second here, and we're gonna lift our less leg up to our hands and put our right foot back again. Feel free to keep your leg lifted to get more of a hip flexor stretch for me. That does bother my niece, so I'm going to flip my foot down and then come down to wherever you can. If you come down to your elbows. Great. If not, stay wherever you are as long they were breathing deeply. You want more of a stretch, Take this knee and push it out a little bit, lifting your sole of your foot off the floor and deep breath in. Think about lengthening, giving a flat back and deep breath out. Make sure that your foot, um, your knee is not coming over the toes of your feet. So if you need to pull your foot forward a little bit more, maybe back off of it if you can. Let's make sure that you're protecting your knee on your left foot. Great. Deep breath in and he breath out through your nose. One more, inhale and exhale Good when you're next in how to slowly walk back, and this time we're just gonna bring our legs back around and come onto our stomachs. We're gonna come up into Cobra, which is sort of like a baby up dog, so you want to place your hands right below your shoulders and make sure your bubbles air not out. You want them in as close as you can to your body. Keep your feet together, tops of the feet onto the mat, and you're just gonna lift up your chest. Deep breath in here on what really gets Cobra working so well is not stretching your back, but taking your hands and sort of pushing back that you lengthen forward. Great. Deep breath in and deep breath out is excellent for opening your chest for deep inhales and strengthening your upper back that we worked so hard. When holding a camera and exhale down, turn your head towards the right, we're gonna come into Bo posture. And if you have sensitive hips, you might want to put your blanket below your hips. If not, you can leave just how it is. But we're going to go ahead and grab the tops of our feet so it doesn't bend your knees and grab the tops of your feet and just going to lift up. At first, you just lift up your heads. You're looking forward. If you're good here and you can breathe deeply, feel free to push your feet away is that it starts toe lift up your body. I'm breathing deeply. It is a great stretch and fantastic back strengthening exercise deep breath in and out. Inhale and exhale One more. Inhale and exhale it down and flip your head to the other side. We're gonna go ahead and put our arms in front of us looking forward at your arms feeder together, and we're just going to do a little lift. So we're not gonna lift our hands right now. We're just gonna lift our feet first. Let's go ahead and lift your legs off. You want to keep your your knees engaged and straight, so keep your knees locked in street you want. Make sure your knees air lifting off the floor, not just your feet. This is not much of electricity, so try to lift your knees off before great and relax them down. And this time we're just gonna lift our upper body. So keep your gaze probably at the edge of your yoga mat just a little bit in front of you. And let's lift up our upper bodies, still engaging all your leg muscles to for this deep breath in and exhale down. Great. We're going to lift both our legs and feet at the same time for a couple of breaths, so exhale your air out and inhale. Lift both your legs. Think about lengthening as much as you can as you inhale like someone's pulling you at your feet in your arms and exhale down. Let's do one more of those and inhale up. And this time let's straddle our legs an airplane, our arms out. Kind of like a Superman. And bring your feet together and your arms and friend and exhale do. Let's do that 11 more time. Inhale up. Exhale, Open everything up, Inhale, bring everything back together and exhale down Fantastic. Let's go ahead and give herself a little child's pose there. Stretch out the back that we just worked so hard. Great. Let's go ahead and help ourselves up. We're gonna flip our feet in front of us, going to come into the happy baby pose. It was a really, really fun one. So just round down, we're gonna do is we're gonna bring your knees up and you're gonna push them out to either side of your body and then grab the outsides of your feet like a happy baby. I guess babies kind of hang out in the post. But we're trying to do is trying to pull our feet down so that our knees come down closer to the floor. Great hip opening exercise. You can kind of rock your baby a little bit and neither side yourself a little back massage. Great. And we can put our feet down. Let's put them all the way out in front of us. Good. Gonna come into our fish posture. So you're going to do go ahead and sit up for now. You kind of see this. I'm gonna put your hands beneath you and keep your elbows in as much as you can. So actually sit on your hands almost up towards your wrists a little bit more and keep your elbows in and you're just going to lean your head back and you want to do this really carefully. If you have any neck problems at all, please put a blocks behind you and just put your head on. The block is not so much of the neck exercises. It is about pushing your chest up and really opening your chest, working about arching the top of your back. So this is a great place for deep, deep inhales and exhales. We're gonna actually stay in this post for a second and do some three. Part breathing is this is a great place to do. Three. Part breathing. So let's inhale and tour stomachs our lungs, then our chests really expanding your body and then exhale out your chest. Lungs in your stomach. Inhale your stomach, chest, lungs. Then exhale out your chest. Lungs, stomach. Great. One more inhale and exhale, and you can slowly come down to sear laying flat on your mat. We're gonna bend our news up. Just give ourselves a little twist. So we're going to put our arms out like an airplane and let your knees fall over to the right as you look to the left, deep breath in and deep breath out. If this pose is easy for you, feel free. The street in your top leg or both legs gives you a little bit more of a twist. I'm bring your knees back to center and we're going to go to the opposite sides and these fall down towards the left and turn your head to the right. Read a street in your legs, one or both give yourself a little bit more of a twist. Deep breath in and deep breath, come to the center. I'm just going to a little hamstring stretch here, so you put your left leg out straight and bring your right leg up. Just grab it wherever it's comfortable. It might be at the thigh, but just try to keep her Knee Street and your foot flex about your leg is engaged, so just might be. Here is where you stretch, too. If you'd like to, you can bend your knee, feel free to grab your calf angle or even the back of your foot, but will help keep it flexed and given extra calf stretch. Good. Deep breath in and out and and exhale more deep breath in and out, and you can release your right leg and switch. Bring up your left leg. Feel free to keep your right knee bent or you can straighten it. Flex your left foot and just pull back to wherever you're comfortable and you can breathe. Little stretch but not over. Stretch deep breath in and deep breath out. Do you want to? You can always bring your leg out a little to the side and structure even more if you want to. Justin. Option number. Deep breath in and out. We put her left leg down. We're gonna bend both knees this time and bring our right ankle to our left. Me? We're gonna bring our hands around the left thigh as we bend our need towards us yourself. A nice hip stretch. What I like to do here is with my right elbow. I'd like to put it on my right knee so that as I'm pulling in, I'm also pushing my right knee out and giving myself a great hip stretch cannot stretch your hips too much. Good. Deep breath in and you breath out one more deep breath in and deep breath out and let your left to go. We're gonna switch. That's so left knee. I'm sorry. Left ankle to write me. Go ahead and grab your right leg. And with your left elbow this time, push open your left knee in a brace. That there is. You pull forward to keep your knee out. Deep breath in and deep breath out. Oh, if for some reason you're doing yoga and you don't have too much time, you can always do the last posted with hamstring stretch in combination with this one all you would have to do this. Stretch your leg that is bent right now straight so I can get both a hip stretch and the hamstring stretch at the same time. So if you don't have too much time to stretch before wedding, double it up, be efficient, do two things at a time. Let's take one more deep breath in and deep breath out. We can put our feet down. Great. Let's go ahead and sit up. And I had a few questions about this particular posed. So I just want to show it to you guys, Um, after we've kind of cool down a little bit, It's kind of nice to do some bouncing poses that are on the ground, so one of the balancing poses that I love, it's called Crow, and it looks a little bit difficult, but it's really not as difficult as you think it be. So what you're gonna do is you come to your feet and you can be about hip width apart. You put your hands in front of you, and this exercise is really more about balance and is about strength at all. I can prove that cause you're on your arms. But women technically normally do not have a lot of strength in their upper bodies. But I find no problem doing this after I get my balance. So what you're going to do is you're gonna bring your knees right on your triceps, Ben Jerk elbows and you just slowly lift your hips up. You can start right here. This is a great place to start, and then we get comfortable being a little bit more foreign, and then you slowly just start to pick up your feet, so play around with it a little bit, and this might be where you play right here, and that's fine. But once you start to get your balance, you need to feel like you're gonna fall for it a little bit. But this is a great balancing technique and a lot of fun. I just want to show that one to you guys a sort of a last balancing exercise. Let's go ahead and put our feet in front of us. We do one more core exercise as we go down for our final relax ation. So I'm gonna have you guys use. Get yourselves in a little yoga toe lock here. We're just going to balance and you can balance here. If you're a little bit more comfortable. Lower, you can do that too. We're just gonna balance. If you would like, you can straighten your legs out in front of you. Remember, Try not to round your back, but keep your chest lifted your back flat or if you'd like, you can straddle a little bit in balance here. So just fine where you're comfortable, really Focus in front of you. Calm your mind and then bring yourself back to center and we're going to scoot ourselves. Streets were sitting in the center of our mats. We'll do one more core exercise or roll back down. You can keep your hands by your sides. Or if you want to give you a little bit more help, you can kind of sit on your hands. We're gonna lift our legs up and they were just going to start to scissor them and you're going to scissor them down. You're going lower and lower until we hit the ground and we'll have the ground in 10 nine, eight, 76 five four, three to one, right. If you were sitting at her hands, bring them out. Palms facing up as we laid down. Try to tuck your shoulder blades back and downs that wire in your final relaxation. You are not stressing any part of your body. Scan your body. If there's any part that's tense, squeeze it up and then let ago, you can let your breathing go here and let your mind go. Listen to your breathing. What we're going to concentrate on here is relaxing our eyes because even though our eyes were closed and still he's strained. So I want you to do what we did in the beginning in class. And imagine, like you're looking at something far away that you can relax your muscles. It's a picture something far away in the distance, something calm and serene, preferably. Do not picture bride and groom at the end of the altar that will make you think of work extra, something calming, and then slowly just do figure eights with your eyes, your eyes, a little stretch and then go the opposite way in your figure eight and then just relax your eyes. Relax your mind and breathe, but your body absorb all the work we did today. Just take this moment to yourself to relax before we begin the day When you're ready, you can start wiggling your fingers and your toes. Start waking your body up. Keep your eyes closed as you bend your knees and then turn over to one side or the other and slowly help yourself up into a comfortable seated position. Whatever that is for you, you place your hands on your knees. Let's take a really deep three part breath we're gonna inhale deep into your stomach. Expand your stomach. Keep inhaling into your lungs into your chest in hell so you can't anymore. Hold it and then slowly exhale very slowly out of your chest, your lungs, your stomach, which all the air out. Let's do that one more time in healthier stomach, lungs, chest. Hold it for a second and then we're gonna do very forceful Exhale. Just let it all out. It's quickest possible. Great. Deep breath in and great. Thank you so much for joining me. I hope you feel both strengthened, relaxed and stretched and are ready to start the day now. Must stay
Class Materials
bonus material with purchase
Ratings and Reviews
Sherrie R
I really really enjoyed this! I love how Vanessa was great about telling you not to push your body more then it could go and to not only breath but how to breath this is so important! I've done a lot of Yoga video and classes too and the teacher never seem to mention (at least on the video) other ways to accomplish a pose! Great job Vanessa!! Thanks Creative Live for putting this type of course on the calendar keep them coming love all that you offer!! I'm so busy in my job/life that I need to remember to stop and take care of me!
Meg Rouje
Awesome! I like doing yoga at home, whenever suits me..Vanessa explains very well and do lot of different poses and gives tips on how to avoid or heal body pain on the field..Breathing exercises are clear too.. Her lessons can really teach anyone, from beginner to advanced: she always takes care to explain each pose for beginners and she will go all the way to advanced stretch..(wonderful to watch!) I got into yoga more seriously since I've started with her, she's really a good teacher!
a Creativelive Student
Love this class! I always wanted to learn yoga but never had the time to commit to a class. This lets me do it when I have time and is great at explaining how to do all the poses! Perfect for someone that wants to learn!
Student Work
Related Classes
Wellness