The Ultimate Guide to Learning Photography: What Is Aperture?
What is Aperture? How One Camera Setting Creates Depth (and Magic) in Photographs
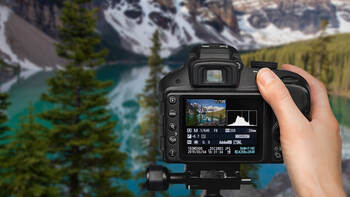
Beginner photographers are often intimidated by the term exposure triangle, and think that they missed a lesson in geometry class. But the 3 components of this triangle - aperture, ISO and shutter speed - are key when learning about the technique and composition of an image. Aperture is simply the size of the opening of the lens, and learning how it works will help you create the depth and light you need for beautiful photos.
In this guide you will learn:
- What is camera aperture and what does it do?
- How to set your camera’s aperture
- How to troubleshoot your lens aperture adjustments
What is aperture in photography?
A camera’s lens collects and focuses light — but just how much light? Aperture is one of three different settings that affect how light or dark an image is, called exposure in photography lingo (the other two settings are ISO and shutter speed).
Aperture changes how wide the lens’ opening is. Inside the camera, a set of circular blades widens and narrows as the photographer adjusts the aperture. The human eye adjusts to bright light by controlling the size of the pupil. Aperture follows a similar concept in that the opening adjusts to different light, only mechanically, not biologically.
When the aperture or opening is wide, a lot of light is let into the image. When the aperture is narrow, very little light is let into the image. When you take a picture on auto mode, the computer inside the camera determines where to set the aperture — on a bright sunny day, the aperture is likely very narrow, while at night the lens is probably wide open.
Where aperture starts to get confusing for most is when the numbers come in. How wide (or narrow) the aperture is indicated in f-stops or f-numbers like f/8. A small number like f/1.8 means a wide aperture, while a large number like f/22 indicates a narrow aperture, like this:
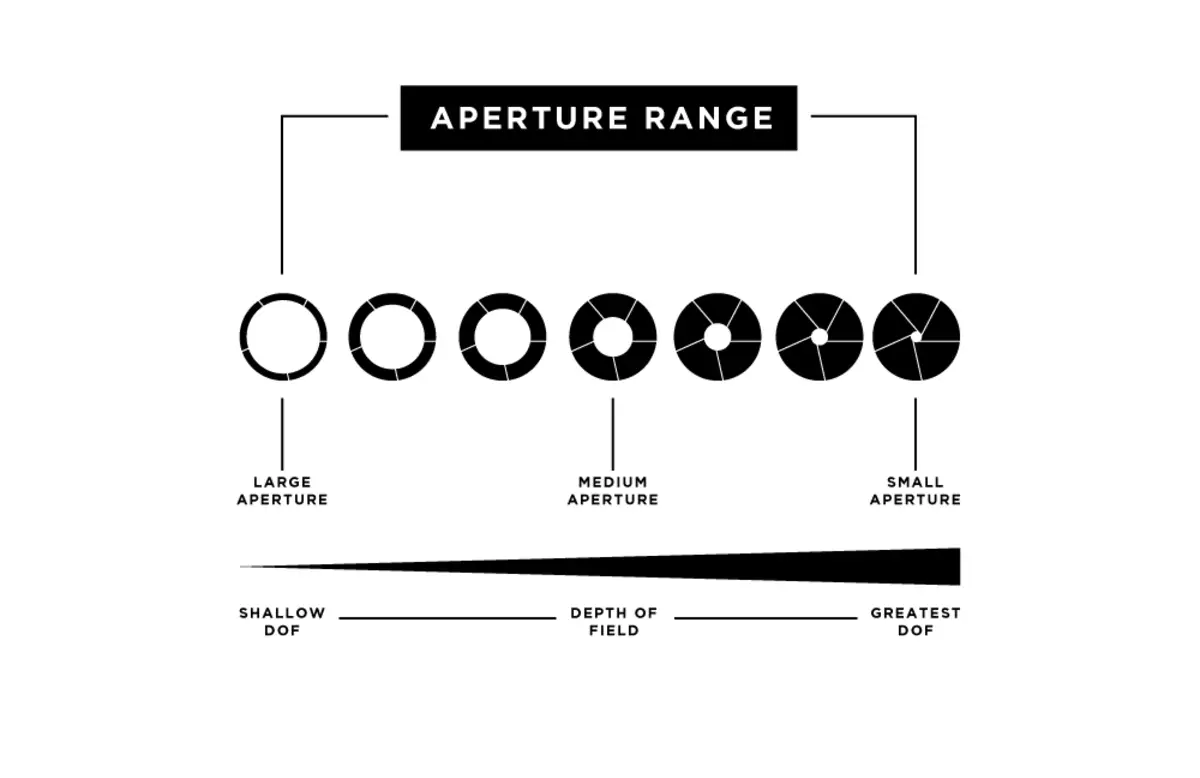
While calculating a proper aperture can get to be a complex process, new photographers need to remember one main concept: Small numbers mean wide apertures, and big numbers mean narrow apertures.
What does aperture do?
Aperture helps control exposure — just like a large window lets more light into a room, a wide aperture (remember that’s a low f-number) will brighten up a photo. If an image looks too dark, widening the aperture will help correct that.
But, aperture does more than just control how light or dark an image is — it also gives the photographer creative control over how much of the image is in focus and how much is blurry. You’ve probably seen dreamy portraits with blurry backgrounds like this one:

— Photo: Casey Cosley
And tack sharp photographs of sweeping landscapes like this one:
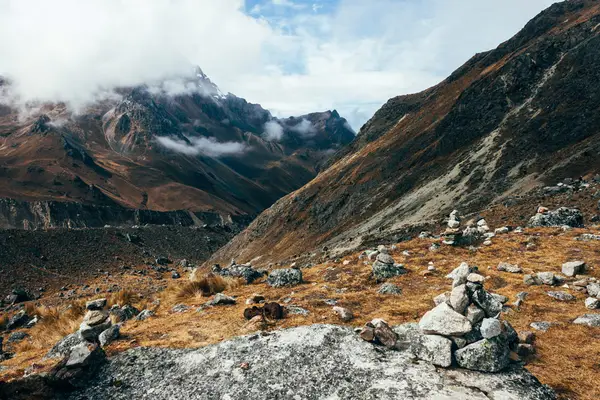
— Photo: Matt McGonagle
The difference between those two photos? Aperture.
A wide open aperture (remember, wide equals small numbers) creates a blurry background, while a narrow aperture (big f-number) keeps more of the photograph in focus. That’s another photography term called depth of field.
It’s important to know that aperture doesn’t determine what is in focus — the camera’s autofocus system does that. Aperture determines the difference between what’s in focus, and what’s not. With a wide open aperture, there’s a big difference between the blurry background and the sharp subject. With a narrow aperture, there’s a much smaller difference between the sharpness of the subject and the sharpness of the background.
Setting the aperture, then, gives the photographer creative control over the image. If there’s something distracting in the background, a wide aperture will help to blur out that distraction. If on the other hand the entire scene is spectacular, a narrow aperture will help keep all of that beauty sharp.
How to set the camera’s aperture
Aperture controls both depth of field and exposure — widening the aperture to blur out the background will also brighten the photo. Advanced photographers will use shutter speed and ISO to balance out the exposure, but there is a way to control aperture and still properly expose the photo even if you have no idea what ISO and shutter speed are.
Aperture priority mode is a semi-automatic camera setting that allows users to control the aperture, while automatically picking the rest of the exposure settings. On most cameras, aperture priority mode is accessible by the "A" on the mode dial — Canon and Pentax users will find it under the "Av."
In aperture priority mode, you can set only the aperture, to control the depth of field, while the camera chooses the remaining exposure settings. Using a low number like f/2.8, you can blur out the background. Or, you can use a wide aperture like f/11 to keep more of the image sharp. On most cameras, you can adjust the aperture in aperture priority mode by moving the back dial on the top right of the camera — if you’re unsure, check your camera manual, since all cameras are a bit different (some, for example, have a dial in the front and the back).
With the camera choosing the remaining settings, however, how do you adjust the exposure if the light is too light or too dark? Exposure compensation is a simple way to do just that. The control varies on every camera, but it’s often adjusted with a button using the +/- sign. Using the same dial while pressing the button allows you to adjust this setting, with positive numbers brightening the photo and negative numbers darkening the image.
Lens Aperture and a few Precautions
Aperture is a great tool for taking creative control over your images, but there’s a few potholes along the way.
First, using a wide aperture is a great creative effect, but it makes it tougher to get sharp shots. If you are going to use an aperture of f/2.8, you should be confident in your autofocus abilities — learn how to use single point autofocus and avoid super wide apertures when the subject is tough to get in focus, like for fast action.
Distance also plays a role in depth of field — the closer you are to the subject, the blurrier the background will appear. That means that even if you want a blurry background, if you are taking a macro photo (or a close up), use a narrower aperture. If you use a wide aperture on a macro photo, very little of the subject will be in focus at all.
Whenever getting the subject in focus is tricky — perhaps because they are moving fast or you are very close — use a narrower aperture to help increase your chances of getting a sharp shot.
Aperture isn’t the same on every lens either. Some lenses allow you to shoot at a very wide f/1.8 while others won’t allow you below f/3.6. The way that zoom lenses are constructed makes it difficult to put a wide aperture in, so many zoom lenses will have a narrower aperture range. Prime lenses, on the other hand, which don’t have zoom, make it easy to fit a wide f/1.8 inside.
Tip: To really get that out-of-focus background, pick up a 50mm f/1.8 lens — it offers a big boost in quality and creative control over the lenses that come bundled with most DSLRs and mirrorless cameras. They’re usually not too expensive either — around $200.
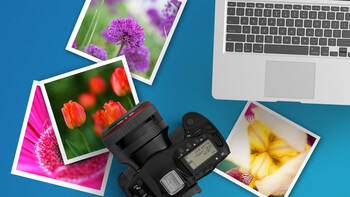
Aperture can seem like a foreign language — especially when you start adding in numbers. But lens aperture gives photographers creative control over just how much of their image is in focus and is an essential piece of the puzzle to getting off of auto and shooting stunning images.
Other Guides
- Photography Guide Home
- Photography Lighting
- Photography Post Processing Techniques
- Exposure Bracketing
- What is Shutter Speed?
- 5 Rules of Photography Composition
- What is Camera Raw?
- Creating Bokeh Backgrounds
- Focus Stacking
- Hyperfocal Distance
- Long Exposure
- Choosing Photography Subjects
- What Makes a Good Photo
- How Does A Camera Work?
- Composition Techniques
- Aperture & Depth of Field