Lessons
Day 1
1Introduction
15:18 2Post-Production Workflow
26:52 3Troubleshooting
12:20 4Setting Up Hardware
29:32 5Create A Rough Cut in Prelude
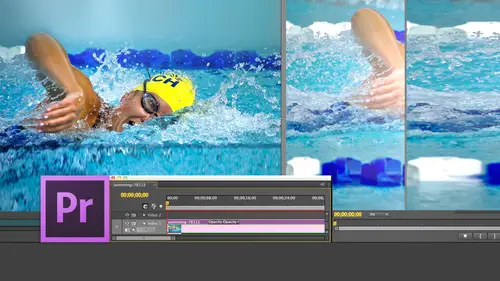
43:29 611:30 am - Introduction to the Adobe® Premiere® Interface
31:56 7Configure Preference Settings
22:47The Media Browser
10:03 9Capture and Import Media
37:09 10Reviewing a Clip
29:17 11Create an Edit
24:18 12General Q&A
14:18Day 2
13Editing Review
18:24 14Editing in the Timeline
35:10 15Trimming
36:13 16Organizing the Timeline
31:19 17Labels and Markers
14:18 18Transitions
24:57 19Introduction to Audio
31:26 20Audio Editing
45:36 21Mixing in Audition
26:51 22Audio Effects
37:41Day 3
23Normalizing and Syncing Audio
24:54 24Text Effects
38:12 25Blend Modes
14:48 26Motion Effects
43:07 27Filter Effects
34:28 28Chroma-Key and Lumetri Looks
19:56 29Color Correction
57:31 30Editing a Mini-Doc
41:09 31General Q&A
26:54Lesson Info
Audio Editing
on the right hand side are the audio meters inside premiere? If I grab this left hand vertical line, I could make my audio meters as wide as I want. Whenever you see a heavy black line, you can adjust sizing of stuff by grabbing and dragging it down. At the bottom is the sorry. On the left hand side is the left speaker on the right hand side is the right speaker and notice these numbers on the right. This is the measure of how loud your sound dis zero db is as loud as your audio can be. If it goes over zero, these red clip lights light indicating that you're in distortion mode. You have not actually distorted the audio onto you export or output. So as long as you just simply playing it in testing levels When the red lights go on, your first reaction should be Oops, I got to bring it down. If you're exporting its Oh my goodness, I've destroyed the file. I gotta re export big deal. When you export notice that the view meters air measured in six DV increments That's that 6 50% drop in gai...
n every time the game drops 24% although the meters only go down to negative 60. Audio actually extends much softer than that. Negative 96 for eight bit audio negative 120 db for 16 bit audio. Negative 143 d V for 32 bit audio. But frankly, I never worry about how soft my audio is. I'm always worried about how loud the audio is. If I right mouse click inside the meters, I'm able to specify the DB range, and I generally are running my meters between 60 and 48. If I know that all of my audio is Humphrey and I don't have any noise in it, I'll run it. 48 db. But if there's a risk of hum, I'll run it 60 db because it's easier to here. Excuse me. Easier to see noise in the meters at that point as we play this first clip, this is Dr Cerf. Let's just watch where the meters air bouncing. Okay, we're not getting audio on the floor it all and notice that our meters air bouncing around negative 32 negative. 36. So that's kind of soft because the loudest that could be a zero, and I don't want it to be quite that low. I can go from dynamic peaks. See that yellow line there? That represents how loud my sound has been over the last two or three seconds, or I can go with static peaks. Now, when I play it, the peaks don't drop. They remain at the loudest level. My audio has been for that period of time. This is really good to see if your audio has exceeded a specific level to say, I want to make sure that my audio doesn't go above three db Setting up the static peaks will remain showing me the loudest peace after I've stopped playback most the time I'm looking at this and dynamic peaks. If I go up to show valleys now, when I play the clever standing, the consequence there or attach the softest audio has been over time of which is the opposite of the loudest. My audio has been over time. Most of the time. I like looking at valleys because he gives me a sense of the range between the loudest on the softest portion of my clip played over time. So the way that I have my system set is I always show valleys. I'm looking at either 60 or 48 db range. Generally 60. I generally I'm looking at Dynamic Peaks unless I need to see the loudest portion of my clip over time. Which guess I'll set it to static peaks. And we got there by right mouse clicking on our audio levels. Audio the audio meters. By the way, as long as I'm here, just show you one other thing. Hold the option key down. Move this clip up. Notice that I've got a clip up here, but it's disappeared. If you grab this, this allows you to move. The slider allows you to scroll up or down to see clips which are out of sight. This line here, if I grab this thumb, I can drive Aiken, change the dividing line between video and audio by going over to the side and dragging up and down in final cut. Oh, they've changed this in cc released? Nope. They haven't got to be over here in final cut. You could be anywhere in a timeline, but in Premier, you've got to be over here to pull this back down again And the same thing with audio is I grabbed this thumb and drag up and down. I can move between multiple tracks of audio. Keep in mind again that I'm working with a very, very small screen size just to keep this demo compact for you guys watching. Okay, pull our meters back just a bit. This would allow me to solo the left channel. So I just see the left Channel. This allows me to solo the right channel, so I just see the right chance those things couldn't happen. I cannot begin to tell you how thrilled I am. Those air there. That's somewhat ironic. I never used them. Let's see what else? Oh, we've seen already that this allows. Let's go back to hear if I mute this clip without someone thinking that that's what surprised me. This is Pan Center, all right. This means that everything on this track I don't here and if I click on this clip very carefully, everything on this track I don't hear notice also that our lights green indicates the audio audio is audible. White indicates the audio is inaudible. Nobody needs to remember it just showing that adobes paying attention to the details. Now let's do one other thing. Um, okay, first problem that we've got is where do we Ruffin levels? Let's say that Ive got talking head audio, and I've got sound effect audio and I've got music audio, and I want to rough in the levels to at least get them within shouting distance of where they need to be. Remember that the number one rule is audio cannot go over zero. And because audio is additive, we want the total mix to go between negative three and negative 60 b and as we play this clip, trained as a mathematician and later as a computer. So he's really soft, so so soft that we've got to increase his game. But where should we put him? So I'm going to give you three numbers, three mixed numbers that can help you to spot your audio. There's no magic to these numbers. Nobody's going to test you on these numbers, but at least gives you something to think about for talking head audio, person on camera talking or your narrator. Have the peaks bounced between negative six and negative 12 db that could she in the ballpark for sound effects for sound effects that is in support of talking heads. The rattle of plates in a restaurant, the sound of air conditioners in the background for sound effects set up between negative 12 and negative. 18 db It's about half assed loud as you're talking head audio for music in an underscore capacity where you want the music playing underneath people talking and you're able to hear the people talking. Sethi Audio to negative 18 db so talking heads between negative six and negative 12. Sound effects between negative 12 and negative 18. Music around negative 18 and then additive. Total total levels when you mix it all together is between negative three and negative six. Now Scott, just because he wants to ask a question would say, Larry, what happens if it goes to negative 2.5 of my in trouble? No, you're not in trouble as long as it doesn't go over zero. Once you've got those numbers roughed in, then it's solely a question of what sounds good to you. Nobody cares what the numbers are. Nobody cares what the numbers are, as long as it doesn't go over zero and it sounds good. It is good. But to help you get in the ballpark to help you get close, use those as as rough it in type numbers. Okay, So far. Still with me. So how do we adjust gain shift plus key Notice that I've got wave forms here may just as long as we're here. Let me talk about one other thing. Human speech is bursting, for instance. Right here. You know, scientists. Let's Ah, go back again here. By the way to shuffle back and forth the timeline, hold the shift key down and used the scroll wheel on your mouse. Those of you who are really observant will say, Larry, you're working at a laptop that's got a track pad. Why we're using a mouse Because I like the precision the mouse provides. I like having the scroll wheel. I like being able to move the mouse precisely and know that I'm dealing with a very small increments. Track pads air wonderful for word processing and finger painting. But they're not good for video editing. I prefer to use the mouse and I don't like a mouse that's got a track pad on it because my goal is I want to be fast, efficient and precise, and a scroll wheel mouse for me does that. You can, of course, at it, using whatever tools you want. That's why I'm using about Could you have the same comment about, Ah, welcome tablet using a pen and tablet? You know, there are very few editors I know maybe one in 10 that used tablets for editing because one who's an outstandingly good editor uses it all the time, but most the time because of the first, I think habit, which is not a bad thing, necessarily. Second, because of precision. I think the mouse is a more precise instrument, then the tablet ISS. It is absolutely, absolutely personal preference. There is nothing I know one editor that hates the keyboard. He comes in, unplug the keyboard, does all of his editing with the mouse. I couldn't edit like that, but he's won awards for his work. I'm a keyboard shortcut junkie. Other people, maybe tablet junkies. Premier works across all three of those. Whatever works the best for you. Most editors that I know tend to work with mice and are there any third party devices that you can use with premier that you know about, or even final cut that they're like fancy mice with extra buttons and scroll wheel. Yeah, contour designs C o N t o ur Contour designs makes a whole separate controller. There are audio what are called control surfaces, which are audio mixers that simply act as a front end of the computer for audio mixing. Black magic design makes a console solely for color correction. There's lots of different pieces of hardware for the actual process of off. Um, editing will think about another thing. Apple just released Logic Pro 10 which is a music creation tool and shipped an IPad app with it, which allows you to use the IPad as though it was, ah, mixer control the operation of logic. So the answer is yes. However, my experience is that for the process of video editing, for me and for most editors, a keyboard and mouse is the most efficient way to work. But that's not to say these other tools aren't useful, and especially in a playback environment, they could be extremely useful. And abs and Contour designs has been around for a long time, absolutely, with checking into. So look at this way for human speech is bursting. Each one of these little puffs of sound is a syllable you want to edit where the wave form is as narrow as possible because that's where there's the least volume in the clip and sorry. Hang on here, for instance. There's almost no talking. We're just seeing room tone. Then he starts to speak with video. You might cut at the very beginning of the action, but not with audio, because of the rhythmic nature of human speech, the timing of the bursts of sound you never do. You read it right. As the sound is about to start, you always do your edit five, maybe six frames before the start of the sound. This way, when the end of one person finishes and the start of the next person starts, there's a little bit of a breathing room, a little bit of a pause. And if you think about conversations, if I'm talking with Alex, Alex finishes talking than I start talking. Unless I'm being really offensive to him, I don't start talking is while he's talking, I don't jump on his lines. At least I try not to, and he tries not to jump on. My life's in dialogue. Most of the time you want to have a little bit of a gap there Now. Robert Altman was hugely font of people stepping on each other's lines. There was no pause between. But that's an affectation, knowing that most human speech there's a slight pause between there's roughly roughly ah, five frame pause for a comma roughly attended 12 framed pause for Syria, Africa for a period and roughly a 15 frame pause for a paragraph. So you want to leave these gaps in tow. Allow your conversations, your dialogue between your actors to sound normal. Clearly, if they're angry, they're gonna be smashing on top of each other. If it's simply ah, romantic dialogue, then they're going to give each other time to talk. So you want to allow for that. You never want to edit where the way form is as large as possible. That's going to create a click or a pop. It's going to sound bad, so edit where the way form is narrow. Never edit where the way form starts, always at it, about five frames before, and sometimes you can see it right here. He's taking a breath. There's a slight rise in the way form, indicating where he's taking a breath. You would never add it in the middle of a breath. You would either edit before the breath or you did it after the breath. What I do it's a really cool technique is if I'm editing somebody, I will keep the breath from the old clip, do a cut and cut tight to the new words. So the breath comes from the old phrasing. So it's got the timing of the old phrase in. And then I cut after the breath and cut to the new sentence. And it sounds seamless when you edit it, because the timing flows smoothly from the old sentence into the new breath into the old breath into the new sentence, something you can you can try for yourself. Try not to avoid editing in the middle of the breath, gives you a double breath effect and sounds bad, so audio is bursting. Each syllable is its own puff of sound. You edit where the wave form is as low as as possible, and you want to make yourself pay attention to the rhythm of human speech and the the breathing of your guests. So how do we adjust our levels? We adjust our levels with this white line down here and to make this easier to see, I'm going to go up to the wrench, turn off the wave forms, and now, because the wave forms aren't there, it becomes a whole lot easier for me to be able to talk about the levels that are going on. If I grab this white line and drag it up, I've increased the volume of the clip. If I grab this white line and drag it down, I've decreased the volume of the clip. So here I drag it up. Now this is what's called making a relative adjustment. I'm making it louder or softer relative to the level at which it was recorded. One. We're recording dialogue on set. We always record dialogues soft because we want to make sure that if the talent starts to yell not did I myself have done that at any time during the show's. But if for some reason they raised their voice, you don't wanna have them distort, thereby screwing up the recording and requiring a retake, which causes the director to take you up back and flog you. Audio engineers are very sensitive to that, so they tend to record on set dialogue soft, knowing that we can bring that dialogue up in editing and make it as loud as it needs to be. Music, which is fully produced, is generally mixed either a level of zero DB for the peaks or 1/10 of a DB below zero, which means music is as loud as it can be. There's no room in the music for us to put dialogue on top, because that would cause our audio, which is additive to go over zero and causes distortion. So we're always bringing music levels down because they're extremely hot, and we're always taking on set dialogue and bringing it up because it's extremely soft. Oh, by the way, don't record with the A G C circuit on in your camera. The A G C, which stands for automatic gain control on most cameras below the cost of $10,000 is so bad that it makes your audio worse. You're much better off taking your microphone, running it into an inexpensive mixer. Sound devices makes good ones. Um, task out makes good ones. Enter all rolling. To make good ones, Run it into a sound mixer. Take the output of the sound mixer. Run that into your camera because the A G C circuit is going so badly. Clamp the audio, destroy all the dynamic range and possibly distort your audio. It's just not a good thing. So turn off a GC, run your audio into a mixer and hire somebody, even if it's a high school friend to watch levels. Your audio is gonna be so much better if you run it into a mixture. Take the mixture running into the camera and just rely on a G C circuit, especially if you're shooting a five D s. 70 a. 60 d a. One d a t two I Any of those cameras? The agency circuits are so bad we have to record audio on an entirely separate device because the camera records audio so poorly. So don't use those cameras. What we're doing now is we're simply raising the level up or down. Okay, so let's go back to our playback. And let's just pull that audio thinking logically, trying to do designs that are rational. All right, what's wrong here? Okay, try it again. Uh, understanding the consequences of architectural decisions are all part in parcel of the Okay. So what we can do is by raising this clip. Uh uh uh, okay. We can raise this clip and the volume gets louder. Now, the what we can do also is that we can adjust the game. Let's just shift minus. I'm getting some weird reactions off this, then getting a couple things I'm not expecting. So I'm sort of thinking about that as I play this back, uh, understanding the consequences. Okay. Notice that our gains around negative 30. I want to bring that gain up a lot. I could grab this line and drag it up and down, which is doable. I could add key frames, which I'm going to do in just a minute, but it makes more sense to go up to the clip men. You go down to audio options and select audio gain. Keyboard shortcut is the letter G. This opens up a series of options which could make our life a lot better. This allows me to set the gain 20 db this makes a absolute change. I want to gain zero. Db means that it is at the level at which it was recorded. I want to raise this gain, say four db So now I'm going up. Four db I want to adjust again up, say four db So what I'm doing is the set gain to is a absolute change. The adjust game is a relative change. These air fine. They allow us to make clips louder. But there's no guarantee that I won't make the clip so loud that it will distort and distortion is bad. We've talked about that, So I want to do none of these. I want to normalize my peaks so that they don't exceed a certain level and I normalized my peaks to negative three. But that translates to an English is I want the loudest portion of my clip not to exceed negative three db So it goes through on that clip and perform some quick, quick calculations to set the peaks to negative three. And now, when I play it, I think it is inescapable that whatever success I hand, it means that the loudest portion of my audio is not going to exceed negative three that whatever success I had is a side effect of having been trained as a mathematician and later notice that his audio is bouncing around. Negative 24 to negative 30. When I set this using the clip menu on your system, I have to select the clip. Go up to the clip men you go down to audio options, go to game when I normalize the Max Peak to negative three, I should have this bounce such that the loudest portion of the clip is right at negative three, which is in this case, his first word because of the audio routing that we're doing during this webinar This this presentation, that gain is being lowered more than I'm expecting, so we're not seeing the results that I expect. So when you try this on your system at home, when you select, when you select a clip and you go down to the clip menu and select audio options gain and you set normalized peak, the loudest portion of your clip will peak the meters right, a negative three when you set, normalize all peaks, toe whatever number you want, and you never, ever normalized to negative three. You always normalize. You never, ever normalized to zero. That's too loud, because if you normalize 20 you can't put anything else underneath it. Because audio is additive the loudest. You would want to normalize your peaks to his negative three. If it's part of a mix, if there's lots of sound effects, if there's lots of music and this is the talking head dialogue, I would normalize to negative 4.5. So for talking head dialogue, when it's the only person talking and there's no sound effects, there's no music. It's just a standalone narrator to the camera on Normalize or Limit to negative three If it's part of a mix and I have sound effects and I have music and I need to have all that stuff fit still inside that zero db limit that I'm gonna normalize my talking head in my narrators to negative 4.5. Those are the magic numbers that I use. But because we're getting some strange audio routing through here, that's why we're getting some strange numbers on the EU meters. So I'm gonna click council here, and the nice thing about normalization is it guarantees you won't distort, and it calculates all those peaks automatically. One of the things that you'll discover is you work with amateur talent is that amateur talent is really, really nervous about being on camera. Witness the calm collected nerves of our studio audience every time they ask a question as they gripped the mic tightly night white knuckles showing. And whenever you're nervous, the way that the human physiology works is your breathing ghost Suck in a big breath, and the very first word out of your mouth is like the loudest word until you run out of air and it gets quieter and quieter. Bring in a big new breath in the next. We were riding this roller coaster of sound big breath, heavy words, and then we run out of air and they don't know breath control. And so here you are, trying to pull levels on audio that's going all over the map. Normalisation won't help the definition of normalization, which Jared is about to write because I'm gonna dictate this to Jared, Is this. Normalisation changes the level of the entire clip by the same amount, such that the entire such that the loudest portion of the clip does not exceed the level that you specify. Type that in a hurry, repeating for those of you writing notes at home normalization. Adjust the level off the entire clip by the same amount such that the loudest portion of the clip does not exceed the level that you specify. Well, if I've got a voice that's way up here on the first word and a slow decrease in volume is he runs out of breath until we get to hear How do we normalize that? I'll make the first word sound good on the 2nd 1 is going to sound terrible. Sorry, the end of this gonna sound terrible cause we so I gotta adjust the volume during the clip. Normalisation doesn't do that. Grabbing that volume line dragging it up and down doesn't do that. How do I do that shift? Plus this line here. If you hold the command key down and you click, we add what's called a key frame. Now key frames have been known to scare small Children. A key frame is simply a point of change during playback. That's all it iss ah, point of change during playback. If nothing changes during playback. You never need to use key frames because I want the audio gain to change during playback. I'm gonna set the key frame and you always work with key frames in pairs. There's always a starting key frame, and there's always an ending key frame. This says that I want my audio to start here and I want my audio gain to end there, or I want my audio gain to start here, and I want my increase to go there now. I could add 1/3 key frame, Hold the command key down command, click and add 1/3 key frame. Then this is the start. That's the end. This incident becomes the start that becomes the end. We always think of working with key frames in pairs to effect change during playback. As I play this clip back, it's going to start at this level. Is going to go to that level, is going to go to that level as the key frames. As the volume line goes up, it gets louder, the surviving line goes down, it gets softer. Now, a really cool feature that I like a lot is if I right mouse click on this key frame we can set busy a control points. We can add curves, toe our audio notice how here it's easing into the key frame, easing out of the key frame and going down to their We'll just set that into an ease in. And now I can grab this busy a control point and change the shape of my audio curve so it eases in, quickly, falls down and gradually lands right at the level that I want. This is exactly the kind of busy eight control we've had in motion graphics for a long time except now were ableto add busy a control inside our audio and change the shape of the curve by grabbing that blue dot and dragging it up and down, which is just way cool. For instance, here, many times I'll work with unexamined where there's a breath right here, so I'll set a curve in. Let's do an ease out and I'll have it. Keep the the breath, the harsh breath quiet, quickly ramp up to full volume so I can still hear the breath. But I've minimized the volume of the breath so it doesn't sound quite so loud. and gasping, or I wanna have a ramp up quickly and then settle in. I'm just gonna change the shape of this curve until it looks the way that I want now, most of the time with audio. Most of the time, you don't need to add Busia control points. It's just really cool that we can, because there are certain circumstances were messing with the shape of the curve can make a big difference. But in this particular case, I can also go back, turn it off by going toe linear. That means straight line. Don't mess with anything. And the way I'm getting to this menu is I right. Mouse. Click on the key frame itself and select what I want to notice. Now it's gone straight line corner, straight line, corner straight line to delete a key frame. Highlight it, and you can either right mouse, click on it and say, Delete. Or you could highlight it. Hit the delete key and your key frames are back to normal again. We also have pan control. We'll talk about that more Just a minute we can adjust the pan control, but before I do, I want to make sure I've got that covered off. Remember the effect controls tab that we saw when we were editing transitions? The effect control stab also gives us control over our audio. So if I go to effect control notices a video effects category, we're gonna spend all day tomorrow and there. We also have audio effects on Channel One and Channel two Now, although this looks like it's a stereo pair, it's actually dual channel mono. The reason I know is that I've got audio effects on Channel One and audio effects on Channel two. We're gonna delete that for right now. So this is what audio effects on Channel One looks like an audio effects on Channel two. We have volume control and we have pan control. If I click, hold on, drag the sound. There we go. Pan allows me to pan the sound. If this is set to zero, that means does the model clip is panned Dead center. If I drag this all the way to the left, 100 means the sound is coming out exclusively the left hand speaker. Drag this to the right. Negative 100 means it's coming out the right hand speaker zero is centered. 100 is left negative. 100 is right. If you hold the command key down, the command key allows you to drag in very small increments. So you can precisely control where your sound is coming from. Or you can just twirl down the triangle next, Japan and drag left and right to set the pan Exactly where you want between the left hand speaker on the left, on the right hand, Speaker on the right. I may have said that incorrectly. So the ministry state that left his negative rightists positive 100 0 was panned in the center. Same thing with volume with volume twirl down level and were able to adjust how loud the clip is. And this DB is the measure of how much we've changed the volume compared to the level at which it was recorded. If this number is zero, we're playing it back at the level at which it was recorded. If this number is less than zero, it's quieter than the level at which it was recorded. If this number is mawr than zero, it's louder than the level at which it was recorded. Um built in two. Premier is a mixer. We can see it up here. It's called mixer. If it's not visible, go up to the window menu. Go down to audio track mixer. This is, Ah, Mawr complete mixer than we're used to inside Final cut, but a little less powerful mixture that we'd find inside Audition By now, you should be hearing that we used the right tool for the job. We can do really simple mixes inside Premiere, and it's gonna be fine. There's not a problem. The audio quality is great, but as your mixes start to become more and more complex, moving it into a dedicated audio package like Audition, which Premier an audition or part of the same family just makes a lot of sense because you're using the right tool for the right job. So I'm gonna talk about a simple mix here, but when you start to get complex, we want to mix it toe audition, and I'll show you how to work with audition after the break. This is a way that adjust our pan on Channel one. These, by the way, are called channel strips. There's four of them. There's three audio channels and a master channel. This allows us to just Japan by click. Hold on dragging, and this slider allows us to adjust volume. There's are mute button. There's our solo button, and the letter R allows us to record, say, a voice over track for premier. It's giving me a warning saying there's no audio gear to record. I'll just click OK and will disarm. That mute means that channel cannot be heard. Solo means that channel could be heard and others cannot, and record allows us to record on that channel. We're gonna talk about that some other time. Notice the zero level here. Zero level on the left hand meter indicates that the audio was playing back at the level at which it was recorded. As I grabbed this fader up and down, I'm changing the level of the track, making it louder than a recording level of softer than a recording level. Okay, I'm gonna play this clip gang, so it's all watch our ears even more important, the success of the Internet, which is well beyond my own personal success because there are so many other people were increasing. But when we are, we're now reading it on the right hand scale. The left hand scale indicates how much we're changing the game compared to the level at which it was recorded. The right hand scale shows us the absolute value of that track, the loudest of which it cannot exceed zero and the master is the aggregate of all tracks. This is the equivalent of the audio meters, so I can see what the sum of all of my audio is when I'm playing it inside. Premier. So what we're seeing is that we can edit audio clips exactly the same way that we had it video clips, except we need to pay attention to the wave form. So we are editing. When the wave form is as narrow as possible. We trim clips exactly the same way. The ripple in the role tools we add clips in the timeline the same way said it in setting out and it into the timeline. But with audio instead of trying to worry about visual effects were worrying about audio effects and audio levels, and audio levels are set by grabbing the level line that white horizontal line inside the clip, dragging it up and down which changes the entire clip but could cause distortion. Or we go to the clip man, you go down to audio options, Click gain and we could normalize the clip, which guarantees that it doesn't distort by setting the loudest portion to the level we specify or weaken set key frames by command. Clicking on the volume line and allowing ourselves to manually set the levels throughout the course of a clip, which is what we do. A lot of inside video editors. And then we can move over to the mixer, and we can use the mixture to quickly set levels or key frames between clips. So that's where we are at the moment. We turn it back over to Jim and Susan. Idea. Jason asks. I run a noise filter before I do anything, taking out things like breathing or a C or fans. Is this a good idea or a bad idea? I would say it's a bad idea. Well, it depends. Everything depends. It all depends. If I'm shooting on location, I absolutely want to hear the sound of the location behind my actors. That's why we're on location. If you're in the kind of studio that you can afford. Some studios like this one are really, really quiet. We don't hear air conditioning noise. Other studios, like home studios, have got air conditioning or outside traffic going by there, you want to have it sound like a studio. She'd want to reduce the noise. The problem is, what noise reduction is actually doing is it's manipulating individual frequencies inside the audio, and many times those frequencies overlap Human speech, and you end up degrading the quality of your talents voice by reducing noise. If you're on location, you want the sound of that location. I would not pull the noise out as long as you're actors air intelligible above the noise also. And this, I think, is really important if you're doing dramatic work as opposed to commercial work. If you doing commercial work, you take breaths out all the time because no advertiser wants to pay for a breath. So commercials air cut tight breaths or missing and and they even speed it up slightly to make sure they squeeze the maximum content in seconds. But for drama, the breath carries all the emotion. If somebody is scared, we've conditioned our voices to respond to the logical side of our brain. And even if we're scared, we can make our voice sound firm and confident, because that's how we work our voice. It's just the way where our voices air trained. But breaths breaths are totally emotional. If you want to know if somebody is scared or worried or nervous, you listen to their breathing and their breathing will give away their emotions all the time. So to cut that out what you've just honest you've cut all the emotion out of that scene because the breath is giving away the emotional side of the logic. Being conveyed by the voice is part of the sentence. So one. If you're on location, I would reduce noise but not kill it. I would never get rid of breaths unless you're editing a commercial on, and that's just sort of general feel. Your situation could be different. There's no single magic rule, but I would also do that noise reduction at the end after everything is done, I would not do it at the beginning because once you do it the beginning, you're totally screwed. At the end. At least you have the option to think about whether you want to leave it in or not. I would. I would always do all audio work at the end of the project. Never the beginning. Great Larry Trap City Productions would like to know. Do you find it important to monitor your audio with a stereo speaker, or do you prefer headphones? Do you think you need headphones? Um, the answer is that if you have the option, always use speakers. Never use headphones. Headphones have way too good hysteria separation, and they are way too precise if you are. If you are listening to headphones, you are hearing flawless stereo separation because there's a brick between the two speakers, and the other is that that you can hear stuff because that headphones air wired directly into your brain. And you gonna spend 1/ hour taking out of breath that nobody can hear because on speakers it's just lost in the in the nature of the speaker. So I tend to edit on speakers unless someone environment where this multiple editors working at once or I have to be on headset just to keep the environment quieter for other people. But the problem is you end up fixing problems that aren't problems because you hear him on headsets and you don't hear him on speakers. The general rule of thumb is speakers. Now. Cheap speakers are worse than good headsets, really good speakers. That I like a lot would be midrange J B. L's to noise events. The mid range Mackey's M audio used to be good, but forget the five inch range that's just fallen apart. But the M M audio be X eight is a really good monitor speaker. If you want the best in the industry and you can afford it first, I can be rented second. You get a general g e N G l E c, and those are really good. With $3000 apiece, you should look to spend about 3 to $400 you want to get monitor speakers, not just standard speakers and never ever mixed to a subwoofer. You always mix two speakers because the subwoofer you're gonna dial out all the base. Somebody's gonna play it that doesn't have a subway fresh sound thin and tinny, and you're gonna wonder why it sounds terrible. Get monitor speakers, which have a flat frequency response Cost about $ a speaker and mixed to your speakers. And you're gonna be really pleased with your sound. Cool. Thank you. So, a couple questions for Missy B and Caylee asking about 5.1 surround sound. Do you want to comment on that? They're asking a premier can handle it Good times and bad times to use it. Well, first, if you're distributing for audio, that's gonna be heard on an IPad. Do you have a 5.1 surround IPad listening environment, Jim? No, sir. I do know you listening to on an IPad or IPod my two speakers have and how many? We've tested this with Susan. How many years do you have? Yes, exactly. Right. So the first question we have to ask is, What environment are you mixing of? I've got once around for the only environment were 5. surround. Makes sense is where it's not going to a mobile device. It's not going to a CD, cause both of those air stereo environments you're mixing either for theatrical release or you're mixing for corporate environment. Where there specifically building of 5.1 surround environment. Absolutely. Yes, Premier can handle ah, 5.1 stereo surround environment, but you're gonna want to mix it in audition. You got much more panning control in audition than you do inside Premiere. So, yes, you'll take the 5.1 surround. You feed the clips to audition. Do the mix. Bring the five dot Once around back to Premier you'll. I'll put the five dot once around as probably a six track quick time movie. You'll be able to take that quick time movie convert that to, AH, DCP package, which is a digital cinema package. Feed that over to the playoffs server of the theater you're going to and they'll take the surround mixing. But now, if you're doing theatrical release and you're not mixing two Dolby that be one way. But if you're mixing two Dolby, you want to take your your premier package toe. Adult Be soundstage because they actually mix theaters in a theater so you can hear the sound on a 40 foot screen, and you'll mix it too, with theatrical environment. And that requires additional hardware to mix the Dolby specs than ships with audition or ships with premier natively. Totally doable, but you need to ask yourself, What is the distributor need and how my supposed to deliver it? What audio level specs do I need? What sound pressure level specs do I need? What, what do they have any special requirements? There's also a big issue, whether you want to use the l F E or if you just want to go with the subwoofer. So there's a lot of different issues to talk about. You need to talk to your distributor, decide what you want to do. Wow! All right, well, we have. Let's take one more question before we go to break unless any of you in the studio audience have a question. So Amit Sinker on said, What setting should I use when exporting a mix from GarageBand or audacity to make it as workable? It's possible in Premier. Do I need to do anything special? Why are they exporting a mix now? If you're using GarageBand to create music, which then becomes part of your underscore, a mix of music as long as you've got as long as you can clamp the peaks and make sure that nothing goes over zero because the rules with same whether you're in Logic or GarageBand or Market the Unicorn or Reason or New Endo, our final Cut 10 or final Cut seven or Premier Audition Pro Tools. The rules are always the same everywhere, which is no audio goes over. Zero db Not at all, not ever. So. If you're using GarageBand is a way of generating your music, underscores, then I'll put those so that the audio's between zero and negative. Three. That's a perfectly good value for music. If, on the other hand, you're exporting clips out of garage band that you want to be able to bring in as clips into premier, then you want to be careful here because once you export it out of GarageBand, it's a stereo pair, and you can't get access to the individual elements off that clip. So give me the question one more time. What setting should I use when exporting a mix from GarageBand or audacity to make it as workable as possible in Premier? Do I need to do anything special? Zero to negative three would be okay, because that implies that it's music and music is mixed. Hot zero to negative three is fine. Get at the end of the last segment I looked over and you looked a little concerned, and I was wondering if you'd be willing to come clean on the looks that I was getting. You know, I was casting aspersions on the the audio engineering of this August facility because I was not getting the levels that I mean, I've seen these clips before, and the stuff was just way low. I mean, really low and certainly would not be my mistake that Well, certainly inside premiere. I got to show this to you because goodness knows, Mike is a limit. You see this thing called Bastar down here that refers to the Master Audio Output channel and for reasons that I do not understand but which were entirely my fault. I had some, um managed to click on that master channel and set it to negative 20 which meant that all of my audio coming through Premier was dropped 20 db, which is like phenomenally low. So I was struggling to get the audio to be as loud as possible, and the master game was set so low there was no way we could be successful. So the first rule is don't mess with the master gain
Class Materials
bonus material with purchase
Ratings and Reviews
Jfraz
I love this class. It is highly technically, but there is an awesome wealth of information to be had, even if you are a beginner. I've been struggling for a while, trying to look at YouTube videos and whatnot, but this class helped me make better sense of what I needed to do in all of my video editing. You get such a great foundation that's going to help you go further.
Valentine
I recommend Larry Jordan's course there is a lot of in-depth information that will help the beginner as well as the advance premiere editor. The only thing is that his humor is a big corky for my taste but if you look beyond that you get a lot from his teachings. He genuinely wants his students to succeed and get paid well in this field which its nice.
a Creativelive Student
This is one of my favorite courses on Creative Live. Larry Jordan teaches in a way that I can follow and is easy to stay focused on. He has a crazy amount of knowledge about this topic as do all the Creative Live teachers. I love this site so much, has done more for my business than all the other sites I have used combined. Keep it up CL!!