Effective, attractive indoor lighting setups can easily eat into your photography business’s budget if you let it; lights and lighting gear can run in the thousands of dollars. And if you work in a rural area, where much of your studio gear comes from the internet, shipping alone can really start to add up. With a little bit of elbow grease and some know-how, though, you can build your own DIY lights and lighting rigs for pennies on the dollar.
In his CreativeLive class, Building and Using DIY Lighting Gear, Kevin Kubota explained how to build everything from a speedtube to a window light scrim. Here, he shares his tips for how to make a DIY ring light, using tools and equipment you can find at any hardware store.
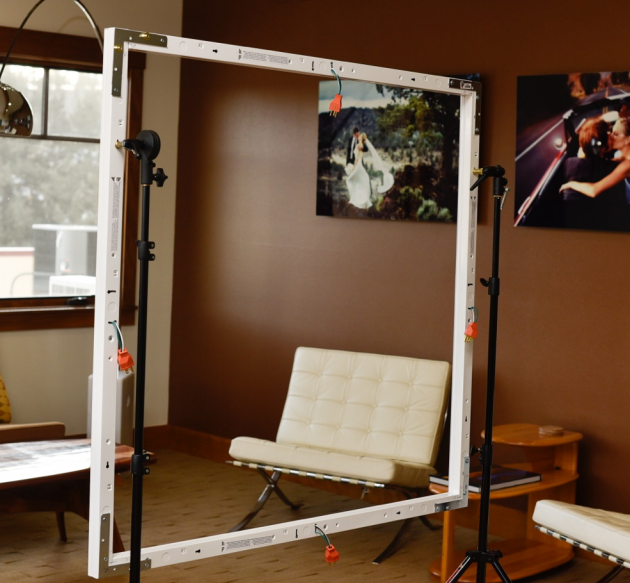
“This project is a little more expensive, but not nearly as expensive as buying this kind of light from a photo manufacturer,” says Kevin. ” It uses fairly bright, and cheap LED shop lights,” which you can find at any home improvement store for only $35 each.
Here’s what you need and how you do it.
Supplies needed:
• 4 – 48” LED shop lights from Lowes Home Improvement (UtiliTech Pro part #0595683) $140
• 4 – metal “L” brackets from the hardware store $8
• Enough sheet metal screws to attach the brackets (#10 x 3/4” usually works) $2
• 4 – 3-prong electrical plugs (or one for each light you get) $12
• 2 – light stand spigots with 1/4”x20 thread (from my junk drawer)
• 2 – lock nuts for 1/4”x20 $2
• 2 – star washers to fit 1/4”. These keep your spigot from twisting under pressure $1
Don’t want to break the bank buying lighting gear? Learn to make your own by watching Build A DIY Home Studio with Mike Hagen.

Then you:
• Open the shop light by squeezing the sides and prying the bulb casing off, then push the electrical cords through the holes
• Attach the 3-prong plug to the wires
• On only 2 of the lights, screw the light stand spigot through one of the holes in the light, using the star washer on the outside and the lock nut on the inside. I put the spigot about 1/3 from one end so I mount it on a stand and use it horizontally without the light stand being in front of the lens.• Use the 2 lights as is, or continue to make a ring light
• Remove the bulb faces again and unplug them from the metal casing. Put them aside.
• Lay the light casings out on the floor, open side down, and make your square shape. Make sure thetwo lights with the light stand spigots are opposite each other.
• Put the L brackets at each corner and adjust so when you drill holes you won’t stab a wire holder inside.
• Mark your drilling spots with a sharpie
• Drill the holes slightly smaller than your screws. Double check again that you won’t be drilling wires
or anything on the inside
• Screw the L brackets on and if you plan to disassemble and reassemble this, mark the matching
corners of each frame with “A, B, C, D” so you know which corner matches the other.
• Put the bulbs back on and put angle lighting brackets on your spigots so they’ll sit on light stands
• Screw the spigot to 2 of the lamps using existing holes. Add L brackets to each corner. You may have to move them around to avoid drilling through connectors on the other side.
• Add your 3-prong plug.
And you’re done! You may need some extension cords, says Kevin, or you could get really handy and attach a battery pack.
“The ring light creates a soft, even light with cool catch lights in the eyes,” says Kevin of the finished product.
Learn more DIY tips by watching Build A DIY Home Studio with Mike Hagen.