 Even though I’ve been a full-time photographer for nearly eight years, it took me a good two or three to fully realize how important lighting was to the craft. It’s not about how many photography tips you know or what camera you use. What’s important to photography is one thing: light. Lighting is just as complex as it is important, but there are some simple tricks you can use to get started with seeing and shaping light to take your images to the next level. Here are a few lighting photography tips to get you started.
Use a kicker
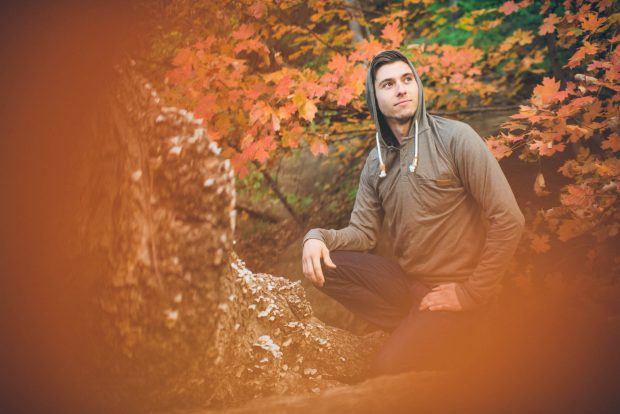
Simply putting a single speed light on a stand and aiming it from directly behind (or 45 degrees behind) can add a ‘pop’ to the subject that you can’t achieve otherwise. This light will separate them from the background in a way that’s difficult to replicate in Photoshop, and is one of the easiest photography tips to make your images appear more professional. The portraits I shoot on location are done using two light setups; one main light on the subject, and one background or kicker light. Two lights are easy to carry, versatile and quick to setup.The 5-in-1 reflector is your friend
Most people have a 5-in-1 reflector sitting with their camera gear, and if not, it’s an easy and inexpensive piece of equipment to get your hands on. These reflectors are great because they have so many uses and can fold down to be much smaller. Besides the reflecting and light blocking capabilities of this tool, there’s one that people often overlook. If you take off the reflector sleeve entirely, most of these reflectors have a semi-translucent disk you can use as a scrim. This is especially useful on bright, sunny days. When the scrim is held up overhead it softens the sunlight and creates usable diffused light source. This can also be used if you want to have another light source to light the subject, but don’t want to block out the sun entirely. This tactic is perfect for taking portraits outdoors when you don’t want the sun to shine too brightly on your subject.
Glasses
A lot of people wear glasses. A lot of these people also don’t have non-glare coating on their glasses. This can makes things more difficult for photographers. Oftentimes, when I tell my subjects I'm getting glare from their glasses, they'll begin to remove their glasses. Although this would be easier, it takes away from the authentic look of that person. The easiest way to remove glare from glasses is simple: raise your light. By raising the light source, it reduces the angle of light hitting the glasses, and removes the glare. This will affect the original mood of the lighting, so you will have to make some readjustments. A reflector will be helpful to fill in the light from the bottom so the shadows aren’t as pronounced. This effect can also be achieved by moving the light more to the side, if you don’t mind a side-lighting effect. If shooting outdoors, the same effect can be achieved by tilting the subject’s face down. Another trick is to keep a small eyeglass screwdriver handy to remove the lenses all together.Take the step towards a more creative life with 30% off all classes! (exp. 2/6/19)

Match the mood
Oftentimes on location, you might find yourself in an area where the color temperature of the lighting inside a building is very different from your main light source. There are two photography tips to deal with this. The first is to use correction gels on lights to adjust for the temperature difference. Under warm/orange/tungsten lighting, use “correct to orange” (CTO) gels on your lights to balance out the difference. The gels correct for fluorescent and cooler lighting, and are worth playing around with. The other is to overpower the existing ambient light. If you forget to bring gels and you’re shooting in a small enough room, try firing a second light in the background, up towards the ceiling, to add light that matches the main light source. Nine times out of ten, it will work.Use gels to help tell the story
You can also use colored gels to help tell the story of the image. Oftentimes, gels are used for special effect, or just because they give a unique look. But gels can also be used to mimic real-world scenarios. In the image below, I shot portraits of firefighters. I used a red gel on my kicker speed light to mimic a light from a fire truck. It was a great way to add to the story of the image and gave the image a little more depth.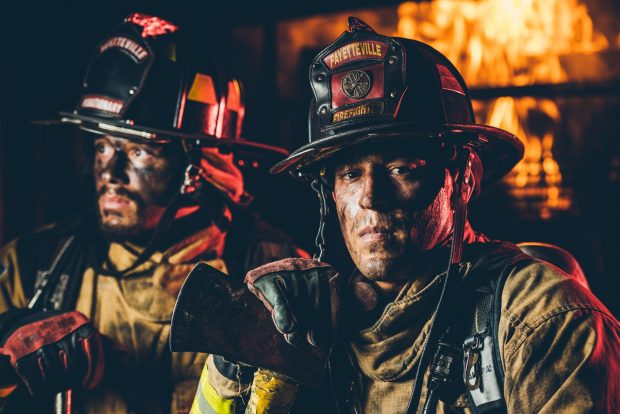
Sandbags, sandbags, sandbags
This one isn’t as much about lighting as it is about protecting your lighting equipment. A bag of play sand costs about four dollars. An empty sandbag costs just a few dollars more. Together, they can save you from replacing costly lighting equipment after windy days. If you’re using heavy modifiers or lightweight stands and don’t have an assistant to hold the light in place, do yourself a favor and get some sandbags. And in a pinch, wrangle your camera bag to hang from the light stand to act as a weight.Look for light
This is perhaps the most important and the most difficult. You can know all the lighting photography tricks in the book, but if you don’t learn how to look for light, you’ll always be limited in what you can do. But once you figure out that all you need to do is look at where the light is coming from, and what it leaves behind (shadows), you can start to really step into the light/dark dance that is photography. This is one you’ll have to learn on your own.Want more lighting photography tips? Tune into Dan Brouillette to learn more.