
What makes a great nighttime photo? Is it the stars shining bright above, the city skyline aglow with light, or the moon casting an eerie glow over everything? Capturing quality photos at night is one of the most challenging and rewarding genres of photography.
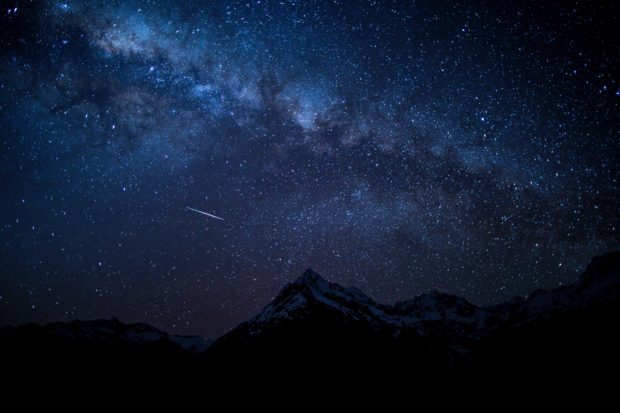
Imagine trying to capture the vastness of the Milky Way with nothing but a camera and your own two eyes. Or freezing time as light streaks through the sky in a long exposure photograph. Taking better photos at night comes down to how well you can capture and utilize light, when light is in very low supply.
Between the low light conditions and extended exposure times, nighttime photography can be a daunting task for even the most experienced photographers. But don't let that stop you from giving it a try! With a bit of practice and the proper techniques, anyone can take great photos at night.
Nighttime Photography Gear: What to Use and What to Avoid
If you're new to nighttime photography, the vast array of camera gear available can be overwhelming. What kind of camera should you use? Does it need to be a DSLR? What about lenses, tripods, and filters?
Here are a few things to keep in mind when choosing gear for nighttime photography:
- Use the best quality gear you can afford. Low light photography is already challenging, so don't make it harder on yourself by using subpar equipment.
- A DSLR camera is not required, but it will give you the best results. If you don't have a DSLR, consider renting one or borrowing from a friend.
- A fast lens is a must. A fast lens is one with a large aperture, typically f/2.8 or wider. The larger the aperture, the more light the lens can let in. This is important because there is typically less light available at night.
- A tripod is also a must. Night photography often requires long exposure times, which means your camera needs to be absolutely still for the duration of the exposure. Even the slightest movement can ruin a long-exposure photo.
- A remote shutter release is also helpful, as it will allow you to take photos without touching your camera. You can find remote shutter releases for most camera models online or at your local camera store.
- A noise-reduction filter can help reduce digital noise in your photos. Digital noise is more prevalent at high ISO settings, which are often necessary for nighttime photography.
- Neutral density (ND) filters are not required, but they can be helpful in some situations. ND filters block out a portion of the light coming into your camera, allowing you to use longer exposure times without overexposing your photo.
Lighting for Nighttime Photography
Light is critical in any photography, but it is especially important in nighttime photography. Without light, there would be no photos! Different types of light are available for nighttime photography, each with unique challenges and rewards.
Artificial light
Artificial light comes from man-made sources like streetlights, headlights, and building lights. Although it may seem like a hassle, artificial light can actually be used to your advantage in nighttime photography.
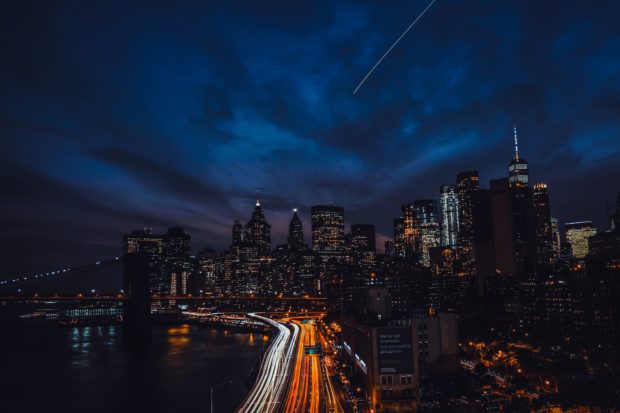
For example, you can use streetlights to light up a cityscape or headlights to create light streaks in a long-exposure photo. The key is to experiment with different types of artificial light and to be creative with how you use it.
Natural light
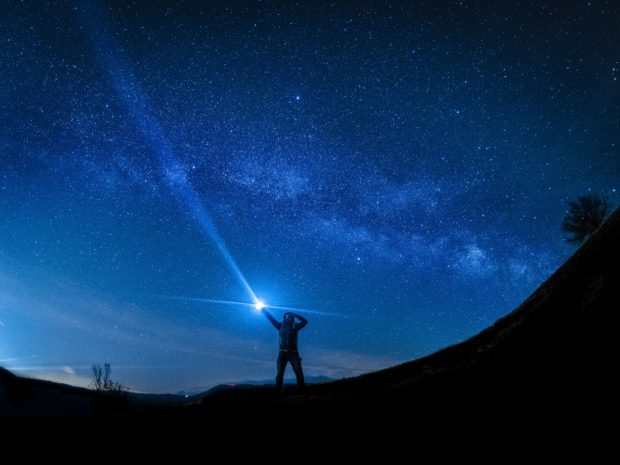
Natural light comes from the sun, moon, and stars. You can use the sun to light up a landscape during sunset or twilight or the moon to light up a night scene. And stars can be used to create star trails or to add a sense of scale to a photo.
Using natural light can be tricky, as you often can't control when and where it will appear. But that's part of the fun! You never know when you'll stumble upon the perfect light for a photo.
For further details and learning on lighting, be sure to check out our full guide.
Flash Photography
When used correctly, flash photography can add a whole new dimension to your nighttime photos. You can use flash to freeze action, add light to a dark scene, or even create light streaks. Between built-in camera flashes, external flash units, and flash photography accessories, the possibilities are endless.
Just be careful not to overdo it with the flash. Remember that less is often more when it comes to using flash photography.
How to Choose the Right Exposure for Nighttime Photography
Getting the correct exposure is essential for any photography, but when it comes to nighttime photography, it can be especially challenging. That's because there is often less light available at night, which means you have to be more careful with your camera settings.
There are three main things to consider when setting the exposure for a nighttime photo:
- Aperture
- Shutter speed
- ISO
Aperture
The aperture is the opening in your lens that allows light to pass through. The size of the aperture is measured in f-stops, with a smaller f-stop number corresponding to a larger aperture. For nighttime photography, you will want to use a larger aperture (smaller f-stop number) to let in more light.
Shutter speed
If the aperture is the size of the opening in your lens, then the shutter speed is how long that opening is open for. A longer shutter speed will result in a longer exposure, which means more light will be let in. Even a tiny increase in shutter speed can make a big difference in your nighttime photos.
ISO
The ISO setting on your camera controls the sensitivity of your sensor to light. A higher ISO setting will result in a brighter image, but it will also introduce more digital noise into your photo. You'll have to experiment to find the right ISO setting for your nighttime photography, but a good starting point is ISO 800.
Finding the Best Environment for Nighttime Photography
One of the great things about nighttime photography is that you can shoot in all sorts of different environments. Whether you're shooting in the city, the countryside, or even your backyard, there are endless possibilities for interesting nighttime photos.
Cityscapes
Shooting cityscapes at night is a great way to capture the energy and excitement of the city. The bright lights and tall buildings make for an impressive sight, and there are endless possibilities for creative compositions. Just be sure to pay attention to your background when shooting cityscapes. The last thing you want is a busy street or bright light pollution ruining your photo.
Landscapes
Nighttime landscapes can be incredibly beautiful, with the stars shining bright in the sky. To capture a stunning landscape photo at night, you'll need to find a dark location with minimal light pollution. Once you've found the perfect spot, you can set up your camera and tripod and start shooting.
If you're photographing a landscape that includes a body of water, you can use a long exposure to capture the shining stars' reflection in the water. Don't forget to use a tripod when doing long exposures, as any camera movement will result in a blurry photo.

Backyards and Gardens
You don't have to travel far to find an interesting subject for nighttime photography. Your backyard can be a great place to practice, and you might be surprised by the results. Simply set up your camera and experiment with different compositions. Pay attention to the different lighting conditions, and use a flash if necessary.
You can also use household items to add interest to your photos—a vase of flowers, a bowl of fruit, or even a pet can make for a great subject. Just be creative and have fun!
Camera Settings for Nighttime Photography
So, now that you know how to set the exposure for nighttime photography, what are some other camera settings you should be aware of?
Focus
When shooting at night, it can be challenging to get your camera to focus correctly. If possible, switch to manual focus and turn on live view so you can see what you're shooting. In a case where your camera doesn't have live view, try using the rule of thirds gridlines to help you compose your shots.
If you're still having trouble getting your camera to focus, try using a flashlight to illuminate your subject. But be careful—if the light is too bright, it can cause your camera to overexpose the photo.
White Balance
White balance is an important setting to consider when shooting at night. The default white balance settings on your camera are probably fine for most nighttime photography, but you may want to experiment with different settings to see what looks best.
Some cameras have a "tungsten" white balance setting, which is specifically for photography under artificial light. If your camera has this setting, it's worth trying it out.
Steps for Capturing Better Nighttime Photos
Now that you know the basics of nighttime photography, it's time to put that knowledge into practice! Here are a few tips to help you capture better photos at night:
Use a Tripod
Nighttime photography often requires longer exposures, making it difficult to keep your camera steady. That's why it's essential to use a tripod whenever possible. A tripod will help keep your camera steady and prevent blurriness.
Set Up Your Camera Before the Sun Goes Down
As the sun begins to set, take a few minutes to set up your camera and get everything ready. This way, you won't have to worry about fumbling with your camera in the dark.
Experiment With Different Types of Light
One of the most fun parts of nighttime photography is experimenting with different types of light. From the sun to the moon to artificial light, there are endless possibilities. So don't be afraid to experiment and get creative!
Use a Remote Shutter Release:
A remote shutter release is a great way to avoid shake and blurriness in your photos. Simply attach the remote to your camera and press the button to take a picture.
Take multiple Photos
With digital photography, you can take as many photos as you want without worrying about film or developing costs. So take advantage of this and snap away!
Edit your Photos
Once you've taken some photos, it's time to edit them and make them look their best. There are a ton of great photo editing software programs out there. Find one that you're comfortable with, and start editing!
Nighttime photography can be a lot of fun. So get out there and start shooting! And if you have any tips of your own, be sure to share them in the comments below. Happy shooting!