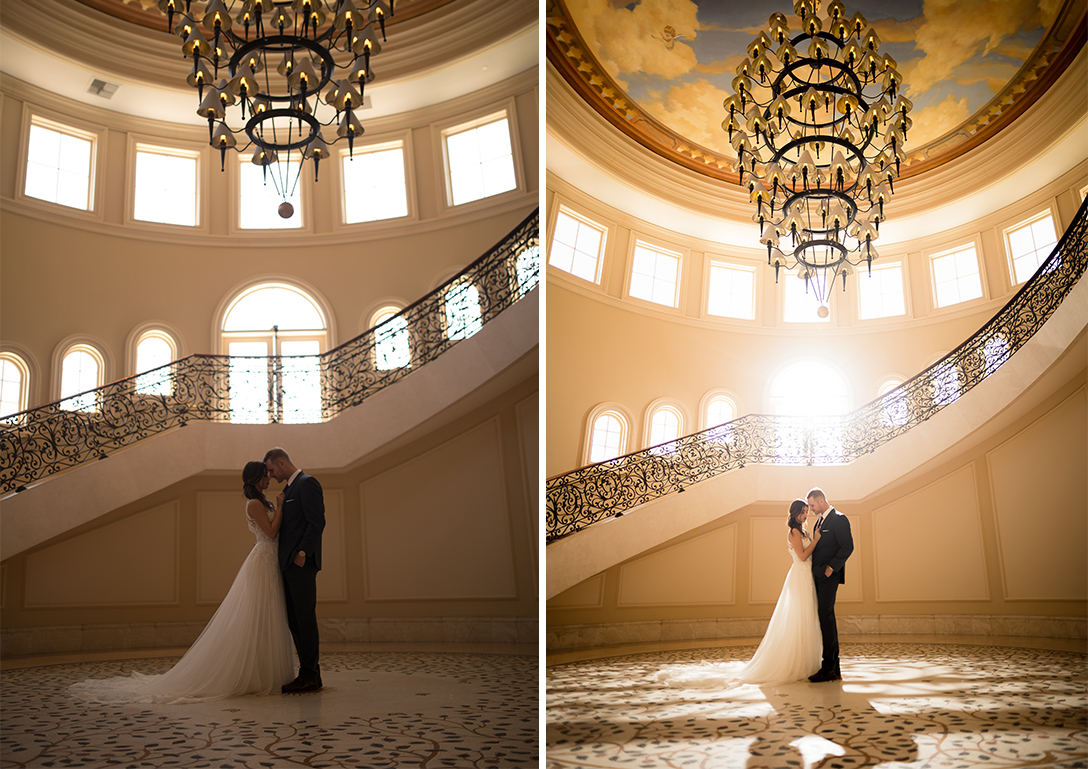
There is a certain magical quality that is associated with golden hour photography. Generating rich orange tones and dominant sun flares to the same extent of natural sunlight can be a challenging feat, but with the right scene analysis and approach, it is possible to yield a convincing result in execution.
Recently, we showed you how to emulate natural sunlight and Golden Hour light with off-camera flash, and we’ve even used high-powered strobes like the Profoto B1 to create a similar effect. In our recent Special Effects Workshop, Recreating Golden Hour, we discuss an alternative option to recreate and enhance sun flares with the ineffable combination of the SLRL Preset System and Lightroom.
RSVP for Lighting, Logistics, and Strategies for a Life in Photography and learn from the best, Joe McNally.
FINDING THE RIGHT SCENE
Even when it’s overcast, you can expect there to be a distinguishable direction of light, so our first step in post is to determine where your natural sunlight is coming from, and see if it is even possible to recreate it in the first place.
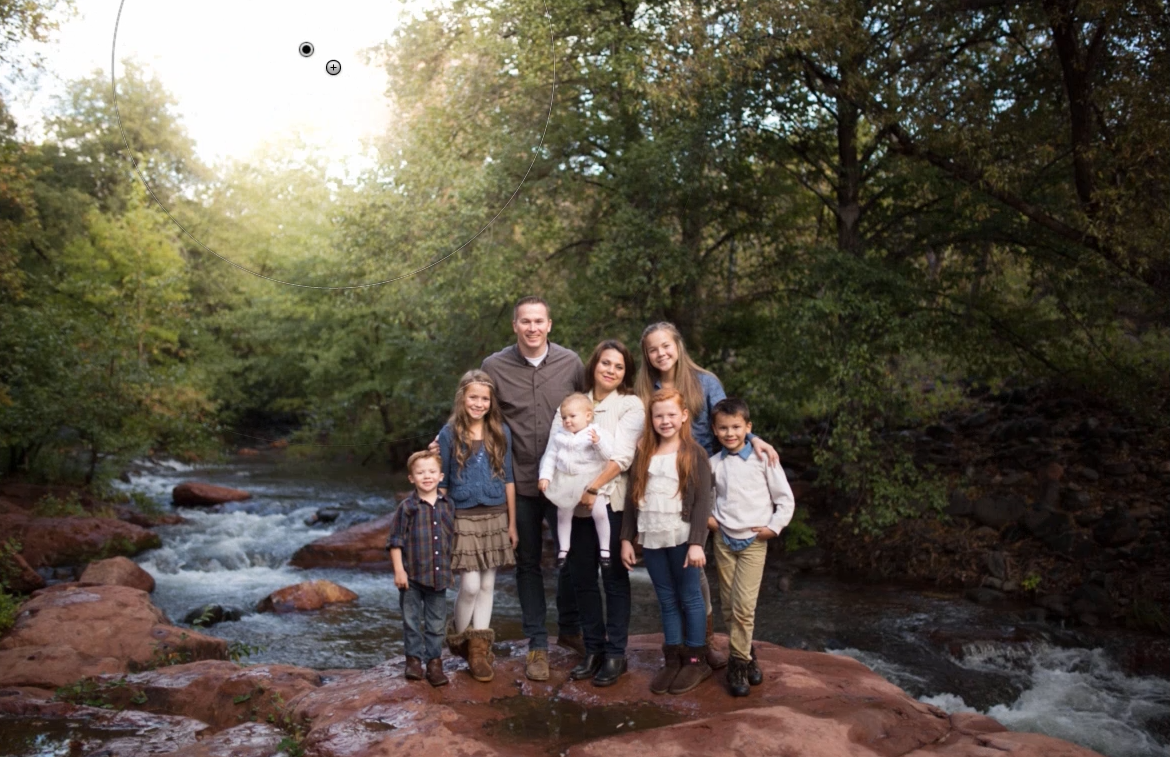
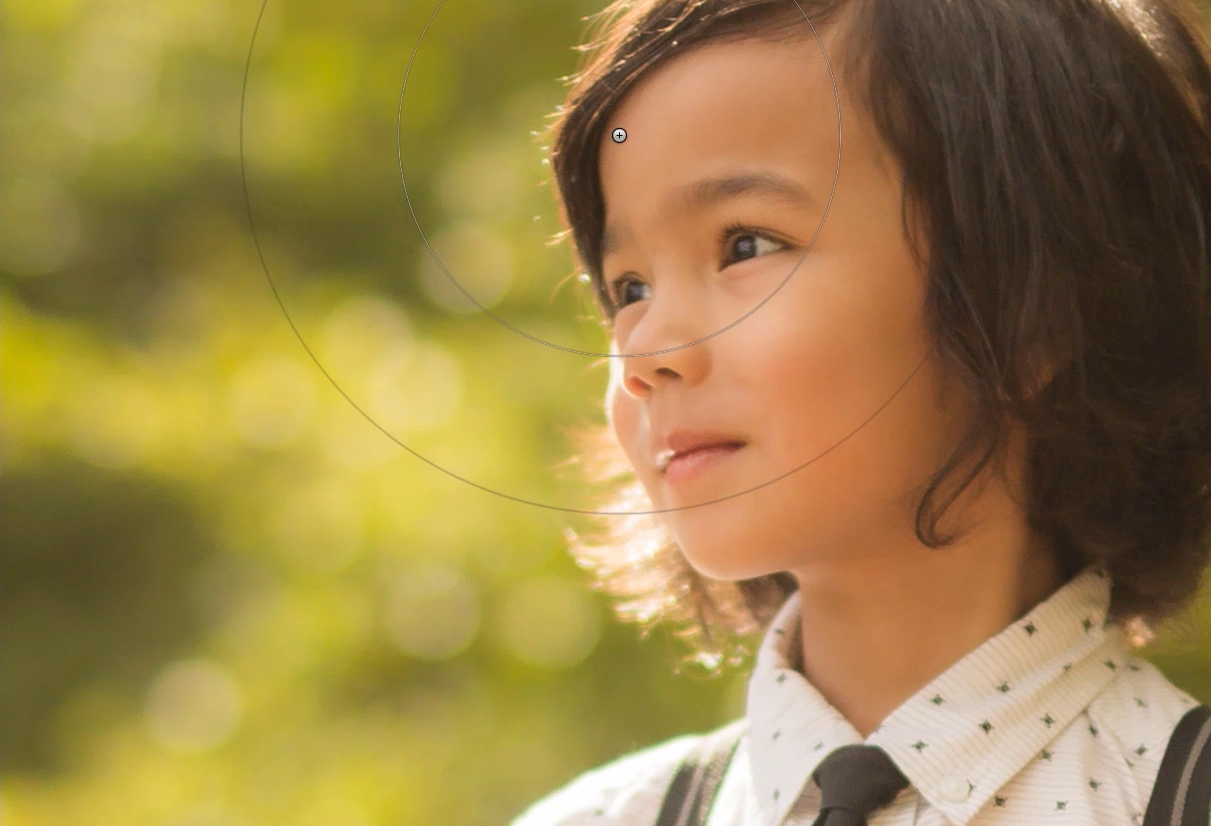
From first glance, we can see that our main natural light is filling the face, not illuminating from behind. Typically, golden hour photography features strong light flares from behind the subject, but we can see here that the sky didn’t permit that much sunlight from peaking through. If we try and add in a local adjustment brush from the SLRL Preset System that was created to mimic a sun flare, we can see that it isn’t a convincible attempt. Matching the light direction with the desired effect is the only way to make it appear authentic, and this is almost always the most common mistake photographers make when trying to enhance natural light in a scene, or recreate sunlight.
[REWIND: CAN YOU TELL THE DIFFERENCE BETWEEN GOLDEN HOUR AND ARTIFICIAL GOLDEN HOUR?]
CREATING THE PRESET
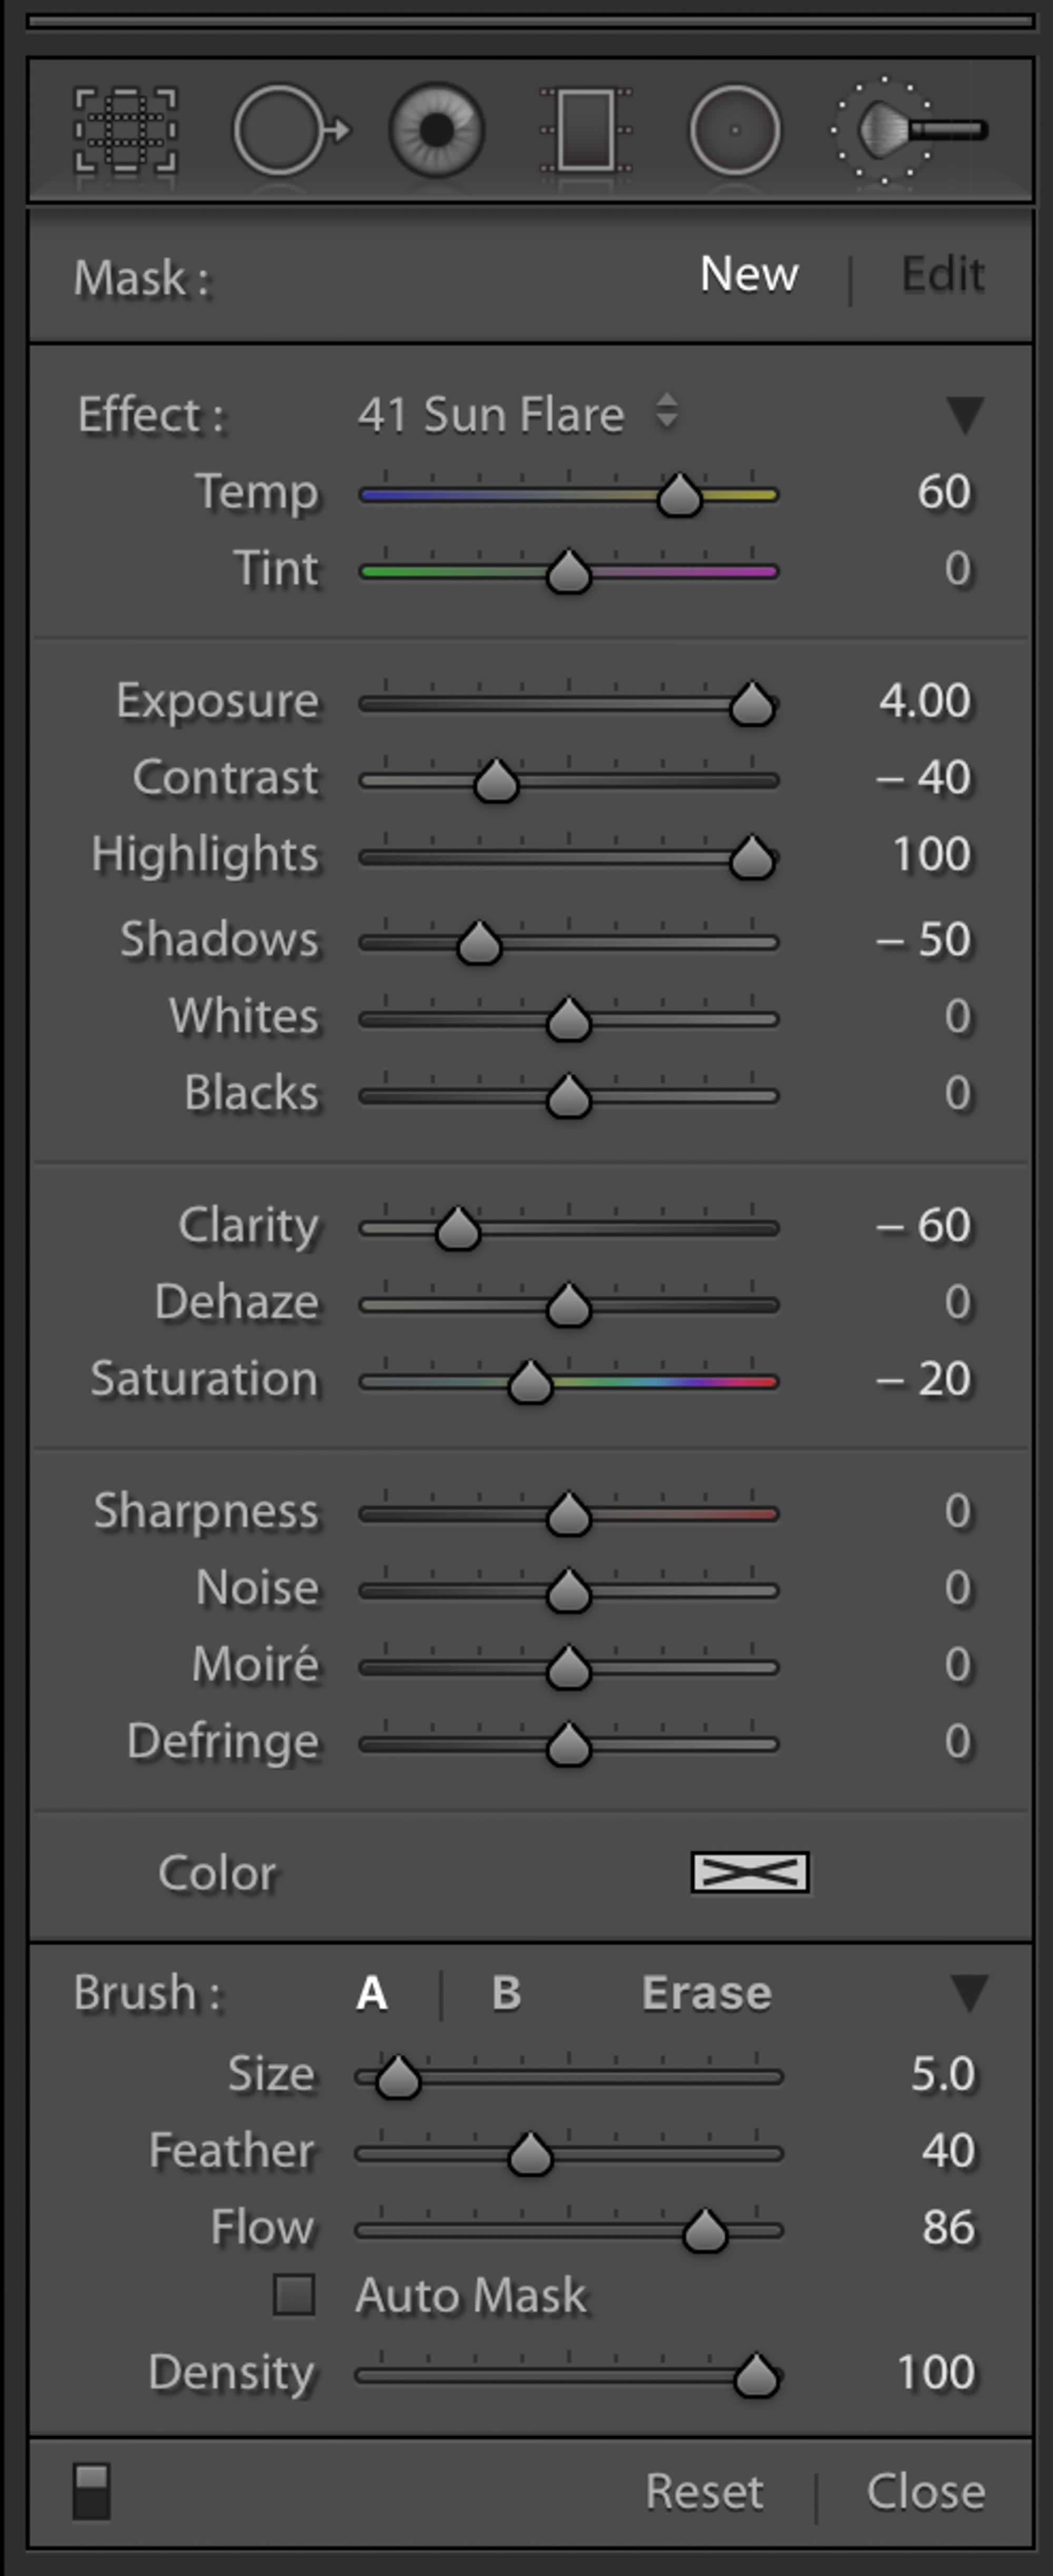
Now that you have seen it in action, let’s break down what exactly the one-click Sun Flare local adjustment brush is doing, and here are the settings.
With a burst of Exposure and Highlights we are essentially creating, well, a mock sun, meant to enhance pre-existing sunlight but can also easily be used to transform a mundane sky when there is a clear direction of light. The brush is a decent size to create larger light spread and has a softer light quality due to the reduction in Clarity and Contrast.
IMPLEMENTING THE PRESET
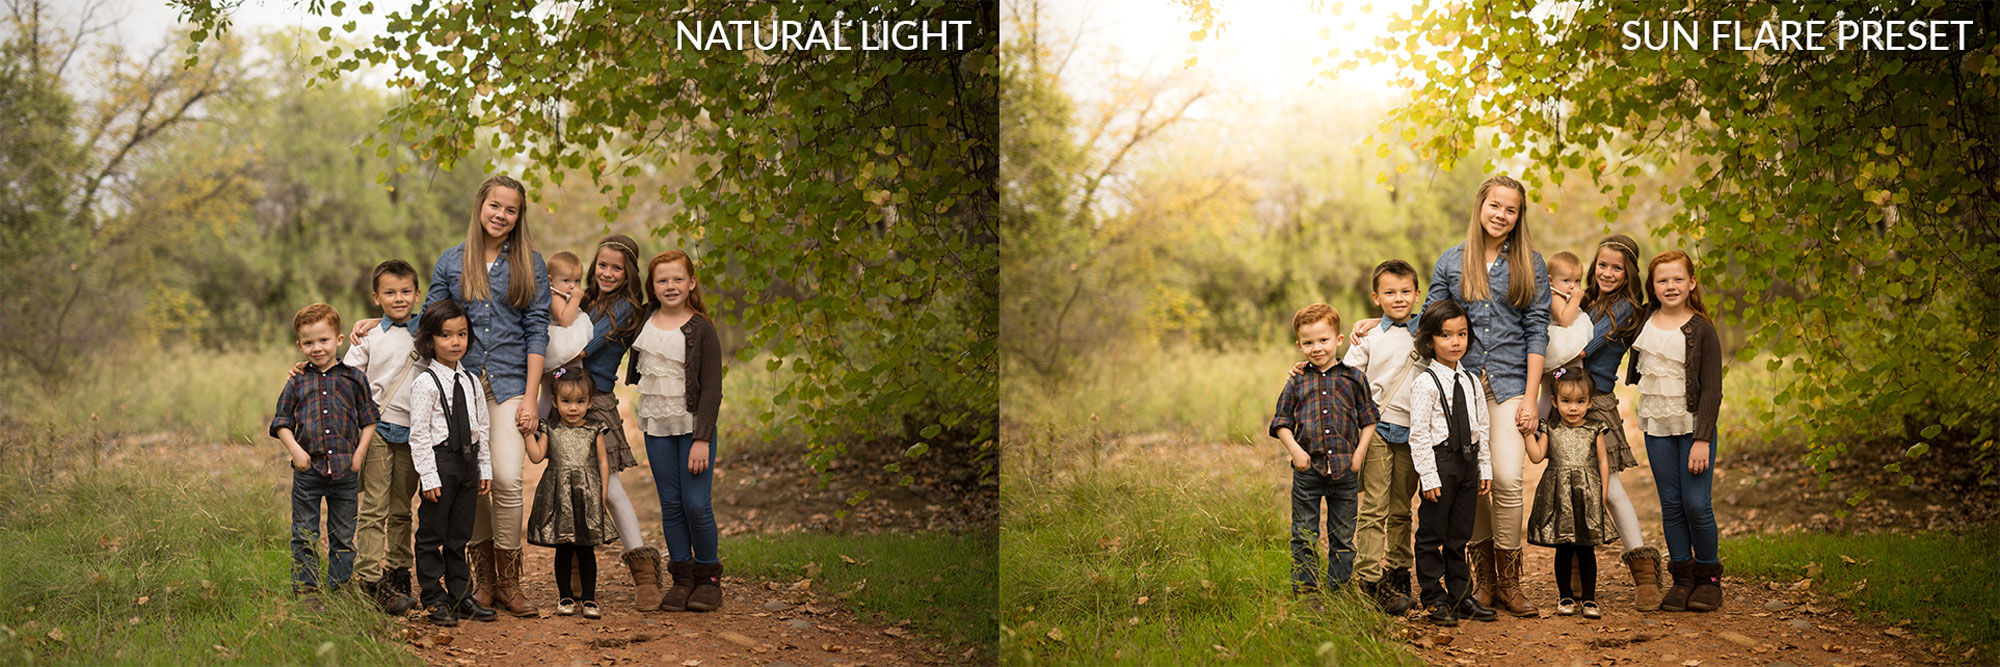
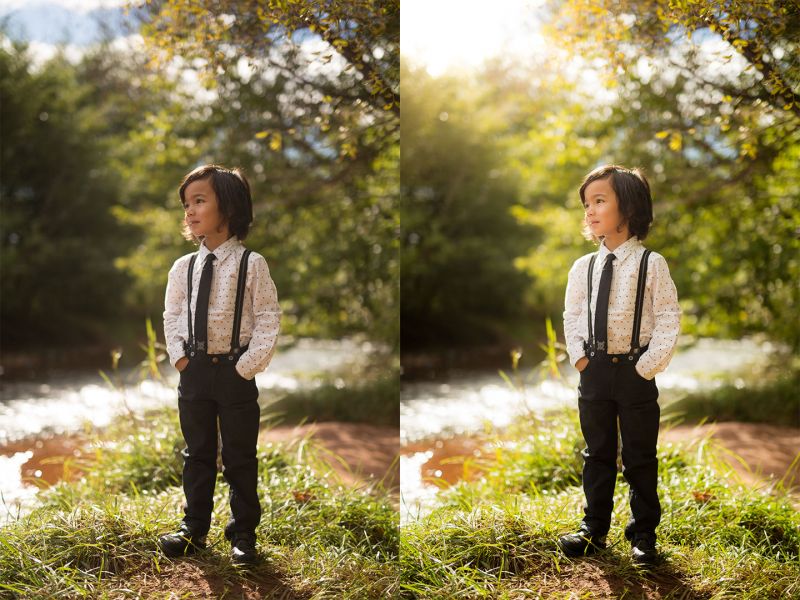
In the original file on the left, you can see that the direction of light is visible, highlighting the edges of the leaves but not powerful enough to create a rim light surrounding the subjects. We placed the preset brush in the top left corner to match the direction of light and, immediately, the image is subtly transformed and vastly more dynamic than its original state.
[REWIND: RECREATING GOLDEN HOUR & NATURAL SUNLIGHT WITH POCKET STROBES]
Although this image above is from the same photoshoot, we can see that the natural ambient light has become stronger, most likely because the sun finally peeked out from the clouds. You can see the existence of natural sunlight when you look closer at the highlights surrounding the subject’s head, a factor missing from our previous example.
The Sun Flare brush applied in this scene has the most realistic effect of the three due to the presence of existing natural light.
In order to create a convincing sun flare in post, always match the direction of sun light in your scene. For more advanced techniques for recreating golden hour in your photography be sure to check out our latest course, or stream it in full as an SLRL Premium member.
