
 Creating really great panoramas requires a combination of solid field techniques and post-processing techniques. Here are five easy, but essential field tips to use when taking panoramas on your travels.
1. Level the tripod
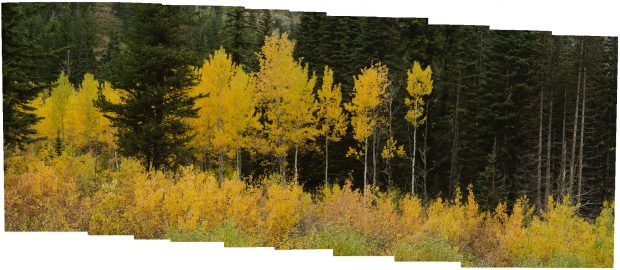
Make sure that the tripod head mounting plate is perfectly level. Some people only level the camera when setting up for a panorama, but this is actually the wrong approach. If the base is not level and you rotate the camera from left to right, then the scene will actually be tilted and the panorama’s horizon will be off kilter.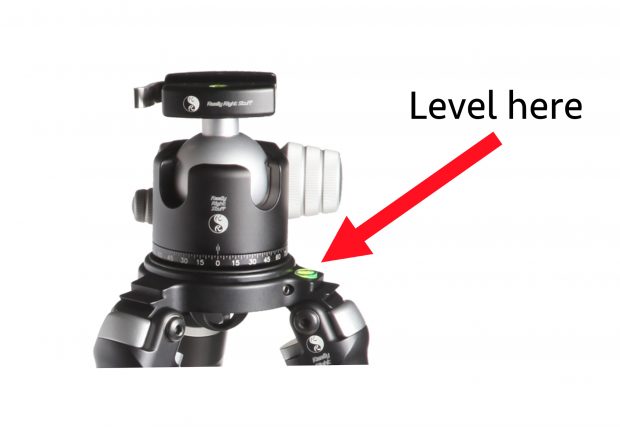 Check out this example where I didn’t level the top plate of my tripod and see what the software did when I tried to merge the images. Notice how the panorama is skewed from the upper left to the lower right? It would have been easy to fix this in the field if I had just taken a little bit of extra time.
Learn how to overpower the sun and control light more effectively with flash for great photos. Learn more with Mike Hagen.
2. Rotate around lens
The best panoramas are made by rotating the camera around the lens’ mid-point. Technically, you should rotate around the no-parallax point for the best results. If you are mounted on a tripod, then try to position your camera on a rail slide so that when you rotate the camera, it rotates around the lens rather than the camera body. You can find the no-parallax point through trial and error by panning your camera from left to right and noticing if things like poles or bushes change in perspective with the background. If the pole does move left and right as you pan the camera, then try moving your camera backwards or forwards a little bit. Once the camera is positioned correctly, you won’t see any relative movement between foreground objects and background objects as you rotate.
If you are hand-holding, then position your camera above your front foot, and rotate around your foot. This is much better than rotating around your waist, since that is most likely to cause parallax errors.
If you are mounted on a tripod, then try to position your camera on a rail slide so that when you rotate the camera, it rotates around the lens rather than the camera body. You can find the no-parallax point through trial and error by panning your camera from left to right and noticing if things like poles or bushes change in perspective with the background. If the pole does move left and right as you pan the camera, then try moving your camera backwards or forwards a little bit. Once the camera is positioned correctly, you won’t see any relative movement between foreground objects and background objects as you rotate.
If you are hand-holding, then position your camera above your front foot, and rotate around your foot. This is much better than rotating around your waist, since that is most likely to cause parallax errors.
3. Meter for the highlights and develop for the shadows
Since a panorama by its very nature captures a very wide area, you’ll need to be especially careful about how you meter for the scene so you don’t blow out the highlights. Today’s modern cameras actually have a fairly wide dynamic range, so you can pull out shadow detail in programs like Lightroom CC and Photoshop CC.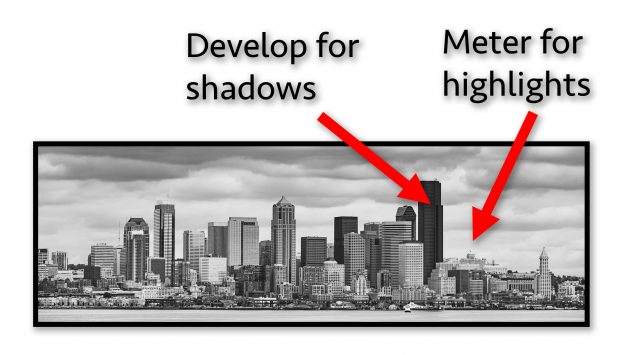 My general approach to metering for a panorama scene is to find the brightest area, such as the clouds, and then meter there so they don’t blow out. I then lock that meter value into my camera and proceed with shooting the panorama. Once back at my computer, I merge the panorama together and then pull out the shadow detail with the shadow slider or other tools in Lightroom and Photoshop.
4. Overlap Appropriately
In order to successfully merge all of your images together in a single panorama, you’ll need to provide the software with a little bit of overlap from image to image. With the really wide angle lens like a 14mm or 16mm, then you’ll need to overlap as much as 50% from photo to photo. With longer lenses like 70 mm or 200 mm, you only need to overlap by 10% from photo to photo. Longer lenses have less distortion and therefore it is easier for the software to merge all of the images together.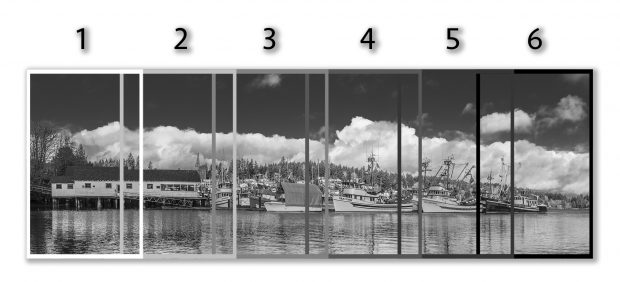
5. Lock Camera Settings
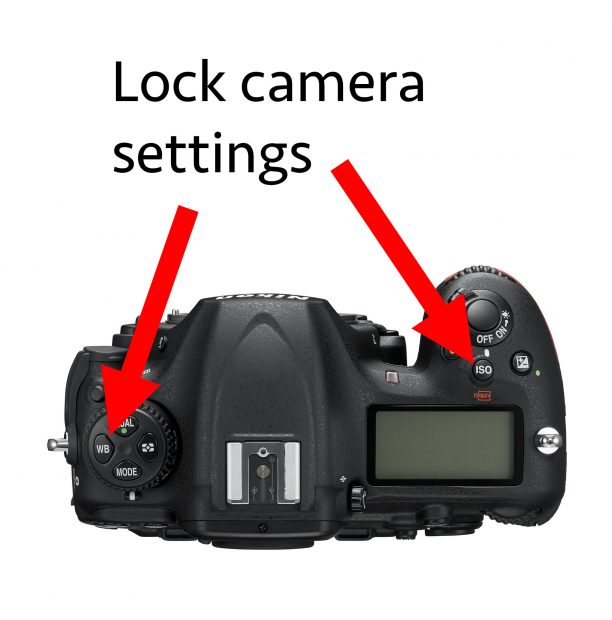 In order for the panorama to merge properly in software, you have to make sure you lock all the appropriate camera settings while you are in the field. These include:
- Focus distance
- Aperture
- Shutter speed
- ISO
- White balance
- Focal length (lens zoom)
Bonus Download
Click here to download a free Panorama Checklist. Print it out and take it into the field with you on your next panorama photo excursion.Learn how to overpower the sun and control light more effectively with flash for great photos. Learn more with Mike Hagen.