In this blog post, Jesus Ramirez walks you through how to create 3D text in Photoshop. Follow these simple step-by-step instructions to enhance the appearance of your text, all possible within Photoshop.

Step 01: Create a New Document
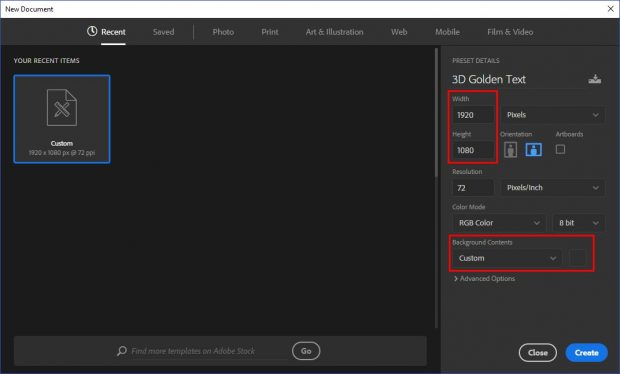
Start by creating a new document that is 1920px wide by 1080px tall. Set the background color to #303030.
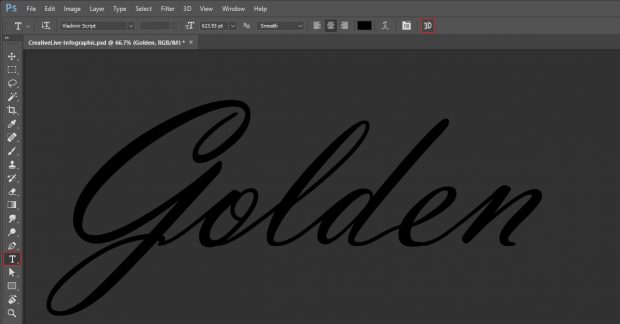
Step 02: Type “Golden”
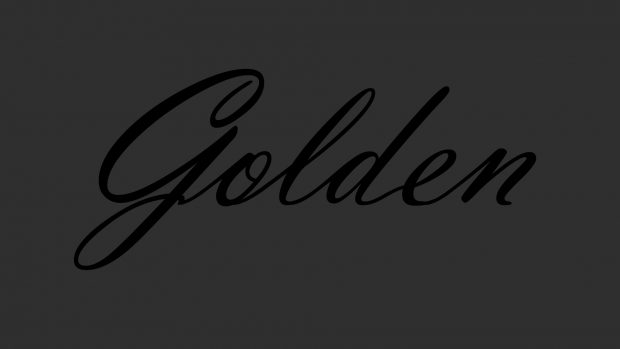
Select the Type tool by pressing T on your keyboard (or you can select it from the Toolbar). Use the font “Vladimir Script” with a font-size of 624 pts, and type “Golden”.
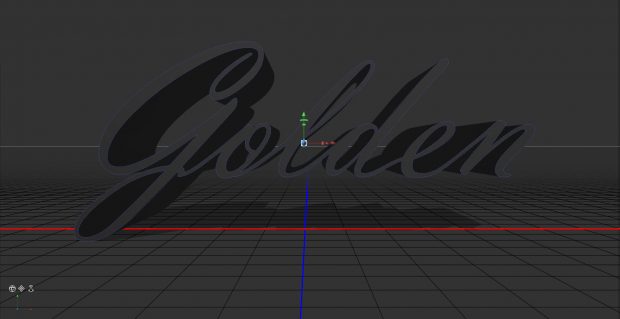
Step 03: Convert the Text Layer Into a 3D Layer
With the text layer selected, and the Text tool active, click on the “3D” icon in the Toolbar to convert the text layer into a 3D layer.
When you have the Move tool (V) selected, you will see the 3D controls. Select any other tool, such as the Rectangular Marquee tool (M), to hide the 3D controls.
Step 04: Add a Shape Preset to The 3D Mesh From the 3D Panel select the 3D mesh, it should be called “Golden”. Then in the Properties panel open the Shape Presets and select the middle preset from the second row.
Then set the Extrusion Depth to 100 px.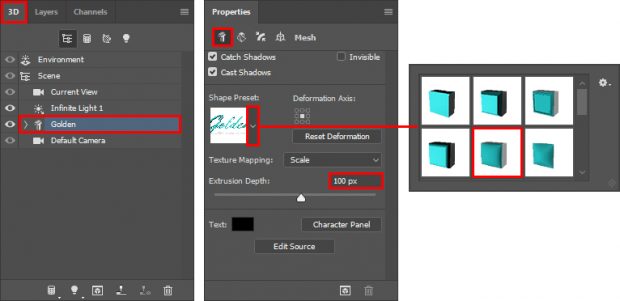
Step 05: Rotate the 3D Object and Lay it on The Ground Plane Make sure that the 3D mesh is selected from the 3D panel. In the Properties panel, click on the Coordinates icon. In the X Rotate axis type “90” to rotate the 3D text on its back.
The shadows and reflections that a 3D object cast reflect on the ground plane. For the shadows and reflections to display properly, click the “Move to Ground” button to lay the 3D object directly on the ground plane.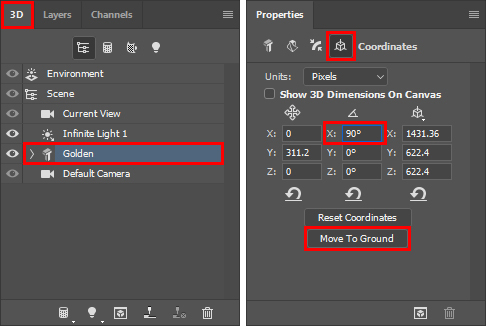
You should now see your 3D text layer laying on the ground.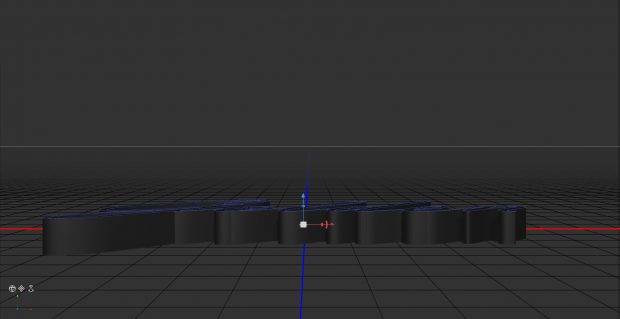 Step 06: Change The Camera Angle to Top View
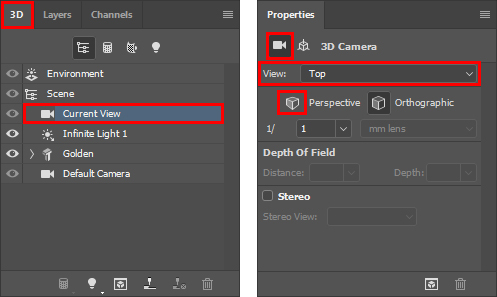
To view the 3D object from the top view, select the Current View camera from the 3D panel. In the Properties panel, select “Top” from the “View” dropdown. Then click the “Perspective” icon.
Step 06: Change The Camera Angle to Top View
To view the 3D object from the top view, select the Current View camera from the 3D panel. In the Properties panel, select “Top” from the “View” dropdown. Then click the “Perspective” icon.
Step 07: Adjust Camera
If you need to make camera adjustments use the Pan and Dolly icons found on the bottom left of the canvas.
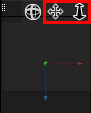
With the Move tool selected, hover over the icons and click-and-drag to adjust the camera. Your 3D layer should look like this: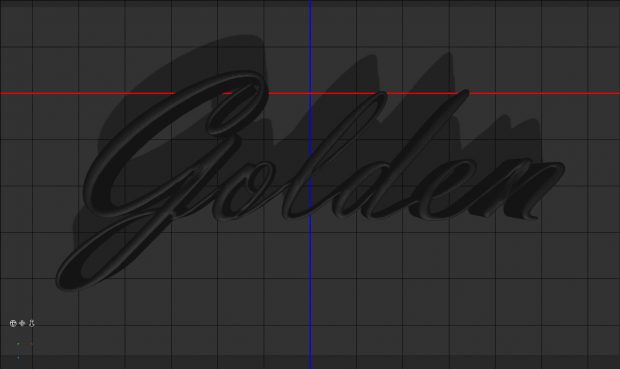
Step 08: Change The Materials Preset 3D objects use materials to apply color, textures, and detail. To apply a material, open the 3D mesh, and select all five materials by clicking on the top one, then clicking on the bottom one while holding shift. Then from the Properties panel, click on the Material preset and select the first material on the sixth row.
Then make the 3D text reflective by increasing the Reflection to 75%.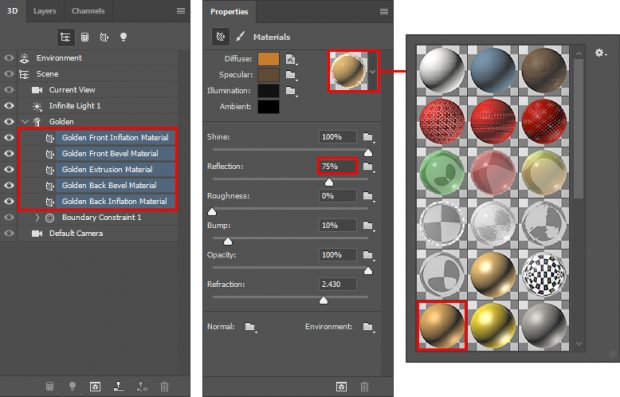
Step 09: Adjust Shadow Softness
From the 3D panel, select the Infinite Light, and in the Properties panel change the shadow softness to 60%.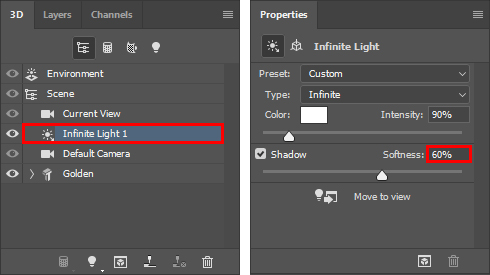
Step 10: Adjust Light Source Direction
You can change the direction of the light source by clicking on the Infinite Light and using the move tool to click-and-drag on the Light source display.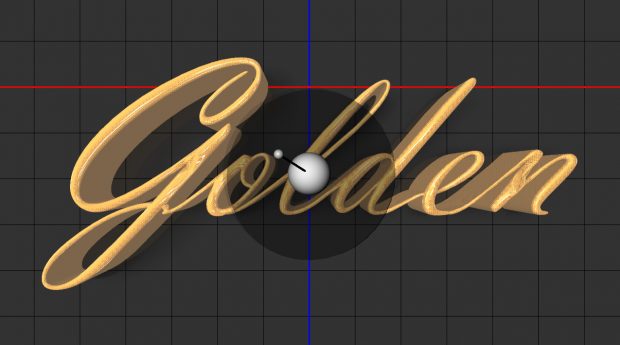
Step 11: Add Reflections to The Ground Plane
To make the ground plane reflective, select Environment from the 3D panel. Under the Properties panel, increase the Reflection Opacity to 35% and the Roughness to 15%.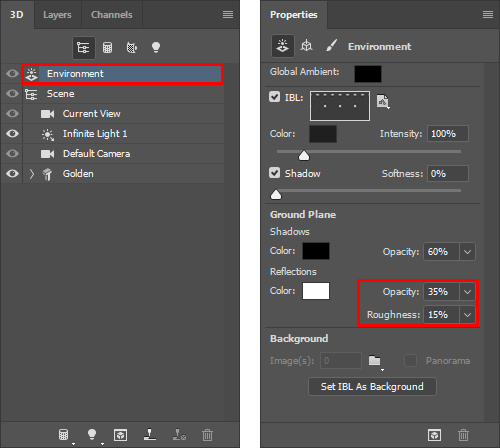
Step 12: Render The 3D Object Make any final adjustments to your 3D object. Then click on the Render button in the Properties panel or go to 3D > Render 3D Layer. The rendering process could take a while depending on your computer’s processing power.
This is what your final render will look like.
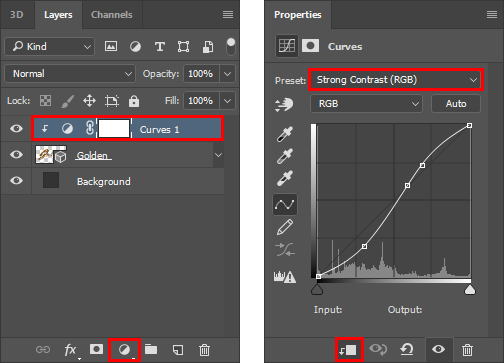
Step 13: Add Contrast To The 3D Object You could add any adjustment layer to the 3D layer to enhance it. For example, you can add a Curves Adjustment layer to increase contrast.
To do so, create a Curves Adjustment layer. From the Properties panel, select “Strong Contrast (RGB)” from the Preset dropdown. Then click on the Clipping Mask icon so that this adjustment only affects the 3D layer.
You will see the down-pointing arrow indicating the clipped layer next to the Adjustment Layer thumbnail.
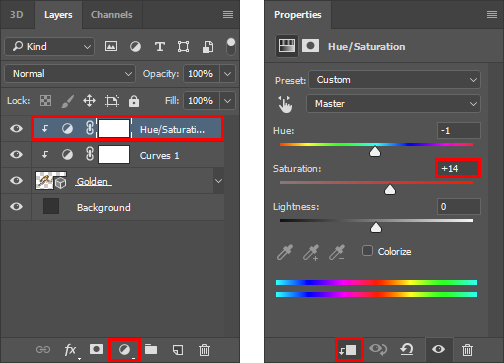
You could also add a Hue/Saturation Adjustment Layer to add more saturation the 3D layer.
When you are done making your adjustment click on the Clipping Mask icon so that this adjustment only affects the 3D layer.
Step 14: Saturate The 3D Object You could also add a Hue/Saturation Adjustment Layer to add more saturation the 3D layer.
When you are done making your adjustment click on the Clipping Mask icon so that this adjustment only affects the 3D layer.