
 Truthfully, I’m more than a little envious of those crafters who are on-the-ball enough to begin creating holiday gifts in July – giving themselves plenty of time to complete insanely elaborate projects for their friends and loved ones.
I’m thrilled if I begin a holiday project in November, but in all honesty most of my Christmas crafting doesn’t begin until December. So! It’s no wonder that I’m drawn to simple tasteful DIYs that can be successfully completed in an afternoon.
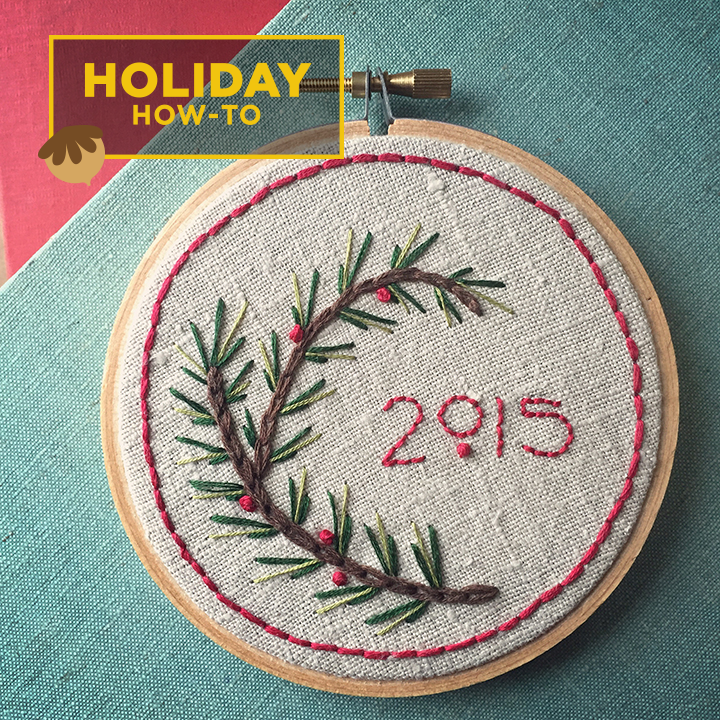
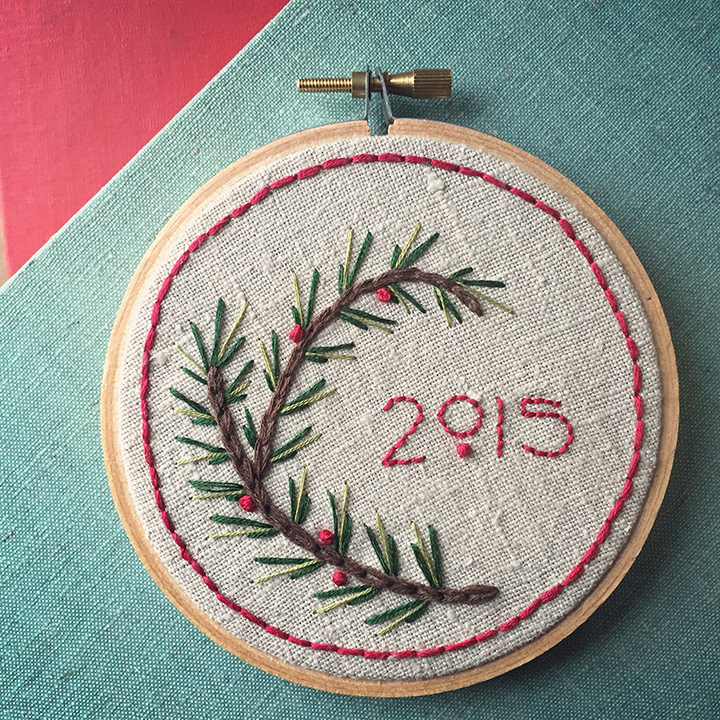
It’s with realistic holiday time constraints in mind that I developed this simple embroidery sampler - designed to be stitched and displayed in a 4” hoop, it’s a manageable size (although it can easily be scaled larger, if you choose). You can gift it right in the hoop, which serves double duty as a frame! Add a lovely loop of ribbon to the top of the hoop and you have a hanging ornament or gift topper.
Not an experienced embroiderer? No worries, I’ve included links and video tutorials to get you up to speed in no time. You can easily create this project with two different embroidery stitches, french knots if you’re up for the challenge and simple straight stitches for the pine needles! Total time to completion? 2.5 to 3 hours. The end result is a lovely, thoughtful handmade gift perfect that can be easily personalized for the recipient. You can do this. Ready? Set. Stitch!
Simple Holiday Embroidery Sampler
Materials:
Fabric to embroider
Carbon paper or transfer pens
Print-out of pattern (download at the bottom of the post)
Tools:
Embroidery hoop
Embroidery needle
Embroidery floss
Sharpened pencil or stylus
Scissors
Truthfully, I’m more than a little envious of those crafters who are on-the-ball enough to begin creating holiday gifts in July – giving themselves plenty of time to complete insanely elaborate projects for their friends and loved ones.
I’m thrilled if I begin a holiday project in November, but in all honesty most of my Christmas crafting doesn’t begin until December. So! It’s no wonder that I’m drawn to simple tasteful DIYs that can be successfully completed in an afternoon.
It’s with realistic holiday time constraints in mind that I developed this simple embroidery sampler - designed to be stitched and displayed in a 4” hoop, it’s a manageable size (although it can easily be scaled larger, if you choose). You can gift it right in the hoop, which serves double duty as a frame! Add a lovely loop of ribbon to the top of the hoop and you have a hanging ornament or gift topper.
Not an experienced embroiderer? No worries, I’ve included links and video tutorials to get you up to speed in no time. You can easily create this project with two different embroidery stitches, french knots if you’re up for the challenge and simple straight stitches for the pine needles! Total time to completion? 2.5 to 3 hours. The end result is a lovely, thoughtful handmade gift perfect that can be easily personalized for the recipient. You can do this. Ready? Set. Stitch!
Simple Holiday Embroidery Sampler
Materials:
Fabric to embroider
Carbon paper or transfer pens
Print-out of pattern (download at the bottom of the post)
Tools:
Embroidery hoop
Embroidery needle
Embroidery floss
Sharpened pencil or stylus
Scissors
'Tis the season. Gift the creative in your life something special - check out our curated holiday gifts.

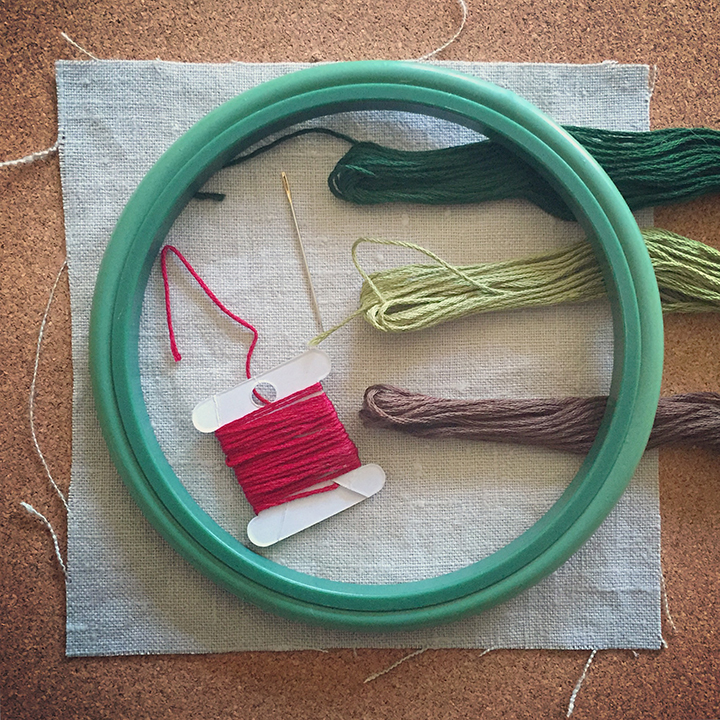
1. Start by gathering your materials and tools and printing out the pattern PDF (download below)! It is sized to be finished and displayed in a 4” embroidery hoop, but it can be easily scaled to a larger size using a photo copier. The sample was created in traditional Christmas colors on linen fabric, but know that your color choices are entirely your own! You can also alter the pattern to your liking, perhaps replacing the year (2015) with a short word like ‘Joy’ or ‘Peace.’ 2. Select and cut your fabric to embroider. A light colored, lightweight fabric, such as a quilt weight cotton or linen, is recommended. Thick or stretchy fabrics are not recommended. Cut your fabric to fit comfortably in your embroidery hoop (example: for a 4” embroidery hoop, cut a 6” square of fabric).
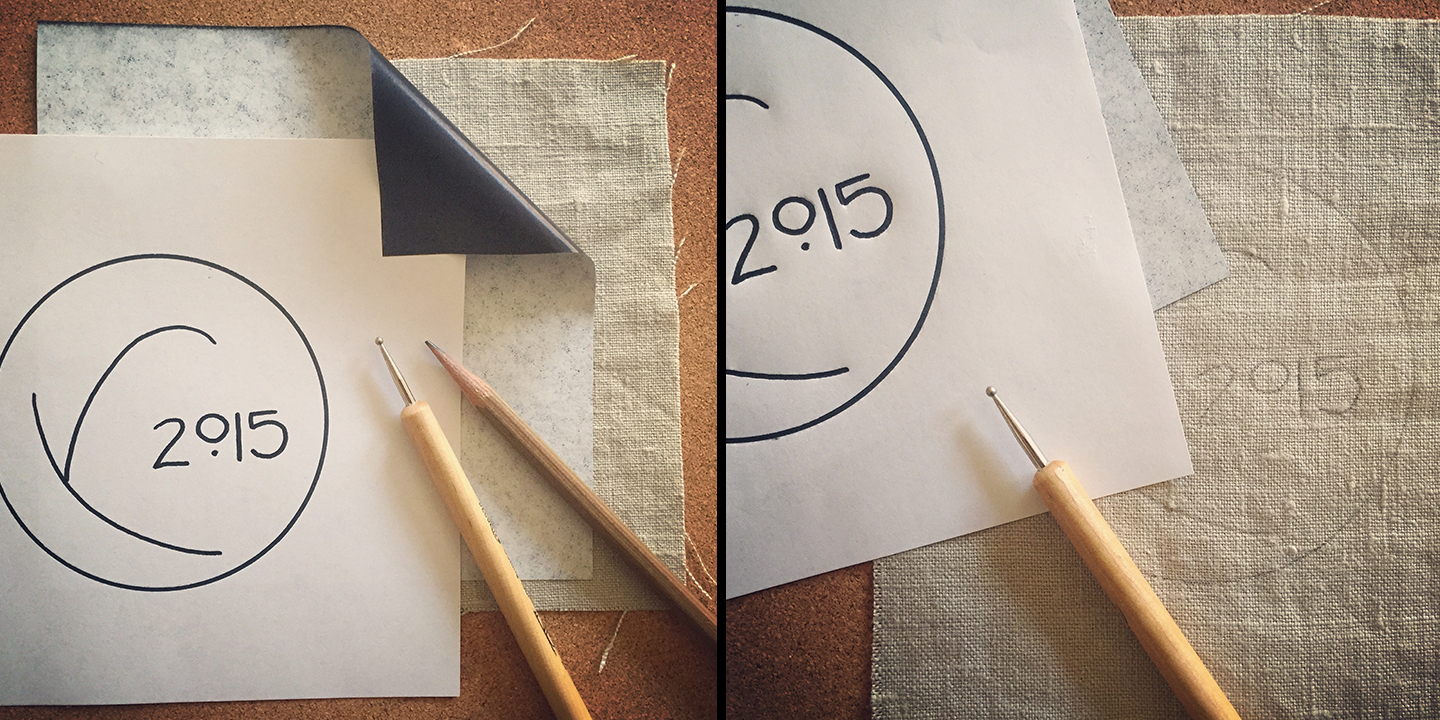 3. One of the easiest ways to transfer the pattern to your fabric is using carbon paper. Lay your fabric flat on your work surface. Place a piece of carbon paper on top of the fabric with the carbon/dark side down, facing the fabric. Center the pattern overtop of the carbon paper and fabric. It’s often helpful to tape the corners of your pattern to your work surface to prevent it from shifting during transfer.
Trace the pattern using either a sharpened pencil or a stylus. Press firmly and trace the pattern lines a few times just to insure a strong transferred image. Once finished, peel back the tape, remove the pattern and carbon paper to reveal your image transferred onto your fabric.
An alternate transfer method is to trace the reversed pattern image with an iron-on transfer pen. Flip the traced pattern over, center it on your fabric and iron according to the manufacturer’s instructions to transfer the image to your fabric.
3. One of the easiest ways to transfer the pattern to your fabric is using carbon paper. Lay your fabric flat on your work surface. Place a piece of carbon paper on top of the fabric with the carbon/dark side down, facing the fabric. Center the pattern overtop of the carbon paper and fabric. It’s often helpful to tape the corners of your pattern to your work surface to prevent it from shifting during transfer.
Trace the pattern using either a sharpened pencil or a stylus. Press firmly and trace the pattern lines a few times just to insure a strong transferred image. Once finished, peel back the tape, remove the pattern and carbon paper to reveal your image transferred onto your fabric.
An alternate transfer method is to trace the reversed pattern image with an iron-on transfer pen. Flip the traced pattern over, center it on your fabric and iron according to the manufacturer’s instructions to transfer the image to your fabric.
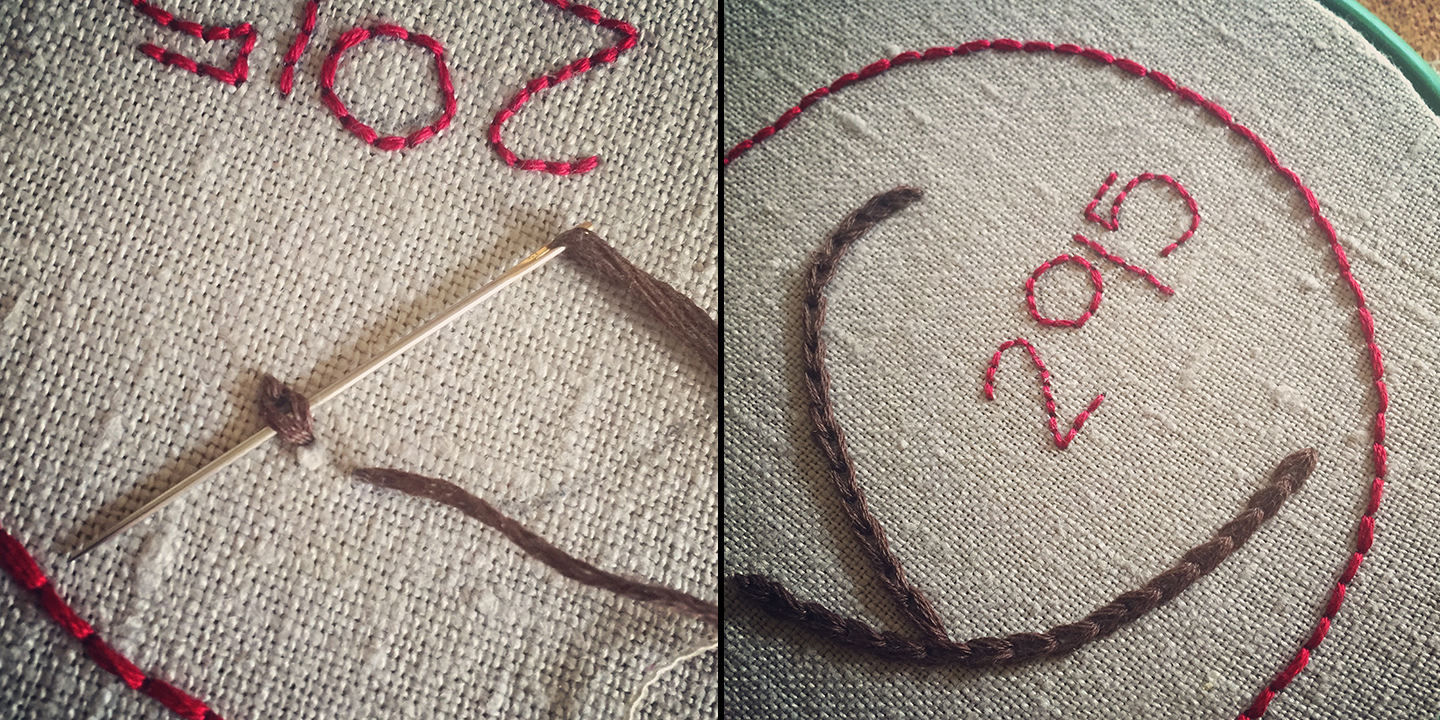
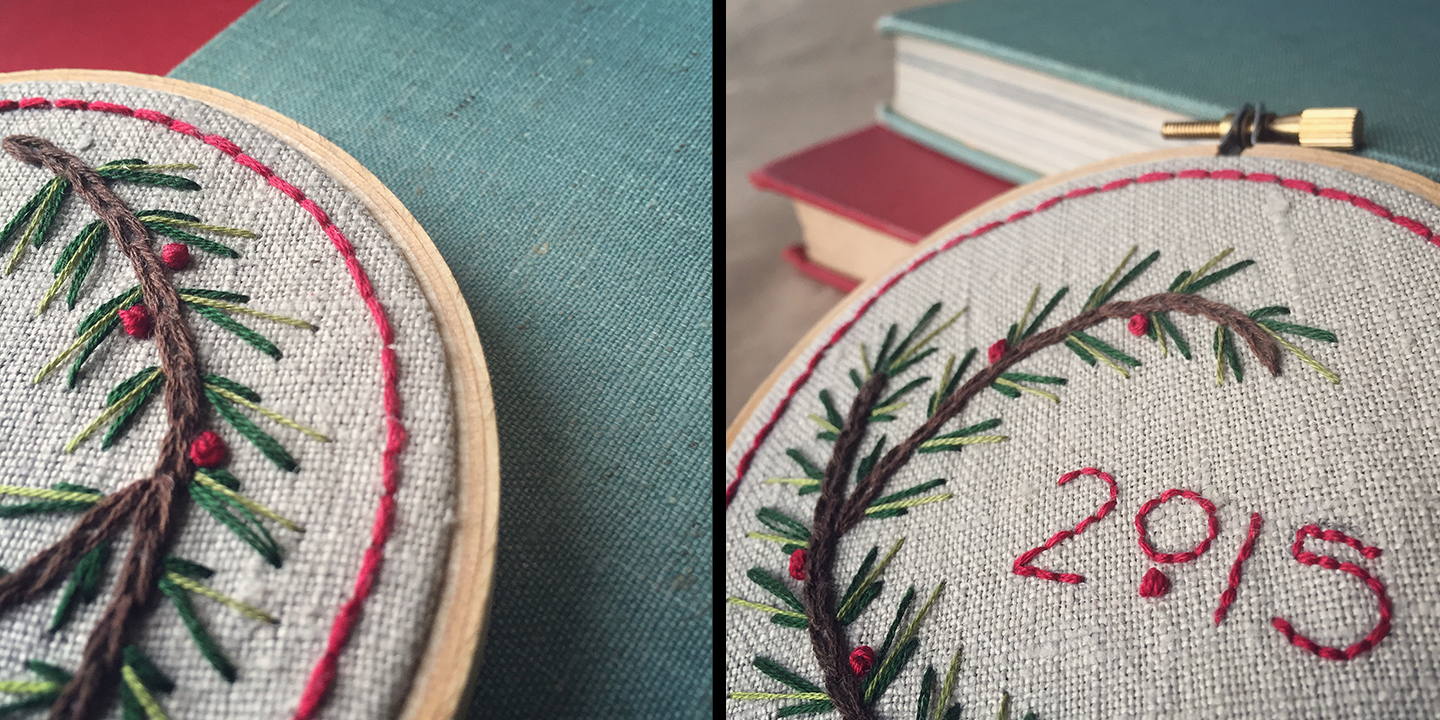
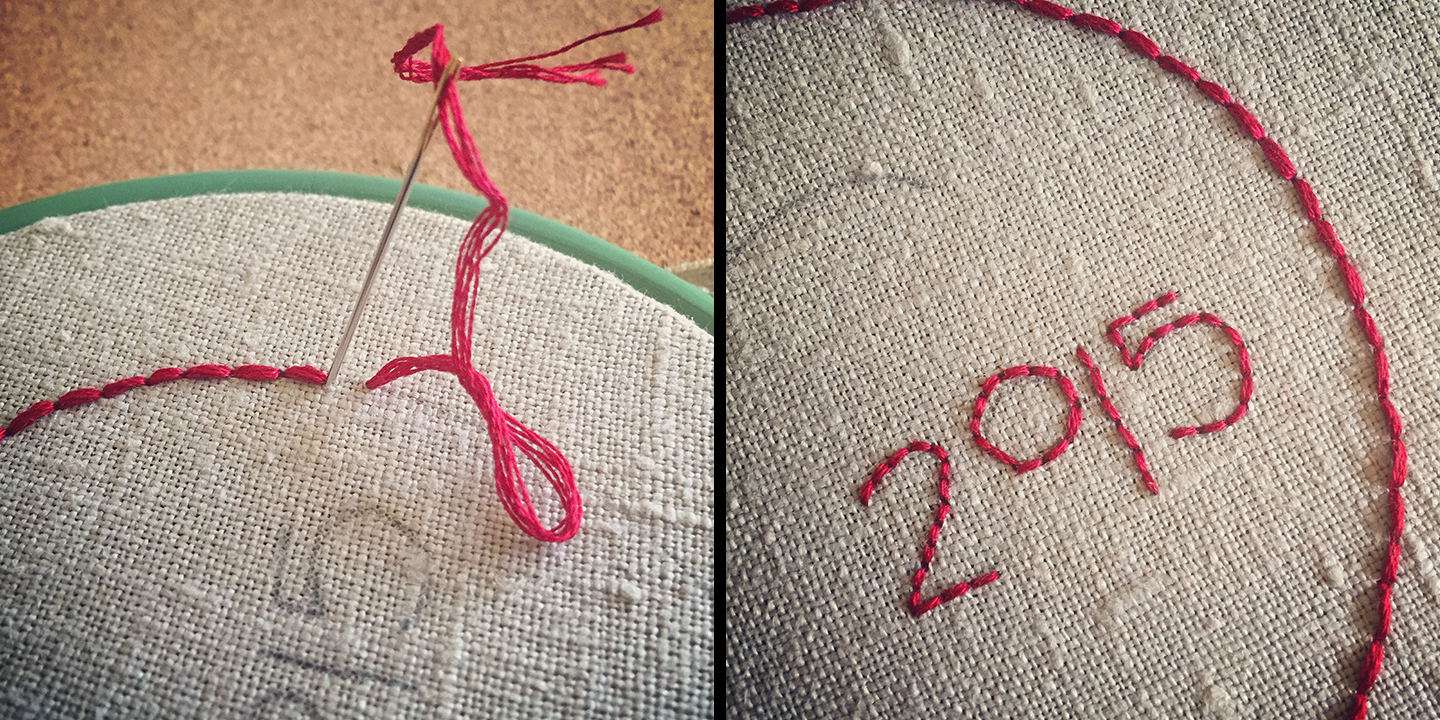 4. Load your fabric into your embroidery hoop and it’s time to start stitching! The circle framing the pattern design and the numbers are embroidered using a standard back stitch with all six stands of floss to creates nice bold lines. Learn the back stitch by following the instructions and graphic here or see a demonstration in the video tutorial I created with embroidery enthusiast and artist Jenny Hart below:
5. Next create the stems of your pine branch using the ‘easiest chain stitch’ - hands down the simplest method of creating this bold, graphic stitch. Again, using all six strands of the embroidery floss will create bold, graphic stems. Another stitch that would work nicely for the pine branch is the chain stitch, which you can learn here or see a demonstration in the video above.
4. Load your fabric into your embroidery hoop and it’s time to start stitching! The circle framing the pattern design and the numbers are embroidered using a standard back stitch with all six stands of floss to creates nice bold lines. Learn the back stitch by following the instructions and graphic here or see a demonstration in the video tutorial I created with embroidery enthusiast and artist Jenny Hart below:
5. Next create the stems of your pine branch using the ‘easiest chain stitch’ - hands down the simplest method of creating this bold, graphic stitch. Again, using all six strands of the embroidery floss will create bold, graphic stems. Another stitch that would work nicely for the pine branch is the chain stitch, which you can learn here or see a demonstration in the video above.
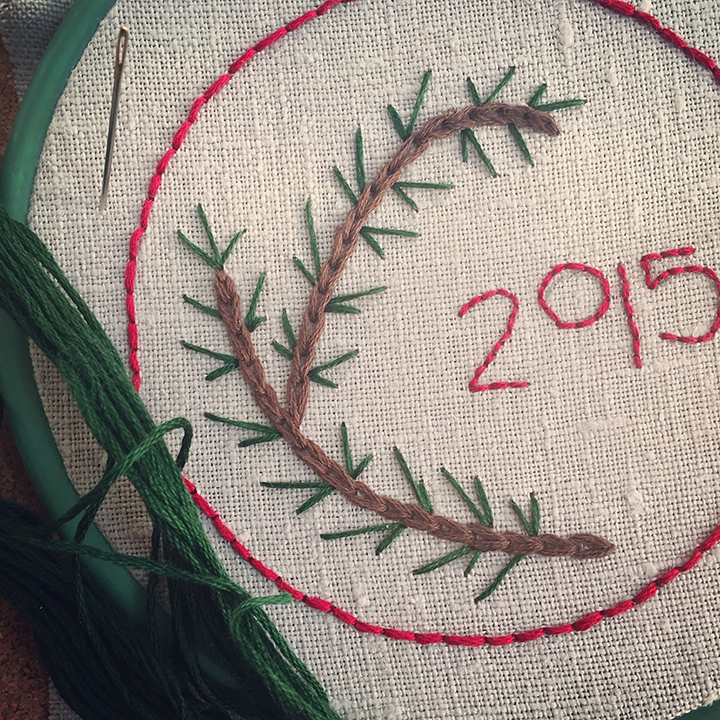
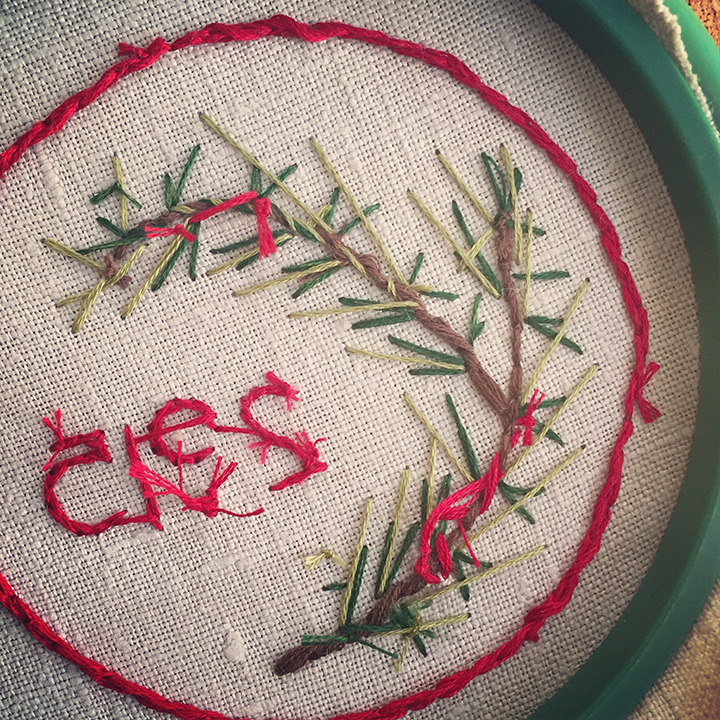
 6. The pine branch needles are created using a series of random straight stitches utilizing two different colors of embroidery floss. Using just three strands of the embroidery floss is recommended to create finer lines for the needles. You’ll note that the needles are not included on the pattern – allowing you to select their placement and length. The sample shows a series of irregular V-shapes created from straight stitches in a dark green all along the stems.
'Tis the season. Gift the creative in your life something special - check out our curated holiday gifts.
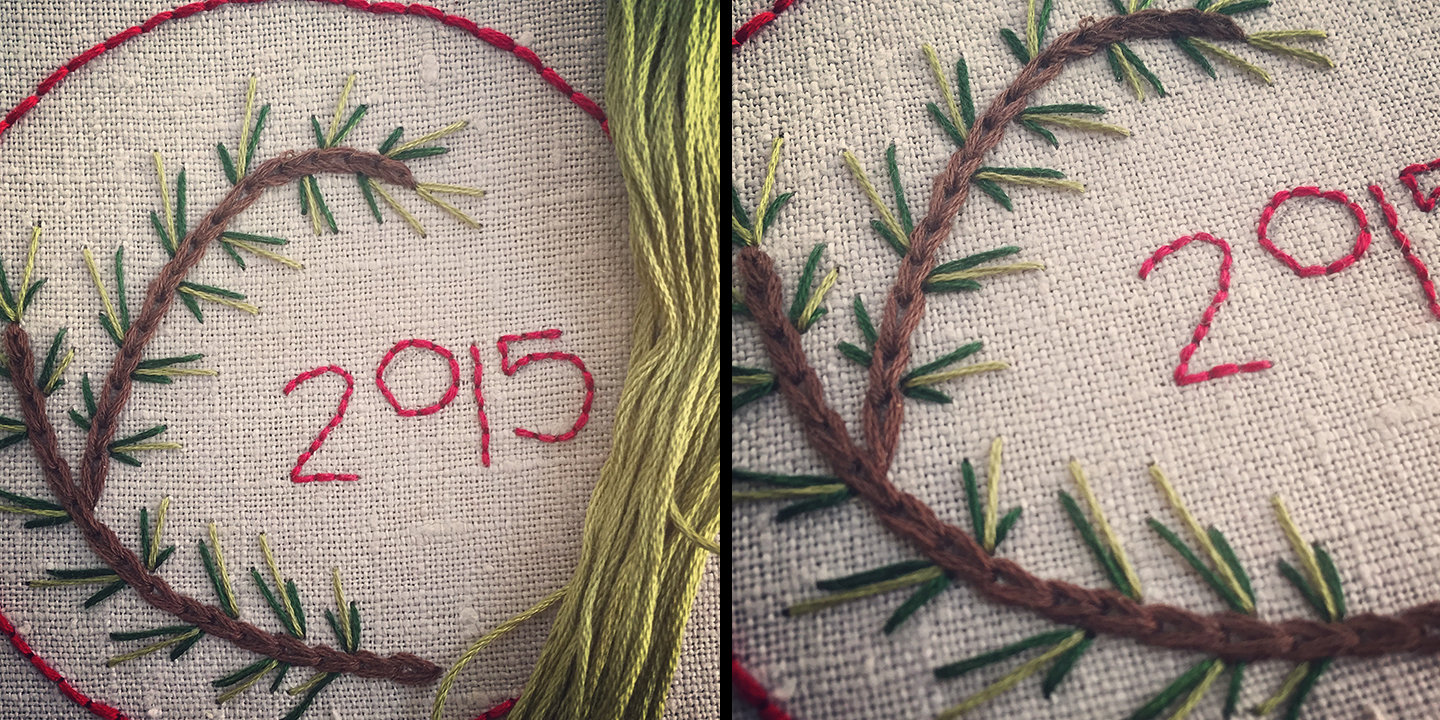
Fill out the pine needles by adding straight stitches in a second color. The sample shows a single light green straight stitch placed in the center of each dark green V-shape. Play with the placement of your pine needles to make the branch as full or sparse as you’d like.
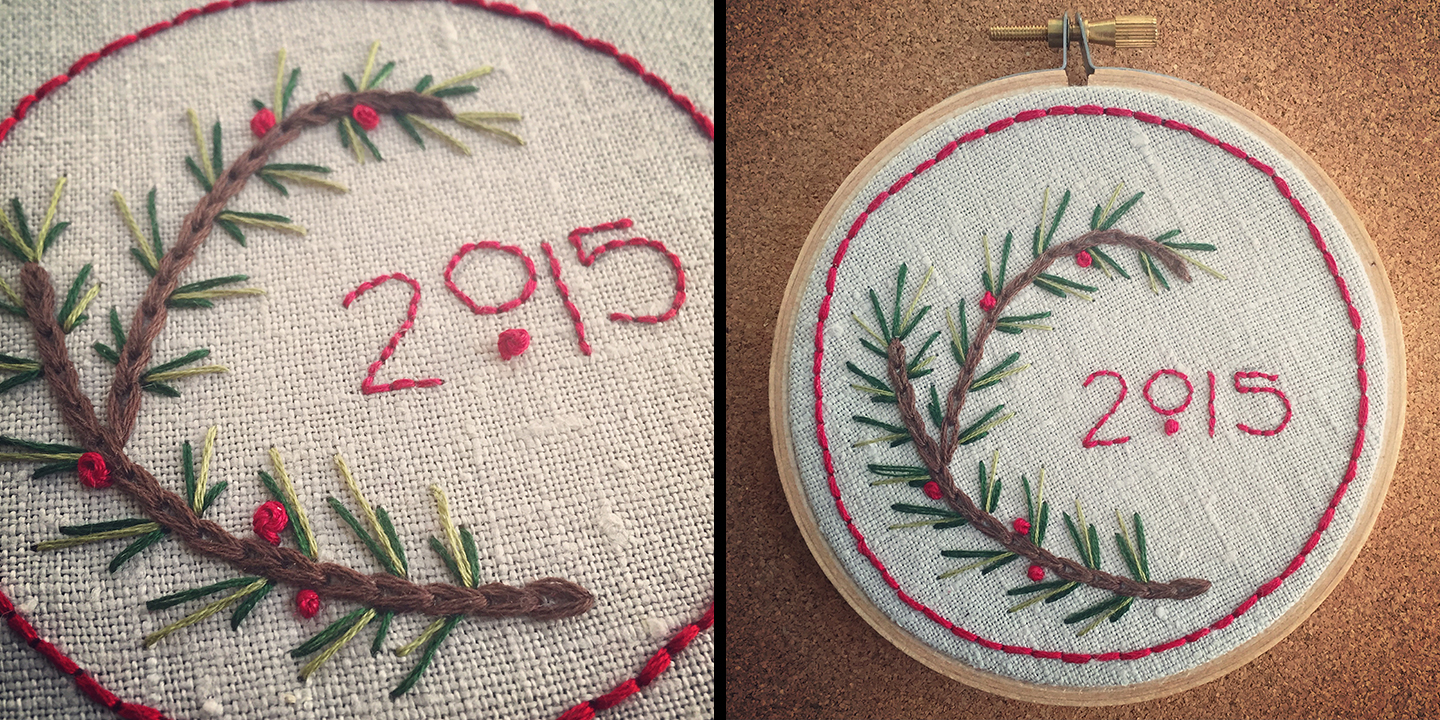
 7. Consider completing your pine branch with a series of french knot berries! Again, the berries are not denoted on the pattern, allowing you to select the placement and number. French knots are feared by many, but here’s a fool-proof method to follow. Need a little more visual reinforcement? Here’s a french knot video tutorial I created, again with the talented Jenny Hart:
And for one final bit of flair, add a single french knot underneath the 0 in 2015!
7. Consider completing your pine branch with a series of french knot berries! Again, the berries are not denoted on the pattern, allowing you to select the placement and number. French knots are feared by many, but here’s a fool-proof method to follow. Need a little more visual reinforcement? Here’s a french knot video tutorial I created, again with the talented Jenny Hart:
And for one final bit of flair, add a single french knot underneath the 0 in 2015!
 Still feeling daunted? Skip the french knots and stitch small seed beads to your fabric to create the look of berries.
8. That’s it, my friends! All that’s left at this point is deciding how to present your embroidery. You might consider removing the fabric from the hoop, ironing it if necessary and then framing your finished piece. Or simply leave your fabric in the embroidery hoop – which serves double duty as a frame and hangs easily on your wall. Here’s a genius little tutorial for finishing off a piece of embroidery framed in a hoop – including how to add a back panel to disguise the backside of your stitching.
Still feeling daunted? Skip the french knots and stitch small seed beads to your fabric to create the look of berries.
8. That’s it, my friends! All that’s left at this point is deciding how to present your embroidery. You might consider removing the fabric from the hoop, ironing it if necessary and then framing your finished piece. Or simply leave your fabric in the embroidery hoop – which serves double duty as a frame and hangs easily on your wall. Here’s a genius little tutorial for finishing off a piece of embroidery framed in a hoop – including how to add a back panel to disguise the backside of your stitching.
 And because I’m always curious about how embroidered work looks on the backside, I’ll share a picture of the knots and tails from the sample!
 Looking for another quick and simple holiday gift idea? Consider my CreativeLive class Fun and Festive Surprise Balls – they make excellent holiday hostess gift and perfect stocking stuffers!
Be sure to enter your email download the sampler guide below:
[subscribe2download link='https://agc.creativelive.com/blog/wp-content/uploads/2015/11/SamplerPattern.pdf' title='Enter Your Email Download the Guide' source='Sampler-Guide' type='Download' channel='Craft & Maker']
<
Looking for another quick and simple holiday gift idea? Consider my CreativeLive class Fun and Festive Surprise Balls – they make excellent holiday hostess gift and perfect stocking stuffers!
Be sure to enter your email download the sampler guide below:
[subscribe2download link='https://agc.creativelive.com/blog/wp-content/uploads/2015/11/SamplerPattern.pdf' title='Enter Your Email Download the Guide' source='Sampler-Guide' type='Download' channel='Craft & Maker']
<
'Tis the season. Gift the creative in your life something special - check out our curated holiday gifts.