As anyone who has been around kids can tell you, little ones change their minds frequently and with gusto when it comes to choosing a Halloween costume. Don’t let this enthusiasm for wanting to be #allthethings deter you from assembling a homemade Halloween costume. After all, tackling an easy Halloween-themed craft project is part of the fun of the season.
Plus, these adorable DIY Halloween costumes will win over your little one and won’t take you more than an afternoon to make. And the supplies you’ll need to make one these costume ideas are inexpensive, if not already living in your craft stash! So ditch the store-bought costume this year and read on to learn how to make a diy costume that will be the talk of the Halloween party.
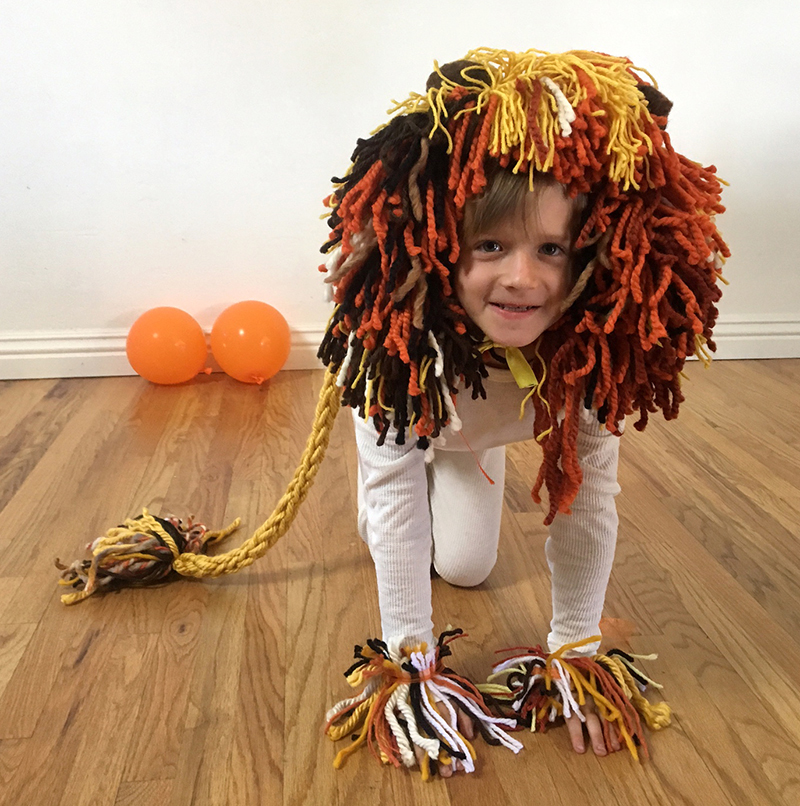
The Lion
Materials needed:
- A hoarder level of yarn (hence, “stash-busting”) in yellow, brown, white, tan, black, gold etc.)
- Something to wrap the yarn around (Cardboard box, DVD case etc.)
- Sharp Scissors
- 4 feet of 1-inch wide spool of ribbon in a warm color
- Pins
- Sewing Machine
- Long underwear or t-shirt and sweatpants/shorts depending on weather
Make a Lion’s headdress (and use some of that yarn you’ve been sitting on for years) by wrapping warm colors of yarn around a DVD case (or really, anything, you like that will give you uniformly sized strands of yarn.) Lay a 2-foot length of ribbon out on a table as you wrap various colors of yarn around the DVD case (or another item of your choosing). Use sharp scissors to cut along one side of the yarn-wrapped DVD case and gently lay the yarn pieces along the length of ribbon. Fill about 18 inches of the ribbon with cut yarn pieces. Make sure the color varies, and the amount of yarn pieces you use is consistent.
Place another piece of ribbon atop the first, sandwiching the 18-inches of yarn strips between the two ribbon pieces. Use pins to keep the top and bottom ribbon pieces in place, then use a sewing machine to sew the ribbon, yarn, ribbon sandwich together. Tie the yarn-less ribbon ends under your chin. Make two much smaller versions of the headdress for wrist cuffs.
Tails can quickly be made by finger knitting a thick cord that is long enough to wrap around the lion’s midsection. Make a tassel from the same colors of yarn used in the headdress and wrist cuffs, and attach the tassel to one end of the tail, and wear over tan sweats, thermal underwear or tan shirts and shorts. Dress up the look with an eyeliner black nose and whiskers. The beauty of the ribbon tying headdress and wrist cuffs means that any sized person can wear them trick-or-treating.

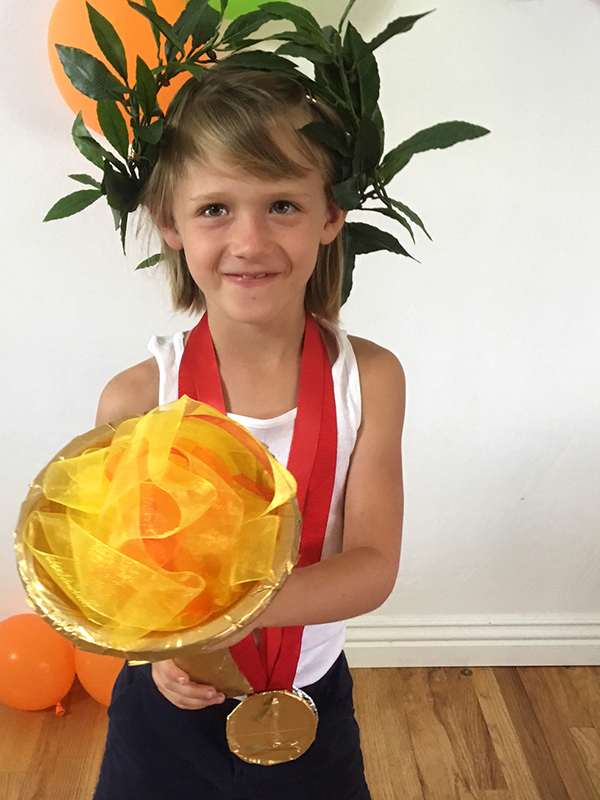
The Olympian
Materials needed:
The Torch:
- Paper towel center roll
- Paper bowl
- Scissors
- Gold Duct tape (or gold spray paint)
- Scrap paper or plastic grocery bags
- Sheer ribbon in orange, yellow and red
- Fabric or Instant Tacky glue
Crown of Laurels:
- 1 bundle of silk leaves
- Craft wire
- Pliers/Snips
- Glue
- Wooden clothespins
Medals:
- Paper bowl
- Roll of Duct Tape
- Glue Stick
- Hot Glue Gun and Glue
- Aluminum Foil
- Red Ribbon
Make an Olympic torch by piercing a paper bowl in its center with scissors. Widen the hole enough that the long tube from a paper towel roll into the bowl can be inserted into the hole snugly. Use a little Duct tape to secure the bowl to the roll. Stuff the roll with scrap tissue or plastic grocery bags to give the handle a bit of substance. Pinch the bottom of the roll and tape it closed. Then cover the rest of the roll and outer parts of the bowl in gold tape (or spray with goldl spray paint). Cut lengths of yellow, orange and red sheer ribbon and glue the ribbon into the bowl, leaving it piled high and as fluffy as you can make it look. Be sure too, that the ribbon “flames” fill the entire paper bowl.
For a crown of laurels that would make the ancient Greeks proud, gather one bundle of silk leaves, and craft wire in a neutral or similarly green color. Use pliers to split the bundle into two sections and with the stems overlapping, wire them together, as you bend them into a crown shape around your head. When you get to the leafy ends of your crown, sandwich a few dots of glue between the leaves from opposite sides of the crown. Use clothespins to hold the leaves in place as they dry. The glued leaves will “close the ring” on your leaf crown.
Make silver and gold medals by cutting large circles out of your paper bowl bottoms. Use hot glue to write a #1 and #2 on your paper circles. When the hot glue has dried, use the craft glue stick to coat the numbered side of your circle then gently place aluminum foil over the glued side, and use soft fingers to work the foil around the hardened hot glue numbers. Use the glue stick to cover the backside of the medals if you wish, and cover that in foil as well. For gold medals, carefully place sections of gold colored Duct tape over your #1 medal. Secure a long length of opaque red ribbon to the backside of each medal with Duct tape to make the medals wearable. Finish the costume with literally any sports equipment you own. This is an incredible and easy Halloween costume that will make your little girl or little boy feel like a true winner!
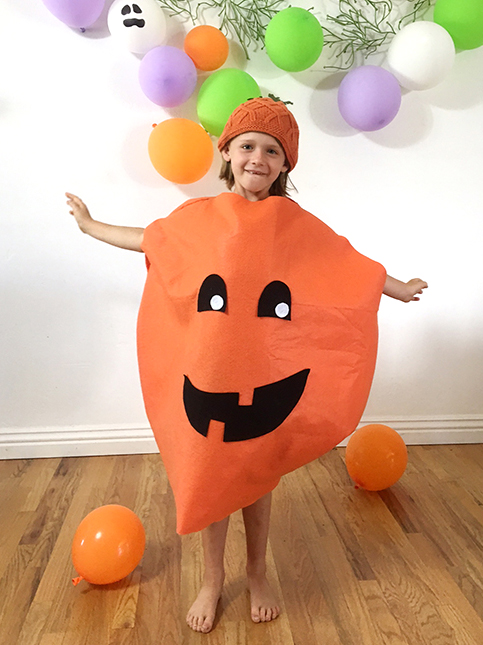
The Pumpkin
Materials Needed:
- 1.5 Yards of orange felt
- Scissors
- Fabric chalk
- Sewing machine
- Pins
- Black and White felt sheet (8.5×11)
- Fabric glue
- Optional: Orange cap, silk leaves, barrettes, hot glue
Cut out a 3×3 foot squatty circle (technical term) out of orange felt. Use the first squatty circle to cut out an identical one. Ask your little one to lie on the circle so that you can see and mark where the head, arm and leg openings will need to go, then place pins in the sections in which you will sew the circles together. Use a sewing machine for a quick sew, then turn the circle inside out and check for fit. Stitches can be ripped out if head or leg holes need to be enlarged. Cut a Jack-O-Lantern’s mouth and eyes from regular felt and adhere with fabric glue, or use adhesive felt when cutting out the face shapes. Top the outfit off (quite literally) with an orange beanie or red hat. Use hot glue to add a silk leaf to a barrette and clip it to the beanie, or skip the beanie, and wear leafy barrettes in your stem, er, um, hair. If trick-or-treater night temps are chilly, wear orange long sleeves and jammie bottoms or sweats under the pumpkin costume.
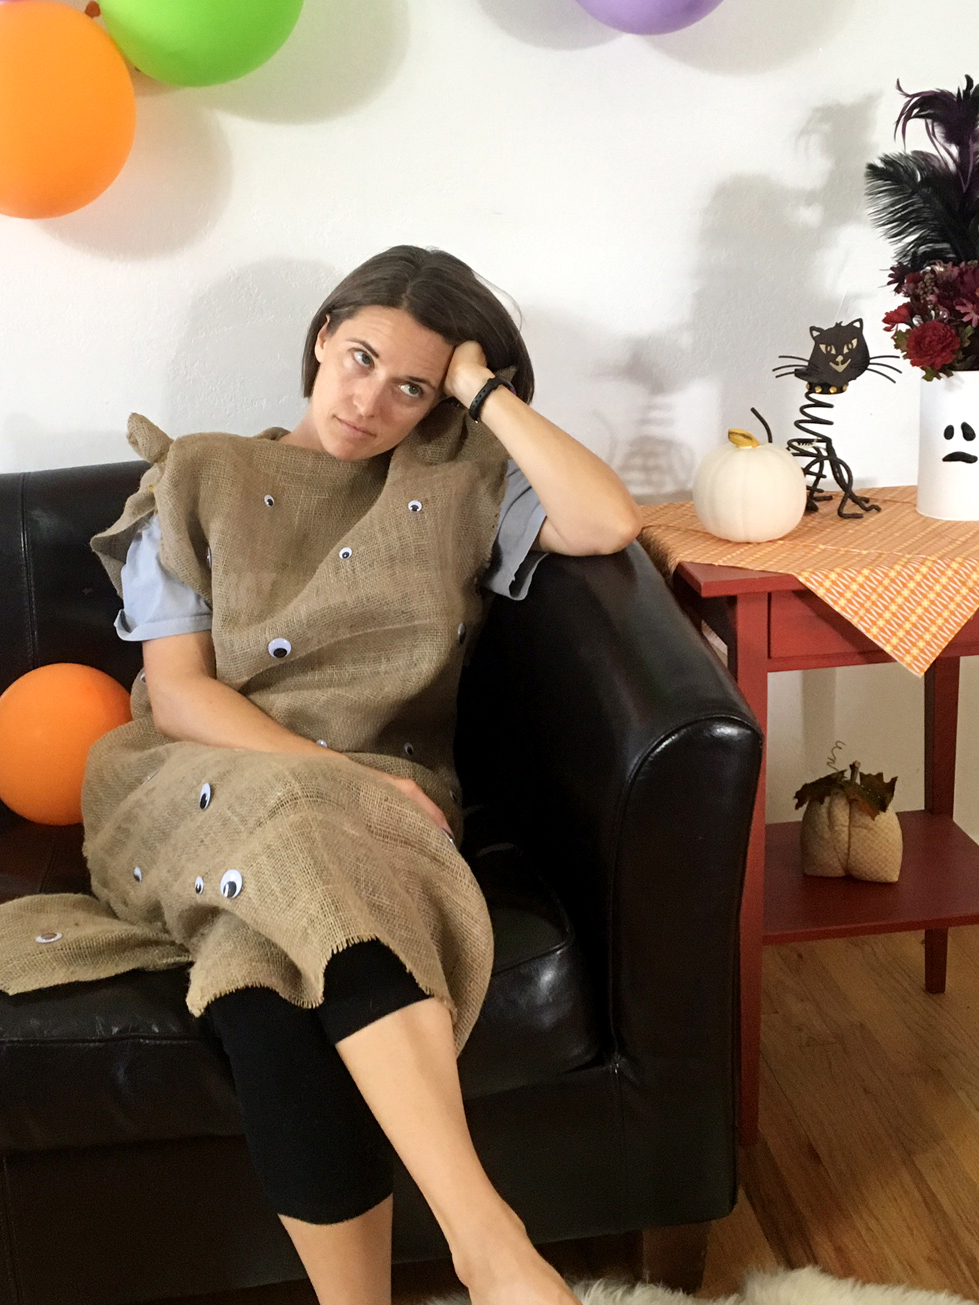
The Potato
Materials needed:
- 1-1.5 yards of burlap
- Googly eyes in assorted sizes
- Tack and/or hot glue
- Needle and thread or floss
Make a quick and easy costume by folding a 1-1.5 yard piece of burlap in half so that it resembles a long (and scratchy) sleeping bag. Use needle and embroidery floss to quickly stitch up the open side of your sack. Leave an arm opening as you sew. You will cut a second arm hole into the other side of the sack. Turn the sack inside out so that the seam stitches are inside. Bunch the top, outer corners of your sack, and secure them with a little hand stitching. Leave a wide opening for your head to fit through the top of the sack.
Then, use instant Tacky glue to cover the entire potato with eyes. Googly eyes! (Because potatoes are covered in eyes, get it?!) When the Tacky glue has dried, I recommend turning the potato dress inside out again, and securing the eyes from behind with hot glue. Since the burlap has such a wide weave, the hot glue will bond to the dry Tacky glue and you won’t leave a trail of eyes behind you all night.
This Halloween costume idea is also a great getup for introverted parents. Just plant yourself on the couch and wait for Halloween to end, while your friends celebrate around you.
Want to learn more handmade skills or do more DIY projects. Subscribe to the Creator Pass to access our full library.