
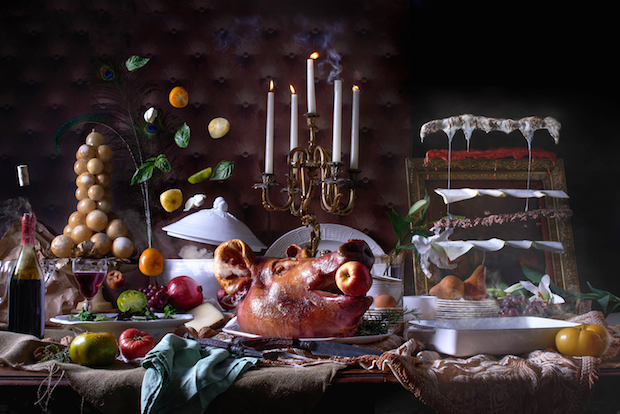
 As a commercial food photographer, I create images of a variety of products from beer to donuts. Over the years though I have become known for my concept-driven images which are often whimsical in nature typically contain elements of motion. This image features an Italian feast gone awry with a Caprese salad and Lasagna exploding into the air and the process we used to create this image in Photoshop began with the way we styled, lit, and photographed the scene.
The most important thing to remember when photographing an image that would be impossible to capture in one frame is to ensure that the lighting for the additional elements is identical to the base image. Any variation in the highlights, color cast, or the light source’s overall feel will be immediately noticeable to the viewer.
As a commercial food photographer, I create images of a variety of products from beer to donuts. Over the years though I have become known for my concept-driven images which are often whimsical in nature typically contain elements of motion. This image features an Italian feast gone awry with a Caprese salad and Lasagna exploding into the air and the process we used to create this image in Photoshop began with the way we styled, lit, and photographed the scene.
The most important thing to remember when photographing an image that would be impossible to capture in one frame is to ensure that the lighting for the additional elements is identical to the base image. Any variation in the highlights, color cast, or the light source’s overall feel will be immediately noticeable to the viewer.
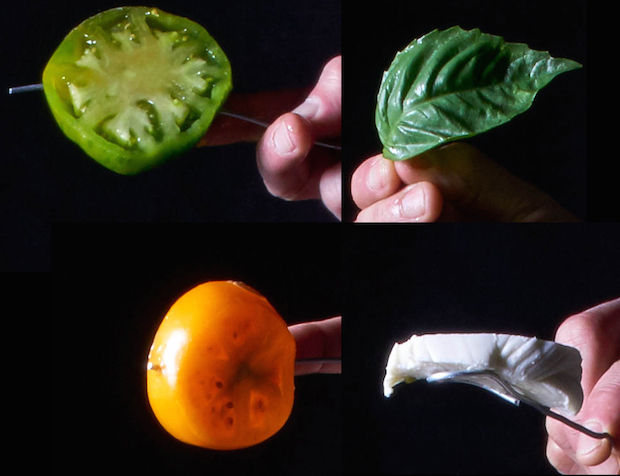 When I photograph a scene like this, I begin by working the scene as far as it will go until I feel I cannot improve upon it. I then begin adding elements to the scene like the smoke, tomatoes, and the flying lasagna by supporting them on trays or wire attached to a stand. Once I have all of the elements I need I proceed to post-production.
It's here! Photo Week 2017 with 40 incredible classes and 20 award winning instructors. Learn More here.

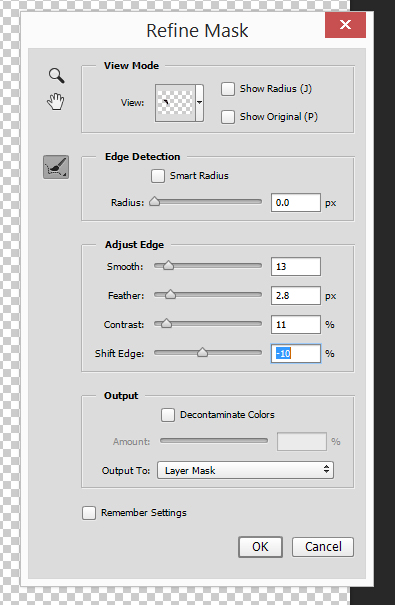
Inside Photoshop, I loaded the base image first and began working with the healing brush and clone tools to remove any unwanted dust spots, dings, or any other element which took away from the look I was hoping to achieve. I then began to drag in the additional elements into the scene like the flying tomatoes. I quickly cut them out from their background using the quick selection tool and then refined the mask by shifting the edge in a bit, bringing the smooth slider to 10, adding 2.8 pixels of feathering, and 11% contrast. These settings provided a nice and quick cut out which created a softer edge and appeared much more believable in the image. Overly-sharp edges are a dead giveaway to a poorly constructed composite. [caption id="attachment_12274" align="alignnone" width="620"]
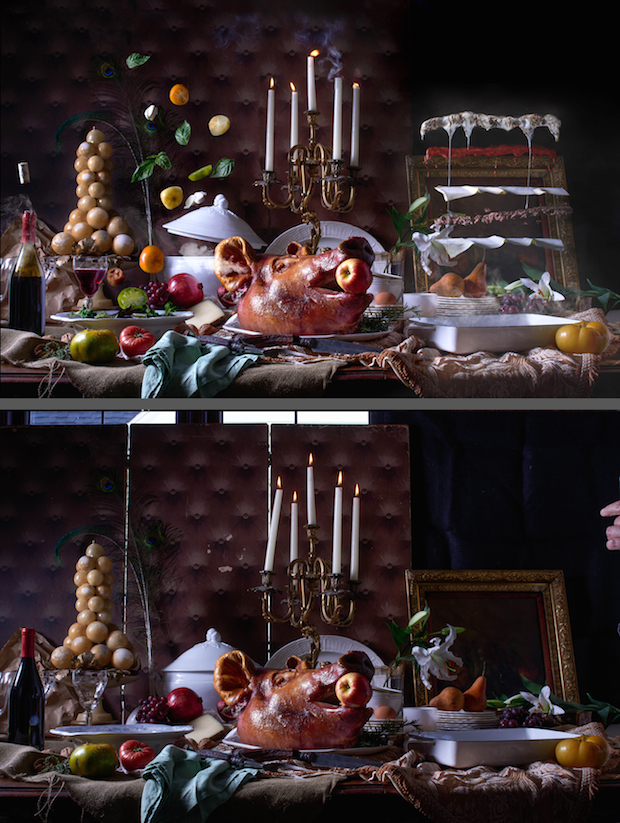 Above: The completed image. Below: The image as it was first shot.[/caption]
Once all of the elements were cut out and placed where I wanted them to be, I took a step back and re-assessed the image. All of the elements I had placed into the image will now need to cast their own shadows and create color casts on the objects and surfaces that surrounded them so it’s best to get your locations nailed down before proceeding to save yourself some work later.
Above: The completed image. Below: The image as it was first shot.[/caption]
Once all of the elements were cut out and placed where I wanted them to be, I took a step back and re-assessed the image. All of the elements I had placed into the image will now need to cast their own shadows and create color casts on the objects and surfaces that surrounded them so it’s best to get your locations nailed down before proceeding to save yourself some work later.
 The smoke was photographed with the same lighting but on a black background so that I would be able to change the blending mode of that layer to “screen” and would be left with just the smoke and not the background appearing on the layer.
The objects were placed in their final position and I then began using the transform and puppet warp tools on the lasagna elements to manipulate them in a way they would behave if being forced upward. I finished the image by adding shadows the composited elements would normally cast by selecting a color in the darkest shadow in the image with the eyedropper tool and drawing shadows on a separate layer. I then switched the blending mode of that layer to “overlay” so that the darker areas would become shadows without effecting the overall textures on the surface.
Pig's Head Feast from Steve Hansen on Vimeo.
To complete the image I dodged and burned elements of the image to draw the eye to certain areas and created a very mild vignette. And there you have it!
The smoke was photographed with the same lighting but on a black background so that I would be able to change the blending mode of that layer to “screen” and would be left with just the smoke and not the background appearing on the layer.
The objects were placed in their final position and I then began using the transform and puppet warp tools on the lasagna elements to manipulate them in a way they would behave if being forced upward. I finished the image by adding shadows the composited elements would normally cast by selecting a color in the darkest shadow in the image with the eyedropper tool and drawing shadows on a separate layer. I then switched the blending mode of that layer to “overlay” so that the darker areas would become shadows without effecting the overall textures on the surface.
Pig's Head Feast from Steve Hansen on Vimeo.
To complete the image I dodged and burned elements of the image to draw the eye to certain areas and created a very mild vignette. And there you have it!
RSVP for Photo Week 2017 to learn from your favorite world-class instructors with 40 incredible classes, Learn More here.