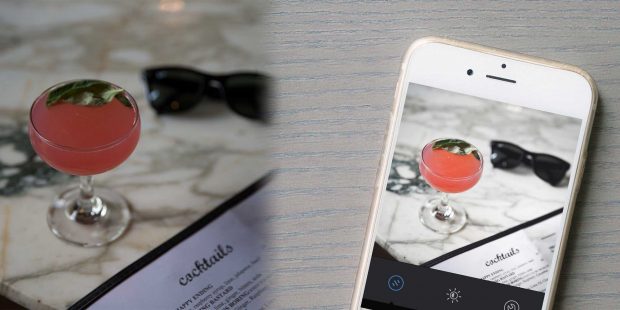
Let's face it, those default Instagram filters just aren't doing your photos justice.
If you want to get serious about taking your great images and making them even better, in this post I'm going to show you how to MASTER editing photos on your iPhone (all of these apps I use are available on Android as well).
This guide works with both mobile photos or DSLR shots. I personally use the wifi function on my Canon 6D to move photos to my iPhone, but you can always buy an Eyefi Card to give your DSLR wifi capability.
We'll start with my favorite mobile editing app, Snapseed. This free editing app by Google is seriously killer. (Pro Tip: increase your screen brightness a bit to see what you're doing while editing)
Here's a video guide on how to edit photos on your iPhone, but scroll down for a more detailed walkthrough and insights.
https://www.youtube.com/watch?v=vbjrlEtN0oI
I'll be starting with this photo of a cocktail from a local bar here in Washington, D.C. If you're ever looking for inspiration coffee houses and cocktail bars usually have unique lighting and vibes for you to capture.
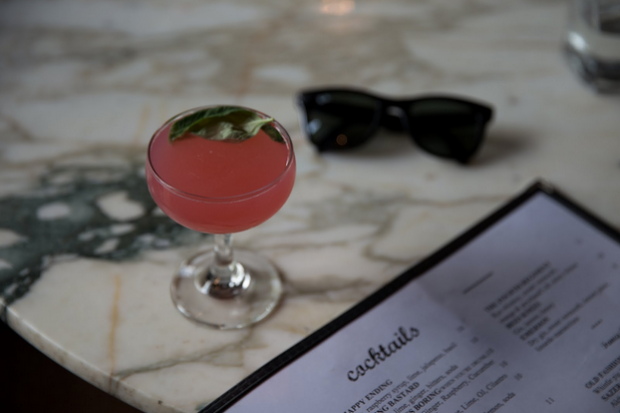
Snapseed
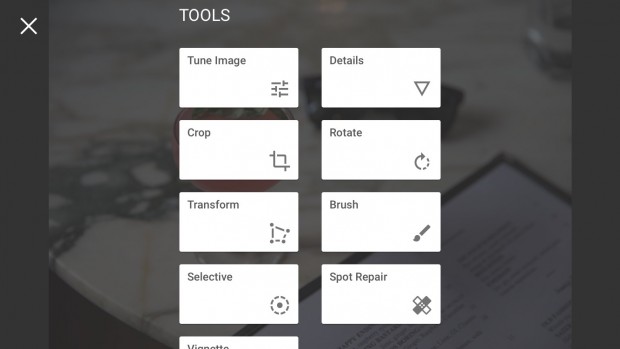 I'll run through some of the main options in the tools pane. In this guide we'll be using "Tune Image", "Details", "Crop", "Selective", and "Vignette".
Getting started the most basic tweaks can be made in "Tune Image". I like to increase the brightness and ambiance for food photography. If you're shooting city photos it's a lot of fun to play around with ambiance and contrast.
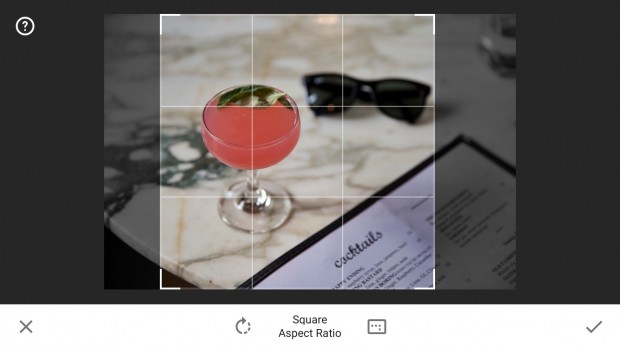
This photo will be used on my Instagram, so I like to crop it to a square in Snapseed before I begin editing.
 In the "Details" tool I like to increase the structure and sharpening to about 20 (anything more than this can look very unnatural).
If you're editing an architectural shot, it is VERY helpful to use the "Transform" tool, as this allows you to change angles and perspective for perfect alignment. For this photo I will not be using it.
My personal favorite tool is the "Selective" tool.
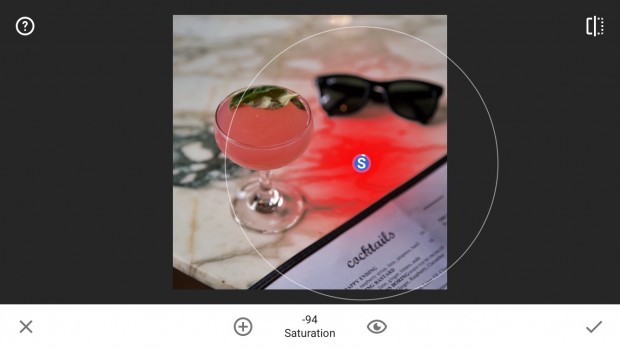 It can be a bit confusing at first, but when you create an edit point, it's actually selecting the color in that area. This is extremely helpful. In this photo, the tool is actually selecting the yellowish tint of the marble. Pinching out will increase the size of the selected area.
To change the tool you're using on each edit, swipe up/down. To adjust the strength, swipe left/right (like many of the tools in Snapseed).
You can also copy and paste these edit points by tapping them. For this edit, I'll be putting the desaturated point all over the table, along with the menu. This really gives the photo a congruent feel.
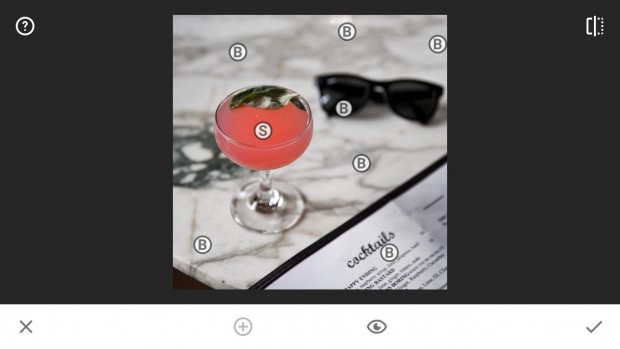
You can only add 8 edit points at a time but no worries, if you run out just apply the change and use the tool again.
Along with the table, I'm also increasing the brightness/saturation of the cocktail. Edits similar to this work great when shooting anything on a table (great for foodies!).
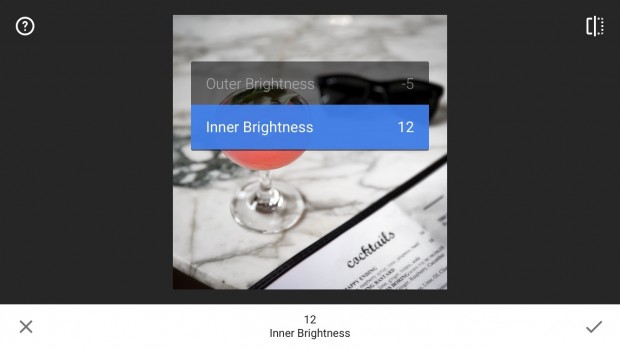 Using the vignette tool, I like to add a bit of inner brightness along with darkening the edges with outer brightness.
Most importantly: play with ALL of the options, create your own style, and something truly unique to you!
Now that we're done editing, hit "Save" and "Save as a Copy" (never modify originals!).
VSCOcam
To put the finishing touch on my photos, I like to use the VSCOcam filters.
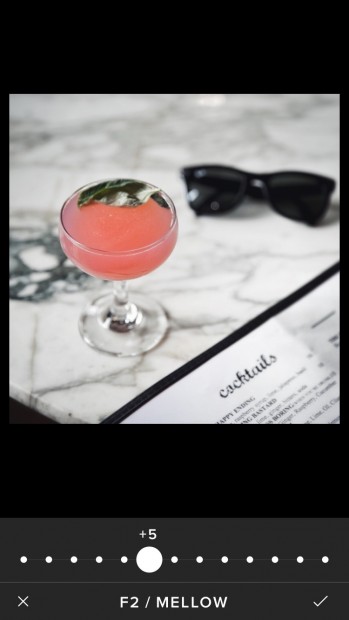 The F2 filter is great for just about any shot, but try them all out. If you double tap a filter you can select its intensity - try to stay on the lighter side.
After editing, save to your camera roll at original size.
Posting to Instagram Tips
An essential aspect of photography today, is sharing it. I love to share on my Instagram.
Here’s a quick tip while posting: try using the same filter on all of your photos at a low intensity. I use Juno on most of my photos at a very low intensity (along with a few other slight edits). Doing this on all of your uploads will give your feed just a slightly familiar feel.
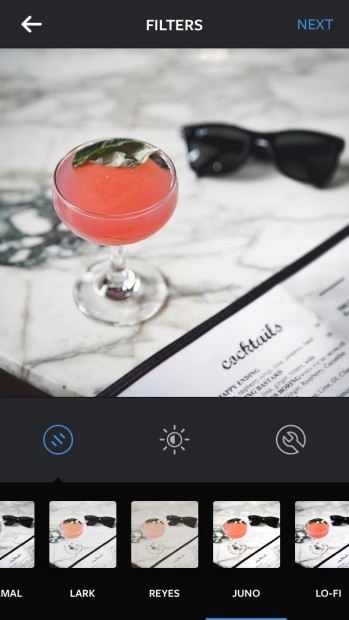 Finally here is our final image on Instagram:
https://instagram.com/p/4IHOdsJvPG/
If you'd like to see more of my work be sure to follow me on Instagram @someguy and my photography blog. Happy Shooting!


 I'll run through some of the main options in the tools pane. In this guide we'll be using "Tune Image", "Details", "Crop", "Selective", and "Vignette".
Getting started the most basic tweaks can be made in "Tune Image". I like to increase the brightness and ambiance for food photography. If you're shooting city photos it's a lot of fun to play around with ambiance and contrast.
This photo will be used on my Instagram, so I like to crop it to a square in Snapseed before I begin editing.
 In the "Details" tool I like to increase the structure and sharpening to about 20 (anything more than this can look very unnatural).
If you're editing an architectural shot, it is VERY helpful to use the "Transform" tool, as this allows you to change angles and perspective for perfect alignment. For this photo I will not be using it.
My personal favorite tool is the "Selective" tool.
 It can be a bit confusing at first, but when you create an edit point, it's actually selecting the color in that area. This is extremely helpful. In this photo, the tool is actually selecting the yellowish tint of the marble. Pinching out will increase the size of the selected area.
To change the tool you're using on each edit, swipe up/down. To adjust the strength, swipe left/right (like many of the tools in Snapseed).
You can also copy and paste these edit points by tapping them. For this edit, I'll be putting the desaturated point all over the table, along with the menu. This really gives the photo a congruent feel.
 You can only add 8 edit points at a time but no worries, if you run out just apply the change and use the tool again.
Along with the table, I'm also increasing the brightness/saturation of the cocktail. Edits similar to this work great when shooting anything on a table (great for foodies!).
 Using the vignette tool, I like to add a bit of inner brightness along with darkening the edges with outer brightness.
Most importantly: play with ALL of the options, create your own style, and something truly unique to you!
Now that we're done editing, hit "Save" and "Save as a Copy" (never modify originals!).
 The F2 filter is great for just about any shot, but try them all out. If you double tap a filter you can select its intensity - try to stay on the lighter side.
After editing, save to your camera roll at original size.
 Finally here is our final image on Instagram:
https://instagram.com/p/4IHOdsJvPG/
If you'd like to see more of my work be sure to follow me on Instagram @someguy and my photography blog. Happy Shooting!