
Push your photo skills in our FREE Creative Photo Challenge with Lindsay Adler!
 As photographers, we are fundamentally visual problem solvers. We establish creative and practical visual goals in our heads, and use our photographic toolkits to create stunning visual solutions.
We must solve the problem of posing in order to flatter our subject. We must solve the problem of lighting to achieve certain visual goals. We must solve the problem of composition to control the viewer’s eye.
When I create beautiful images it is certainly not point and click, and I certainly don’t nail the image on the first shot. Instead its a lot of maneuvering and problem solving!
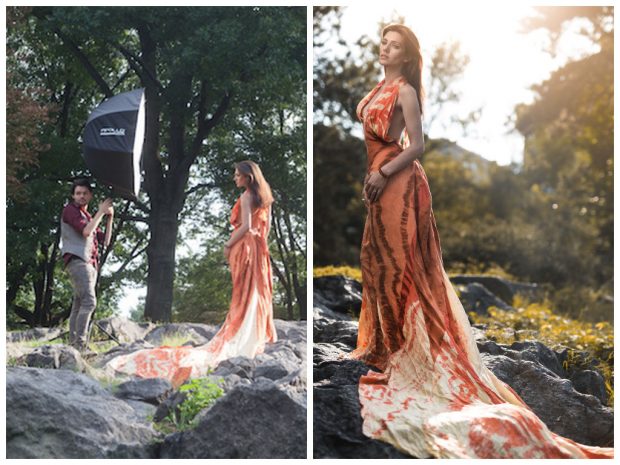
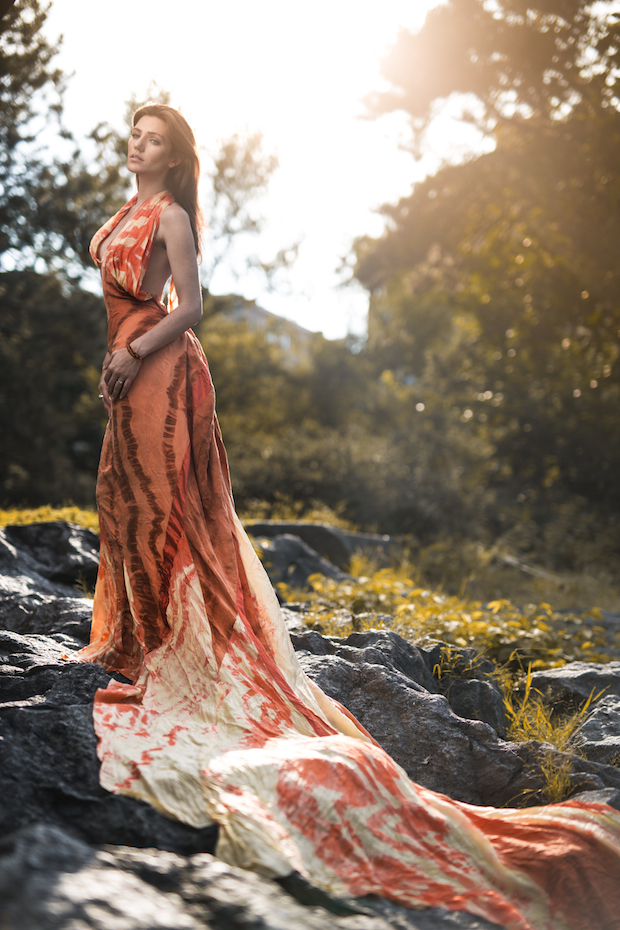
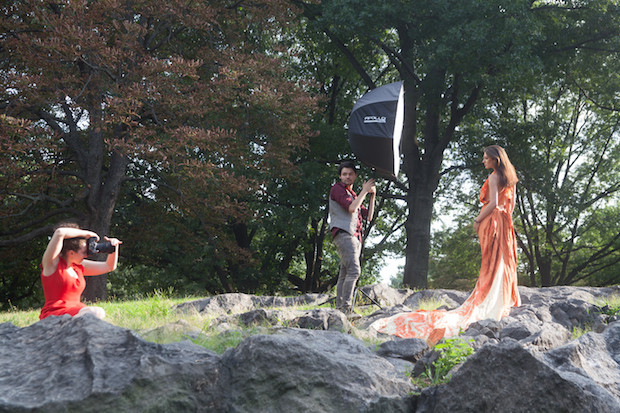 When creating this fashion portrait in Central Park, I decided upon a few key problems I wanted to solve. First, I wanted to have very narrow depth of field to help separate my subject from the background. Next, I wanted to background to be darker than my subject so that she would really ‘pop’ from the frame. Finally, I wanted to be able to include a bit of lensflare in the frame to give that feeling of the sun glowing in the distance. I’d like to briefly take you through the thought process that occurred inside my head to achieve these goals and overcome possible challenges.
Here's my gear list:
- Canon 5D III
- Sigma 50mm 1.4 Art
- Westcott Apollo Orb
- Westcott Triple Threat Flash Bracket
- (3) Phottix Mitros+ speedlights
- Phottix Odin Trigger
- Wardrobe: Sunfire Parachute Dress from Dreamshootrentals.com
And here are my camera settings:
- 1/2000 sec F/1.6 ISO 100
First, to achieve narrow depth of field I grabbed my Sigma 50mm 1.4 Art. This new lens is tack sharp with beautiful bokeh ((Don't know what Bokeh is? Check out our Ultimate Resource Guide here). I selected an aperture camera setting of f/1.6 to help me have the narrowest depth of field, and knew that nailing my focus would be critical. For this reason I used back button focus to help me lock my focus in place.
Next, to make overall scene darker, I used a faster shutter speed. This allowed me to have narrow depth of field by having a wide aperture, but keeping the exposure in check by putting my shutter speed all the way at 1/2000 of a second. Now the entire scene including our subject are much darker. In fact, the subject’s face is now dull and dark.
Now that I had those key elements, I had to figure out how to illuminate my subject. First we tried a reflector but it wasn’t quite providing the quality and direction of light I desired. Instead, we opted to utilize flash. I used my favorite speedlight, the Phottix Mitros+ with the Phottix Odin trigger paired with the Westcott Apollo Orb. This light is wrapping, soft but also can introduce more contrast to a scene which is already heavily backlit (and therefore a bit flat). Unfortunately, utilizing flash in this scene creates new problems for us to solve!
Because of our fast shutter speed, typically we would be limited by our camera’s sync speed (strobes and camera’s can’t function properly faster than 1/200 sec). Because I decided to use speedlights, I could easily switch my flash into ‘high speed sync’ (HSS on most flashes). High speed sync allows me to shoot faster than my camera’s sync speed by sending out short pulses of light during my exposure. This is an excellent feature to utilize when choosing to shoot at higher shutter speed and still utilize flash.
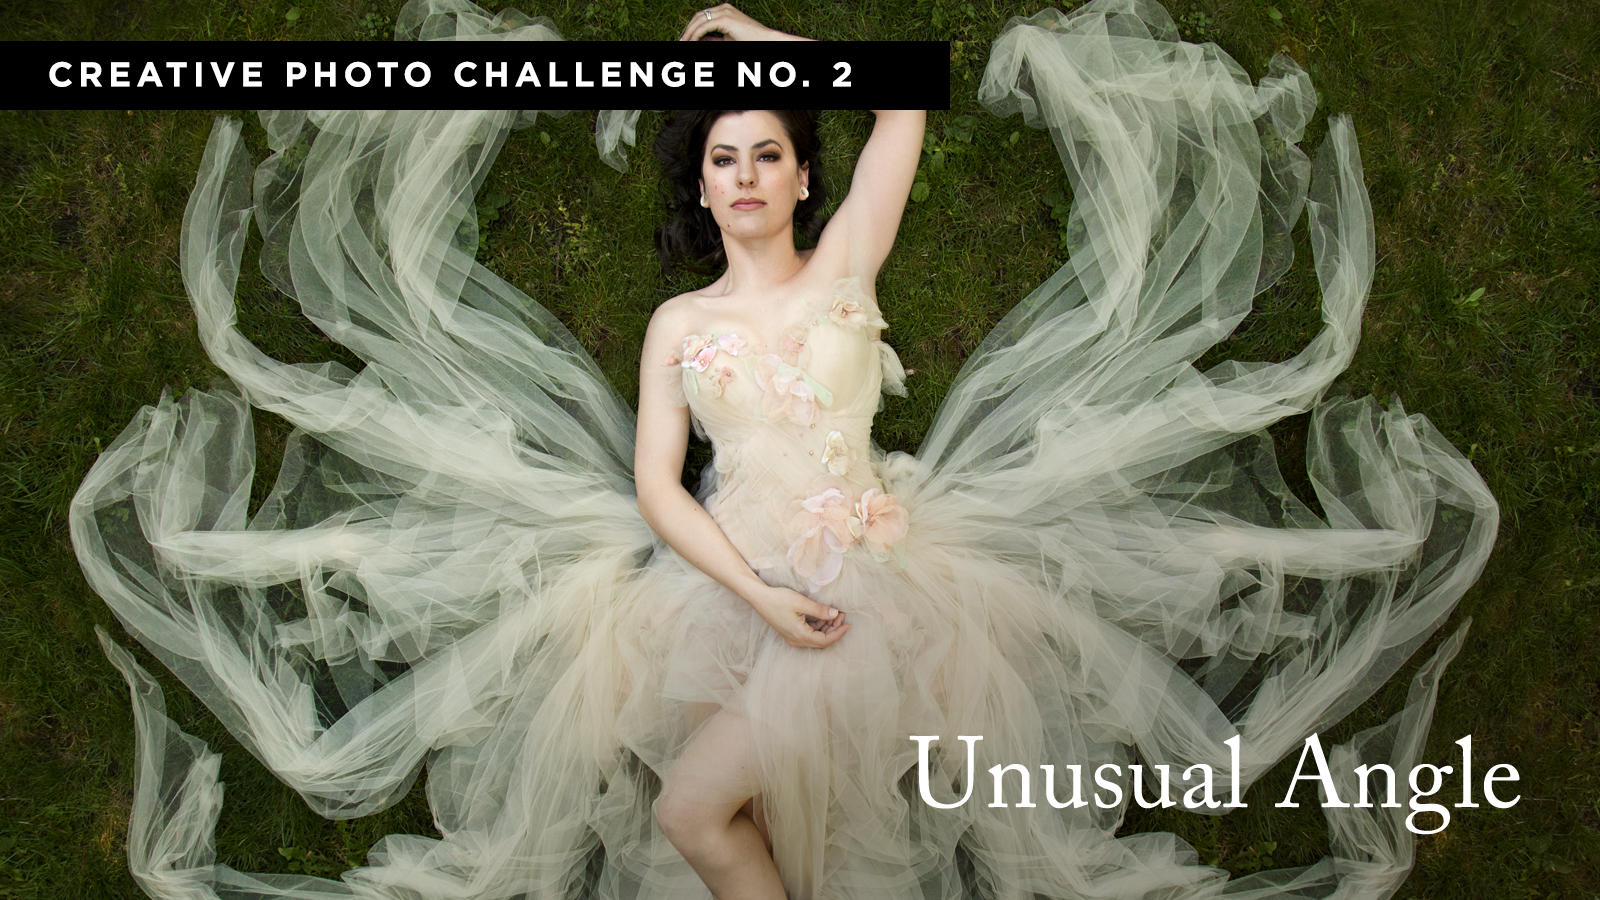
Challenge No. 2 Unusual Angle is live and FREE! Join, Share, Vote and Win!
Problem solved, right? Unfortunately, not quite. Because we are using high speed sync, these short pulses of light have significantly less power than our usual flash output. The light, therefore, is much weaker. We have several solutions to try to fix this problem. First, we can bring our speedlights a bit closer to increase their functional strength (inverse square law!). Unfortunately, we are already as close as possible without having our light in the frame. We can also open up our aperture to brighten up our flash exposure. Unfortunately we are already wide open. We could, as well, bump up our ISO to make the camera more sensitive to the flash’s output, but then we will need an even higher shutter speed.
In this instance I decided to opt for more power! I utilized the Westcott Triple Threat flash bracket to allow me to utilize 3 Phottix Mitros+ flashes at once inside the Apollo Orb. One of the reasons I love utilizing Phottix is not only do they allow me to achieve everything I need from a speedlight, but they also allow me to use multiple flashes in a scene without breaking the bank! In some instances I can use 3 Phottix strobes together for high flash output for the same price as just ONE ‘name brand’ strobe.
Now that I had my three flashes, the rest is up to posing and composition. I composed my frame so that I was facing into the sun, and allowed the sun to creep into the top of my frame, giving me a haze and a bit of lensflare. Now all the elements came together for a successful!
Narrow depth of field, done!
Subject well-illuminated with a slightly darker background, done!
Lens flare and a heavenly late-day glow in my shot, done!
As I mentioned originally, practice makes perfect. The more times you come up against possible problems and challenges, the easier it will be in the future to reach into your memory and call up easy solutions!
Challenge No. 2 Unusual Angle is live and FREE! Join, Share, Vote and Win!
Still interested in learning to light? Check out our Ultimate Resource Guide to Lighting. And if you're asking yourself, what is aperture - we've got you covered there too.