
Over 71% of businesses have an online presence, and most of those have a product they sell. Quality product photographs is key to success, whether it's a local business owner with a few products or an established e-commerce store with hundreds, if not thousands, of SKUs.
Product photography is a field of photography that covers the capture of products for both online and offline commercial use. It's used by businesses to market and sell their products, and as such, it needs to show the product in the best light possible.
Certain techniques and best practices must be followed to achieve this result and boost sales. Here's what you need to know as a product photographer.
Equipment Needed
The first step to taking great product photos is to set the stage by getting the right equipment. A product photographer needs a few essential pieces of gear to get started, most notably: a lightbox, a tripod, and a camera.
Lightbox
A lightbox is a small enclosed space with diffused lights placed around the perimeter. This creates an evenly lit environment perfect for taking pictures of objects. Think of it as a miniature studio that you can set up anywhere.
Lightboxes come in various shapes and sizes, so it's important to select one that's appropriate for the products you'll be photographing. For example, if you plan on taking pictures of jewelry, you'll need a smaller lightbox with an opening that prevents reflections off the metal. Or, if you'll be photographing larger items like furniture, you'll need a lightbox with a spacious interior.
Tripod
A tripod is another must-have for product photography. It allows you to keep your camera perfectly still while taking long exposures, ensuring that your photos are sharp and blur-free. A remote shutter release is also a helpful tool to have as it allows you to take pictures without touching the camera, further minimizing the risk of camera shake.
Camera
Of course, no photographer can work without a camera. While any digital camera will do for product photography, a DSLR camera is best as it offers more manual controls and interchangeable lenses. This flexibility allows you to fine-tune your photos to get the perfect shot every time. We'll go over the cameras in more detail later on.
Lighting Tips and Advice
If you're still early in your product photography journey and don't have a lightbox yet, there are still plenty of ways to take great photos. Here are a few lighting tips to help you get started:
Use a White Background
Let's take a step back and examine how a camera captures an image. When you take a picture, the camera's sensor is exposed to light reflecting off the objects in the scene. This reflected light contains all the colors that make up the object, and the sensor captures these colors.
That's why having a white background is crucial when taking product photos. A white background reflects all colors equally, so it doesn't bias the camera sensor towards any particular hue. This results in accurate color reproduction in your photos.
If you don't have a white backdrop, you can also use a piece of white poster board or foam core as a makeshift background. Just be sure to place it far enough away from the product, so it doesn't cast any unwanted shadows.
A white sheet hung from a clothesline makes for an excellent background for larger products. You can also try draping a white fabric over a table or flat surface.
Use Multiple Light Sources
Even if you're using a lightbox, you'll want to set it up near a window so that natural light can supplement the diffused lights inside the box. However, it's best to use indirect sunlight light. Direct sunlight can create harsh shadows and make colors appear washed out.
Experimenting with different lighting setups is the best way to find what works for you and your products.
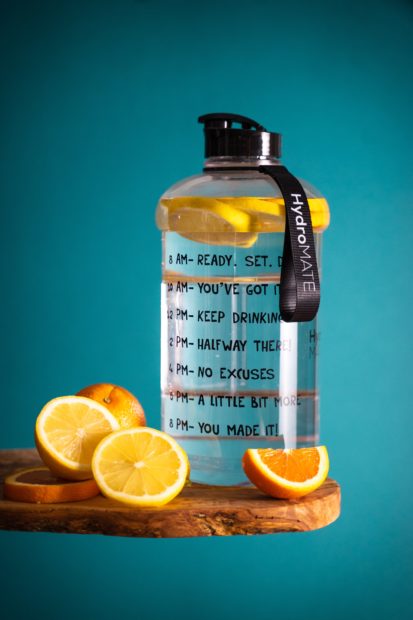
Lifestyle Product Images
While a white background provides the most accurate color representation, it's not always the most visually appealing option. In some cases, a brand may want its product to be photographed in a natural environment or as part of a lifestyle scene.
Lifestyle product photography is all about showing the product in use. This could mean taking pictures of someone wearing jewelry or using a laptop on a desk. It could also be something more abstract, like a close-up of a pair of shoes against a concrete wall.
The key is to make the product the star of the show while still incorporating it into a realistic setting. These images make for perfect social media posts as they help potential customers visualize themselves using the product.
Note that some lifestyle product shoots might still require a white background. In these cases, the artistic background is added in post-processing using Photoshop or a similar program.
How to Create and Pitch a Storyboard
If you're working with a brand that wants lifestyle product images, discussing the specific vision for the shoot beforehand is important. This way, you can ensure that you have the right props and set up the scene just as the client wants it. It also enables you to express your creative ideas and get feedback before the shoot takes place.

The best way to communicate your vision is through a storyboard or concept. This is simply a series of sketches or images that show what the final photo will look like. You can use real-life examples or create something from scratch.
Creating a storyboard or concept for a company starts with understanding the company's brand guidelines. These guidelines will provide you with information on the company's values, mission, and target audience. With this knowledge, you can begin brainstorming ideas for your storyboard or concept.
Once you have a few ideas, it's time to start sketching or gathering visual references. If you're creating a concept from scratch, try to devise a clever way to incorporate the product into the scene. The goal is to make the product look natural and unobtrusive.
Once you have your storyboard or concept ready, it's time to pitch it to the client. It can be done in person, over the phone, or via email. Explain your thought process behind the shoot and how it will help the company achieve its goals.
Best Cameras to Use for Product Photography
Product photography requires a few different things from a camera. First and foremost, you need a camera that can produce high-quality images. You might say: "duh, all cameras do that these days." But not all cameras are created equal.
Some have better sensors than others, which means they can capture more detail and produce sharper images. Thus, you'll want to ensure you're using a camera with a suitable sensor. Another critical factor to consider is the lens. For product photography, the optimal lens depends entirely on the subject matter. Here are a few examples:
Small Products:
Jewelry, food, and cosmetics will all require a macro lens to get a close-up shot. Macro lenses are designed to capture small objects with great detail, as they have a very short minimum focusing distance.
Large Products:
If you're shooting something like furniture or cars, you'll need a wide-angle lens to get everything in the frame. Wide-angle lenses have a large field of view, perfect for shooting large subjects.
Models:
In the case of clothing or mannequins, you'll want to use a lens that can capture the whole outfit in one frame. This could be anything from a 35mm lens to an 85mm lens, depending on how far away you are from the subject.
Reflective Products:
Glassware and metal objects require a unique lens to prevent glare. These lenses, called anti-reflective or AR lenses, have a special coating that helps reduce the amount of light reflecting off the object's surface.
Your camera should also be manually adjustable, as you'll need to control the aperture, shutter speed, and ISO. Aperture controls the amount of light that enters the camera, while shutter speed determines how long the sensor is exposed to light. ISO specifies how sensitive the sensor is to light.
You'll generally want to use a low ISO (around 100-400) to prevent graininess. A higher aperture (around f/8-f/11) will ensure the whole image is in focus, while a slower shutter speed (1/60th of a second or slower) will help prevent blurriness.
Of course, these settings will vary depending on the lighting conditions and the subject matter. So, it's essential to experiment and find what works best for you.
Conclusion
Photography is a complex craft that takes years of practice to master. However, with the right camera and a bit of creativity, anyone can take great product photos. Remember to keep the company's branding in mind, use an appropriate lens, and adjust the settings until you find what works best.
If you want to learn more about the art of commercial product photography, check out CreativeLive's on-demand courses. Taught by renowned photographers, these classes will help you take your product photography to the next level.