
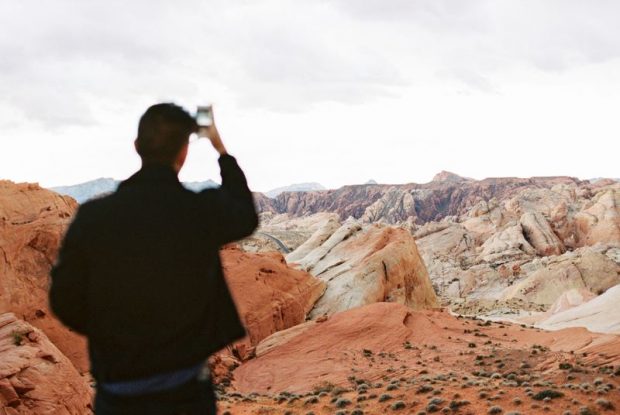
 The phrase isn’t just an advertising gimmick -- more people take photos with an iPhone or smartphone than a camera from any other brand. The iPhone is one of the most used cameras not because it can outperform a DSLR, but because with smartphones, anyone can take a photograph. But just because a three-year-old could take a photo with an iPhone doesn’t mean your photos should sit on the same level as a child’s crayon drawing. Use these six iPhone photography tips to create great photos with the camera you already have in your pocket.
Know your iPhone’s strengths and weaknesses.
Every camera has strengths and weaknesses -- understanding what your gear can do and what it can’t is essential. The iPhone is a good camera because you can take it anywhere, easily. With iPhoneography, you're more likely to have a camera ready when you're in the right place at the right time for an amazing image. The lens captures a nice wide view. iPhone users love the simple interface and editing without a computer. Smartphone companies also work to make up for what the devices can’t do with software, like HDR, and, for dual lens smartphones, artificial background blur. Like any smartphone though, the iPhone doesn’t offer the same level of control as a DSLR. The lens is fixed, which means there’s no optical zoom or aperture setting. The smaller sensor means the iPhone isn’t ideal for giant prints and you can't get the same bokeh as in professional photos. Heavy use of the iPhone camera can also drain the battery quickly.
Understanding the camera you already have is the first step to taking better photos. Along with knowing those general pros and cons, make sure you’re familiar with what your particular camera model can do. Apple introduced dual lenses with the iPhone 7 Plus, which gives the plus models several photo-related advantages. The iPhone X, for example, has an excellent portrait mode and can even generate artificial lighting effects. Older models like the iPhone 5S may not have all the features as the newer Apple models.
Like any smartphone though, the iPhone doesn’t offer the same level of control as a DSLR. The lens is fixed, which means there’s no optical zoom or aperture setting. The smaller sensor means the iPhone isn’t ideal for giant prints and you can't get the same bokeh as in professional photos. Heavy use of the iPhone camera can also drain the battery quickly.
Understanding the camera you already have is the first step to taking better photos. Along with knowing those general pros and cons, make sure you’re familiar with what your particular camera model can do. Apple introduced dual lenses with the iPhone 7 Plus, which gives the plus models several photo-related advantages. The iPhone X, for example, has an excellent portrait mode and can even generate artificial lighting effects. Older models like the iPhone 5S may not have all the features as the newer Apple models.
Join Pei Ketron, well-known photographer, educator, speaker and iPhone expert as she guides you through how to maximize your photos using your iPhone.

Tap to focus, drag to brighten.
One of the perks of the iPhone is that big touchscreen. But the touchscreen also leaves some features hidden because there’s no actual label for them on the screen. You can adjust both the focus and the exposure (how light or dark the image is) by tapping on the screen. First, tap the object or person that you want to focus on. Once the camera focuses, you’ll see a yellow box on that spot with a yellow sun next to it. To adjust the exposure, tap on that sun and drag your finger up to brighten the image or down to darken it.
HDR is your friend.
HDR is an effect built into your phone that does instantly what it would take a few minutes with a DSLR and editing software. HDR, or high dynamic range, essentially captures a wider range of light than a single photo. That means the lightest parts won’t be so white and the darkest parts won’t be so dark. Use HDR anytime you are photographing a high contrast scene, which is pretty much any shot where you include a sky or window. Turn it off for action shots, though -- it's a mode best for still life and landscape. The process actually merges multiple photos together, so the mode doesn’t work well for moving subjects. The HDR effect is easy to turn on and off by tapping the HDR icon at the top of the camera app.Force a flash in crappy light.
The flash on a smartphone is often better left off because of the harsh shadows that tiny light creates. But there is a good reason to turn that flash on and it’s in a scenario where most don’t realize a flash is actually helpful: extreme bright light. If you’re outside in the sunshine and you’re taking a photo of someone and the sun is making dark shadows under their eyes, turn the flash on. (Auto will only fire if the scene looks dark). The flash will fill in the shadows, and since you’re already in a bright light anyway, it will hardly look like you used a flash at all.Join Pei Ketron, well-known photographer, educator, speaker and iPhone expert as she guides you through how to maximize your photos using your iPhone.
Use advanced photography apps for striking results.
One of the biggest perks to smartphone photography is software. If you’re using only the native camera app, you’re not taking advantage of one of the iPhone’s biggest advantages. Download an app with advanced camera options to find more features than what’s in Apple’s basic app. Often, these apps are the same ones that you can use to edit your photos. Some of the best options include Adobe Lightroom CC, VSCO, Pro Cam and Moment Pro. Inside an advanced camera app, turn on the option called RAW or DNG. (The feature is available with iOS 10 or later and models since the iPhone 6S). This is a file that carries more information than the usual JPEG. That means you have much more flexibility when you edit the photo than if you leave that option off. The downside is that you will have to do some post-processing to the images, and they'll also take up more space on your iPhone. Be sure to look around the app for other specialty modes -- for example, the Lightroom mobile app has an option to photograph long exposures. HDR modes are also often part of these apps. Advanced camera apps will also allow you to have the most control over the settings. With some reading up and practice on exposure settings, you can adjust the shutter speed and ISO yourself to create intentional blur, eliminate blur, or create the mood you want by intentionally shooting a darker or lighter image.
Expand your iPhone photography with lenses and lights.
iPhone photography doesn’t mean you have to shoot with just an iPhone. The smartphone’s popularity means there’s no shortage of accessories to help you capture the shot. Lenses will create more flexibility than the camera can offer alone. A telephoto lens will get up close and also create more of that softer background that’s difficult for smartphones to capture. But you can also go even wider with an ultra-wide angle lens. A macro lens allows for great close-ups, often even closer than you can get with a DSLR because of that smaller sensor. An iPhone photography light can also step up the quality of your images by allowing you to control the light in the scene. Mini tripods can also be helpful for taking a selfie without that telltale arm extended, or trying out that long exposure mode available on some apps. The iPhone camera has been everything from the launching point of a full-blown photography career to a memory keeper for those everyday moments. By integrating a few photo tips, you can get the most from the camera you already own -- and maybe enter the annual iPhone photography awards. Remember, the best iphone photography isn't about gear, but about what you're able to capture with it.Join Pei Ketron, well-known photographer, educator, speaker and iPhone expert as she guides you through how to maximize your photos using your iPhone.