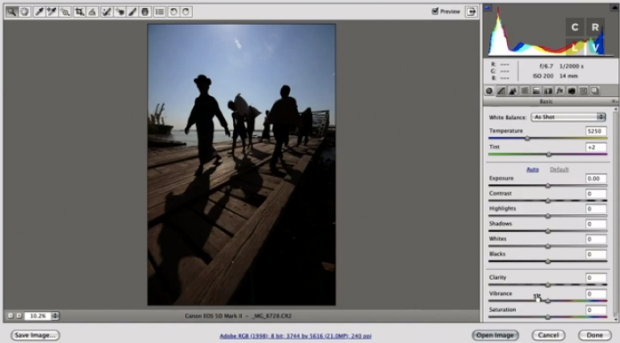
In photography, no matter how you phrase it, the irrevocable objective of each click of the shutter is to “get it right in camera.” In fact, making an argument for the contrary would prove difficult. Unless composites or HDR images are a big part of your workflow, having the right exposure, composition, crop, and so forth at the time of capture is essential to higher efficiency come post-processing.
There are many ways to get your image just right in-camera. Exposure wise, many artists rely on a quick glance at the rear LCD for verification of a properly exposed shot. However, depending on ambient conditions, camera LCDs can be deceiving. By the time you’ve gone home and downloaded the images onto your computer, it could be too late.
Enter the histogram.
To underestimate and simply overlook the importance of knowing how to properly read histograms is a disservice to your photography. Much can be learned about the initial steps to editing an image by understanding the histogram. If the image looks too dark or too bright, knowing whether to adjust the blacks and shadows versus whites and highlights can greatly improve your chances of bringing out the desirable exposure.
So where do we start?
Ben Willmore, Photoshop instructor extraordinaire, provides a quick explanation on the
CreativeLive YouTube channel.
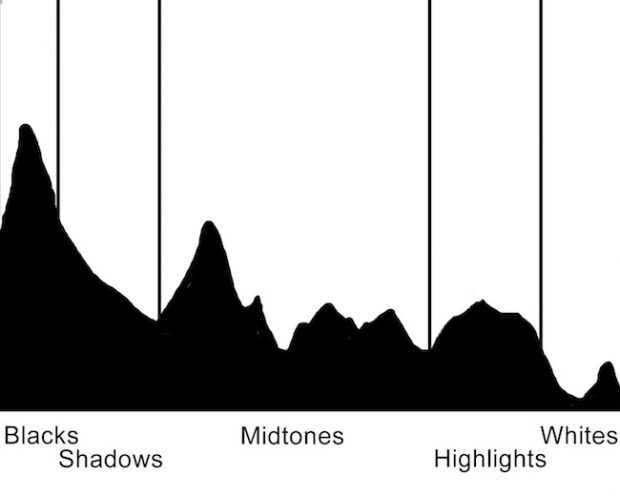
The rightmost side of the histogram represents the whites (or highlights) of the image; the leftmost side, the blacks (or shadows):
“Spikes,” or high value,s on either side can mean lost information or unrecoverable data in the respective zone:
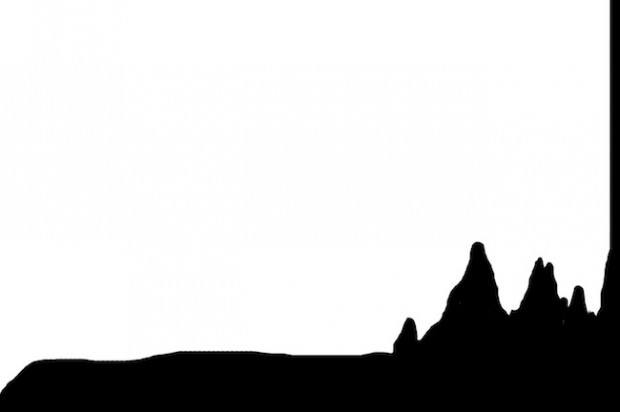
Any gaps between the histogram itself and the upper or lower limit of the graph (a part of the histogram seems to be chopped off) indicates the need to adjust exposure as a whole:
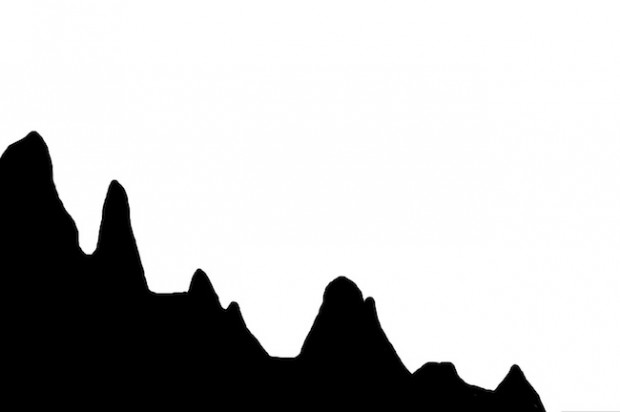
If there are no gaps, then a histogram with a spike on the left means you need to adjust blacks; a spike on the right, whites.
Dull-looking images, indicated by a histogram that’s clumped together towards the middle (no true blacks or whites), could mean the need to increase contrast which will make the highlights brighter and the shadows darker:

Remember that shooting RAW will give you the most latitude with exposure, whereas jpegs are limited to already-compressed data. And while there is no “right” shape for any given histogram, having a better grasp of the important information histograms provide will be an asset to your creative process.
For more tips from Ben, don't miss
Photoshop for Photographers: Beyond the Basics on CreativeLive.
 In photography, no matter how you phrase it, the irrevocable objective of each click of the shutter is to “get it right in camera.” In fact, making an argument for the contrary would prove difficult. Unless composites or HDR images are a big part of your workflow, having the right exposure, composition, crop, and so forth at the time of capture is essential to higher efficiency come post-processing.
There are many ways to get your image just right in-camera. Exposure wise, many artists rely on a quick glance at the rear LCD for verification of a properly exposed shot. However, depending on ambient conditions, camera LCDs can be deceiving. By the time you’ve gone home and downloaded the images onto your computer, it could be too late.
Enter the histogram.
To underestimate and simply overlook the importance of knowing how to properly read histograms is a disservice to your photography. Much can be learned about the initial steps to editing an image by understanding the histogram. If the image looks too dark or too bright, knowing whether to adjust the blacks and shadows versus whites and highlights can greatly improve your chances of bringing out the desirable exposure.
So where do we start? Ben Willmore, Photoshop instructor extraordinaire, provides a quick explanation on the CreativeLive YouTube channel.
The rightmost side of the histogram represents the whites (or highlights) of the image; the leftmost side, the blacks (or shadows):
 “Spikes,” or high value,s on either side can mean lost information or unrecoverable data in the respective zone:
 Any gaps between the histogram itself and the upper or lower limit of the graph (a part of the histogram seems to be chopped off) indicates the need to adjust exposure as a whole:
 If there are no gaps, then a histogram with a spike on the left means you need to adjust blacks; a spike on the right, whites.
Dull-looking images, indicated by a histogram that’s clumped together towards the middle (no true blacks or whites), could mean the need to increase contrast which will make the highlights brighter and the shadows darker:
 Remember that shooting RAW will give you the most latitude with exposure, whereas jpegs are limited to already-compressed data. And while there is no “right” shape for any given histogram, having a better grasp of the important information histograms provide will be an asset to your creative process.
For more tips from Ben, don't miss Photoshop for Photographers: Beyond the Basics on CreativeLive.