
Music has been a part of human culture for thousands of years. In the past, music was primarily created and experienced through live performances, whether it was an opera singer performing in front of a large audience or a street musician playing for passersby. While live music is still popular today, the rise of technology has allowed music to be created and experienced in new ways.
The turn of the 20th century saw the development of new technologies that allowed music to be recorded and played back. This was a game changer for the music industry, allowing musicians to create and distribute their music to a broader audience.
Nowadays, anybody with a computer and the right software can produce professional-sounding music. The world of music production to anyone with the creativity and passion to make their own songs.
Keep reading to learn about the different aspects of music production and how you can produce your songs like a pro.
What Are the Recording Devices Needed?
First of all, you need to understand the different recording devices available and how they work. Depending on your goals, skill level, and budget, you can either buy professional equipment or use the built-in microphone and recording software on your computer. Alternatively, you could pay for studio time, where you can use high-end equipment and get help from a sound engineer.
However, this avenue is typically reserved for paid professional musicians, as studio time can be quite expensive. For the DIY music producer, setting up a home studio is the way to go. Here's what you need to get started:
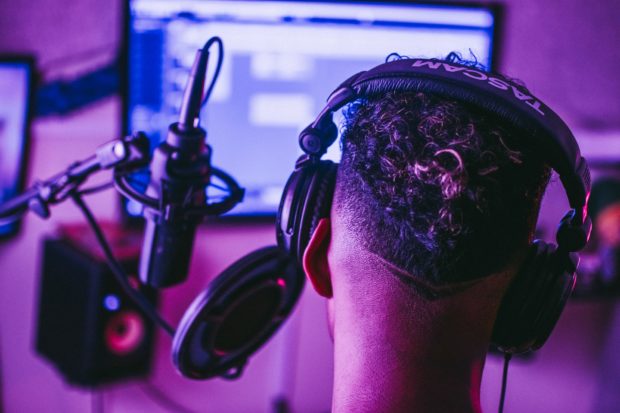
Microphone
The single most important piece of equipment for recording music is a microphone. A microphone converts sound waves into electrical signals, essentially capturing the sound of your voice or instrument.
Many different types of microphones are available on the market, including USB microphones, condenser microphones, and dynamic microphones. We recommend taking a trip to your local music store to try out each type to see which one suits your needs best.
Microphone Stand
Once you have your microphone, you'll need a stand to hold it in place. Holding it in your hands is possible but not recommended as there is no way to keep your hands completely still while you're singing or playing an instrument. The stand also allows you to move around while performing, giving you more freedom of movement.
Pop Filter
Another essential piece of equipment for recording vocals is a pop filter. A pop filter helps to reduce the amount of 'plosive' sounds (sounds made when air is released from the mouth, such as 'p' and 'b' sounds) that the microphone can pick up. This results in a cleaner recording with less unwanted noise.
Audio Interface
Unless you opt for a USB microphone (which isn't the highest quality), you'll need an audio interface to connect your microphone to your computer. The audio interface converts the analog sound signals from the microphone into digital information that your computer can understand.
Most audio interfaces will also have built-in preamps, which help boost the microphone's signal before it reaches the computer.
Computer
Of course, you'll need a computer to run your recording software and store your recordings. Any laptop or desktop computer should be powerful enough to run music production software. However, we recommend opting for a computer with a faster processor and more RAM if you can afford it, as this will help the software to run smoother.
Cables
You'll find that your home studio quickly becomes a web of cables connecting all of your equipment. Make sure you have the right cables to connect your audio interface to your computer and any other equipment you might be using.
The most common type of cable used in home studios is an XLR cable, which connects microphones and audio interfaces to other devices.
Acoustic Panels & Bass Traps
Even the best mics will pick up a fair amount of background noise, such as the sound of your computer fan or outside traffic. This noise can be reduced by using acoustic panels and bass traps, which help to absorb sound waves and prevent them from bouncing around the room.
Acoustic panels are typically made from foam or fiberglass and can be placed on walls or ceilings. They pick up high-frequency sounds, such as sibilance and cymbals. Bass traps are designed to absorb low-frequency sounds such as the rumble of a fridge or the sound of footsteps.
Headphones
To monitor your recordings, you'll need a good pair of headphones. Avoid using the earbuds that came with your phone, as these will not give you an accurate representation of the final result. Instead, opt for a pair of closed-back over-ear headphones, which will block out any external noise and give you a clear idea of what your recording sounds like.
Some people prefer open-back headphones as they provide a more natural listening experience. However, these are not ideal for recording as they will leak sound and pick up any external noise, which can be distracting.
Studio Monitors
Studio monitors are speakers that are specifically designed for monitoring recordings. They provide flat frequency response, meaning that they accurately reproduce the sound of your recording without adding any coloration or distortion.
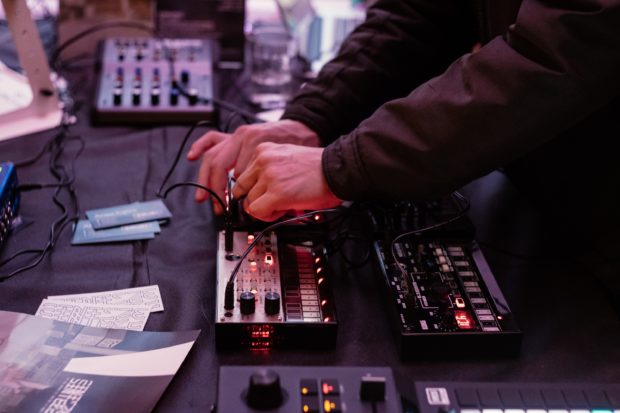
Music Production Software
After you've purchased all of the necessary hardware, it's time to start thinking about which music production software you want to use. Various programs are available, ranging from simple, entry-level tools to more complex ones that offer a wider range of features. These programs act as a DAW or digital audio workstation.
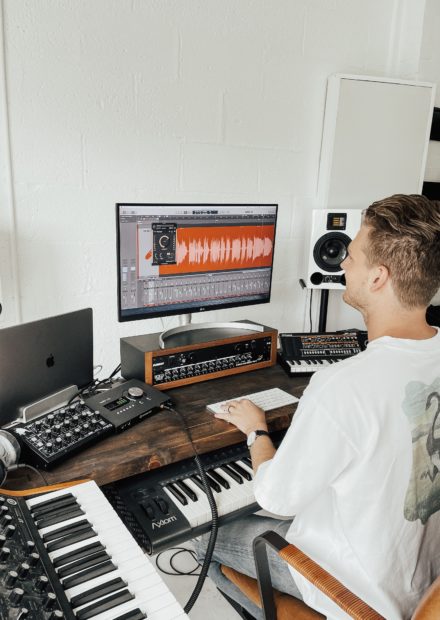
What is a DAW? (Digital Audio Workstation)
A digital audio workstation (DAW) is a software program that allows you to record, edit, and mix audio. Most DAWs will also come with a wide range of built-in plugins and effects that you can use to enhance your recordings.
They might vary in terms of features, but most DAWs will allow you to do the following:
Record audio: This can be done either via a microphone or by connecting an instrument directly to your computer.
Edit audio: Once you've recorded your audio, you can edit it to tighten up the performance or remove any unwanted noise. Cutting and splicing sections of audio together is also possible.
Mix audio: This involves adjusting the levels of each track, as well as adding effects such as EQ, compression, and reverb.
Export audio: Once you're happy with your recording, you can then export it as an MP3 or WAV file.
Here are the most popular DAWs on the market:
Ableton Live
Ableton Live is a popular DAW used by bedroom producers and professional musicians. It's known for its ease of use and intuitive interface and comes with a wide range of built-in plugins and effects.
The German product is known for its effects racks and live mode, which allows you to trigger loops and samples in real-time.
Logic Pro
Used primarily on Apple's macOS operating system, Logic Pro is a powerful DAW. Logic Pro is considered a step above Apple's GarageBand in terms of features and functionality. Logic is a great choice for those who are serious about music production. Learn more about it here.
GarageBand
GarageBand is an excellent choice for beginners just starting in music production. It's an entry-level DAW that is simple yet still packed with features. GarageBand comes free with every new Mac computer, making it an affordable option for those on a budget.
However, it should be noted that GarageBand is not as complete as some of the other DAWs on this list.
Audacity
Over twenty years later, Audacity is still one of the most popular DAWs on the market. It's free to download and use, making it a great choice for those on a budget. Audacity is also available for both Windows and macOS, as well as Linux.
How to Layer Music and Record Multiple Instrument Tracks
That's it! You're officially ready to produce your own music. Most songs nowadays, except for maybe singer-songwriter-type songs, have multiple layers of music. By layering different tracks, you can create a richer, fuller sound.
To layer tracks, you will need to record each channel separately. For example, if you want to layer a guitar and a keyboard, you must register the guitar first, then the keyboard. The same goes for your voice.
You can use a microphone to record both acoustic and electric instruments. If you're recording an electric instrument, you will need to use an instrument cable to connect it to your audio interface.
Once you have recorded your tracks, you can start mixing them.
What is Looping?
Looping is a music production technique that involves recording a section of audio and then playing it back on repeat. You can use looping to create anything from simple drum beats to complex melodies.
Instead of recording an entire song, you can record each section of the song separately and then piece it all together. It will ensure accuracy and save you time in the long run. You can use a DAW or a looper pedal to loop a section of audio.
What is a Sample?
In music production, a sample is a piece of audio recorded from another source. Samples can be anything from a drum beat to a melody to a vocal recording. Samples are often used in hip hop and electronic music. They allow producers to create new sounds without recording everything from scratch.
However, beware of copyright laws when using samples in your music. If you use a sample without permission, you could be sued for copyright infringement.
Where Can I Browse Samples?
There are a few different places where you can browse and download samples. Splice is a popular option, as it offers a wide range of high-quality samples. Google is also an excellent place to look, as many free sample packs are available for download. Just make sure to check the copyright laws before using any samples in your music.
Note that if you don't plan to use your music for commercial purposes (i.e., just for fun), you can get away with using copyrighted material.
How to Record a Song and Upload it to Spotify, iTunes, or Soundcloud
Finally, you're ready to share your music with the world. The next step is to export your song as a .mp3 file. This format is widely accepted by all major music streaming platforms, such as Spotify, iTunes, and SoundCloud.
Once you have exported your song, simply upload it to your chosen platform and start sharing it with your friends and fans. These platforms make it easy to share your music, as it's usually done with just a few clicks.
And that's it! You now know how to produce a song from start to finish. So what are you waiting for? Master your craft with CreativeLive, get out there and start recording!