
You have your subject, you have your digital camera, and you want to take complete control over your photograph with the correct exposure. Whether you're shooting portrait or landscape photography, understanding exposure is critical in order to get the best in-camera shot possible.
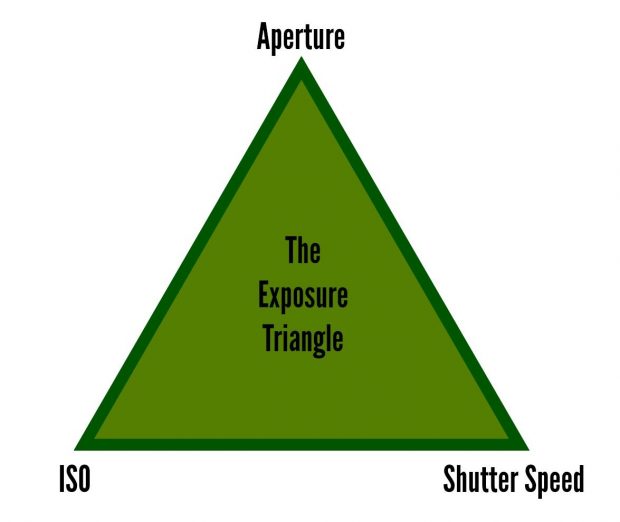
Simply put, exposure is light striking a sensor (or if you’re going old-school, a frame of film). Having good exposure can make or break an image so is critical to get right. You control exposure with three parameters: aperture, shutter speed and ISO. This is what’s called the Exposure Triangle:
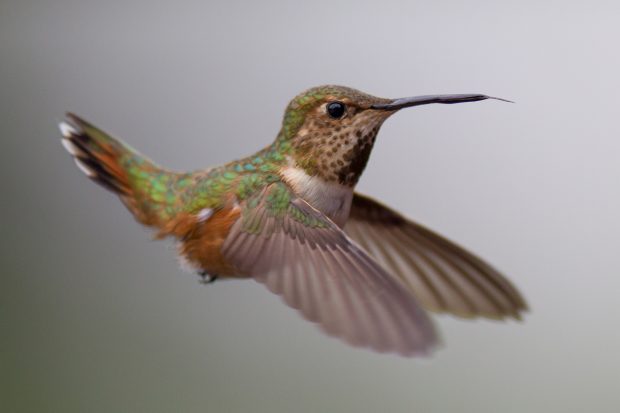 1/2000 sec; f/2.8; ISO 800 Canon 7D; EF300mm f/2.8L IS USM
Your choice of shutter speed comes down to what you want in your picture. Do you want your subject to be frozen so that you can clearly highlight areas of detail? Or do you want something more abstract, where motion blur reveals movement? Remember, fast shutter speeds mean less time for the light meter to hit the sensor, so the faster the shutter speed the less light available for the image. A slow shutter speed or longer shutter speed will have the opposite effect. If fast is necessary, then aperture and ISO are on your side to help obtain the image you desire.
1/2000 sec; f/2.8; ISO 800 Canon 7D; EF300mm f/2.8L IS USM
Your choice of shutter speed comes down to what you want in your picture. Do you want your subject to be frozen so that you can clearly highlight areas of detail? Or do you want something more abstract, where motion blur reveals movement? Remember, fast shutter speeds mean less time for the light meter to hit the sensor, so the faster the shutter speed the less light available for the image. A slow shutter speed or longer shutter speed will have the opposite effect. If fast is necessary, then aperture and ISO are on your side to help obtain the image you desire.
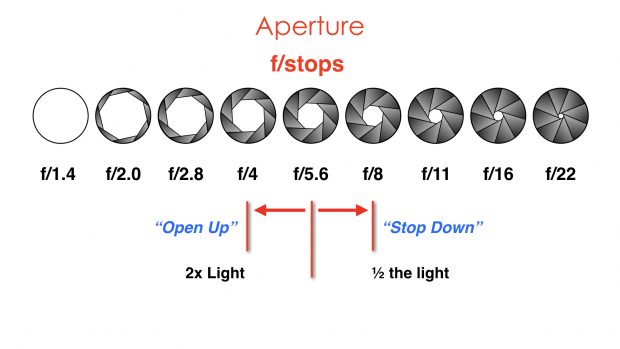 When you change the size of the aperture opening in the aperture settings (larger aperture vs. a smaller aperture), you change the amount of light and also alter the path that the light travels. This changes how much of the scene will be rendered sharp and in-focus. The in-focus area is defined as the depth of field. A shallow depth of field isolates a focused area from the rest of the background, a large depth of field will show most of the scene in focus. Depending on how you want your image to look while still allowing what you deem is the right amount of light to hit the sensor is where you’ll find the aperture settings playing a role in your artistic vision. Aperture priority will allow you to manually control the aperture settings yourself.
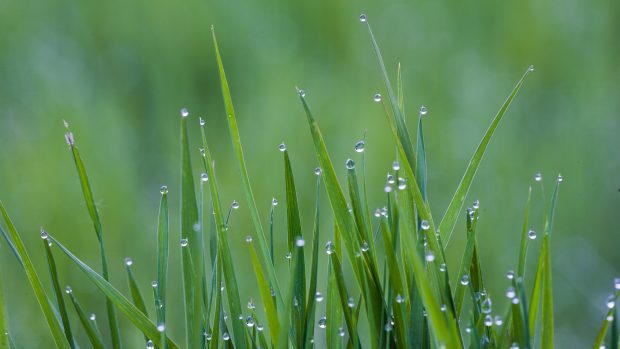
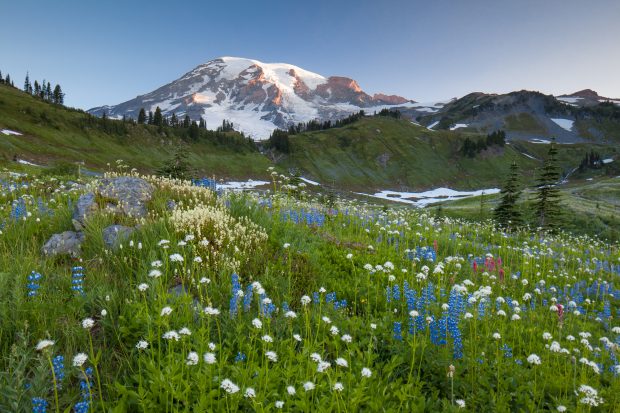 Minimum depth of field vs maximum depth of field

By adjusting the exposure settings, we can change our exposure to make the image brighter or darker. It's important to be in manual mode in order to have more control over these settings (and understand them better). However adjusting any one of these controls not only makes the image brighter or darker, it changes some other aspects of the image as well.
Let’s get into some detail of each:
Shutter Speed
Shutter speed is the measure of time that a sensor or frame of film is exposed to light. By controlling how long you blast light into your camera, you decide how time is stopped in that final image. The difference between a hundredth of a second and a thousandth of a second can be the difference between getting an epic shot and not getting a usable image at all.
1/2000 sec; f/2.8; ISO 800 Canon 7D; EF300mm f/2.8L IS USM
Your choice of shutter speed comes down to what you want in your picture. Do you want your subject to be frozen so that you can clearly highlight areas of detail? Or do you want something more abstract, where motion blur reveals movement? Remember, fast shutter speeds mean less time for the light meter to hit the sensor, so the faster the shutter speed the less light available for the image. A slow shutter speed or longer shutter speed will have the opposite effect. If fast is necessary, then aperture and ISO are on your side to help obtain the image you desire.
Aperture
The opening of the lens, otherwise known as the aperture, is both a technical and artistic tool for you as the photographer. By deciding 1) what lens to shoot with 2) what focal stop (f-stop) you prefer and 3) how far you want to be from your subject, you’ll be controlling the exposure and depth of field of the photograph.
When you change the size of the aperture opening in the aperture settings (larger aperture vs. a smaller aperture), you change the amount of light and also alter the path that the light travels. This changes how much of the scene will be rendered sharp and in-focus. The in-focus area is defined as the depth of field. A shallow depth of field isolates a focused area from the rest of the background, a large depth of field will show most of the scene in focus. Depending on how you want your image to look while still allowing what you deem is the right amount of light to hit the sensor is where you’ll find the aperture settings playing a role in your artistic vision. Aperture priority will allow you to manually control the aperture settings yourself.
Minimum depth of field vs maximum depth of field