Flash photography
It can be many things to those who have not dabbled. It can be impressive, cumbersome, or frightening to learn about. Sometimes it can be all three at once. When you get started, it can take a while to grasp how it all works. However, if there’s one thing that will improve your flash photography, it is knowing when and why to flash.
Today we’ll be talking about using flash on location and why you might want to drag all that heavy equipment on location with you. Of course, flashes are also used in studio and even on top of the camera, but here we’re specifically looking at using your lights on location to create dramatic effect. This can be extremely powerful and here are a few reasons why you may find it worthwhile.
Before we get started, let’s consider one very important point. In the days of slow film, flashes were oftentimes necessary to simply get an exposure on film. However, the digital cameras we use now are so sensitive to light that we rarely, if ever, need to increase the quantity of light. We will be approaching flash photography from the perspective of improving the quality of our light. That distinction is a simple, but very powerful one.
So, let’s jump on in an find out why we flash?
Are you ready for the biggest Photoshop event of the year? Join CreativeLive for Photoshop Week 2018 to learn how to produce professional quality photos and reach your full creative potential. RSVP Today.
To Give Direction
A cloudy day can be a fantastic time to shoot portraits of people. The soft, enveloping light offers a flattering space to place a person and focus solely on their expressions without having to worry about exactly how the light falls.
Now take that same person and day, but move your subject next to a window. By doing so, you have that same soft light but it has direction. When placed to one side, the window gives the face shape.
We can achieve this same effect by placing a flash next to our subject instead of a window. Anywhere at any time of day, we can achieve window-style light with a flash in a large modifier. In fact, the flash offers another level of control as we are able to adjust its power.

To Create Separation
One of the basic tools we can use to give the illusion of three dimensionality and allow our viewers to perceive depth or separation between objects is contrast. This can be a contrast of focus, sharpness, or even a conceptual difference. It can also be light. Warm light in a cool scene creates separation, as does hard light in a soft scene. The color and contrast of the light we introduce can bring our subjects off the background for our viewers.
In the example below, I used a single speedlight to camera left to bring about some additional contrast on my model. The post sunset light was warm and enveloping, but offered very little to lift the subject off the background. A one stop under-exposure on her coupled with a small pop of flash did the trick in no time at all.

To Create Drama
As I mentioned before, flash can give you another level of control. Even one flash can give you the ability to have great control over the brightness of your background. As we know, increasing contrast increases the dramatic nature of an image and we can use this to create a whole new mood for an image.
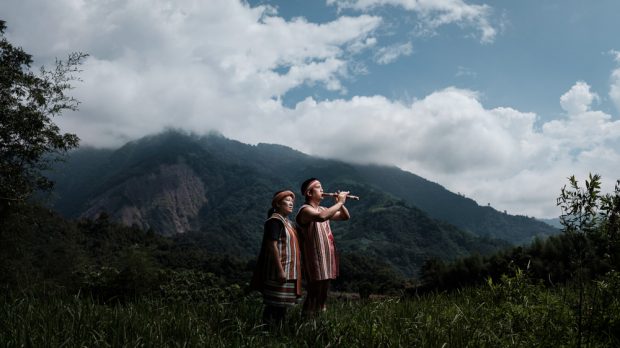
Let’s say, for example, that we have a couple standing on an open field with storm clouds behind. If we expose for the couple, we end up blowing out the clouds and losing that drama. If we expose for the clouds, we plunge our couple into shadow but keep the drama. Let’s say we take this ‘underexposed’ image and add a flash to illuminate our couple. Now we have a very dramatic image that separates itself slightly from reality, and from the crowd of photographers who may be shooting on that day.

Join us to learn everything Photoshop during Photoshop Week 2018 with 20 seasoned experts from the field. RSVP Today.
To Freeze Motion
Here is one property of flash that we can exploit to our advantage, especially if we are using speedlights or larger flashes with short flash durations. The burst of light that leaves the flash unit can be much faster than your shutter and allow you to freeze motion you couldn’t otherwise freeze.
You can use this creatively as well as functionally. By ‘dragging’ your shutter (making a long exposure) and allowing motion in your frame to blur before popping a flash, you can allow motion to first record on your sensor and then freeze objects of your choice at the last minute.

To Clean up the Existing Light
One of my favorite ways to use flash is quite subtle. Sometimes, I love the quality of light hitting my background, but don’t like the way that same light hits my subject. In this case, I actually like to replace the existing light with my own. Allow me to explain.
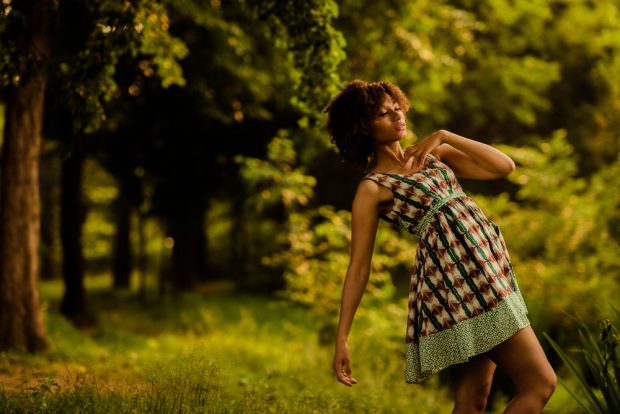
In the scene below, the dappled light of the afternoon looks fantastic on the foliage in the background. The patches of light and dark allow our eyes to explore the scene. However, this same light on my subject wasn’t really working for me. In this case, I used my Westcott Apollo Orb to shade the model, and then popped a flash inside it to make up for the lost light on her. This changed the quality of the existing light (the sun) without changing it’s quantity and made for a much more flattering picture.

The Wrap
In all of these, we are improving the quality of light, not the quantity. By choosing how we want to expose existing light and then adding flash, we are exercising control over our scene in a different way than we can with just the simple exposure triangle.
Of course, these are only a few of the possibilities we can explore when using flash off camera and outdoors. To take a deeper dive and learn even more about the technique of working outdoors with flash, check out Mike Hagen’s classes.
Are you ready for the biggest Photoshop event of the year? Join CreativeLive for Photoshop Week 2018 to learn how to produce professional quality photos and reach your full creative potential. RSVP Today.


