

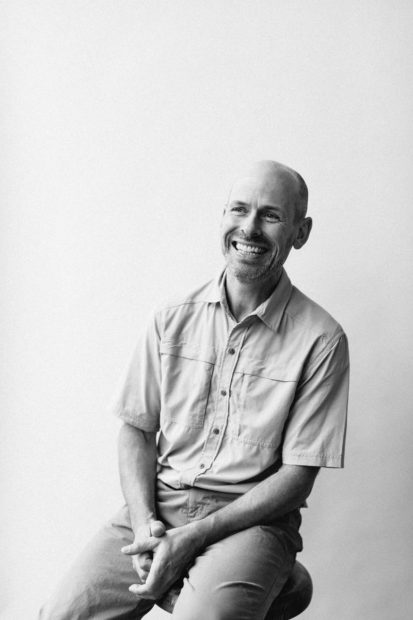
When most people ask me questions about print or digital photography, I quickly realize that they think that all I do is grab the camera, point it at something until that something looks pretty, and then press the shutter button. If you’re just getting into photography, you might think that too. And you know what? That’s OK.
There’s more to photography than clicking a button, though, and it all depends on two things: light and technique. Light is the most important factor in any type of photography, but knowing different techniques on how to harness its power is an essential part of being a good photographer.
Here are some basic photography tips and techniques that you can play around with if you’re just starting out in the photography world.
The Photography Starter Kit for Beginners
By award-winning photographer, John Greengo
- Understand shutter speed, ISO and aperture and how they work together
- Utilize depth of field
- Learn to focus in manual mode
- Understand different types of lenses
- And much more
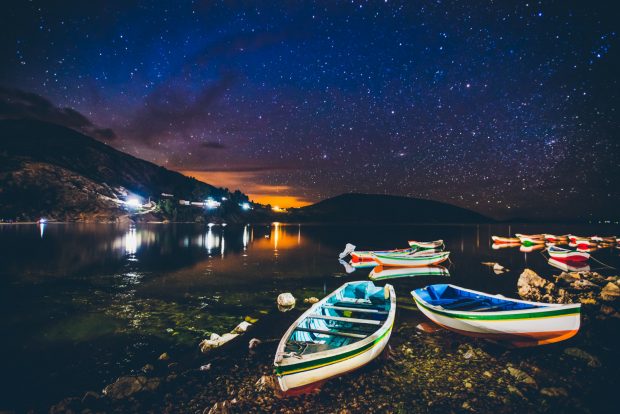
Long Exposure
One of the most versatile photography techniques to master is the long exposure. It can be used in numerous situations, either to create dramatic effect and show you something your eyes can’t see, or as a tool to better document exactly what it is you can see. The idea is that by leaving the shutter open for a longer amount of time, you let in more light and are able to catch where that light is moving to or from.
Things that are moving begin to flow, while things that are stationary stay that way. If you’ve ever seen images of waterfalls with that blurry, flowing water, that was done with an exposure of generally a half a second or longer. If you’ve seen images of stars, those images were usually taken at 15-30 second lengths.
Luckily, with modern digital cameras, you can play around with long exposures (or any of these techniques) and get instant feedback on how the image will turn out, without having to do the painstaking calculations that were prominent in the film days.
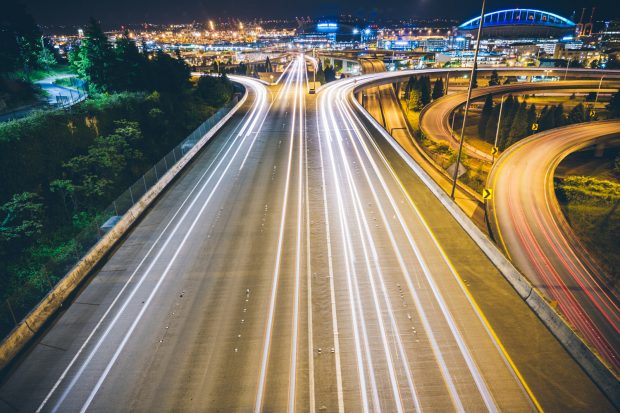
Tip: For long exposures in the daytime, you’re likely going to need a neutral density filter, which cuts down the amount of light entering your lens. A tripod is also a must, since any camera shake can ruin your shot.
Motion Blur
Related to the long exposure is the idea of “motion blur.” With a long exposure, you need to put the camera on a tripod. In order to capture motion blur, the camera must move while you take the image.
Your shutter speed should be slower, but not to the extent of a long exposure. Whereas a long exposure could be a second, ten seconds, twenty seconds, etc., a photo with a goal of motion blur might be just 1/30 of a second, or even 1/60, or sometimes even 1/200, depending on what you’re shooting and how fast it’s moving.
The idea is to “pan” the camera along with your subject while the image is being captured, so that the subject appears more still relative to its surroundings. This takes a lot of practice and experimentation with a slow shutter speed, but the results can be interesting.

Macro
The term macro has always confused me. Macro photography refers to the photographing of small things. Tiny things. To me, that should be “micro,” not “macro,” but no one consulted me when coming up with the term. (FYI: Nikon’s macro lenses are called “Micro-NIKKOR.” Food for thought.)
In any case, macro photography is fascinating. In our human-oriented world, we forget that there exists an entirely different world on a much, much smaller scale, and by playing with macro photography, you can bring that world to life.
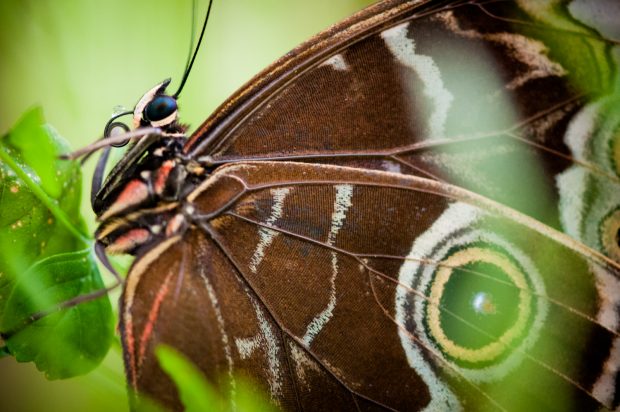
Macro work requires more specialized equipment than many other forms of photography. You’ll need a special lens — a macro lens — or a lens or camera with macro functionality.
If you’re starting on a point-and-shoot camera, look for a little icon of a flower on the camera. Turning that function on lets you focus at a closer distance to your subject, which is exactly what you need to do macro work.
A camera with a dedicated macro lens, however, will give you the best results. And not all macro lenses are created equal. Look for one with a 1:1 magnification or greater, and ideally, one with a larger focal length. I have a 105mm macro lens, which is fantastic, but there are also longer focal length macro lenses, which allow you to be less close-up from your subject.
This can be especially handy if your subject is a little skittish, such as a butterfly. There are also other macro-specific gear, such as extension tubes, reversing rings, macro-specific lighting, and more, but that’s something to look at once you’ve done all you can with the equipment you have.
Black & White
This one isn’t as much of a technique as it is a style, but there is definitely a technique to shooting good black and whites. With practice, you can start to turn off the “color” part of your vision, and just start to see light. It takes a lot of time to master black & white photography, surprisingly, if you started out shooting color. Many photography students are required to begin their coursework with black and white photography before adding in the color variable, and with good reason.
My best tip for getting good at shooting black and white photography, or for learning how to select which images you want to convert to black and white during post-processing in Photoshop (or Lightroom), is this: if your camera shoots in raw, you can most likely turn on a monochrome setting that allows you to see the images in black and white as you’re shooting.
If you have a mirrorless camera, you can do this and see the world in black and white in real time. This will quickly start to shift your mindset and allow you to more easily look for light instead of being distracted by color information. And by shooting in raw, once you get back to the computer, you’ll still have all of the color information at your fingertips. The monochrome image on the back of the camera is just a JPEG preview, but all of the color data is preserved. Give it a shot.
Light Painting
One of the most fun photography techniques is called “light painting.” The name photography itself breaks down, in the Greek, to “writing with light.” So, “painting” with light is a fairly accurate term for this technique.
To give light painting a whirl, you’ll need two things: a tripod, because this will be a long exposure, and a light source you can control, such as a flashlight, candle, glow stick, etc. Find a dark place (this is also a good opportunity to dabble with night photography), put the camera on a tripod, stop down the aperture to f/8 or smaller (you’ll have to play with the camera settings a bit), and then set the exposure to either bulb mode if you’re using a remote shutter release, or to a longer exposure of 15-30 seconds, depending on what you’re shooting and how you’re painting it. Then hit the shutter, and paint!
You can do this a couple of ways. The first is to aim the light back at the camera, and the other is to shine it on whatever it is you want to paint. Here are a couple of examples.
This will take lots of practice and patience, but the result can be fun.
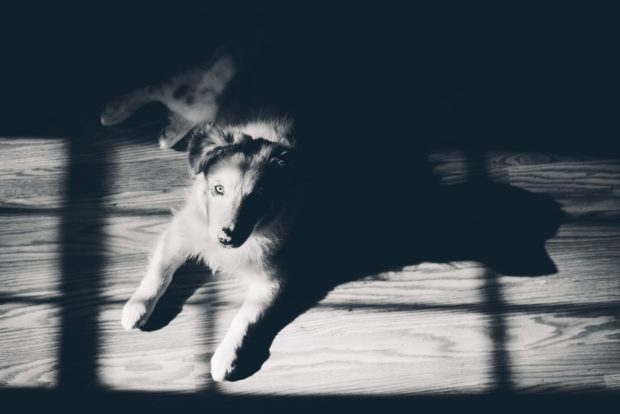
Silhouettes
Silhouettes have a rich history. They started out as paper cutouts and were an early form of faster, cheaper portraiture in the 1800s. Today, we can recreate their style easily with our cameras.
I always enjoy practicing silhouettes, though I don’t do it very often. In my client work, usually people want to see the subject, not just an outline of the subject, but throwing a silhouette into the mix can show that you’re able to think about the world a little differently, and knowing this technique can also help you translate what you’re actually seeing in the real world into a photograph.
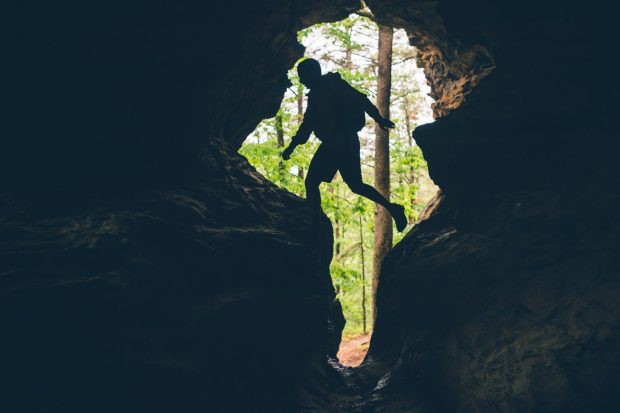
The basic technique is to place your subject against a brighter background, and expose so that the outline of the subject is dark against that background. Profiles of people work better than straight-on portraits when doing silhouettes, because you’re better able to see the outline of their face.
Combining Light Sources
One of the more complex photography techniques that you’ll start to experiment involves combining multiple sources and types of light. If you’ve used a camera flash, you’ve already done this — combining the flash’s light with the light of the sun, or the interior lights of a house, etc. Once you start to play with light, you can experiment even further with that idea. Mix a constant light source, such as a lamp, with the flash of a strobe. Use the flashlight in coordination with the light of the moon when doing a light painting. The potential for this is limitless, and when you master using different kinds of light in your images, you’ll truly be living up to the intentions of photography.
After you’ve mastered some of these techniques, the next step is to start combining them. Try long exposure photography, but turn it black and white. Do macro work, but as silhouettes. The combinations of techniques are endless in photography, and by learning and practicing these techniques, you can take your skills up a notch and begin to develop your own style.