
 Photography is a universal language. A way to share memories, fondly recall momentous events, and visually track the passage of time. But all too often our images don’t fully encapsulate the grandeur, emotion or authenticity of any given moment. Fear not; we’ve put together six simple, easy to remember tips, to help improve your photos in no time—no matter your camera or technical know how.
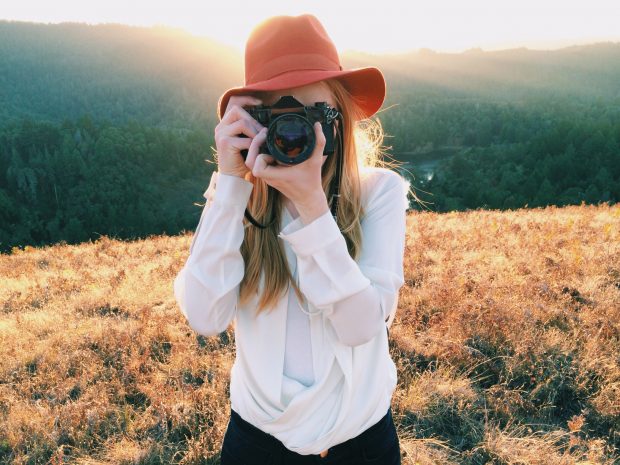
Problem #1: Blurry images
In order to capture vivid details of your subject, spend some time getting comfortable with your camera’s focus.- DO use manual focus to achieve razor-sharp details. If you’re starting out, first determine what you want to focus on while holding the shutter button down halfway. This will help inform the focal point of your photograph and determine where a viewer’s eyes will be drawn. By selecting a strong focus point, you’ll instantly transform your images resulting in both crisper and more visually powerful shots.
- DON’T let your camera decide what to focus on. It can be intimidating at first, but the best way to learn great focus is to shut-off auto mode and experiment with the settings yourself. A good rule of thumb is to focus at “double distance” -- twice as far as the closest object in your image.
Ready to focus? The CreativeLive class The Photography Starter Kit for Beginners will train your eye to locate what’s important in your photos in no time.

Problem #2: Uninspired compositions
Composition is the way in which varying elements of a photo are organized. If your photos feel underwhelming, take a new perspective on framing with these helpful pointers.
- DO master composition techniques like the rule of thirds to create a sense of depth and make your photos pop. To do this, mentally divide the frame into nine equal rectangles and align objects on an intersecting point. This is a quick way to create an unexpected and impactful visual.
- DON’T just place your subject in the middle of your frame and click. Instead, try moving your subject a little farther to the right or placing your subject within a natural frame like a doorway or tree. Experimenting with placement helps add depth to your images and oftentimes helps tell the greater story of time and place.
The CreativeLive class Composition Basics will arm you with effective techniques for composing better photos, including the rule of thirds, frame-within-a-frame and more.

Problem #3: Sheepish subjects
It’s natural for someone to feel self-conscious in front of a camera, so it’s important to make your subject feel as comfortable as possible. Posing subjects can be a daunting task for any photographer but with a few angle adjustments, you can put your subject at ease and capture flattering photos every time.
- DO photograph your subject at eye level for flawless compositions that flatter. By positioning your camera at the same level as your subject, you’ll create an intimate setting and ensure your subject looks their best. This may mean crouching down to capture a pet or child or stepping on a stool to reach your tallest friend. As the photographer, mimicking the desired facial expressions (smile if you want them to smile, for example) helps you coax the planned result from your subject, and simultaneously enriches your connection -- yielding stronger shots.
- DON’T photograph your subject from below to avoid emphasizing chins and noses. Not only will this be an unflattering angle, but it will draw your viewers’ focus to areas your subject would rather not have called to attention.
For more on these and other posing tricks check out CreativeLive’s Posing 101 Essentials, which will help ensure anyone you photograph will love the way they look.

Problem #4: Washed out photos
Even the most breathtakingly beautiful locations can look washed out or dull if you don’t know how to use light to your advantage.- DO use natural light as much as possible. If indoors, look for a bright window or soft, dappled light to create a striking contrast. Or, try shooting during the “golden hour” -- the hour before dawn or sunset -- for a beautiful, glowing effect.
- DON’T be afraid of harsh, midday light. If this is the only time you can shoot, there are ways to make it work. Look to your immediate environment for things like trees, buildings and window shades to naturally diffuse the light. It’s also a wonderful time to use backlight and capture silhouettes and capture a unique perspective.
In Natural Light with Sue Bryce on CreativeLive, learn to take photos confidently in any type of light without a hefty investment in equipment.

Problem #5: Obstructed views
- DO pick up your feet! If your subject isn’t where you want them to be (or if there’s a building or tree interfering with a view), use your body as a natural zoom to get the shot you want. Manually controlling the depth of field will give you control to capture a more captivating shot.
- DON’T buy a lot of expensive gear. Get better photos with the gear you have by learning where to stand to get the best possible photos. And don’t be afraid to take lots of images. By taking a lot of shots from myriad directions and distances, you’ll be able to revisit your work later, and learn what location worked best for the type of results you wanted to achieve.
Angling for that perfect perspective? Join National Geographic photographer Frans Lanting in The Art of Seeing to help train your eye to scout for ideal shooting locations.

Problem #6: Lack of control
- DO stabilize your camera with simple body adjustments. Hold your elbows close to your body or brace yourself against a wall. Once your camera is stabilized, you’ll eliminate any concern around the dreaded “camera shake” that can make a photo blurry even when a subject is standing perfectly still.
- DON’T forget to draw inspiration from other sources. It’s easy to get swept up in the technicalities of your camera and which lens to use for what effect. Sometimes the best way to gain more control in your craft is to temporarily step away. Take a class, read a photography blog or browse images from a photographer you admire. This is a great way to develop your eye and ultimately improve your own photographs.
Learn more strategies for clear, crisp photos in the CreativeLive class The Photography Starter Kit for Beginners.
Whether you aspire to be a professional photographer, are honing your craft or just love taking pictures of the people and places around you, CreativeLive is your one-stop shop for all things photography. With world-class instructors and more than 1500 courses, CreativeLive is always in the picture. Join us to learn more.