Lesson Info
1. Building Adobe Lightroom Presets
Lessons
Building Adobe Lightroom Presets
1:26:46Lesson Info
Building Adobe Lightroom Presets
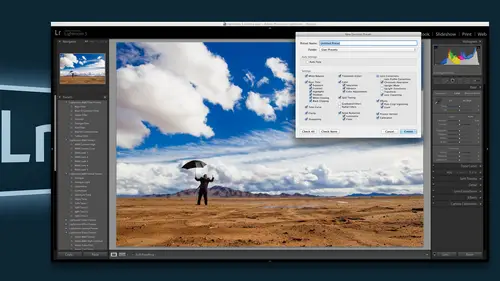
Jared platt is a photographer. He does wedding in lifestyle work out of arizona he's, an instructor who has been here on a number of times, he's a light room guru and is just going to break it down for us. So who's just taken away taken away well today in the segment, our goal is to discuss presets and I am a big big fan of presets. In fact, pretty much everything I do in the developed module is either done by presets or it's done in the basic module, so I do a little adjustment bring my images to normal and then I work on presets because presets are the best way of automating the process of getting the work done. The more clicks you make in light room, the longer it takes for you to do something and we want to do less clicks, therefore we use presets. So today, during the segment, we're going to talk all about building really great presets. We're also going to discuss some other presets like curve presets. We're going to discuss camera calibration, presets, things like that. So we're ...
going to talk about a lot of different presets inside of the developed module, those presets are going to change the way you work in light room, so whether you're a beginner, intermediate or advanced if you want to understand presets better and how to make them better and how to use them better. This is a good segment for you. Just tune into um so here we go. All right. In order to understand presets, the first thing we have to do is figure out what they are and where they belong. So if you will go to your develop module inside of the left hand side panel, you'll find a siri's of, uh, drop down menus, and one is called the preset it's, one of snapshots when his history, when his collections these collections kind of transfer over from module to module. Now that we're in light room foreign five, I believe, is where they started transferring over into all of the different modules, which makes it very easy for us to kind of move around into different types of of collected images on dh. We discussed collections yesterday, so on a segment yesterday s o if you're interested in those collections, go back and watch that section. But today we're going to talk about this preset panel. But there are presets all over the place there's presets here, which we call our developed presets the developed presets are for when I touch a preset here it will come over and it will move sliders on the right hand panel here teo different positions so that I don't have to do that so these air global they do it to everything on the image so anything I touch here happens to a slider over here for instance, if I touch something that changes my clarity than my clarity globally is going to change throughout the entire image. Now there are other presets as well, so if you go over to the left hand panel below the hist a gram they're all of your tools so the crop tool has presets if you look at the aspect ratio here of if you click on the drop down menu next to this lock panel there are presets right there so those are your crop presets if you go to the radiant tool just below the grady in't tool button there's an effect list right here that effect list has a drop down menu and that is all of your presets. Now it ships with very few presets and then anything that you add in there you can create a preset creating a preset is simply as easy as in the in this drop down menu was down at the very bottom. Any setting that you've said you just hit save his current priests say that the current settings is pre set and then you have a pre set that you can use over here on the left hand panel in the in the more global presets those are created by clicking on the plus panel here, so right where it says presets there's a little plus, but when you click on that and you can create your preset here on dh, you can choose what aspects go into the pre set and you can also choose what folder it's going to go into andan hit create so that's how you create those presets, but there are more presets, so we're going to go down a little ways and we're gonna find the tone curve area we click on the tone curved area you can see that there there's you know where you create your tone curve and you khun switch the tone curve from a more light room style slider type of tone curve or you can click on this little button, which is looks like a point curve. I click on it and now I get the point curve that I'm more used to inside of photo shop either one you can create a pre set down at the bottom there's a drop down menu, so in this instance it says point curve and I click on that and I can create any pre set I want their ahs well and when I click on that pre set, it will then change the tone curve so that I don't have to do it, so if you've worked a lot on anything whether it's slider positions whether it's tone curves whether it's positions of the sliders inside of the brush is whatever it is you've worked on you need to create presets so that you don't ever have to do that again because if you're working on on on slider positions constantly doing the same thing over and over again you're just wasting time so this is the way that you avoid wasting time but there are more presets if you scan down to the bottom here in the camera calibrate asian area there are also presets here is well they're called profiles and these profiles have very specific uh processes in them as well. Now this is a tiff file so that the problem profiles aren't showing up but if I just grab any random raw image and click on that profile you'll see that what comes with adobe light room is camera faithful camera neutral camera portrait camera standard and then adobe standard but you can also create your own profiles here in various ways you can buy profiles visco visual supply company makes a lot of profiles for every single camera so like canon cameras and then they profile it as though you were shooting with velva fillmore portrait film or whatever so they make him and then they sell them so you can buy profiles or you can download free ones or you can make your own for instance if you happen to use the color checker passport, which is just it's. Just a color. Checked her card. You can create your own profiles for your own camera right off of that color. Check your passport and then it the color checker passport actually comes with a tool, a plug in for light room that will then create that and put it into this list for you. So there's a lot of ways for you to make these camera profiles, so that right off the bat, your cameras giving you the color that you want. But those air generally just those air, just presets. Rather than use sliding sliders and messing with stuff, you just click on a pre set and you get the color that you want. So these are the places that you find presets inside the developed module. But you also find presets in the export modules. So as we go to the export dialog box, there's presets over here, and those presets talk a lot more about him in the next segment where we're talking about exporting and output. But though there are presets there as well, they're presets pretty much everywhere you go in light room. Even in the library module, you have pre sets in the import dialog box you have presets down at the bottom here that the import preset if I click on this bottom little tab this black tab here it pops up and I can create presets here is well so that if I have different import styles I can import those styles I have pre sets in the metadata as well for all my copyright information and the information that I want to put in there and all of these drop down menus no matter where you go inside of light room if there's a drop down menu then there's a save as pre set in that drop down menu and so anything that you do twice stop take a few minutes, make a preset for it and then you never have to do it again clear good all right, so now that we understand that they're presets everywhere now let's talk about where those presets air actually housed there's this if you go into the light room preferences and for those who want p c this is in the edit menu but for mac it's in the white room menu if I hit preferences and I go to the preset panel where so many presets and light room that they have their own panel in the preferences so in the preferences I'm going to click on this little button that says show light room preset folder when I click on that it's going to show me deep in the bowels of my computer where those presets exist the presets exist inside of the we can follow this path there in the library in the application supporting this is for mac only pc it's buried even deeper it's like you have to go to the seventh circle of hell to find your presets because it is so far down there and that's that so I think where the seventh circle of hell exists is in somebody's pc so just so you know if you're looking for it s so it's in the application sport adobe and then in light room and then there's a bunch of folders look at all that all of those folders are presets so you can make auto layout presets you could make color profile pretty sets you can make developed presets you can make email address book presets you can make export action and preset I mean just and the list goes on and on so if you're looking for your presets there in that folder except the ones that aren't which I never understood why they don't put them all in there but there are some that air that are specific to camera wrong and they actually cross pollinate between light room and photoshopped kamerad. And so if you look right above the light room folder there's a camera folder and that camera folder has camera profiles so the camera profiles that you see in light room are not in the light room preset folder they're actually in the camera rafel there because camera uses them as well so if you look here camera profile see all those camera profiles so there is all the camera profiles that you could ever want now I have a lot more than you might have because I have a whole bunch of different camera profiles that I've downloaded from everywhere so that I can show him to you um more than you should ever have you should never as a working professional you should never have this many profiles that's ridiculous you should have just a very select few that you use me as a teacher I have to have all of them which annoys me severely then curves there's your curve profiles those curve presets that I just showed you those air all right here they're not in the preset folder for light room they're in the camera raw folder but it's right next to it so it's very easy to find once you find the light room folder if you're looking for this camera off older, the easiest way to find it is go to the preferences in light room click on the button that's asked that shows you where the light room presets r and then look above it and you'll find the camera presets that's how you find them because there's no button to find the camera raw one so you just have to look for it so those air, those even linds profiles and all that kind of stuff exists in camera. But we're going to talk specifically right now about the light room presets and if I go one step further, I see a developed presets folder that is where most of your presets that you use all the time are going to be. So these air the developed presets that are on the left hand panel inside the developed module that's where they exist now, if we go back to light room, I'm going to get out of this panel here if we go back to light room going to the developed module and you see these presets here, you can see the each one has a folder. So for instance, if I go to my everyday favorites folder and I click on this triangle, it opens up the presets and on. By the way, everybody who purchases this course gets this everyday favorites actually know they get the essential pretty sense it's it's like a one hundred three cents or something like that, so the everyday fare it's folder has a bunch of presets in it. Those presets are exactly mimicked here inside of the light room presets folder inside of my inside of my computer in the developed presets if I go down to the everyday favorites, which is right here there they are and they look exactly the same as they do here. Now I want you to notice something though there are no folders inside of this folder you can't keep subdividing and subdividing precept folders to organize them you only get one folder deep that's all you get so if you start here at the developed presets the next folder is the last folder you can put into the system and then everything has to be presets if you put a folder in here full of presets it won't see it light room could only see one folder deep that's just kind of a rule it's very easy to organize these to your heart's content from the system itself and then every time you open up light room whatever you've done inside of here well then be read by light room and then shown to you in that organizational pattern. And so if you wanted to, you know copy one of these let's say you wanted to copy this preset so that you had it in two different folders you would come to the actual system folder, right? Click this one and copy it and then go to your you know, some other folders so let's just say to this job specific settings right, click here and then paste the item and now the next time you open light room that same preset would be in two places because within light room, you don't have the ability to right click preset and copy it you can't duplicate inside of light room, you can take a preset and drag it from folder to folder so you can move presets from folder to folder and it will actually move them through the folders inside of the system. But you can't actually duplicate anything and so it's a shortcoming. I wish they actually had a duplicate and then I could move it, but they just don't have that right now. So the best way to do it is to right click that preset show that pre set in the finder. It shows you where it is. You copy it and then you go to the other folder. You want to put it in let's? Go back here and right click it paced the item and now it's going to the next time you restart. It won't be available right now because light room only looks at these when it when it opens up, it looks to see what kind of presets it has on dso. Every time you restart like room it will get look there and we'll see those changes, and then those changes will be available to you. Phil bernie who just wanted so how do we bring other peoples or purchase presets or the ones that you get when you purchase this course into it is it just simple is copy him into that folder well it's a simple is that but there's about three different ways you can do it it depends on how many you have if someone sent me one preset then I would simply right click here and import that pre set so I could just right click here import point to the pre set that I want to grab and then it had just imported if I had and that's true for even a folder I could highlight a folder of presets or a group of presets and bring him in but if I got for instance those people who purchased this course and they actually get the entire essentials preset collection there's like fire there's eight folders I think of priests that's inside of that one thing so in order to easily import eight folders full of presets the best way to do that is to go to the light room menu goto the preferences and tell it to show you that light room preset folder once you're there then you drill down into the developed presets then go to wherever you have your other folders so let's say these were your folders of presets then you would grab those and highlight the folders that you want to import and simply dragged them into this developed pre set and then restart light room and they'd be available tio so that's the easiest way to get a bunch of them in but the important thing is to realize that you have on ly one folder deep if you grab a bunch of folders like if you went in ground this developed preset folder which has a bunch of folders in it which have light room presets in it and you just grab this and dragged it into this folder it wouldn't work because there would be too many folders deep so you just got to make sure that you're at the final folder that you're dragging in but that's the easiest way to bring stuff in I got that before yeah, you're right why wouldn't more important over there and it took me a lot of things but it was just buried in a couple folders and so if you just take that fuller there's only one place that you can have the folder and it is right you've got the developed folder and then whatever folder is going to separate them out inside of here could you only get one day one deep and that's good to know? I mean especially if you have it on different hard drives that you may have to do it one at a time it seems you know, especially since the going on ly one deep right if you have different hard drives out actually was part of the question yeah, if you have them all over the place in different places, what I do when I'm trying to congregate and this is how I organize them when I'm when I'm actually working on presets that I'm going to sell to people, I actually congregate them all into one place, so I collect them from different computers because I work on presets here and I work on presets on my computer and stuff, and I congregate him in one place and I look at him and then I move them around and get him organized the way I think they ought to be in general on my system because they're gonna have, like, different folders open, and I can say all this one should be here this one should I just kind of congregate him, and then I make sure that I'm looking at a set of folders that's a folder folder, folder, folder and each one has on ly light room pretty that's in it, then just grab all of them and drag him into that developed presets folder and then you're good but it's just a matter of being organized about it collect them all and then put him in rather than trying to collect him and put him in all same time because then you make mistakes okay, so I know we've talked a lot about just where the presets are, but that's really important to understanding how to deal with pre that's. The last thing I want to talk about when we're talking about where these presets are is the concept of synchronizing those presets from one computer to another and there's different ways that you can do this. In fact, one of my creative life courses photos light room one o one that's already on creative life. I go through and I detail the process of making what I call a sink box a sink folder for these so that literally your computer's khun b synchronized without any effort on your part through a drop box. So it's, very easy to actually automate this process, but I'm going to show you how to do it in a non automated way those of you who are out there and have two different computers, the key is to have one of the computers be the place where you do all of your creation of presets. So you take that as your master computer, and then the other computer just received the presets fromthe one, all you have to do is on a regular basis, and maybe every month or every week or something like that, go to the light room preferences click on that show light room, preset folder and once you've got that folder just take that light room folder and copy it so just copy and then you khun hide light room and you can just go to your desktop and paste it so let me close all of these oh there we go pasting there so you see this folder right there that is a copy of the light room precept folder and if I opened that up all of the priest sets that air dealt with in light room are sitting right there if I just take this and I put it into my dropbox then when I go to my other computer this will appear in the drop box and the other computer or I could put it on a thumb drive and carried around with me put it in and then just simply override the same light room preset folder inside of my other computer and suddenly both of my light room experiences of the same paul the same presets all the same export presets all the same develop presets all the same presets for the brushes and the radiant tools all of those are going to be exactly the same because it's the same folder and if I want to make sure that all of those camera raw type presets or there as well all at the news copy that camera raw folder and take that over to the other computer and replace it on the other computer as well and that can doing that can also be done in an automated fashion through kind of a synchronization through the drop boxes well if you're interested in that just look into that light room one oh one class because in it we actually talk specifically about synchronizing those two so that it's a hands off process ok you have a question I don't have light room so I could take the precepts and transform over too two camera wrong yes you can it's complicated because they're not actually transfer a bowl so if I go to light room and I make a preset here and then I try and put that pre set into the camera raw preset area because it has presets as well they don't talk they're different languages on dso you have to convert them over there's two ways to do it the first way to do it is just to create a d n g from that preset like pushed the preset than exported tng and then and then open that dmg inside of camera and all the settings will be the same and then just simply make a preset from that that's the the very basic simple way to do it but you would have to do it to a lot of him and that would be really annoying so the other way to do it is there's a tool that you can purchase and I believe it is on photog offers toolbox dot com or something like that but it's called the camera it's called camera raw preset organizer and not only will organize the presets that aaron camera ross so that you have more of a folder structure and you could like turn some on and off but it also convert your lighter and presets into camera raw presets so that's the tool you want to get and it's not very expensive I think it's even a donation where type of situation so it's not expensive and it's called camera raw uh preset organizer something like that thank you. So look for that and it's it works you just drop all of your presets into it and they spit out camera raw presets so that you can have both together. Okay, all right, now we're getting to the fun part no good so we have all of the idea of where these things are and where we can use them and where they exist on our computer. Now what do we do with them? So let's talk about process of making a good preset absolutely essential that when you make your preset you make them correctly. Otherwise you'll end up wasting time rather than saving time a presets goal is to save time it's not like an action and action is very different than a preset because inaction is like a little program and there's a lot of tricky voodoo inside of an action that you don't understand what's going on but you just like the way it finally looks right there's stuff and I know a lot about photoshopping a lot about light room and I still look at some people's actions and think what what were they doing and it's and sometimes you can't even reverse engineer to figure out what they were doing you just like man alive these guys were really doing something you know it's like black magic um so that's not a preset presets or not black magic they are very simple they're simply sliding sliders into specific positions and that's it that's all they're doing so what's the point are they trying? Is it a secret sauce that you're putting on that you can't figure out? No all it is is a saving of time I'm sliding fifteen sliders into a position those sliders create in effect and when I make a preset from now on one click slides fifteen sliders so I've just in a sense saved myself fourteen clicks by making a pre set of a fifteen click action that's what I'm doing so it's not rocket science it's just got to be done right so here are the rules for making presets the first rule is that it needs to be organized so first we use folders because if we use folders we can specifically look for the place we want to be so if I want black and whites on ly I can click on a black and white folder and now I've got a bunch of black and white pretty says that's pretty simple right just put him in folders I've seen I've seen right at the beginning, especially when light room first came out I saw people talking about their presets that they were making and then they would it was, you know, online video about how cool my presets are, you know? And then they would have these tutorials where they and the guy would like scroll you're like, ok, I want to do something with this and he'd be scrolling and scrolling and scrolling and scrolling and I mean and you'd be like five minutes into this scrolling process like how is that saving you any time to scroll constantly? So using folders will help the scroll issue because now you can just simply click on the thing that you need and find it very quickly because there's really only a little bit of pre sets you know it's not it's not a huge ordeal to find the priest that you're looking for because you have them in a unorganized fashion came and I would try and keep those folders to maybe thirty or forty presets total at the most you can keep him even smaller than that that would be great that way you just click used the ones you need to use and then close the folder and go to something else. The other rule so that's rule number one is organized into folders. The other rule is number two you need toe have a every day favorites folder now mine the ones that air you're going to download from this course actually have an everyday favorites folder in it and when you open that you will see the ones that I use on a regular basis every single day. In fact, most of what I do tall of my images is accomplished simply by using these presets that's it very rarely do I have to go outside of this folder to get any more presets because I've kind of honed down what I like to do with images and so any time you find yourself loving say you know this soft to saturation and you're using it all the time and you keep having open this folder now is the time to grab it and drag it into the everyday favorites folder so I congratulate this softy saturation and I can just drag it into the everyday favorites folder and now it is in the everyday favorites holder it's no longer in there and I will just work on this one now if conversely, if you find that you stop using something in the everyday favorites hence it becomes not your everyday favorite you simply remove it and drag it to an appropriate folder if it's a black and white throw it back in the black and white if you think you'll never use it again deleted you can always delete something by right clicking it and deleting it right and again if you wanted to duplicate something you can right click it, show it in the finder and then duplicated in the system put it fully wanted to be restart the system and you would have that one in two places yes oh oh that was a brush of the hair I thought it was ok so that's the next role is that you need in everyday favorites folder if you have that folder you will find that you very rarely have to go outside of it. Um the third rule is that everything needs to be coded just fall in position so if you look at the names of the folders they actually have one two three I'm going to zoom in here so you can see this one two, three, four, five, six, seven, eight, nine and then they start over one, two, three, four, five like that see that if you then look at the everyday favorites folder you see that every single one goes zero one one a two to three four, five six seven, eight, ten and notice sometimes I don't finish the line because that gives me space to put something else in there and then it goes ten eleven twelve, thirteen fourteen all the way to nineteen and then twenty twenty one twenty two and by the way see this little one that says grain with the arrows it's not actually it's a preset but if you want to make a divider where you could like see what one's color and this is where the colors begin in whatever all I did is just make a preset with no boxes checked so it's doing nothing if I click on it it just does nothing to the image but it's a preset that's how you make that little divider all right then we come down but that that numbering system is specific because this is an alphanumeric organizational structure if I didn't have the numbers at the beginning than it would go in alphabetical order and so my b would be way away from my s is but my black and white and my cpo get used together because usually I turned to black and white and then I had a c p a to it and if I'm turning into black and white and adding the c p a to it I want to be a little click click not click scroll click because that's a waste of time so we we organize our presets not by what they do but how we use them so if you're constantly using your vignettes at the same time that you're using your grains, well, then your grain and your vignettes should be similarly placed if you're constantly using all of your colors together than use all put all your color type presets together, but they'll via would be down at the bottom and color pop would be at the top and they wouldn't be together unless you put them coded as number eleven and twelve and then suddenly they're together. So you want to make sure that all of the all of your tools are congregated, such that they make the least amount of scroll so that's, the next rule is that you need to code everything by numbers at the beginning so that then you khun rationally place your presets in an organizational structure. The next rule is that you name them in a rational way. Now there are a lot of really cool presets out there that say, you know, uh, you know, mom is chicken fried steak, I don't know what that does now the person who uses mom's chicken fried steak would know what it does, but I don't know what it does and when I buy that preset I don't know what it does and so I have to click on it quite a few times before I recognize what it does but if all it's doing is warming up the temperature of the image and giving a little grain and may putting a vignette on it then why wouldn't I call it warm grained then yet then the person who clicks on it would know what it was the second they clicked on it before they clicked on it and they wouldn't even have to have the navigator appear open a lot of people to rely on this navigator to see what it's going to do because as they roll over they can see what those things were going to do right? But if I turn to the navigator off, I get more real estate so aiken seymour presets and I know that when I click on say, my, uh light ah tone light see pia split tone light cpr I know I'm going to get a c p I don't need to see what it's going to dio I know what it's going to do so I can click on it and now I've got my sea pia so that's the next role the next rule so there's a lot of rules but if you follow these rules while you're creating your presets I guarantee you the process of using them will actually be valuable to you so the next rule is that when you're making them that you make them very specific instead of everything in the kitchen sink you just do little things at a time for instance, you saw that that see pia tone did not turn it to black and white now a lot of people when they think of a c p a toned image they think of a c p a toned image but it's black and white seat be atoned but see peotone works really well for color images as you've seen so why tie it to black and white? If I had see peotone tied to black and white in the priest that then the preset would turn into black and white and add cp tone and then I'd be like why only wanted the cpi a tone so then I have to remove the black and white what's the point that's two clicks instead of one click if I wanted it to be black and white I have a rich black and white up here that I can click on or just a black and white mix so if I click on this one it added black and white underneath the sea peotone and now I have a c p a tone black and white you see how were congregating on lee they were making him very small and targeted in their nature so that they can do more for us um are there any mathematicians in my audience right now? Anybody who's good at math? I know you're all photographers, but you're good at math. You're not good at math. You are ok, she's good at math. Ok, so you're good at math. You know what? Per mutations are excellent. So if I have five presets here that are unique and I have five options here that a unique, so five and five, how many options do we have? Twenty five because it's five to the it was fine. Well, no it's not even it's five to the fifth power, so that it's five times five times five times five times fought, right? So it's like what? Yeah, open your calculator. So the point is, I only know the name permutations, and I know what they do, but I have no math skills whatsoever, so I'm not going to be able to calculate that out for you, even though it's fine, someone will jump in, but the permutations as long as you have five unique options and five unique options, you don't just have ten options. You have exponential options because you're it's five to the fifth power, so if you have thirty presets that air uniquely targeted that do very, very different things, you don't just have thirty options you have thirty two you know it's it's exponential I don't even know what the number would be hopefully give us the answer just remember that it's a bunch of what is the perfect answer it's a ton there you go twelve twelve twenty five that's a lot so the idea is that you make these combinations work for you as opposed to people who create everything in the kitchen sink type of presets what happens is they're the ones that scroll through endless scrolls of presets because they've made black and white with sepia black and white with blue tone black and white with rich cpi a black and white with light cpi a black and white was see pia plus a vignette black and white was c p a minus than than yet black and white with a really good vignette black, white and so they've created all the permutations for you and you have to scroll forever to find those instead if you target them and you say ok, we're on lee going to create a vignette on this pre set all it does is vignette and then we're going to create our cp atones and all it's going to do a c p ahs and we're going to our sayin a types and those are only going to do science and we're going to do if we if you follow that methodology then what happens is that you have about thirty presets and you can just go click click click click and we're done okay, so a quick question just kind of like segway I think you know where you're going here light room three says does the process of making very specific presets let's just say one or two slight adjustments not ruin the whole idea of saving time with presense? Absolutely not because I want to I want to show that to you and I think that's great because you're right, this is exactly why we're going so this is my shot and I come into my basic tone kerr or my basic area and I just, you know, get the get the shot brightened up the way I want it and add the contrast that I want and maybe the temperature that I want to the photograph then all I need to do is go I want this to be black and white age see pia and I wanted to have two hundred grain and I wanted to have a medium tone curve and I wanted to have a strong vignette and I've been and now we're finished with the home but yeah, wow, that was a well but you see how yeah, but did you see that it was just a matter of normalized the image with three slider movements and then we know where we want the image to go and that's kind of you gotta have an idea some people like to feel their way through images and they just kind of experiment I'm not that kind of person I see an image and I know where I want it to go usually already know what I wanted to be when I'm shooting it I know that this is an old time photograph this dress that she's wearing literally was made in like eighteen, eighty so it's falling apart as we're shooting it's literally like ripping as she moves because it's just like moths have been eaten from years and so I know that this is going to be a really old time photograph, so I know black and white I wanted to be c p a I wanted to have grain I wanted to and so I'm just adding those things but it's, click click, click, click, click and then we're done so no, it doesn't it actually saves time by having multiples because now there's no click go fix whatever you just did because when you have everything in the kitchen sink, you actually click on something and then you have to come back over to the developed area here on the right hand side and you have to start unclip king stuff and that's a killer okay, now another rule so that rule is that we target so we target our preset so they're very target in their action they don't do everything in the kitchen sink they do very targeted things another rule is that whenever you are working on something that you might not like you create a remove pretty set for it. The remove preset is done simply by like for instance, you can see here here's my grains grain two hundred eight hundred sixteen hundred and then a grain remover the grain remover simply removes the grain, so if you go to let's, go down to the effects panel where you see the amount of grain is twenty two and if I click on that remove grain it simply removes the grain to zero so any time you want to do remove like, for instance, if you have a black and white ad black and white, the remove would just be to record the process of turning it back to color so always make little removes to pull vignette soft to pull grains off to pull those types of things. If you have like clarity thing, then you should have a clarity reset, so that goes back to zero because if you click on clarity let's say we did that say I add eight hundred grain and then I came up here and said, I'm gonna, um, restore it back to color and I'm going to add some grain are some edged efren jing because they're maybe there's some light coming back from the other side of her and then I'm going to add some luminous noise reduction to it if I did all that and then I thought, well, wait a second, I really don't want any grain on this image I'll have to do is go to the grain and remove it and it pulls it out from under it otherwise you have to do undo undue, undue, undue undo and then you have to redo the stuff he did or you have to come on back over here, and my goal inside of light room is to work in the basic panel adjust then come over here and click my presets never having to go back over here because this transit is a waste of time and I know it seems like it's not, but when I'm working on thousands of images, moving from this side to that side is a big waste of time. In fact, it would be wonderful if I could take this panel and put it right next to this panel and have the picture over here so that the transit is just like this that'll be a big save saving of time, so but I've said it, I don't know it all happened, so the the idea is less clicks because you're using the buttons too to represent multiple sliders and you're you're organizing them in a way that you can find them without scrolling and you're not going back to fix things over here. All right? So let's make a priest so I'm going to go to an image let's just do this one as an image, I think that's a really beautiful area here. I'm standing on the top of warwick castle looking down. I mean, can you imagine europe? You're a king or whatever and you just look off onto your lands or it's got to be cool. Um, so I'm up here on the castle looking this way a little foggy out there, I'm gonna just this a little bit it's been pretty much I like the way it is, but I'm gonna add some style to it. S o let's decide what we're gonna do and I'm not gonna use presets on this because we're actually going to, um discuss the process of this. So when I'm making a preset, I slow down and I work on the image and make presets. So if you come to an image and you really tweak that image and you really work on that image strongly that's the time to make a preset because obviously like what you've done and it's useful to you to not have to do that time consuming process again all right so we're going to scroll down so basically everything in this basic panel up here is normalizing the image so we use this stuff from white balance down to blacks we use that stuff to normalize the image everything below that is style this up here is science right here that's the science of the image this is style everything from presence down is subjective style artsy stuff but whether or not the images exposed correctly whether the blacks air correct whether the whites air correct whether the temperature is correct that's more science so get this done and normalize the image and then we come out and start adding style so we can add a lot of clarity to or we could soften it and by pulling the clarity down we even increase that a feeling of the fog so I kind of like the idea of increasing the feeling the fog so we'll go with kind of a negative clarity on it we definitely want the vibrance to be up because I like all of that green but here's an interesting trick that I like to poll and that is increase the vibrance but decrease the saturation so when you decrease the saturation you get kind of an old film type of look but by increasing the vibrance you still increase the relative um the relative saturation of those greens and blues so it still feels very lush even though it's a muted film look so I'm gonna pull the saturation down a little bit and increase the vibrance quite a bit um, in the tone curve, this is and this is a good there's, a time for a little lesson on tone curves, so in the tone curve, you have the normal tone curve here, which is kind of the light room style with all the sliders, and then you have the point curve. The point curve is much more powerful in the way that you can use it, so I'm going to create a point curve, and I still want this to feel much more like film. And so one of the things that's unique to film, especially older films, is that the blacks aren't really black, they just never are. You have to really push a black in film to make it black. Um, the film itself usually doesn't, you know, give you is deep of aah black and so what we're going to do is we're going to grab this point on the point curve, which is the representation of black, and we're going to drag it up so now nothing can actually hit true black. So if you if you look here, this is the representation of where true black would be, but nothing can hit the actual black. So there is no true black in this and if you look you can see that that's true inside of this tree all the blacks are a little bit less deep little more milky and then in order to combat that a little bit we're going to come and grab a point here and bring down the shadows a little bit so we get kind of rich shadows but we don't get a true black and then we'll take the highlights back up to where they were and that gives us a very different tone curve so I'm gonna turn this often on so that you can see the difference so there's off see how the blacks are in there and then if I turn this on see how it kind of makes the blacks milking so we're going to do that then let's go into the hs cells, which is our hugh saturation luminant on dwi complain around with this I'm going to simply take the greens and I don't know what color of those greens are but I want them to pull up a little bit, even saturate them a little bit more on gun actually dark on them down a little bit I'm going to use the this little thing right here which is the target adjustment and so it just looks like a little target if I click on it I get this weird little cursor and if I put that target right over the green. It's going to tell me what the green is by dialing and so I'm dialing down the saturation. Oh, I want to go up in the central asians. I'm going up with the saturation and it's see odds actually, yellow and green. You can see that in the eighteen and twenty. So it's figures out what the color is made of and it's pulling up the greens and the yellows. And then when I go to the loo eminence, I can take the same area and go down with luminant so that the greens get a little darker so they're not quite as phosphorescent. Um and so that's what I want to do with that. And then I'm going to come down to my split toning in the split toning. If you hold down the option key while you choose your hugh, it will tell you. You see that you can see what the hell is going to be. Um, it's just showing you that. And so I want this to be kind of a purplish shadow. And then I want the highlights tohave a little bit more yellow to them. There we go and now I just need to choose the saturation how much yellow do I want in the highlights? And that's giving me kind of that warm sunset look and then how much purple do I want in the shadows? You know, that's kind of creating an interesting old look to that photograph, so I really like the way that's looking, so I'm going to click on that so there's there's my and then I could grab the balance and kind of move it back and forth do I want it more yellow doing it more? And I like it a little cooler, so I'm going to go with that and I'm going to saturate up the old is just a little bit okay on dh, then I could go into the details I could work on details, but I think it's good the way it is on dh, then I can go into the effects or the lens corrections, whatever else I want to do, but I think I'm happy with what I've got here, so now let's make preset, we go into the preset remember, we've spent a lot of time on this, so we better get something out of it because if you spent this much time on a photograph, you better get more than just the photograph out of it, okay, I'm gonna click on the plus button at the presets and now I got to start thinking before I was feeling I was feeling now I'm thinking so it's time to think first thing is where is it going to go? Well it's a color effect so I'm going to put it in my color area so it's in the color section and what am I going to name it? I don't actually know where I wanted to position itself so I'll just give it like the forty you know number forty that's going to be and then later on I can rename it and put it in the position I wanted to be in because I don't know how many pick and how many presets I have in that folder so now I'm going to go to it's it's going to be in the color folder it's going to be positioned forty and I'm in a name it what should I name this thing obviously color because it's in the color thing um it's kind of a cross pras success it's got de saturation to it okay it's it's soft ok, so what if we say that this is, um soft fog? Um cp is what I like to use for cross process because we trying code these things saw fog cross process er purple shadows um and yellow highlights so you see I'm coating it so I know what's in it um and then I think that's what else did I do to it? That was interesting oh that's right I did a little bit of ah okay with and let's just say with um with increase green something like that and then I can always rename this thing to my liking later but this gives me a good indication of what's in there and then I check none and there's always going to be this process version sitting there nagging you the process version is simply what version of light room we're talking about if you click on process version than whatever version of light room you're in whatever crop process version that's what's going to be forced on the preset so if someone was in light room three when they made the image and they were now in like five but they're working inside of the old process version from two thousand ten if you click on this when they click on this preset it will force them into process version two thousand twelve the important thing to understand about process version is simply the math and the science being used in working on the image. So if it's two thousand twelve than your light from foreign five and it's two thousand ten than your enlightened three and I don't know if it's too or not and I don't remember where they change from two thousand two thousand three process version is definitely one and maybe two I think so anyway but it changes and you'll notice that the tools change so for instance, if you go from process version two thousand ten twelve the sliders in the developed module change and so if you force them into the process version you might make them change their sliders so I'm gonna unclipped this because there's nothing that we do did that was unique to the process version two thousand twelve that I should force them into it okay? So I'm leaving that alone and it won't force people in and that's why when I make presets I can tell people they're cross platform two three four, five because I don't I don't click on the process version if I do if I do click this then I'll always put a code up here a the end this is lr five five to tell people this is going to force you into five just so that they know but in this case we don't need to sell we uncheck that so that its works cross across all the different versions now what did we put into this? We did a tone curve that was important remember that was thing that did the blacks um we did a negative clarity on it that was important we also did a saturation issue and a vibrance issue and some color adjustments so we did all of those we did some split toning on it what else did we do? You think of anything else? Okay now we didn't do it in yet, but if we had what I want to put it in this no, because that would be a different pre set that we could make. In fact, the argument could be made that we don't want to apply the split tone because the split tone could be added later as well. But since this is kind of an over our searching film, look, I'll accept putting the split tone in there because remember, I have a remove split tone that I can always click on right afterwards. Um anything else that you can think that we did to this what's that oh, up here in the basic tone, yeah, we worked on the shadows and highlights and exposures, but the the most important rule you can know about making good presets is that you never actually use this area here for a preset because it's unique to every single image. And so if you start using exposure in your preset, you're going to ruin images that you adjusted. You know, you notice that when we came into this image I had already adjusted it toe look a certain way it had already had the exposure of the science had been taken care of now we were adding this style presets are best used for style, not for adjusting the unique needs of that image that's needed you have to go into each image and look at it and say is this properly exposed if it isn't I need to brighten it up that's science style is added on top of that and that's why we don't put presets in this basic area here or the white balance those are the things we avoid like the plague when we're making a preset okay so we've made our preset and I'm gonna hit create so now I have that pre set and it's in the color area here and if I click on it and I don't like what I I like everything but I don't like the tone I can simply click on removed tone and now the tone the cross process tone that we made has been removed do you see how important the removal is now okay I'm gonna undo it because I did like that and now I'm going to go to some other random image doesn't matter what it is let's just go to say the sheep here so I've got a sheep and if I click on this image so if this is correctly exposed and I like the way it looks and I click on this it added the style but it didn't affect the exposure even though the exposure on this one is different and all the settings are different than the original one that I made the preset on and that's the value of thinking when you're making those presets, don't just click all and make a preset. If you do that, you're going to ruin images and you're going to spend more time dealing with the aftermath of ruining the image. Then if you had just worked on each individual image on its own and never used a preset any questions I know we've kind of rambled on for quite a while in that way have got a few there's, a little bit of a question about still the kind of process of creating whether presets air stackable later arable good question, that's a great question. So are are they stackable again? There's a big difference between a preset and an action. If you if you use an action photo shop, you do it once. If you did it again, it would it would increase whatever effect that had on doom or to it, and it would keep building and building until you took completely destroy the image, right? Whereas a a light room preset is simply sliding sliders back and forth. And so if I were to, for instance, if I if I go up to my everyday favorites and I choose to do a scion a type here, I'm going to scan down here really quickly and turn on the split town you can see the split tone effect that's happening here I'm get yellow and purple is what's in that split tone but if I click on this scion a type it overwrites that because it's on ly dealing with this area here if I click on see pia it overwrites that because the check boxes just simply asking light room to include the split tone area inside of the preset the check boxes are your layers so when you go to make a preset just consider each check box a different layer and if you have a pre set that on ly works on say let's check none and on ly works on the grain then that grain is a very separate layer and will not affect anything else in the photo except for that layer and so you have what is that about twenty layers and if you use them uniquely then they kind of stack on top of each other and become layers to each other if you don't use them uniquely and you check all, then overwrites everything and then does whatever you just did that's what you see happen sometimes is with like pre purchase presets is that they will have checked all and they will overwrite everything so you can't really layer those because it's changing everything that's correct and that's that's why um I work so hard when I'm designing my presets to make sure that they're very targeted so they do is minimal damage as they can and let's just say that you had purchased a preset that did this where it every single one of the check boxes have been checked and so when you click on it you like the effect but you keep having to fix it the best way to then go in and reverse engineer and change that is to simply do this you go in and you you click on the basic panel and then you go to that whatever that is and you click on it so let's say it's sayin a type and you click on it and then you click undo and then you click on it and click undo and if nothing changes here then that's cleared it's like it's like being fbi agent running through each room and clearing the room so you cleared that room so then go to the tone curve and you click on it again you say click on the light see bia undo click on it undo click on it undo no clear so we've cleared that room and we just keep going down until finally we'll end up with split tone and will click on it and we'll go oh that's changing so that I write it down this checkbox split toning needs to be changed and so you go through and find out what's being changed then all you have to dio is go back into it right click that that pre set an update with current settings so get it where it works the way you like it and then just go in and say ok check none it was on ly the split toning that they were using but they were also using the basic tones which was ruining my image so turn the basic tones off and keep the rest of what they were doing and ninety nine percent of time what happens is a totally useless preset becomes a golden preset which is funny because you bought it as a useless preset and by altering it yourself you made it a golden preset so it's kind of a backward way of doing business but you know so that's what you have to do you can actually just open it up look at the check marks and I checked them you know you have to wear a sinner because it when you hit plus it's just giving you whatever your last settings were it's not giving what they chose it's giving what you last chose on the last pre set that you made wass and so it's very different you just have to reverse engineer write down the things that you saw change and then decide which ones you want to cross off that list and then come in and just click on and off the things you want and then hit update and it will update that and now it's your precept but once you've done that my advice is right click it rename it and changed the name so that you know that it has been fixed right and keep fixing him and throw away the ones you don't want to fix and keep the ones you do and rename him with like your initials on him so that now they're yours they're no longer whoever you bought them from they're yours now because you fixed them congratulations you now you own those presets because you did what should have been done in the first place you could have the word gold at the end yeah yeah some people in chatter actually having a hard time understanding the process versions and changing over from older light room to the newer light room can just that says ok so here's the basic area see that has exposure contrast highlight shadow whites blacks those are the those air the slider positions that are in light room four and five if I go down to the camera calibration area there is a process version right at the top and if I click on that drop down there's three options two thousand three two thousand ten and two thousand twelve two thousand three was the landmark year that changed my life because that's when light room came about and so when I can't saw light room for the first time, it was an amazing epiphany, and I remember it was, I think january or something like that, it was right at the beginning of the year, I saw this beta, this public beta come out, and I downloaded it and had this warning on it that said, don't use this professionally because we have no idea what it'll do to your image is make sure that you use this on test images or something like that, and I said, no, I'm going to use it on everything, so I just backed everything up, and then I started using it and never once did it fail me, and it just did amazing stuff, and so I was so happy with it, but that was two thousand three, so that's, when they made the math is two thousand three. And so if I click on two thousand three it's going to take me south, change that a little bit, I go back up to the basic. Now I have exposure recovery, phil like blacks, brightness, contrast and exposures up here, brightness is down here. The brightness knob is no longer inside of light room now, it's just an exposure knob, it's kind of combination of exposure and brightness that combine them into one so it's the old style inside of light room five I still have access to everything else, the book module, the maps, all that kind of stuff, but the area here, the basic areas and some of the things that I can do are no longer available because using the old mathy old computations on dh that's true, if you go to also two thousand ten that's still light room three type of stuff, and so if you the reason they have the process versions in there is so that if you have light room five open, but you have an old image that you worked on in light from three, you can pull those in and not have to do any adjustments to him because that's using the old math and if you like the way it is, it will stay in the light room three, uh, mentality, and you could just export it from, like, five because using that old math, and so when I'll important older photo, that older photo will see itself as two thousand ten, while the next photo right next to it might be using two thousand twelve instead so you can have two different images side by side ones and light room three ones and light room five and that's the purpose of having that and any if you like what you see, just leave it if you want to work on it, then you might want to update it to two thousand twelve and then tweak it or maybe just tweak it in the original math in two thousand ten or two thousand three and just tweak it from there it's really up to you, but that little check box when you're making the preset determines which version of light room you happen to be in when you're working on it. Well, if you click that little escalation point on an old photo, will it change? If you updated two the new version does it change the look or wait? So it was lighter if I have this, if I have two thousand twelve or two that say it's in two thousand three and I then click on the little exclamation point or I come over here and update the process version two thousand twelve, it will probably change the way it looks. In fact, when I when I went from two thousand, for instance, if I take this and I play around with the black points like this, so I've done something to the image and then if I come down here to calibration and I change it from two thousand three, two thousand twelve, watch the image it changes because the sliders I was using are completely different and so I have to then readjust it toe to make it work okay let's talk about the two are the different presets that I discussed over on this side we've talked a lot about these presets first off when you're creating a brush or if you're creating a radiant or even if you're creating a radio and radio uh radio filters air new tow light room five and they're absolutely indispensable when you click on a radiant a brush or a great aunt all of them used the exact same presets so if you click on this little effects panel here down at the right right at the very top of each of these panels there is an effect panel that has a set of presets and so if I click on one burn one stop it sets the exposure down minus one stop and does nothing else but it's just quick to do it rather than slide the sliders where I wanted to be and it doesn't matter if I'm in the grady in't it'll burn it one stop or if I'm in the radio it'll burn one stop all around the sheep see how it's burning up here burning down there and then when I if I want to adjust this and I hold the option key down aiken just a just one side of the or if I click on the shift it will adjust the whole thing equally all right and then I can also you know turn the egg a little bit so they're so now I've I've burned not only around I used to have to do this with grady and I used to have to go like this and like, make multiple grady ints like this in order to really, you know, burn in something like that. But now, instead of doing that, I can just use the radio so it's fantastic, but it doesn't matter what I'm using, I can just simply see how it that's the same preset that's being used on all of them. Now, if I go into the brush and I click on, say, smart dodge, see what it's done here is it's increased the exposure to contrast highlights and then decrease the shadows and that's increased the clarity and the reason that I've done that so that I can come in on don't use a a tablet now I can come in and start bright ning this thing up here, the sheep but it's not brightening up the shadows so I don't have to be is accurate about the way I brighten up the sheep because it's avoiding the shadows because I'm pushing the shadows back down, so but this kind of a thing trying to make this thing work every single time if I had two scoops, if I had to slide the sliders like this every single time, I wanted to make this brushwork can you imagine how long that would take me to do that? So instead, all I do is I've set the ciders and they work, so then I click on that effect drop down menu, come down to the bottom and save the current setting is a new pre set and then use some of the same rules. I need to put it in position with a code, oh three and then I need to name it rationally and say, this is, you know, dodge tool, but I call it a smart dodge tool because it's smart enough to realize that the shadows don't need to come up right. You can also do a regular dodge that wouldn't have pushing this shadows down so it's important for you to recognize those of their. But those presets are also inside of that precept folder inside of light rooms, preset folder so those could be shared anywhere you go. And if you purchase presets for me that's where they would go, they would they're going there on, by the way, I have a code for people watching if they want fifty percent off, so I'll show that at the end. So anyway, when we're making presets that's important to recognize that their presets here for you to use. There are also presets down here in the camera calibration and it's not something that we want to go into serious depth on, but if we're in the camera calibration and we want to create our own presets down here for our camera calibrations, there are several ways to do it number one is by them and there's a lot of people that do a lot of math and they like visco does an amazing job it like they take every single camera and they figure out what colors change on what films and then they do it for each camera and so you don't want to do that just just by those they can do all that the geeky math and you khun and be the beneficiary of it but if you want to calibrate your camera specifically, then what you need is the color checker passport on but it's it's it's I'll show you a an image of it so let's see right here there it is that's the color checker passport right there so it's just a great card it's made by x right and it has all the colors that and they know what these colors are it's got grays and whites and then it's got reds and blues and all that and then they have a they have a plug in inside of light room that you just goto a bug in and you run the plug in on this photograph and it will calibrate to that specific light in that specific condition, and then it will install that specific lighting scenario in here as a camera profile for your camera in that specific life, and so you'll have the most absolute accurate color profile you can have for that specific condition. And so when I'm trying to be very, very accurate about color, you know, I'm photographing trunks that need to be specific colors or are, you know, some kind of ah bottle or something like that, where it needs to be an exact or someone's if you're doing a clothing line or something like that, you needed to be accurate color this is the way to get that color absolutely accurate for that specific shoot and it's just a plug in and light room you just run the plug in and it's there it's very simple to use and they have lots of tutorials online about it. But the other thing that you khun dio which I think is really funky and fun it's you gotta do know you gotta you gotta like, give yourself a couple hours on it on dh play with it, but it's a really funky tool, and that is, and you can download this from adobe but it's, the dmg profile editor just google it, you'll find it tng profile editor and what you do is you open up a d n g and then you can go in and tweak that thing to your heart's content and do all sorts of crazy random and you start off see it's pulling from the same profiles and then you can just start tweaking that thing wherever you know whatever you want to do with it you can start tweaking the file um and then name the profile put your copyright on the profile because you made it and then go ahead and say that as your own profile and then if you just put it into the profile place in the camera raw folder then it will be available to you and you can funk if I things so this profile could take all of your magenta is and turnem green and take your greens and you know and you could just make it crazy and then you will have this very unique color profile that starts at the very base route of the d n g as you open it up, you could just start work so it's his fantastic little tool so google it's the dmg profile editor and this is where you could create your own unique little recipe for your color profiles that don't have to be yeah, the ex rights going to make you an absolute mathematical certainty perfect version this is going to be where you could just play around and do something crazy to your profile so play around with it it's not something that you uh you khun destroy something with so just just have fun with it and make your own profiles and then install them inside of that light there inside of that camera raw folder that's above the light room folder inside of your presense area yeah I know the developed presets are in the develop presets but the ones for the greedy and brush in the where are they yeah where would you put those in? Okay, so if you made some or if you had some again if you go to the preferences show the light room precept folder it's those grady and all the grady int the brush tools all those those are right here inside of it called the local adjustment presets that's what they're called local adjustment presense um meaning that you're localizing an adjustment so those are all the presets and you'll notice that that list looks very much like this list and remember you have to restart light room in order for it to see those presets yes can you explain the difference between previous and reset buttons right there so when you when you mentioned earlier okay I believe so and again we just mentioned a lot about the synchronizing techniques in yesterday's discussion but just a quick answer to you reset takes your image back to your camera default and the camera default is set by you. Well, it's set by adobe first is a default, but then you can set it up here. Whatever you adjust here, if you go to the default set the camera defaults, then you can create your own camera default for each specific camera, and we detailed that very, very specifically yesterday in that in that section in the automation section yesterday. But previous simply steals whatever settings air on this photo and puts them on this photo every single setting. So if you were to take this photo and you were to change it to black and white and increase the temperature, and then you go to this one and you hit previous it stills every setting and pulled it over every single one radiance, everything okay? And again, I'm always feel free to hunt and play and do whatever you want in light room because light room doesn't actually do anything to your images there. Always considered as sacred, it won't touch them. And so it's on lee working inside of its own database it's not actually ruining your images, and so all you have to do is hit command z and undo whatever you've done and unlike photo shop where you have to set the number of undoes in light room you have as many undoes until you opened up the program, and so you can go all the way back in history. If you left the program open for twelve years, you go back twelve years, eso it's just got it's just unlimited in the amount of undoes that it has. So I've never reached the point yesterday that he's using the same catalog as from when he for I started using the program, so technically you can undo what, twelve years or something? No, no, no it's a with its when I opened at last, but but, yeah, I actually have been using the same catalog since two thousand three has not changed. I'm not created a new one, I've just every time I've gone, I've updated it, and I optimized the catalog a lot to make it faster and stuff like that. But it's all it's the same catalog nothing's changed it's just new math has been installed into that catalog, so on ly there wasn't undo button twelve years back, a question comes from a person named fish if you create preset, then apply them to multiple photos, but the exposure settings were slightly different between the photos. Is there a way to make a preset that equalizes exposure when the settings from photo to photo are slightly different? And then a follow up is or do you have to go back and manually leah just each one brighter or darker compared to the image that you created? There are two ways to solve that problem. All right? The first way to solve that problem is to simply go if if I have a set of images here and each one has different exposures on it let's, just say we're taking these four images, but this image is different. So let's go in the developed module and, you know, decrease the exposure on this one but all the other and I like them all, but they're all too dark to light too warm to cool whatever the easiest way to do it, simply go into the grid and use the quick develop not as a preset but as a quick developed, and you can adjust all of these things here, so basically the basic area of the exposure because everything that you do inside of the grid is relative tow where it currently is as opposed to pre sets are actually pushing a dial specifically to a very specific number, so their exact whereas inside of the library module these are relative and so as you adjust something it's relative to where it is, so if this one's a little brighter this one's a little darker, they'll move up like this this rather than going to an exact position together which is what happens in the developed module and in all the presets now there is a tool that has just come out that is a plug in tow light room that is a little bit so very very new and it's not and I won't show it because I'm afraid whether or not I don't know if it'll specifically work for us because I tested it and it doesn't quite do everything right yet but it's very promising um and that is called I mean going to develop module and just show you what that is so it's in the help menu is where it gets installed which is kind of odd it's in a plug in extra and it's called start relative adjustments relative adjustments and it's actually on its currently available on photographers toolbox it's made by jeffrey friedel I think is how you say his name but anyway it's new it's brand brand new he sent it to link to it said hey here's here's what I'm working on it zone interesting idea and what it's not something you just click but the idea is that if you click on it it opens up a dialogue box and I'm really not going to show it because I don't want it to fail on me because it is new um but you open a dialogue box and it says what pre set do you want to apply to all of these images and then you choose the pre set and then you tell it, how much percentage of that pre set do you want to apply? And it will literally apply a certain percentage of the preset relative to where everything is across the whole set. So it's something that you have to think. I need these fifty images to have a little bit extra of this precept, but not all of the pre set, and it will intelligently figure it out. It's, it's really new and so expect when you get it, it'll be a little wonky and it might not work and stuff provide the feedback to him because he's working on it but he's an excellent program and he's done some amazing plug ins in the past, so I have no reason to believe that in the future you won't be able. So have that is not something that it seems like adobes working on, so it seems like maybe that's the sound very promising. Phil birdie, how do you create a remove preset great question, creating a move removed preset let's just say that we want to create a remove of then yet preset so if I had created my presets so down let's say it was an effects pre set down in the post cropping vigna area and I had created a vignette that kind of follows the edges there like that and I feathered it a lot so that's my my my crop aren't my post crop vigna preset if I wanted them to create a remove immediately after so I had I made this preset I went in here and I called it you know oh three uh deep uh pc for post crop then yet um and then I put it inside of my vignettes here on guy said check none on lee do post crop vigna and created it soon as I had created that the minute I create that preset I know I also want to remove for it so I go right over to the effect and I double click the effect takes it to zero so if you if you double click any slider it takes it to its original position so I double click the amount down back to zero so there is no vignette then I go right back up to the top of the presets create a new one and I just leave post crop vignette as the only check box thing and I say oh four uh remove pc then yet and then I and if I wanted to also remove all vignettes I could say all remove all vignettes and then just go into the lens vignette ng here and turn that on so now all vignette ing would remove and then I would have that create. And so now I have a remove, and I have a post a deep post crop in yet. So I click on this one. It's got the vignette. Remove all vignette, takes them all away.
Class Materials
bonus material with purchase
Ratings and Reviews
Valerie
Another great class from Jared Platt. He thoroughly reviews the creation, placement, and removal of LR presets. Plus he includes his Everyday Favorite Presets for those who've purchased his class - what a fantastic bonus!
a Creativelive Student
Wonderful, wonderful, wonderful class! I am new to Lightroom and am learning so much! Looking forward to the 3-day class in March.Thank you!!!
Keshav Ittea
Amazing tutorial