Lessons
Lesson Info
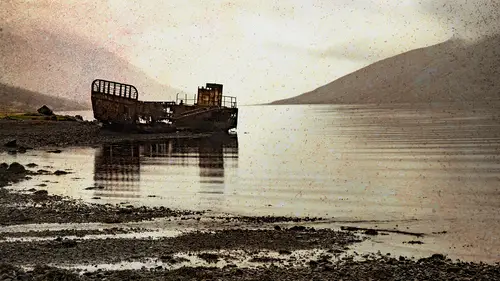
Blend Modes for Textures
now, I don't know yet what texture I want to use, so I would tend to go a little overboard so I can see what I'm doing because I'll probably come back and tweak it. And sometimes I literally just whatever it says. I just say open object is going to get into photo socks. I don't know yet. So open object. Then let's go with. I don't know which one should I use of these ones? 123 or four. What do you think? Three goods. So that's also a camera smart off. Now, in this case, I definitely have no idea. So I'm just gonna collect open object cause I don't know yet what to do with it. I just need to get it into Photoshopped now. If I drag that on top of the other one, I can close this. So now, as you can see, if you look closely, I have two cameras. Smart objects, one for the underlying photo, one for the texture. And just to begin with, let's do the real. The simplest way of blending, of course, would be to change the blend mode so I go to multiply. That's what it looks like now that I've done...
that, maybe the texture doesn't. Maybe the color isn't quite right or something else will. Now it'll preserve multiply mode. If I double click to go back to this one, I can say, Let's push the exposure higher and maybe change the saturation A little bits. I don't know, something like that. Click OK, and it will update, and that will show me that changed version. Okay, I could also go the other way and say, Well, I like the way the textures looking but maybe this one, the bottom layer I need to do something where Take away some of the highlights. Or maybe Goto something like D. Hayes and pop the clouds a little more. Whatever. Click. OK, since I do that, it updates associates a constant thing. Instead of having a one shot deal would say, Well, all I've got is multiply mode. I'm still in multiply mode, but I'm making a look completely different each time because I'm changing the factors cause that's the way a blend mode works. It compares the layer you're on with the layer below, So if you change any of the makeup of those layers the result of multiply mode will look completely different. And that's just beginning, because, of course, we could do a lot more than just change the blend mode. But I mentioned that because a lot of people go multiply, I don't like it. Let me switch to something else. It may well be that multiply motives the right mode. It's just the photos themselves need to be tweaked a little bit to get the results you want. Of course, hopefully it goes without saying that this is still a layer, and we will add a layer mask. So if I don't want the texture on the building, I could still add a layer mask and take my brush tool and say, Please don't mask that or whatever. I could do a better job, you know, being more, um, accurate. So that doesn't change. It's still a layer, so that means you can make other changes. But just the fact that to me it's made a world of difference to know that I can do these cameras smart objects and both of them can be edited. So whatever factor I changed will have some effect, which is again both good from an efficiency standpoint, but not from I could do this for five hours now because I could just keep trying things. So some of this texture stuff, you just have to sort of accept the fact that if you really want to play with it, don't expect it to be three minutes unless you have a really good plan in mind, cause usually go Oh, or I could try this. So yeah, lots of cool possibilities. So that's the importance of these things called camera smart objects.
Class Materials
Bonus Materials with Purchase
Ratings and Reviews
Beatriz Stollnitz
Great class for anyone looking to blend a photo with a texture for a creative effect. Dave discusses Blend If, smart objects, Apply Image and many other techniques that enable us to get the most out of Photoshop when adding texture to photos.
Laura D
Loved this class. Dave covered exactly what I needed to know to add textures, including a multitude of ways to make the texture more or less subtle. I learned a lot. You do need some Photoshop background to understand all the content.